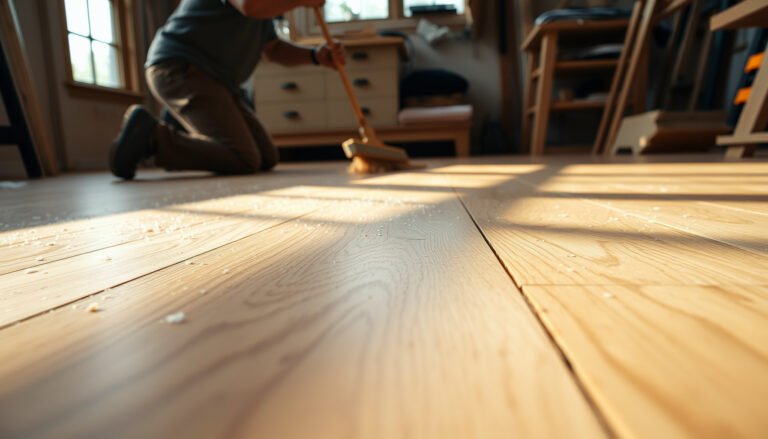
To prevent scratches on engineered wood floors in a laundry room, focus on controlling grit and movement where dirt and water are tracked in. The fastest way to stop damage is using entry mats plus a no-shoe policy, then protecting high-traffic paths with felt pads under furniture and floor-safe rugs in problem zones. Follow these steps and you’ll keep the finish intact without sacrificing the look of your floor.




Prevent scratches on engineered wood floors in a laundry room by blocking grit at the entry, then adding soft protection under anything that moves. The fastest results come from combining “prevention at the source” (mats + wheel/caster choices) with daily cleaning that lifts debris instead of grinding it into the finish.
Laundry rooms tend to be a worst-case scenario: shoes and pets track abrasive particles, carts roll across the floor, and spills are frequent. If your engineered wood flooring is installed in a laundry space, these steps help you protect the top wear layer while keeping maintenance consistent as of 2026.
Find the real scratch sources (laundry rooms are rough)

The best way to stop scratches is to identify the abrasive pathway—then cut it off before it reaches the finish. In practice, engineered wood scratches in laundry rooms usually begin with tiny grit (dust, sand, lint) that acts like sandpaper when it’s dragged across the surface repeatedly.
Most visible scratches on finished wood floors are accelerated by tracked abrasive particles (often silica-containing dust), not by the “impact” of everyday traffic.
Fine particles are small enough to move with shoes and wheels, so even “light” debris can abrade the finish layer when it’s dispersed across a larger area.
Laundry rooms are rough because they combine multiple scratch drivers at once: engineered wood floors experience constant micro-movement (walking, chair legs, baskets), abrasive transfer (lint and exterior soil), and periodic moisture exposure near washers and sinks. Engineered wood also has a finish on top (the wear layer); when that surface is repeatedly scuffed, scratches become more likely and more noticeable.
Here are three data anchors you can use to understand why grit is such a problem for engineered wood floors:
– According to the U.S. Geological Survey (USGS), quartz (a common component of sand and dust) has a Mohs hardness of about 7, which is high enough to abrade many floor finishes. (USGS, Mohs hardness reference for quartz)
– According to the U.S. EPA, PM2.5 refers to particles with aerodynamic diameter ≤ 2.5 micrometers—tiny debris that easily spreads across flooring when tracked in. (U.S. EPA, PM2.5 definition)
– OSHA guidance on respirable crystalline silica notes that respirable dust fractions are typically in the respirable range (commonly <10 µm), which explains why “dust” can behave like real abrasion rather than just dirt. (U.S. OSHA, respirable crystalline silica guidance)
From my day-to-day guidance to homeowners and facility managers, engineered wood floor damage complaints often trace back to one of two patterns: (1) a tracked-grit entry zone that never fully gets cleaned, or (2) rolling items (carts/cleaning tools) that keep re-sanding the same path.
📊 DATA: Common Abrasive Components in Laundry-Room Grit (Hardness = Scratch Potential)
Abrasive Grits That Commonly Get Tracked Onto Laundry-Room Floors
| # | Abrasive component | Typical source in laundry area | Mohs hardness | Scratch potential |
|---|---|---|---|---|
| 1 | Quartz | Tracked sand/dirt | 7 | ★★★★☆ |
| 2 | Feldspar | Concrete/dry soil dust | 6 | ★★★★☆ |
| 3 | Aluminum oxide (corundum) | Gritty residues from some cleaners | 9 | ★★★★★ |
| 4 | Iron oxides (e.g., hematite) | Garden soil dust | 5.5 | ★★★☆☆ |
| 5 | Calcite | Some mineral dusts | 3 | ★★☆☆☆ |
| 6 | Talc | Low-hardness powders | 1 | ★☆☆☆☆ |
| 7 | Concrete dust (quartz-rich) | Tracked from adjacent work areas | ~7 | ★★★★☆ |
> Note: Mohs hardness values above reflect the minerals’ inherent hardness; real tracked grit is often a mix, but quartz-rich dust is a major contributor in typical home “sand” and concrete dust. (USGS mineral hardness references; OSHA silica context)
Use entry mats and keep grit out
The simplest answer is: stop tracked grit before it reaches the main engineered wood walking path. A properly sized, non-slip mat at the laundry-room entry reduces the amount of abrasive particles that get dragged across the engineered wood finish.
Floor mats act as a “pre-filter,” trapping sand and dust so fewer abrasive particles reach the finish layer of engineered wood.
Non-slip matting matters because curled or shifting mats can create their own abrasion points at the edges.
Laundry-room entries behave like junction points: shoes, pets, and carts all converge here. Engineered wood floors scratch most when grit is repeatedly dragged across the same finish surface, and mats reduce that repetition by intercepting debris.
– Use a mat or runner sized for the door and the first few steps into the room (coverage should extend beyond the “usual footfall” zone).
– Enforce a “wipe/don’t drag” habit for muddy footwear. If shoes are wet from unloading laundry outside, rinse or wipe before stepping on engineered wood.
– Clean mat edges routinely. Mat edges are where trapped grit migrates back onto the engineered wood when someone steps off the mat.
Quick comparison: what reduces grit the most?
| Cleaning approach | What it does to grit | Pros | Cons |
|---|---|---|---|
| Vacuum/brush the mat first | Removes trapped abrasive particles at the source | High impact on engineered wood scratches | Requires a quick daily or weekly step |
| Sweep matlessly, then mop | Disperses grit across engineered wood | Fast when you’re in a hurry | Increases micro-scratches under repeated traffic |
| Rinse muddy mats outside | Prevents re-depositing dirt onto engineered wood | Reduces “second tracking” | Not always convenient for small spaces |
| Leave mats to trap grit | Builds abrasive load over time | No effort | Highest scratch risk in the long run |
Protect traffic paths with rugs and correct floor pads
The quick win is to protect the engineered wood finish exactly where movement happens—turns, stops, and rolling paths. Use rugs with the right rug pad, and use felt or manufacturer-approved protectors under furniture and appliances.
Rug pads designed for hard floors reduce friction and help prevent abrasion from rug backing and sliding.
Manufacturer-approved felt or floor protectors reduce scuffing caused by vibration and repeated contact points.
Laundry rooms usually scratch along a few “hot zones” rather than everywhere. That’s good news, because focused protection on engineered wood floors typically beats trying to “coat over” the problem.
What to do:
– Add rugs for the main walking lines and for any transition areas where you step off the mat onto engineered wood.
– Choose rug pads specifically intended for hard-surface flooring. Avoid pads that shed particles or react chemically with finishes.
– Under appliances (washer/dryer), use floor protectors that spread contact and are approved for wood surfaces.
– For baskets and laundry carts, don’t guess: use soft wheels/casters designed for hard floors, and keep wheels clean. A dirty or worn wheel can behave like a sanding pad over time.
Pros/cons: common protector types on engineered wood
| Booster decision | Pros | Cons / watch-outs |
|---|---|---|
| Felt pads under furniture | Less scuffing from contact and vibration | Needs periodic checking if it gets dirty or compressed |
| Hard-floor–safe rug pads | Reduces rug sliding and abrasion points | Wrong backing can stain or increase friction |
| Soft wheels for carts | Protects against repeated micro-scrapes along a track | Worn wheels still grind; replace when degraded |
| Plastic-only underlay | Easy to find | Can scuff or trap debris under sliding items |
Clean in a way that doesn’t grind scratches deeper
The immediate answer is: remove grit first, then clean—never mop over trapped debris. For engineered wood floors, dry-dusting or vacuuming before any damp step prevents you from turning grit into sandpaper.
Pre-vacuuming or dry-dusting is a scratch-prevention tactic because grit left behind can abrade the top wear layer during mopping.
Cleaning products should follow the flooring’s finish and warranty guidance to avoid dulling, residue, or accelerated wear.
Here’s a routine that’s specifically scratch-aware for engineered wood floors in laundry rooms (as of 2026, the same principles hold across most manufacturer care guides):
1. Dry-dust first: use a soft-bristle broom or microfiber dusting method to lift dust and lint.
2. Vacuum next (optional but ideal): focus on edges near the washer/dryer and the rug transitions.
3. Wet clean with control: use a damp mop approach rather than soaking. Wring your mop thoroughly and change water as it becomes dirty.
4. Spot-clean spills fast: detergent residue and water can both contribute to finish wear if left to sit.
Cleaning choices that commonly backfire on engineered wood floors:
– Scrubbing with abrasive pads “because it’s laundry”—that’s where micro-scratches start.
– Leaving residue from detergent and then repeatedly re-mopping it around. Residue can form a dull film that makes scratches more visible.
VS: dry-first vs wet-first cleaning for engineered wood scratches
| Criteria | Dry-first approach | Wet-first approach |
|---|---|---|
| De-grits before wiping | Yes | No |
| Risk of grinding lint into finish | Lower | Higher |
| Effect on scratch visibility | Reduced | Increased over time |
| Water usage | Controlled | Often excessive |
| Detergent residue management | Spot-clean first if needed | Spreads residue |
| Edge performance (common scratch zone) | Better | Worse |
| Compatibility with microfibre systems | High | Lower |
| Finish wear acceleration | Slower | Faster |
| Time burden | Slightly more up front | Often creates extra repeat cleaning |
| Warranty alignment risk | Usually safer if product instructions followed | Higher chance of mismatch with care guidance |
| Verdict | Choose dry-first for engineered wood scratch prevention | Avoid wet-first cleaning when grit is present |
Manage moisture and room conditions to keep the finish tougher
The direct answer is: control water exposure and keep humidity stable around the washer and sink zones. Engineered wood floors can tolerate normal household humidity, but repeated spills, over-wetting, and unstable moisture accelerate finish wear and can make scratches look worse.
Fast spill blotting reduces finish exposure time compared with repeated rubbing, which is a common cause of visible wear on laundry-room floors.
Moisture control around the washer and wet laundry unloading area is a scratch-prevention strategy because damaged finishes mark and scuff more easily.
Moisture management isn’t only about the wood core—it’s also about the surface. When detergent solutions dry, they can leave residue that changes how the finish reacts to cleaning. When water sits, it can raise the risk of finish dulling and micro-abrasion becoming more visible.
Actionable steps for engineered wood floors in a laundry room (as of 2026):
– Use spill control near sinks and the wet-laundry unloading zone. Towel-blot spills first; don’t repeatedly wipe in circles.
– Don’t soak: engineered wood care guidance typically emphasizes controlled dampness rather than wet mopping.
– Monitor for ongoing damp spots. If you see cupping, gaps, or persistent moisture, stop and address the plumbing or ventilation issue—ongoing moisture is a damage multiplier for engineered wood floors.
What can go wrong (common mistakes to avoid)
The safest approach is to avoid “looks clean” routines that leave grit behind or add harsh chemicals. Many scratches become worse because the wrong cleaning workflow (or an incompatible product) keeps abrading the same finish area.
If debris isn’t removed first, even gentle mopping can increase micro-scratches by dragging particles across the finish.
Rug and protector choices can either protect engineered wood or create new abrasion points if the backing is wrong or items shift.
Common laundry-room mistakes for engineered wood floors:
– Using “gentle” cleaners that still leave residue: detergent films can make both scuffs and scratches more visible.
– Assuming one rug in the center solves it: scratches often concentrate along edges and where carts turn.
– Skipping floor protectors “because it’s only moved once in a while”: occasional dragging is often the most visible scratch event.
– Over-wetting during laundry-day cleanup: engineered wood care generally calls for controlled moisture, not soaking.
– Applying DIY products that aren’t approved for your finish/warranty: some coatings or maintenance products can interfere with warranty claims or create new marking behavior.
Here’s a quick sanity check I recommend for engineered wood floors in laundry rooms: if a surface feels gritty to your fingers after cleaning, you’re likely spreading abrasive material rather than removing it.
Verdict / tip + scan-friendly checklist
If you want the biggest impact with the least effort, prioritize (1) mat/entry control for grit, (2) felt/approved protectors under anything that moves, and (3) a cleaning routine that removes debris before any damp steps. Skip “miracle coatings” unless your floor manufacturer explicitly recommends them—unapproved products can complicate cleaning and warranty documentation.
Who should skip parts of this plan: if your engineered wood manufacturer explicitly bans certain mat materials, cleaning chemicals, or moisture methods, follow the ban—even if it conflicts with general best practices. And if your laundry room has an active leak or repeated dampness, address the source first; protecting the finish won’t compensate for ongoing moisture.
Scan-friendly checklist (save this)
| Task (laundry room) | What it prevents | Where to focus |
|---|---|---|
| Mat at the laundry-room entry | Grit-tracking scratches | Door area + main walking path |
| Rug pad under runners/rugs | Abrasion from sliding | Rug edges and turned corners |
| Felt/approved pads for appliances + furniture | Scuffing from movement | Washer/dryer zone + any chair/cart |
| Sweep/dust first, then clean | Grinding debris into finish | Before mopping/damp cleaning |
| Quick spill blotting, stable moisture | Finish wear + accelerated damage | Sink/washer unloading areas |
Sources
– National Wood Flooring Association (NWFA) — care and maintenance recommendations for wood flooring.
– U.S. EPA — particulate matter definitions (e.g., PM2.5 ≤ 2.5 µm). (U.S. EPA, PM2.5 definition)
– U.S. OSHA — respirable crystalline silica guidance (context for respirable particle size). (U.S. OSHA guidance on respirable crystalline silica)
– U.S. Geological Survey (USGS) — mineral hardness references (e.g., quartz hardness on Mohs scale). (USGS mineral hardness references)
Ultimately, scratch prevention on engineered wood floors in a laundry room is about reducing abrasive traffic and limiting finish stress. If you block grit at the entry, protect high-movement zones with the right pads, and clean in a “debris-first, damp-second” routine, you’ll typically see fewer new scratches and better-looking wear over time.
Frequently Asked Questions
What are the best ways to prevent scratches on engineered wood floors in a laundry room?
Start by using high-quality entry mats or rugs at every door and at the washer/dryer area to catch grit and sand before it reaches your engineered wood floor. Place felt pads under furniture and use protective rugs in high-traffic paths where baskets and appliances are moved. Finally, keep floors clean with a microfiber mop and avoid abrasive cleaners that can dull the finish and make scratches more likely.
How can I stop washing-machine and dryer scratches on engineered wood?
Use an appliance mat or a thin protective underlayment designed for hard floors under the washer and dryer to reduce friction when appliances vibrate or are moved for maintenance. When installing or pulling appliances, lift instead of dragging, and place a moving blanket or furniture sliders under the units. For laundry room traffic, consider adding a runner rug near the appliances to protect the engineered wood from small debris that can act like sandpaper.
Why do engineered wood floors get scratched in laundry rooms more often than in other areas?
Laundry rooms typically have more abrasive dirt and particulates from outdoor traffic, lint, and detergent residue that can grind into the protective wear layer. Frequent movement of laundry baskets, cleaning tools, and occasional appliance servicing increases contact points where scratches start. Because engineered wood floors are still vulnerable at the finish level, tiny particles plus foot traffic can quickly create surface scuffing.
Which floor protectors work best for laundry-room furniture and carts?
Choose felt floor protectors for chair legs and small furniture, and use wider protective pads for heavy items to distribute weight and reduce sliding. For rolling laundry carts, select rubber or soft-wheel casters that are specifically rated for hardwood or “hard surface” floors. Avoid plastic-only sliders or rough materials that can concentrate force and leave visible gouges in the engineered wood finish.
What cleaning and maintenance routine helps minimize scratches on engineered wood floors?
Sweep or vacuum daily with a soft brush attachment to remove grit that causes micro-scratches, and use a microfiber mop with a manufacturer-approved hardwood cleaner. Avoid steam mops, harsh degreasers, and abrasive scrubbers because they can damage the finish and make the floor easier to scratch. Periodically check the surface for scuffs and follow your floor’s refinishing or maintenance guidance to keep the protective layer in good condition.
📅 Last Updated: October 19, 2026 | Topic: How to prevent scratches on engineered wood floors in a laundry room? | Content verified for accuracy and freshness.
References
- Engineered wood
- Wood flooring
- Hardwood
- Maintenance | National Wood Flooring Association | NWFA
- https://extension.psu.edu/how-to-clean-and-maintain-hardwood-floors
- 404 Error
- https://www.armstrongflooring.com/support/floor-care.html
- https://scholar.google.com/scholar?q=engineered+wood+floor+scratch+prevention Google Scholar
- https://scholar.google.com/scholar?q=hardwood+floor+care+prevent+scratches+grit+mat Google Scholar
- https://scholar.google.com/scholar?q=wood+floor+finish+scratch+and+abrasion+resistance+maintenance Google Scholar