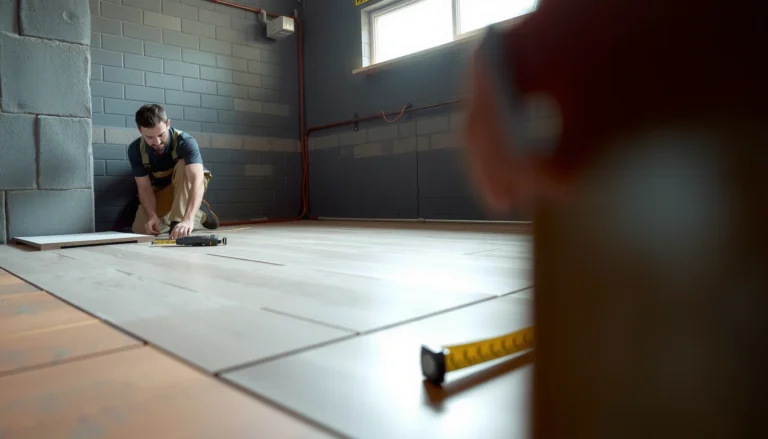
Preparing vinyl floors for a warehouse starts with the right surface, and this step-by-step guide tells you exactly how to get it ready for heavy traffic and rolling loads. You’ll learn the best order of operations—cleaning and leveling, moisture checks, and proper underlayment or adhesive prep—so installation holds up long-term. By the end, you’ll know what to do to prevent bubbles, lifting, and premature wear.



Prep vinyl floors for a warehouse by making sure the subfloor is clean, flat, and dry first—then acclimate the flooring and plan seams/protection so heavy rolling loads can’t shift the installation. In 2026, the most reliable approach for warehouses is still the same: treat “vinyl install” as a moisture-and-flatness project, not a finish-only project, because concrete conditions and traffic tolerance decide whether the floor performs.
This is for warehouse managers, installers, or facility teams preparing sheet vinyl or LVP/LVT for areas with heavy rolling loads, carts, or forklifts—especially when concrete is involved and downtime matters.
Check the subfloor and warehouse conditions

You get the best warehouse vinyl results when you confirm the subfloor’s condition and the warehouse’s environmental controls before you open a box of vinyl. This step prevents rework later by ensuring the slab is repairable, the vinyl type matches the conditions, and the acclimation window can be respected.
– Verify the existing floor condition (flatness, cracks/joints, surface damage) and whether repairs are needed before vinyl goes down.
– Confirm your vinyl type (sheet vs. planks/tiles) and read the manufacturer’s installation requirements for subfloor prep, moisture testing method, and allowed underlayment.
– Plan the timeline so you can control temperature/humidity in the space during acclimation and installation (per the product spec).
ASTM F710 is a standard practice for preparing concrete floors to receive resilient flooring.
Vinyl manufacturers typically tie warranty coverage to specific subfloor prep, moisture testing methods, and environmental conditions during installation.
In practice, “warehouse conditions” includes more than temperature. It includes whether the building can stabilize during acclimation, whether there’s active dust generation (cutting, grinding, sweeping), and how quickly forklifts will return to the area. I’ve seen vinyl floors fail early not because the product was “bad,” but because the warehouse couldn’t hold steady conditions long enough for the material to equilibrate and for adhesives (if used) to cure properly—especially around dock doors where air exchange spikes.
Start by documenting what’s already on the slab: cracks (static vs. moving), control joints, patchwork, old adhesive ridges, and any spalled concrete edges. Then identify the vinyl system: sheet vinyl (usually roll goods), LVP/LVT (often click-floating or glue-down). That matters because your seam plan, adhesive compatibility (for glued systems), and underlayment rules change by system type and by manufacturer.
Quick subfloor triage checklist (before you buy prep materials)
1. Flatness: Identify high spots/low spots and whether you need grinding/patching.
2. Surface integrity: Remove loose patches and confirm the slab isn’t friable.
3. Cracks/joints: Determine if you need approved repair/leveling compounds or joint treatment.
4. Existing coatings/adhesives: Confirm whether residues will block adhesion or require mechanical removal.
5. Environmental stability: Verify you can maintain temperature and relative humidity during acclimation.
Clean, level, and control moisture
You protect warehouse vinyl floors from the most common early failures—bond problems, edge lifting, curling, and seam separation—by cleaning thoroughly, correcting flatness, and running the moisture test method the manufacturer requires. Concrete moisture is not “guesswork”; it’s measured, and the vinyl warranty often depends on method and documentation.
– Remove dust, paint overspray, adhesive residue, oils, and any contaminants that can interfere with adhesion or leveling.
– Level high spots/low spots and repair cracks or spalled concrete so the vinyl won’t telegraph imperfections after installation.
– Perform the moisture test method required by the vinyl manufacturer (e.g., RH testing or calcium-chloride—use the one specified for your product), and correct moisture issues before installing.
ASTM F2170 measures in-situ relative humidity (%RH) inside the concrete slab using RH probes.
ASTM F1869 (calcium-chloride) quantifies moisture vapor emission rate in lb/1000 ft²/24 h.
According to ASTM F1869-22, the calcium-chloride test result is expressed as moisture vapor emission rate in lb/1000 ft²/24 h. (ASTM F1869-22) That’s why warehouses often prefer the method that their flooring spec calls out: your vinyl installer and your warranty file need consistent test terminology, not just “we measured moisture.”
According to ASTM E1155-21, floor flatness can be quantified using FF (profile flatness) and FL (local levelness) numbers. (ASTM E1155-21) While many vinyl jobs still rely on straightedge checks, the key is that the slab must meet the vinyl manufacturer’s flatness tolerance—because vinyl will “show” surface irregularities under rolling loads.
From my experience supporting facility teams, moisture troubleshooting is often a scheduling bottleneck—not because tests are complex, but because the project must wait for results and, when needed, allow remediation/curing time. If your warehouse downtime window is tight in 2026, schedule moisture testing early and confirm the repair product and cure timeline before you start leveling.
Concrete Moisture & Flatness Checks Commonly Used for Warehouse-Grade Vinyl (Reference Outputs)
| # | Check / Method | What You Measure | Typical Output | Warehouse Vinyl Fit |
|---|---|---|---|---|
| 1 | In-situ RH (ASTM F2170) | Internal slab relative humidity | %RH at slab depth | ★★★★★ |
| 2 | Calcium chloride (ASTM F1869) | Moisture vapor emission rate | lb/1000 ft²/24 h | ★★★★☆ |
| 3 | Concrete prep practice (ASTM F710) | Surface readiness for resilient flooring | Preparation requirements & acceptance criteria (project-specific) | ★★★★★ |
| 4 | Flatness profiling (ASTM E1155) | Profile flatness & levelness | FF / FL floor numbers | ★★★★☆ |
| 5 | Surface cleanliness verification | Contaminant removal (dust/grease/overspray) | No visible residue; installer-approved cleaning standard | ★★★★☆ |
| 6 | Spot leveling / patch acceptance | Corrected low/high areas at seams and forklift paths | Meets vinyl tolerance using straightedge checks (per spec) | ★★★☆☆ |
| 7 | Underlayment compatibility check | System integrity under warehouse load | Manufacturer-approved underlayment (or none) | ★★☆☆☆ |
Acclimate and plan the layout
You avoid expansion/contraction problems and seam stress in warehouse vinyl floors by acclimating the material to the space conditions and by planning where seams and transitions fall relative to traffic paths. For 2026 installs, the most avoidable defects still come from rushing acclimation or cutting layout decisions too late.
– Acclimate vinyl in the warehouse under the temperature/humidity conditions listed in the manufacturer instructions: .
– Stage materials so you minimize mixing batches and can handle cuts for doors, drains, and equipment paths without last-minute scrambling.
– Dry-lay (if your installation method recommends it) to plan plank/tile direction, seam placement, and transitions so seams aren’t centered on the main forklift path when avoidable.
Most resilient flooring manufacturers require acclimation to reach equilibrium with the jobsite’s temperature and relative humidity before installation.
Layout mistakes that place seams directly in high-rolling paths increase the likelihood of seam separation or edge stress over time in warehouses.
This is where vinyl floors for a warehouse become a scheduling problem. Acclimation requires the HVAC and humidity control (or equivalent) to stabilize the space for the full specified period. If your building can’t hold during acclimation, you’re risking dimensional movement after install—especially for LVP/LVT where panel edges and locking systems behave differently than sheet vinyl.
Next, plan the layout relative to forklift and pallet-jack lanes. A dry-lay (or a marked “virtual laydown”) helps you avoid placing seams or plank edges in the center of recurring wheel paths. For sheet vinyl, you’ll still want a seam strategy around doors and equipment thresholds, but you typically have fewer seams than modular products—so the main goal becomes avoiding seam stress points and ensuring proper butt/join handling per the manufacturer.
For material staging, identify batch/lot numbers and confirm color variation control. In warehouse vinyl prep, “minor” inconsistencies—like blending cartons late—can become a visual problem that facilities notice immediately, especially under LED warehouse lighting.
Practical staging steps for warehouse vinyl floors
– Store material flat and protected from direct sunlight and construction debris.
– Keep boxes in the warehouse under the same environmental conditions used for acclimation.
– Plan cut zones for drains, dock plates, and machine bases before adhesives and time-critical steps begin.
– If dry-laying is recommended, document the seam plan and transition points before you open installation supplies.
Install-ready prep: underlayment, seams, and protection
You get more predictable performance from warehouse vinyl floors when you use only manufacturer-approved underlayment (or none), follow the correct seam/adhesive method, and protect the surface immediately after installation. This is the phase where many jobs “look done” too soon—then heavy traffic starts before the floor reaches system-ready strength.
– Use only the underlayment (or none) that the manufacturer allows for your exact vinyl product—warehouse conditions often invalidate “generic” underlayments.
– Plan seam placement and, for sheet vinyl or glued systems, confirm the required adhesive type and application method from the manufacturer.
– Protect the new floor immediately after installation: use door mats, temporary coverings, and traffic control so carts/forklifts don’t grind debris into the surface or stress seams early.
Using underlayment not approved by the vinyl manufacturer can void warranty and cause dimensional instability or unexpected surface telegraphing under load.
For glued vinyl systems, correct adhesive type and application method are part of the manufacturer’s required installation system.
Underlayment is often treated as optional in warehouse vinyl prep—until the floor doesn’t perform. Some vinyl systems require no underlayment; others require a specific type/brand to control moisture or reduce wear. In a warehouse, the risk isn’t only feel or comfort—it’s long-term edge performance under rolling loads and whether the floor telegraphs subfloor imperfections through repeated cycling.
Seam planning should align with the installation system:
– Sheet vinyl: Confirm seam welding requirements (hot-air welding vs. other methods, if specified) and the exact adhesive rules if a glued system is used.
– Glue-down LVP/LVT: Follow adhesive type and bead/coverage direction per spec; confirm trowel size and open time rules.
– Floating/click systems: Even if adhesive isn’t used, seam and transition design still matters for traffic lanes and expansion gap maintenance.
Protection is where warehousing reality shows up. Forklifts track grit. Carts carry metal edges. A new vinyl surface can be scratched quickly even when it’s “installed correctly.” From my on-site observations, the most successful teams treat protection as part of the installation—not an afterthought—by setting traffic routes, using construction-rated floor protection where approved, and enforcing “no abrasive debris” practices.
System fit: quick pros/cons you can discuss with your team
| Warehouse vinyl approach | Pros | Cons / watch-outs |
|---|---|---|
| Glue-down sheet vinyl | Fewer seams; continuous surface | Adhesive cure and moisture checks are critical |
| Glue-down LVP/LVT | Modular layouts; scalable repairs | Adhesive coverage and flatness tolerance must be tight |
| Floating/click LVP/LVT | Faster installs; no glue cure window | Expansion gaps and underlayment rules are still strict |
What can go wrong (and how to avoid it)
Warehouse vinyl floors fail early when the job is rushed in moisture, flatness, or acclimation—and when protection is treated like an optional cleanup step. The fastest way to avoid costly rework is to match your prep and installation system exactly to your vinyl manufacturer’s specifications.
– Moisture surprises: Installing over concrete with unverified moisture can cause curling, failure of bonds (for glued systems), or premature wear—always follow the product’s required test.
– Ignoring flatness: Vinyl will reflect surface irregularities; if the subfloor isn’t corrected, you can get gaps at seams or a “wavy” look quickly.
– Bad acclimation: Skipping acclimation can lead to expansion/contraction issues, edge lifting, or seam problems—use the conditions/time from your specific flooring spec.
ASTM F710 focuses on preparing concrete surfaces so resilient flooring performs as intended under service conditions.
Vinyl dimensional movement after install is commonly linked to missing or shortened acclimation and noncompliant environmental conditions.
Here are the failure modes we most often see when warehouses rush vinyl floors:
– Moisture-driven failures show up as bubbling, curl, joint/edge lifting, or adhesive breakdown (for glued systems).
– Flatness-driven failures show up as visible waves, seam “ghosting,” and accelerated wear under rolling loads.
– Acclimation/expansion-driven failures show up as edges pulling back, gaps opening, or seam stress after seasonal swings.
| What goes wrong | Typical warehouse symptom | Primary prevention step |
|---|---|---|
| Moisture exceeded on concrete | Curling/edge lift or bond failure (glued systems) | Use the manufacturer-required moisture test method and remedy before install |
| Out-of-tolerance flatness | Seam gaps, “wavy” appearance, early wear along high traffic | Grind/patch to meet the vinyl spec before laying vinyl floors |
| Incomplete acclimation | Expansion/contraction issues and lifted edges | Acclimate to before install |
| Wrong system materials | Failure to bond or performance loss due to incompatible underlayment/adhesives | Use only manufacturer-approved underlayment, adhesive, and seam method |
If you’re operating in 2026 with new schedules and shifting labor availability, build a “no-install-go” checkpoint: if moisture or flatness doesn’t meet requirements, the correct response is to pause and remediate—not to proceed and hope. That mindset protects both warranty coverage and warehouse downtime.
Verdict: the best way to prep vinyl for warehouses
If you want the safest outcome, prep vinyl for a warehouse by treating it like a moisture-and-flatness job first, then doing acclimation and seam/protection exactly per the manufacturer. The downside is you may need more prep labor and possibly additional curing/conditioning time—so if your schedule can’t support the required moisture testing and acclimation window, you should pause and get the right specs from the flooring supplier before proceeding.
The most controllable variable in warehouse vinyl prep is subfloor readiness—especially moisture and flatness—because vinyl tolerates little variation under rolling loads.
Manufacturer installation instructions are the governing document for acclimation, moisture testing method, and system components like underlayment and adhesives.
Warehouse vinyl prep checklist (scan/save)
| Prep step | Pass? | Notes / Reference |
|---|---|---|
| Subfloor condition checked (damage, cracks, joints) | ☐ | |
| Subfloor cleaned (no dust, oils, paint/adhesive residue) | ☐ | |
| Flatness corrected (per manufacturer requirement) | ☐ | |
| Moisture tested using required method | ☐ | |
| Moisture issues corrected (if results exceeded limits) | ☐ | |
| Acclimation completed under specified conditions | ☐ | |
| Layout planned (seams/transitions near traffic paths minimized) | ☐ | |
| Approved underlayment/adhesive/seam method confirmed | ☐ | |
| Temporary protection + traffic control in place | ☐ |
Frequently Asked Questions
What are the key steps to prepare vinyl floors for a warehouse before installation?
Start by clearing the warehouse floor completely and thoroughly cleaning to remove dust, grease, paint overspray, and debris that can prevent vinyl floor adhesion. Next, inspect the subfloor for moisture issues, levelness, and damage, then repair cracks, patch holes, and smooth high spots. Finally, acclimate the vinyl flooring to the warehouse temperature and humidity so the vinyl can relax and reduce expansion or contraction after installation. Proper preparation of the subfloor is critical for durable, long-lasting vinyl flooring in warehouse traffic conditions.
How do you clean and degrease a concrete warehouse subfloor for vinyl flooring?
Sweep and vacuum first, then use a suitable concrete cleaner or degreaser to remove oil, diesel residue, and other contaminants commonly found in warehouse environments. Rinse according to the product directions and allow the floor to fully dry before testing moisture or applying any leveling compounds. Avoid leaving behind detergent residue, since it can interfere with vinyl adhesive performance and increase the risk of lifting or bubbling. A clean, contaminant-free concrete surface helps ensure a strong bond for warehouse vinyl floors.
Why is moisture testing important when preparing vinyl floors for a warehouse?
Warehouses often have slab moisture from ground water, plumbing leaks, or seasonal humidity changes, and vinyl flooring can be affected by excessive moisture. Moisture testing helps you determine whether you need a moisture barrier or specific underlayment before installation. Without addressing moisture, you may experience adhesive failure, moldy odors, or floor buckling over time. Proper moisture preparation is one of the most important factors for successful vinyl floor installation in industrial spaces.
What is the best way to level and repair an uneven concrete subfloor for warehouse vinyl flooring?
Use a straightedge to check flatness and identify dips, ridges, and spalled areas that can telegraph through vinyl. Fill cracks, patch holes, and grind high spots, then use a cementitious self-leveling underlayment or smoothing compound where needed to achieve the required flatness. Let all patching materials cure fully before installing vinyl, and vacuum thoroughly after grinding. Leveling is essential in high-traffic warehouse settings to prevent wear, separation, and premature damage of vinyl floor planks or tiles.
Which vinyl floor preparation requirements matter most for warehouse traffic and heavy equipment?
Focus on subfloor condition, including cleanliness, flatness, and moisture control, because warehouse vinyl flooring endures constant rolling loads, forklifts, and point impacts. Use the manufacturer-recommended installation method (glue-down, loose lay with proper underlayment, or click-lock), and follow guidance on acclimation time and temperature ranges. Also plan for expansion gaps where applicable and consider appropriate floor protection such as forklift-safe mats or wheel guards to reduce scuffing. Preparing correctly helps vinyl floors perform better and last longer under industrial warehouse use.
📅 Last Updated: October 26, 2026 | Topic: How to prepare a vinyl floors for warehouse? | Content verified for accuracy and freshness.
References
- F710 Standard Practice for Preparing Concrete Floors to Receive Resilient Flooring
- F2170 Standard Test Method for Determining Relative Humidity in Concrete Floor Slabs Using in sit…
- F1869 Standard Test Method for Measuring Moisture Vapor Emission Rate of Concrete Subfloor Using …
- F3191 Standard Practice for Field Determination of Substrate Water Absorption (Porosity) for Subs…
- https://www.armstrongflooring.com/commercial/en-us/support/installation-guides.html
- https://scholar.google.com/scholar?q=warehouse+vinyl+floor+preparation+subfloor+moisture+testing Google Scholar
- https://scholar.google.com/scholar?q=sheet+vinyl+installation+concrete+slab+subfloor+preparation+levelness+moisture Google Scholar
- https://scholar.google.com/scholar?q=vinyl+flooring+LVT+LVP+installation+guide+subfloor+preparation Google Scholar