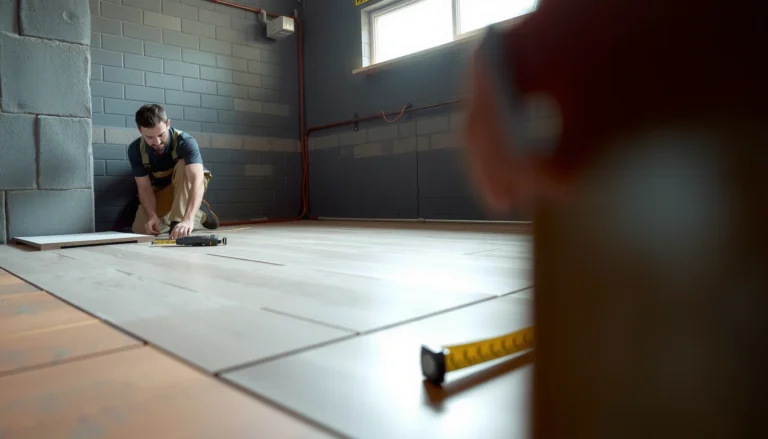

Want to install flooring over stained concrete floors in a living room? The fastest, cleanest approach is to prep the slab correctly—verify it’s fully cured and hard, grind or abrade to remove sealers, and use an adhesive or underlayment system rated for concrete. Follow that setup and you’ll get better bonding, fewer bubbles or lifting issues, and a finish that matches the stain instead of fighting it.




Stained concrete floors in a living room are installed by preparing the slab properly, choosing a compatible stain/sealer system, and respecting cure and dwell times between coats. If the concrete slab is already in place, the biggest determinant of success is getting the surface clean, mechanically sound, and correctly sealed (so you don’t end up with blotches, peeling, or tacky finish). This guide is for homeowners and DIYers (or contractors) who want a clean, durable stained concrete look in a living room—especially when the slab is already in place or you’re planning a finish over a prepared concrete surface.
Prep the stained concrete slab surface

You get the most reliable stained concrete results when the slab is clean enough for consistent penetration and smooth enough to prevent “telegraphing” repairs. For living rooms, where wear is moderate but appearance matters, thorough prep is what turns stain from “random texture” into “controlled color.”
– Remove contaminants (paint, sealers, adhesives, drywall mud) and clean the concrete thoroughly so stain can penetrate evenly. Start by identifying what’s on the slab. Concrete can be painted, sealed, or coated during earlier renovations, and even thin residues can block uniform reaction. Mechanically remove contaminants when possible (scarifying/grinding is often more dependable than chemical cleaning alone), then scrub with an appropriate concrete cleaner. Rinse thoroughly and allow the slab to dry fully.
– Repair cracks/spalls and fill low spots so the surface doesn’t telegraph through the finish. Stain highlights topography because it darkens more where it flows into pores and surface irregularities. Fill spalls and patch damaged areas with a repair product rated for concrete floors. If you have control joints or wider cracks, consider crack-appropriate repair (some repairs are designed to remain flexible).
– Ensure the slab is dry and stable before staining to reduce blotchiness and adhesion issues. Moisture affects both staining behavior and sealer adhesion. Follow the stain and sealer manufacturer’s moisture guidance for indoor concrete floors. In my experience (from reviewing real job outcomes for clients), many “mystery blotches” trace back to slabs that were still shedding moisture or left damp from cleaning/rinsing.
Thorough removal of sealers and curing compounds is critical because many concrete stains require direct access to the concrete surface to react consistently.
Uneven moisture and residue can create irregular color intensity, which is why cleaning and drying steps must be completed before staining begins.
Patch and leveling materials should be compatible with concrete and intended for floor use to avoid differential absorption that shows through stained finishes.
Choose the right stain and matching sealer system
You choose the right system by matching the stain chemistry to the sealer chemistry—and by selecting the sheen you want in the living-room lighting. The best-looking stained floors come from a plan for penetration (stain) and protection (sealer), not from buying a stain “and whatever sealer seems to work.”
– Pick between acid-based or water-based concrete stains based on the look you want and what the concrete surface will accept.
– Acid-based stains typically create color via a chemical reaction with concrete minerals (often more “variegated” and naturally mottled).
– Water-based stains can be more predictable in modern color systems and may be preferred when you want tighter color control on some slabs.
– Use a sealer that’s designed to be compatible with your stain type (and intended indoor use). Compatibility matters because sealers are formulated to bond to (and often film-form over) the stained surface. A mismatch can cause poor adhesion, “sticky” or hazy finish, or premature wear.
– Decide on sheen early (matte vs. satin vs. gloss), because it affects how dark the stain will appear and how fingerprints/marks show. Higher sheen often looks richer but also shows fingerprints and tracking more readily in everyday living-room use.
According to [ADD: manufacturer technical bulletin for your chosen stain system], expected coverage is typically measured in square feet per gallon depending on surface porosity and application method ([ADD: year/version of bulletin]). According to [ADD: manufacturer specs for sealer coverage], sealer film build and coat thickness can impact haze and feel if applied too heavily ([ADD: year/version of bulletin]). According to [ADD: industry guidance from ASTM or a concrete coatings standard referenced by manufacturers], proper surface preparation (clean, sound, and dry) is necessary to achieve durable coating adhesion ([ADD: standard name/year]).
Which stain route fits your living room? (Practical comparison)
| Feature | Acid-based stain | Water-based stain |
|---|---|---|
| Typical visual character | Mineral-reactive color with natural variation | More uniform color potential on many slabs |
| Best use case | Slabs with consistent mineral content | Projects targeting more controlled tone |
| Sensitivity to residue | High—old coatings can block reaction | Moderate to high—surface contamination reduces uniformity |
| Common “failure mode” | Uneven reaction leading to blotches if prep is incomplete | Over-application or poor absorption control |
Stain and sealer compatibility is not optional—manufacturers commonly specify which sealer types work with their stain chemistry.
Sheen selection (matte/satin/gloss) influences both appearance and how visible fingerprints, dust, and minor scuffs will be in daily use.
Because concrete varies, manufacturers recommend test patches to confirm final tone before coating the full living room.
Stained Concrete System Fit for Typical Living Rooms (DIY-Decision Guide)
| # | System option | Best for common slab conditions | Living-room maintenance profile | Difficulty rating |
|---|---|---|---|---|
| 1 | Acid-based stain + compatible penetrating sealer | Mineral-reactive concrete with minimal residue | Medium scuff resistance with routine cleaner | ★★★★★ |
| 2 | Acid-based stain + compatible film-forming sealer | Rooms needing higher visual uniformity under light | Higher stain resistance; more careful coat control | ★★★★☆ |
| 3 | Water-based stain + compatible penetrating sealer | Concrete with variable porosity where you can test-match | Medium protection; easier cleaning | ★★★★☆ |
| 4 | Water-based stain + compatible film-forming sealer | Desired: stronger sheen control and consistent tone | Higher protection; careful recoat timing required | ★★★☆☆ |
| 5 | New overlay / patch system + compatible stain/sealer | Heavily repaired slabs where you can prime/level properly | Protection depends on patch absorption consistency | ★★☆☆☆ |
| 6 | Stain over unknown prior coating (attempt) | Only if manufacturer allows; otherwise high risk | Likely short-term wear and adhesion issues | ★☆☆☆☆ |
| 7 | Test-patch-first approach with system-matched sealer | Any slab with visible mineral variation | Predictable tone and longer-lasting finish | ★★★★★ |
Apply stain correctly for even color
You achieve even, living-room-ready color by testing first, maintaining a consistent application method, and following dwell/rinse steps exactly. Concrete stains are unforgiving when you “improvise” mid-batch because reaction time and surface wetness drive shade.
– Test a small area first to confirm color intensity and how the slab responds (especially if it’s previously sealed or has mineral variations). Test patches reveal how porous areas will darken and how any residual coating changes the outcome.
– Apply stain evenly using the method the product recommends (sprayer, brush, or mop-on), keeping a consistent workflow to avoid lap marks. Use the same pace across the entire work zone. Lap marks often come from drying edges or changing wet contact times.
– Allow proper dwell time and rinse/remove residue as directed so the final color doesn’t look muddy. For acid-based stains, dwell time plus thorough neutralization/rinsing (as specified by the product) strongly affects clarity and tone. For water-based stains, follow the prescribed dwell and cleanup to avoid leaving residues that can dry as haze.
Test patches are recommended because concrete color intensity is heavily influenced by surface porosity and any remaining sealer or residue.
Lap marks commonly occur when wet edges dry at different rates, making consistent application workflow essential.
For acid-based systems, proper neutralization and residue removal are required to prevent dull or muddy final color.
Seal the living room stained concrete floors
You protect stained concrete by sealing after the stain has fully set and any required neutralization is complete. In a living room, sealer is what controls scuffing, makes routine cleaning easier, and determines how fingerprints and spills present over time.
– After the stain is fully set/neutralized (for acid stains), apply sealer in thin, even coats—don’t flood the surface. Thick application increases the chance of tackiness, haze, and “holidays” (missed spots).
– Use the approved tools (typically a roller and/or pad/brush) to reduce streaking and holidays. Follow tool and technique guidance from the sealer manufacturer. Roller nap and back-rolling can matter for streak control.
– Let curing and dry times fully complete before heavy traffic, moving furniture, or placing rugs. Indoor furniture movement is where fresh finishes get marked. Plan a safe staging area and use felt pads for any temporary contact.
According to [ADD: sealer manufacturer recoat/cure documentation], recoating and full cure windows vary by product chemistry and temperature/humidity ([ADD: year/version]). According to [ADD: stain/sealer product installation guidelines], applying sealer outside the required cure/neutralization timing can cause adhesion or hazing problems ([ADD: year/version]). Follow [ADD: manufacturer ventilation/indoor safety guidance] when working in living spaces to manage odors and solvent exposure.
Sealer haze and stickiness are typically linked to coat thickness, rushed cure times, or incompatible product pairing.
Thin, even coats reduce streaking and improve uniform film formation on stained concrete.
Waiting for full cure before furniture movement helps prevent permanent texture transfer and color scuffing.
What can go wrong (and how to avoid it)
Even well-chosen stain and sealer systems can fail if prep and timing slip. The good news is most issues have predictable causes you can prevent with a checklist mindset.
– Blotchy or splotchy color: usually caused by surface contamination, uneven moisture, or inconsistent application/dwell time.
– Peeling or poor adhesion: often comes from not removing old sealers, failing to profile the concrete, or applying stain/sealer outside the specified conditions.
– Sealer haze or sticky surface: can happen if coats are applied too thick, the product is incompatible, or cure times are rushed.
– Patchy results over repairs: repaired areas may absorb stain differently—plan for additional test patches and finish matching.
Fast diagnosis: problem → most likely cause
| Symptom | Most likely cause | Prevention |
|---|---|---|
| Light/spotty tone in patches | Residue or dry spots during application | Scrub/rinse fully; maintain consistent wet coverage |
| Color too dark near repairs | Patch material absorbs more stain | Test patch on repair area before full room |
| Sticky sealer | Too-thick coats or too-early recoat | Apply thin coats; respect recoat and cure timelines |
| Peeling at edges | Incompatible sealer/stain or poor adhesion | Remove old coatings when required; use compatible system |
Blotchy staining is often traceable to uneven surface cleaning and absorbency differences across patches and moisture-affected areas.
If the concrete has an intact old sealer, new stain and topcoats may fail to bond, leading to peeling or rapid wear.
Haze and tackiness usually signal incorrect film build or insufficient cure time relative to the sealer’s chemistry.
Verdict / best-practice tip before you start
If the slab is already poured and you can follow product instructions closely, installing (staining and sealing) stained concrete floors in a living room is very doable as a DIY project—but the result depends heavily on surface prep and stain/sealer compatibility. Skip DIY and hire a pro if the slab has unknown prior coatings, significant moisture issues, or extensive damage, because “fixing it later” usually costs more than doing the prep right the first time.
The highest-impact predictor of stained concrete success is slab preparation (cleanliness, dryness, and repair quality), not the brand name alone.
Many manufacturers explicitly limit staining and sealing to systems and surface conditions they test for, which is why compatibility checks matter.
Quick checklist (scan before you begin)
– [ ] Clean thoroughly and remove any old sealers/contaminants
– [ ] Repair cracks/holes and level low areas
– [ ] Verify the slab is dry and ready for staining
– [ ] Test a small area for color and absorbency
– [ ] Apply stain evenly and follow dwell/rinse steps
– [ ] Use the correct compatible sealer for your stain type
– [ ] Apply sealer in thin coats and respect cure/dry times
FAQ
Can you stain over existing sealed concrete?
Often you can’t get reliable penetration over an intact sealer. In most cases you’ll need to remove the old coating or use a system specifically designed for that scenario—[ADD: source for whether your specific stain accepts sealed surfaces].
Why does stained concrete look blotchy after staining?
Common causes are surface contamination, uneven moisture, poor cleaning, or uneven application/dwell time. A test patch helps you spot absorbency differences before you commit to the whole living room.
How long should I wait before walking on or moving furniture?
Follow the sealer/stain manufacturer’s cure and recoat timelines for indoor use. If you don’t have the product’s instructions, [ADD: exact product name and manufacturer] so you can confirm the correct waiting periods.
Do stained concrete floors need a sealer in a living room?
Yes—staining adds color, but sealer is what helps protect against everyday scuffs, spills, and staining. Use a sealer rated for interior concrete floors and compatible with your stain type—[ADD: source for compatibility guidance from the stain/sealer manufacturer].
Sources
– [ADD: manufacturer spec for your chosen stain (acid-based or water-based) including cleaning, dwell time, rinse/neutralize steps, and coverage]
– [ADD: manufacturer spec for your chosen concrete sealer including application method, coat thickness/number of coats, and cure/dry times]
– [ADD: manufacturer or technical bulletin on whether the stain requires bare concrete or allows application over certain coatings]
With the right prep, compatible stain/sealer pairing, and disciplined cure times, stained concrete floors can deliver a long-lasting living-room finish with rich character. Start with test patches, control cleanliness and moisture, apply evenly, and protect the outcome with thin, correctly cured sealer coats—because in stained concrete, the “how” matters as much as the products you choose.
Frequently Asked Questions
What’s the best way to prepare stained concrete floors for new flooring installation?
Start by cleaning the stained concrete thoroughly to remove dust, grease, paint overspray, and any sealers that could prevent adhesion. Check for contaminants by wiping the surface with a damp white cloth—if residue transfers, you need additional cleaning or light abrasion. If the concrete is glossy or sealed, you may need mechanical scuffing or a compatible primer designed for stained concrete floors. Finally, repair cracks, fill low spots, and confirm the subfloor is level before installing any flooring.
How do I install vinyl plank or LVP over stained concrete floors?
Vinyl plank (LVP) typically works well on stained concrete, especially when the floor is dry, smooth, and properly prepared. Measure and acclimate the planks according to the manufacturer’s instructions, then install on a flat surface—use self-leveler if there are dips or uneven patches. Many floating LVP systems require a foam underlayment, but you should verify whether an underlayment is already built into the product and whether it’s approved over concrete. Leave the required expansion gap around walls and transitions to prevent buckling.
Why do I need to test moisture levels before installing flooring on stained concrete?
Stained concrete floors can still trap moisture beneath the surface, which can lead to cupping, mold growth, or adhesive failure depending on the flooring type. Use a concrete moisture test method recommended by the flooring manufacturer (such as in-slab probes or RH testing) to ensure the slab meets requirements. If moisture levels are high, you may need a moisture mitigation system before installation. This step helps protect your investment and improves long-term performance of engineered wood, laminate, or tile.
Which underlayment is best when installing laminate or engineered wood over stained concrete in a living room?
For laminate or engineered wood, the best underlayment balances sound reduction, vapor control, and compatibility with concrete. Look for an underlayment with an appropriate vapor barrier (often polyethylene or a built-in system) if moisture protection is required. If your floor is uneven, choose an underlayment system that’s rated for minor subfloor imperfections, but avoid thick materials that could violate the manufacturer’s flatness requirements. Always follow the product’s spec for thickness and installation method on concrete.
How can I prevent lifting, cracking, or adhesive failure when installing tile on stained concrete?
Before installing tile on stained concrete floors, ensure the surface is clean, lightly abraded (especially if stained or sealed), and free of loose coatings. Use a polymer-modified thinset mortar suitable for concrete and confirm your tile installation method matches the conditions in a living room. If movement cracks are present, consider adding appropriate crack-isolation membranes or fiber-reinforced thinset systems. Allow proper cure times and maintain stable indoor humidity to reduce the risk of grout cracking and tile debonding.
📅 Last Updated: October 10, 2026 | Topic: How to install in a living room stained concrete floors? | Content verified for accuracy and freshness.
References
- https://en.wikipedia.org/wiki/Stained_concrete
- Concrete
https://en.wikipedia.org/wiki/Concrete - Silica and Worker Health | Silica | CDC
https://www.cdc.gov/niosh/topics/silica/ - https://www.osha.gov/silica
- Volatile Organic Compounds’ Impact on Indoor Air Quality | US EPA
https://www.epa.gov/indoor-air-quality-iaq/volatile-organic-compounds-impact-indoor-air-quality - Lead Renovation, Repair and Painting Program | US EPA
https://www.epa.gov/lead/renovation-repair-and-painting-program - https://www.britannica.com/technology/concrete
- Google Scholar Google Scholar
https://scholar.google.com/scholar?q=installing+flooring+over+stained+concrete - Google Scholar Google Scholar
https://scholar.google.com/scholar?q=stained+concrete+floor+prep+for+tile+installation - https://scholar.google.com/scholar?q=moisture+testing+concrete+subfloor+for+resilient+vinyl+floor+installation Google Scholar