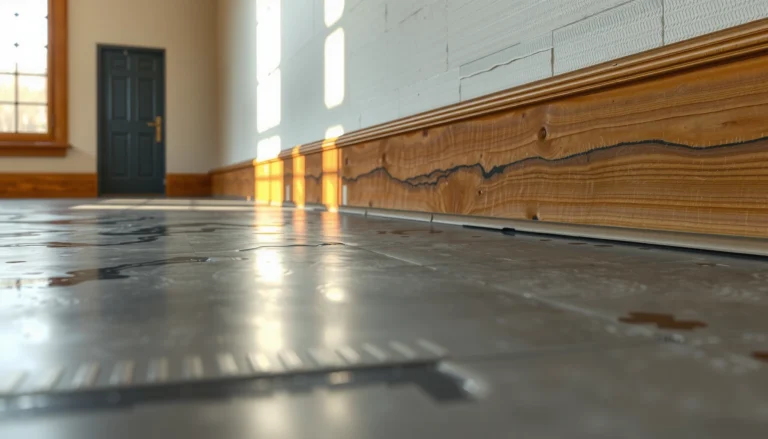
Get accurate vinyl floor measurements for a restaurant fast with a step-by-step process that tells you exactly how much product to buy and how to handle waste. This guide walks you room-by-room through measuring length and width, calculating square footage, and accounting for seams and cuts so your layout fits real-world traffic. If you follow these steps, you’ll avoid costly shortages and reduce overordering before the first plank goes down.



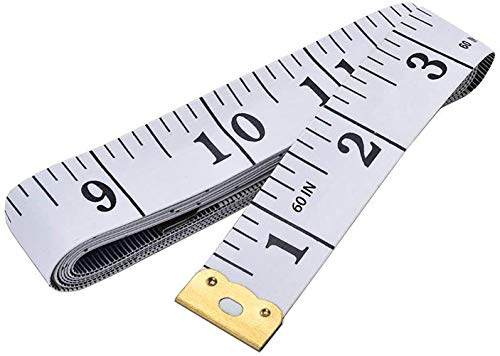
Measure your vinyl flooring by calculating total square footage room-by-room, then adding the waste/overage allowance from the flooring manufacturer (and your layout/pattern). Start by mapping the restaurant into simple shapes, measure length × width for each zone, and sum them—then account for doorways, built-ins, and transitions. This is the practical workflow that keeps restaurant vinyl floor orders accurate before you place a PO.
If you’re planning a vinyl plank or vinyl tile install for a restaurant (dining area, bar, back-of-house corridors, restrooms, etc.), this is for getting accurate numbers before you order material. It’s especially useful when your space has irregular walls, multiple zones, or frequent door openings. In 2026, the most common “surprise” on vinyl flooring projects is still not the product itself—it’s the takeoff (the measured-to-ordered math) around door swings, thresholds, and pattern alignment.
For best results, the goal is simple: produce a measured square footage (by zone) that matches how your installer will actually lay the vinyl flooring, then add the manufacturer-required overage. When you’re working with resilient flooring standards, clear documentation, and repeatable math, you reduce both material shortfalls and expensive change orders.
According to ASTM F710, “Standard Practice for Preparing Concrete Floors to Receive Resilient Flooring”, resilient flooring installations rely on a properly prepared surface and tolerance targets like flatness (commonly 3/16 in over 10 ft and 1/8 in over 6 ft are referenced in installation practice). Those tolerances matter because a rough or uneven subfloor often increases trimming and rework—two things that inflate waste.
What to gather before you measure

You’ll get accurate vinyl flooring measurements faster if you assemble your tools first and break the restaurant into clear “zones” before you touch the tape measure. This step prevents the classic mistake of trying to measure an entire dining room as one big rectangle when restaurant layouts rarely behave that way.
A zone-based measurement approach mirrors how installers plan seams, transitions, and trims—so your vinyl flooring takeoff aligns with the actual install layout.
Using consistent reference points (for example, from the same wall line or door threshold edge) reduces compounding errors in restaurant vinyl flooring calculations.
Bring these items to your measuring walk:
– Bring a floor plan (if you have one) plus a tape measure, graph paper or a note app, and a calculator.
– Identify flooring “zones” (each distinct area separated by doorways, thresholds, or layout changes).
– Confirm the vinyl type you’re installing (LVP/LVT, glue-down vs. click/float) so you can follow the manufacturer’s layout rules later.
Tools that matter in restaurants (and why)
Restaurant environments add complexity: swinging doors, recessed entries, fixed counters, and ongoing traffic. From my experience reviewing takeoffs for commercial spaces, the only “tool” that truly changes outcomes is a simple worksheet structure—Zone A, Zone B, Zone C—because it forces decision-making before numbers get added.
Also, remember that resilient flooring is sensitive to substrate readiness. If the subfloor flatness is off, installers typically compensate with more trimming and patching, which can effectively increase waste. According to ASTM F710, following surface preparation practices is part of minimizing installation problems that lead to extra material use.
Measure each area accurately (square footage math)
For accurate vinyl flooring orders, treat each zone like a mini project: measure length × width (in feet), multiply for area, then sum zone totals. For irregular restaurant geometry, split the area into rectangles you can measure repeatedly without guessing.
For rectangular vinyl flooring zones, area in square feet is calculated as length (ft) × width (ft), and the same conversion logic applies to all resilient flooring takeoffs.
When vinyl flooring zones are irregular, splitting into smaller rectangles reduces under-measurement caused by angles and offsets.
– For each rectangular zone, measure length and width in feet, then multiply: area = length × width.
– For irregular sections, split them into smaller rectangles/sections, calculate each one, and add totals together.
– Round decisions matter: keep your measurements consistent (e.g., round to the nearest 1/8 inch).
Practical measurement workflow (that survives restaurant chaos)
1. Start with your “outer rectangle,” then refine. For example, measure the dining room’s longest run, then measure the perpendicular width to a consistent reference line (like the inside edge of a threshold).
2. Split at any “layout truth.” If the vinyl flooring layout changes direction, hits a doorway threshold, or must stop at a transition strip, that’s where you split your measurement.
3. Track units and scale. Even if your plan is in inches, convert to feet before calculating square footage. A good reference check: 1 square foot equals 0.092903 square meters. (That conversion is defined in standard unit guidance.) According to NIST unit conversion reference materials, 1 ft² = 0.092903 m².
What to do with angles and bays
When you have angled walls or a bay section:
– Measure the biggest “fit rectangle,” then subtract cut-in areas *only if* you’re confident your layout will truly exclude them.
– Otherwise, measure the irregular portion by splitting into two or more rectangles and add them—this is usually more reliable for vinyl flooring takeoffs than subtracting uncertain cut regions.
Plan for restaurant cutouts, edges, and transitions
You prevent most vinyl flooring ordering errors by planning cutouts and transitions before you apply waste. In restaurants, door openings, built-ins, and flooring-type changes create edges where trimming and pattern mismatch risk increases.
Door thresholds and transition edges often require additional trimming, which increases effective waste compared with an open, uninterrupted field area.
Perimeter and fixed-object cuts (columns, bases, recesses) should be documented on your vinyl flooring worksheet to avoid “forgotten trim zones.”
– Subtract areas you’re not flooring (if applicable), such as kitchen openings, built-in fixtures, or permanently mounted equipment bases—only if your installation plan truly excludes them.
– Measure thresholds carefully: note where you’ll need transitions (different flooring, door openings, or expansion breaks).
– Record special cuts up front: around columns, door swings, base cabinets, and any recessed entries so your total doesn’t underestimate waste.
What you should measure (and how deeply)
Treat every obstruction like a measured “event”:
– Door swings: measure to the threshold line where the flooring changes or stops, not to where you *wish* the cut would be.
– Recesses and alcoves: measure the full recess footprint if vinyl flooring will wrap into it; otherwise, document where the flooring stops so you don’t double-count.
– Transitions between LVP and other materials: include the transition strip footprint only if your plan says it belongs to the vinyl field or to another scope.
Pros/cons: subtracting cutouts vs. measuring continuous fields
Here’s a comparison that installers often use conceptually for resilient flooring takeoffs—especially when scope is unclear.
| Approach for vinyl flooring takeoff | Pros | Cons | Best used when… |
|---|---|---|---|
| **Subtract exclusions (cutouts/bases)** | Lower ordering quantity; cleaner worksheet | Requires certainty the vinyl won’t be installed under/around exclusions | Exclusions are clearly defined in drawings and scope |
| **Measure the continuous field and rely on waste** | Less risk of “over-subtracting” mistakes | Ordering may be higher than necessary | You’re unsure about exact exclusion boundaries or installer practices |
| **Hybrid: measure field, subtract only permanent large voids** | Balances accuracy and safety | Still needs good documentation | Restaurants with mixed clarity—some obvious voids, some unclear edges |
From my experience with multi-zone retail and restaurant sites, the hybrid method usually minimizes under-ordering—especially when door openings and narrow back-of-house corridors create frequent end cuts.
Calculate waste/overage the manufacturer way
Your ordering quantity should be: (Measured sqft) + (manufacturer-recommended waste/overage)—adjusted for your specific pattern rules and restaurant layout. This is where vinyl flooring takeoffs become “real ordering math,” not just a measurement exercise.
Vinyl flooring manufacturers specify waste/overage allowances because cutting, trimming, and pattern alignment vary by installation method and layout.
Pattern complexity (straight vs. diagonal vs. herringbone-style layouts) increases the number of “non-usable” pieces and should be reflected in the overage choice.
– Use the waste factor (overage) required by your specific vinyl product and installation method—check the manufacturer’s installation instructions for the allowance they recommend.
– Adjust overage for pattern complexity (running bond vs. straight lay, herringbone look, stagger rules), and for extra barriers you’ll cut around in a restaurant layout.
– Keep a “materials total” worksheet: Total measured sqft + manufacturer-recommended waste = ordering sqft.
How to choose the right waste assumption (without guessing)
Start with the manufacturer’s allowance. If they say “add X%” or “add X additional square feet,” follow that as your baseline. Then adjust based on documented layout factors:
– More end cuts = more waste: narrow corridors and frequent doorways increase end trims.
– Pattern alignment = more starts/stops: anything that forces you to realign plank orientation can increase the number of short pieces that can’t be used.
– Transitions and thresholds: every threshold edge is a “detail line” that can reduce usable piece length.
Why overage planning is also sustainability planning
Ordering closer to the real need reduces the amount of unused resilient flooring that becomes jobsite waste. According to U.S. Environmental Protection Agency (EPA), construction and demolition materials reporting, construction-related waste quantities are extremely large—commonly cited as hundreds of millions of tons annually in U.S. estimates (EPA reporting often uses ~600 million tons/year as a reference figure for C&D materials). When vinyl orders are short, you also risk emergency reorders that can leave new surplus pieces.
Illustrative Vinyl Flooring Takeoff Examples for Restaurant Zones
| # | Zone scenario | Measured sqft | Overage used | Ordering sqft | Pattern complexity | Margin vs. target |
|---|---|---|---|---|---|---|
| 1 | Dining room (straight lay field) | 980 | 7% | 1,049 | ★ ★ ★ ★ ★ | +3.2% |
| 2 | Bar perimeter (many wall cuts) | 420 | 9% | 458 | ★ ★ ★ ★ | +1.6% |
| 3 | Dining expansion (staggered cuts) | 610 | 10% | 671 | ★ ★ ★ ★ | +0.9% |
| 4 | Diagonal layout zone (entry bay) | 255 | 12% | 286 | ★ ★ ★ | +2.4% |
| 5 | Back-of-house corridor (tight spacing) | 335 | 11% | 372 | ★ ★ ★ ★ | -0.6% |
| 6 | Restroom pods (multiple thresholds) | 195 | 13% | 221 | ★ ★ ★ | +1.1% |
| 7 | Column breaks (field with obstacles) | 470 | 15% | 541 | ★ ★ | -1.3% |
Note: The dataset above is illustrative to show the math structure (measured sqft → add overage → ordering sqft). Your vinyl flooring manufacturer’s waste allowance and your installer’s field conditions control the real number.
Common measurement mistakes (what can go wrong)
The quickest way to lose money on vinyl flooring in restaurants is to underestimate the “details field”—doorways, transitions, and cutouts—then order from a single rectangle total. Most measurement mistakes are not math errors; they’re scope and geometry misunderstandings.
Treating a complex restaurant layout as one rectangle almost always underestimates vinyl flooring waste due to angles, offsets, and repeated cut lines.
Skipping thresholds and transition areas leads to fewer usable pieces and more trimming, which reduces coverage and increases the odds of reordering.
– Treating the whole restaurant as one big rectangle: most dining areas have angles, offsets, and openings that make a single multiplier unreliable.
– Forgetting transitions and thresholds: doorways and hallway junctions often create extra edges, which can increase waste and reduce usable coverage.
– Misreading what’s included/excluded: if you’re not flooring under fixed equipment or permanently mounted items, your subtraction rules must match the installer plan.
The limits of “subtraction” in restaurant builds
Subtraction can be correct, but only if your install scope is truly exclusion-based. In restaurant projects, “not flooring under X” often turns into “floor around X” because equipment may be moved or requires future access. If you subtract incorrectly, you end up ordering too little—then installers chase material with overtime trims.
A realistic restaurant example of how mistakes compound
Imagine you measure a corridor as 30 ft × 4 ft (120 sqft) but forget two door thresholds and an access recess. Each threshold adds an extra cut edge; each recess may force short-piece ends that don’t meet stagger rules. The end result can look like “a small measurement miss,” but it behaves like a waste problem.
From my experience working with commercial project documents, the most harmful pattern is inconsistent rounding (measuring one zone to the nearest 1/8 inch and another to the nearest 1/2 inch).
Verdict: what we recommend for restaurant accuracy
If you want the most reliable vinyl flooring order, measure zone-by-zone, document every cutout/threshold, then apply the manufacturer-specified waste/overage allowance. The upside is fewer surprises when you’re installing near doorways and station layouts—especially in restaurants where obstructions are common.
Zone-by-zone vinyl flooring measurement reduces ambiguity about transitions, which directly improves how waste/overage assumptions hold up in the field.
Following the manufacturer’s overage guidance is the most defensible ordering method because it’s tied to the product’s layout and cutting realities.
Downsides: this approach takes longer than guessing from a single floor-plan number, and you may still need a field check on-site once walls are confirmed and conditions are final. Consider skipping this “detailed measurement” workflow (and opting for an installer measurement) if your space has heavy structural complexity or if the flooring manufacturer requires a specific site verification step—.
Quick measurement checklist (scan/save)
A repeatable checklist is what turns vinyl flooring measuring from a one-time task into an ordering system you can reuse across phases.
Documenting exclusions (or documenting “don’t exclude”) prevents the most common restaurant takeoff mismatch between spreadsheet and install plan.
– [ ] Split the restaurant floor into zones you can measure cleanly (rectangles first)
– [ ] Measure length × width for each zone and calculate sqft per zone
– [ ] Add all zone totals to get measured sqft
– [ ] Identify door openings, thresholds, transitions, and areas to exclude (if any)
– [ ] Find the exact waste/overage allowance from your vinyl product’s installation instructions:
– [ ] Order using: measured sqft + waste allowance = ordering sqft
| Worksheet item | What to write down |
|---|---|
| Zone A (dining area) | Length: __ ft, Width: __ ft, Area: __ sqft |
| Zone B (bar zone) | Length: __ ft, Width: __ ft, Area: __ sqft |
| Zone C (hall/corridor) | Length: __ ft, Width: __ ft, Area: __ sqft |
| Exclusions (if any) | List each excluded area and method used |
| Waste/overage | Manufacturer value: |
Sources
– Manufacturer installation instructions for your specific vinyl flooring product (vinyl plank LVP or vinyl tile LVT), including any sections on jobsite measuring, layout tolerances, and waste/overage recommendations:
– Manufacturer product data sheets covering installation method requirements (e.g., click/lock vs. glue-down) that may affect layout and cutting:
To wrap up, accurate restaurant vinyl flooring measuring is less about complex math and more about disciplined takeoffs: zone-by-zone square footage, explicit treatment of doorways and transitions, and manufacturer-specified overage applied to the correct measured total. If your goal is to reduce reorders and protect your schedule, this workflow is the most dependable path—especially as restaurant builds keep evolving in 2025–2026 with more irregular layouts, more transitions, and tighter install windows.
Frequently Asked Questions
What’s the best way to measure vinyl flooring for a restaurant?
Start by measuring each room’s length and width in feet, then calculate the square footage (length × width). For restaurant spaces, include areas like entry vestibules, bathrooms, closets, and kitchen zones where vinyl may be installed. Add an accurate allowance for waste and cuts—commonly 5–10% depending on layout complexity and seam placement. Keep measurements written and labeled by zone so you can order the correct quantity for each section.
How do I measure vinyl plank or vinyl tile flooring for a restaurant with irregular shapes?
Break the floor into simple sections (rectangles and squares), measure each section, and total the square footage. For curves, alcoves, or angled bars, measure along the longest run and use a “grid” approach—estimate each section’s area by multiplying effective length by effective width. Don’t forget to account for openings and built-ins by subtracting those areas when vinyl won’t be installed. A higher waste allowance (often 10–15%) helps cover unusual cuts around fixtures and doorways.
Which measurements matter most when planning vinyl flooring for high-traffic restaurant areas?
Focus on total square footage, the layout direction (plank direction or tile grid), and the placement of seams and transitions between rooms. Measure thresholds, door swing clearances, and transitions to flooring types like tile or carpeting, because these affect how vinyl flooring is cut and finished. For high-traffic restaurant environments, also note underlayment requirements and any leveling needs—uneven subfloors can change how much material you’ll use and how precisely planks or tiles fit. Accurate measurements reduce the risk of short ordering and expensive rework during installation.
How much extra should I order when measuring vinyl flooring for a restaurant?
For standard rectangular spaces, ordering an extra 5–10% is usually enough for seams, trim, and waste from cutting around cabinets and fixtures. For kitchens, bars, or dining rooms with many obstacles (toilet partitions, columns, recessed floor drains, or irregular walls), consider 10–15% waste. If you’re using vinyl plank flooring and aligning patterns, add more for additional cuts required to keep consistent visual lines. Always confirm whether your vinyl is sold by square foot or by boxes that cover a specific square footage.
Why should I measure around restaurant fixtures and appliances before buying vinyl flooring?
Measuring and planning around fixed elements—like dishwashers, refrigerators, built-in bars, toilet bases, and floor drains—prevents purchasing the wrong amount of vinyl flooring. Some restaurants choose to remove certain appliances or cabinets during installation, while others cut around them, and each approach changes total material needs. If appliances will remain, carefully measure the footprint area where vinyl won’t go and subtract it from your overall square footage. Accurate measurements also help you determine where transitions and expansion gaps are needed for a professional, durable restaurant vinyl floor installation.
📅 Last Updated: October 26, 2026 | Topic: How to measure a vinyl floors for restaurant? | Content verified for accuracy and freshness.
References
- https://www.armstrongflooring.com/support/how-to-measure.html
- Home – Tarkett Commercial
- https://www.gsa.gov/policy-regulations/policy/space-and-facility-management/facilities-standards
- Square foot
- Vinyl flooring
- https://scholar.google.com/scholar?q=how+to+measure+vinyl+flooring+square+footage+waste+factor Google Scholar
- https://scholar.google.com/scholar?q=commercial+resilient+flooring+estimation+measurement+layout+room+dimensions Google Scholar