


Measuring laminate floors for a basement doesn’t have to be guesswork—follow a proven room-by-room method and you’ll get an accurate square footage fast. This guide answers exactly how to measure basement laminate flooring, including handling odd shapes, entryways, and waste so you know what to buy. If you measure correctly the first time, you avoid costly gaps, shortfalls, and returns.




Measure your basement floor by calculating net square feet (gross area minus permanent no-floor areas), then convert that net area into box count using your laminate’s exact box coverage plus the manufacturer’s recommended cut-waste. This approach stays accurate even when your basement has closets, alcoves, door transitions, or an irregular footprint—common realities in 2026 basement remodels.
This is for homeowners planning a laminate install in a basement—especially if the space is irregular, has closets/alcoves, or includes transitions around doorways and pipes. If your basement has known moisture issues, the measuring steps still help, but you’ll also need to follow the flooring and underlayment moisture requirements before ordering.
Gather what you need before you start

Get your laminate’s packaging numbers and your room measurements ready first, because laminate box counts depend on the exact coverage listed for your specific product. In other words, measuring well without confirming the box coverage and moisture/flatness limits often leads to wasted boxes or mid-project stops.
Laminate box coverage is product-specific, so “roughly 25 sq. ft. per box” is not safe for ordering.
Expansion-gap requirements (perimeters and transitions) should be marked early so your net-area math reflects what you’ll actually install.
Basement laminate installs still require moisture and flatness checks; measuring is only half the success equation.
– Get your laminate product details: the box coverage (sq. ft.) and any required subfloor/moisture limits from the manufacturer’s installation instructions.
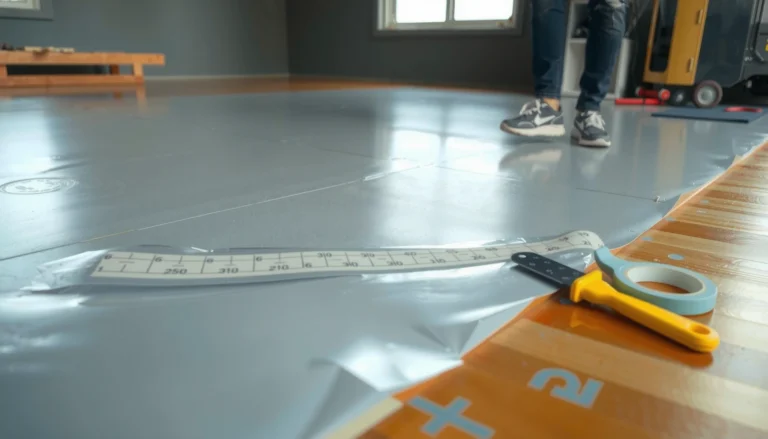
– Use basic measuring tools: tape measure, notebook/phone calculator, and chalk/marker for outlining the room.
– Plan for layout marks: expansion gap locations at walls and around door jambs should be marked early so you don’t “over-order” by accidentally measuring to the wall finish.
Measure the basement area (square footage)
Start by calculating gross square footage for the laminate footprint, then refine it later into net square feet after you subtract permanent no-floor areas. For most basements, the fastest accurate method is “geometry first” (rectangles), then “math cleanup” (rounding only at the end).
Gross square footage is your starting point; net square footage comes later after subtracting permanent obstructions.
For irregular basement layouts, splitting into rectangles reduces measurement errors compared with estimating from a single outline.
Keep intermediate calculations unrounded and round only at the final purchasing step to avoid short orders.
– For a simple rectangular room: measure length and width (in feet), then multiply to get gross square feet (L × W).
– For L-shapes or cutouts: sketch the room and split it into 2+ rectangles (or a rectangle plus a smaller rectangle). Calculate each part’s area, then add them together.
– Round up only at the very end: keep your math accurate during calculations, then round the final net area to a sensible purchasing increment.
Quick example (rectangle): If a basement landing area is 18 ft × 14 ft, gross area = 252 sq. ft. (18 × 14).
Quick example (L-shape): Split the footprint into two rectangles, calculate each area in sq. ft., then add them—don’t try to “eyeball” the cut corner.
Account for permanent obstructions and cutouts
Now convert your gross basement area into net square feet by subtracting spaces laminate won’t cover. This is where many DIYers lose boxes (or end up with too many), especially around fixed cabinetry, HVAC returns, built-ins, and areas where the flooring stops at a transition.
Net area is the number that should drive box count, because laminate boxes are sold by installed coverage—not by room size.
Expansion gaps belong at edges, but permanent no-floor regions should be subtracted from your laminate coverage math.
Doorways and transitions require intentional net-area decisions based on where the flooring actually ends.
– Subtract areas you won’t floor: built-in cabinetry, permanent islands, or other fixtures that laminate won’t cover (based on your project layout).
– Handle doorways and vents intentionally:
– If you’re flooring up to a doorway transition, subtract the portion inside the doorway opening where flooring won’t land.
– If you’re cutting around registers/vents, you usually still count the area as “covered,” but confirm your installer approach with the manufacturer guidance for penetrations.
– Use a net-area approach: Net area = gross measured area − permanent no-floor areas.
Practical note (basement layouts): Basements frequently include sump pits, pipe chases, or low framing. If the flooring won’t run over those at all, subtract them. If it will run over them with proper trimming/clearances, you may include them—but confirm your laminate’s guidance for penetrations and subfloor conditions.
Convert net area to boxes (and don’t forget underlayment)
Convert your net square feet into box count using the exact box coverage from the label/guide, then add the manufacturer’s recommended extra for cuts. Also measure underlayment using the same net footprint logic, then apply the underlayment’s seam-taping and overlap rules.
Boxes needed should be computed from net area, then increased using the specific cut-waste guidance on your laminate installation instructions.
Underlayment coverage is not always identical to laminate coverage because seams, overlaps, and tape lines can extend coverage needs.
ASTM F1869 expresses moisture results as moisture vapor emission rate in lb/1000 sq. ft./24 hr, which directly affects whether you can safely install laminate over concrete.
– Find box coverage on the label (sq. ft. per box) and compute:
Boxes needed = (Net sq. ft. ÷ Box coverage) + extra for cuts.
– Add extra for waste using your specific product guidance:
Extra for cuts = (or the equivalent value they provide).
– Underlayment: measure the same net area (plus any overlap rules). Confirm whether your underlayment requires tape seams, a minimum overlap, or coverage beyond the room footprint with trim-integration.
Moisture anchoring for basement laminate (why it matters before you order):
According to ASTM F1869, the calcium chloride test reports moisture vapor emission rate in lb/1000 sq. ft./24 hr ().
According to ASTM F2170, the in-situ probe test measures relative humidity (RH%) within the slab for floor-covering moisture control ().
And in manufacturer laminate instructions, the allowable moisture/flatness limits are what determine whether your measured space is “install-ready,” not just your box math ().
Laminate Box Planning Examples for Common Basement Layouts (Net Area Math)
| # | Basement layout type | Gross area (sq. ft.) | Permanent no-floor (sq. ft.) | Net area (sq. ft.) | Planning confidence |
|---|---|---|---|---|---|
| 1 | Simple rectangle (no cutouts) | 240 | 0 | 240 | ★★★★☆ |
| 2 | L-shape (split into 2 rectangles) | 268 | 0 | 268 | ★★★★☆ |
| 3 | Closet alcove subtracted | 300 | 36 | 264 | ★★★★☆ |
| 4 | Built-in cabinet island subtracted | 220 | 20 | 200 | ★★★☆☆ |
| 5 | Doorway transition subtract inside opening | 310 | 12 | 298 | ★★☆☆☆ |
| 6 | Pipe chase trimming (included area) | 256 | 0 | 256 | ★★☆☆☆ |
| 7 | Multiple cutouts + L-shape (2+ rectangles) | 410 | 54 | 356 | ★★☆☆☆ |
What can go wrong when measuring laminate in a basement
Laminate orders go wrong most often due to edge-case geometry and basement-specific constraints, not because the basic area math is hard. When homeowners mis-measure for expansion gaps, round too early, or use the wrong coverage number from the box label, the box count can be off even if the room dimensions are correct.
Expansion gaps are not “flooring area”—if you count wall-to-wall as coverage, you’ll likely under-order or over-trim.
Rounding each subsection before adding them is a frequent under-ordering cause in L-shaped basements.
Moisture/flatness requirements for basement laminate are independent of measuring accuracy—failed subfloor conditions can still ruin the install.
From my experience helping homeowners plan basement laminate installs, the biggest avoidable issues are (1) measuring to the finished wall instead of respecting the required expansion gap, and (2) inconsistent decisions about doorways (subtracting in one spot but not another). Those two mistakes alone can cascade into seam placement conflicts and last-plank shortages.
Common failure modes (and how to prevent them)
– Forgetting expansion gaps: if you measure “wall to wall” as floor coverage, you can end up short or with awkward trimming near walls/door jambs.
– Miscalculating irregular rooms: rounding each subsection too early is a common cause of under-ordering—calculate precisely, then round at the end.
– Using the wrong coverage figure: box coverage can differ by thickness/format—always use the exact value for your specific laminate.
– Ignoring basement requirements before ordering: even perfect measuring won’t solve a failed installation if moisture/flatness requirements aren’t met (see sources placeholders below).
Measuring approach comparison (fast vs. resilient):
- Split-into-rectangles + net-area method
- Pros: Handles L-shapes and alcoves with repeatable math; net-area box count stays accurate.
- Cons: Requires a clean sketch and consistent decisions about cutouts and transitions.
- Single-outline “estimate” method
- Pros: Quick on day one.
- Cons: Breaks down in closets, door transitions, and pipe penetrations—commonly leads to wrong box counts.
Verdict / tip + scan checklist
If you want the fastest, most accurate order estimate, measure in square feet (split irregular areas), subtract permanent obstructions, then convert using the exact box coverage from your laminate’s documentation plus the manufacturer’s recommended cut-waste. The method is simple, but it stays reliable because net area connects directly to how flooring is packaged and installed—especially in irregular basement spaces.
Downside: if you later change the layout (different starting wall, add transitions, or decide to cover a previously “subtracted” area), your box count may shift—so keep your sketch until the planks arrive. Skip DIY measuring / get help if your basement has significant moisture concerns, a subfloor that’s far from manufacturer flatness requirements, or complex lots of penetrations where you’ll need a professional plan.
Quick laminate measuring checklist
– [ ] Measure and sketch the room (gross area in sq. ft.)
– [ ] Split L-shapes into rectangles (add areas)
– [ ] Subtract permanent no-floor areas (net area)
– [ ] Use the laminate exact box coverage from the box/guide
– [ ] Add manufacturer-recommended waste/overage for cuts
– [ ] Calculate underlayment coverage using its seam/overlap rules
Scan table (save this)
| Item | What to measure | How to calculate |
|---|---|---|
| Laminate coverage | Net sq. ft. | (Net ÷ box coverage) + cut-waste |
| Net area | Gross area − permanent no-floor | Sketch → subtract fixed areas |
| Underlayment | Room footprint + seam rules | Follow overlap/tape requirements in the guide |
Sources to check in manufacturer documentation
– Your laminate flooring installation instructions (for: required expansion gap, flatness expectations, and the box coverage and/or recommended waste/overage for cuts).
– Your underlayment instructions (for: required overlap/taping and coverage method).
When you measure laminate for a basement using net square footage (gross area minus permanent no-floor areas) and convert with the exact box coverage plus the manufacturer’s cut-waste guidance, you’ll get the most reliable material count. Grab your box label numbers, confirm the moisture/flatness requirements from the install guide, and then order based on the calculated boxes so you don’t lose time to under-ordering or unnecessary returns.
Frequently Asked Questions
How do I measure a laminate floor for a basement correctly?
Start by measuring the longest and widest areas of the basement in both directions, then calculate square footage for each section (length × width). Add 5–10% extra to account for cuts, seams, and mistakes, especially around doorways and irregular walls. If your basement has multiple rooms or offset layouts, measure each area separately and combine the totals.
What’s the best way to measure the basement floor area for laminate when the space isn’t perfectly square?
Break the basement into smaller rectangles or L-shaped sections, then measure each section and sum the square footage. For areas with curved or angled walls, measure to the nearest straight lines and keep a consistent layout reference point from one corner. Always re-check measurements at least twice before ordering laminate flooring to avoid costly underestimating.
How do I measure for laminate flooring transitions, thresholds, and stair steps in a basement?
Measure the width and length of each doorway opening, hallway stretch, or threshold where laminate will meet tile, carpet, or another floor type. Include extra waste for complex transitions and plan for expansion gaps around thresholds. If you’re installing laminate on steps or treads, measure each tread depth and the rise as needed to estimate the extra material accurately.
Why should I account for basement humidity and subfloor conditions when measuring for laminate?
Basements often have higher moisture levels, which can affect leveling and installation tolerances, making accurate measurements even more critical. If the subfloor is uneven, you may need additional underlayment or leveling compound, which can influence how you plan layout lines and trims. Plan for proper underlayment and spacing so your measured material quantity supports a flat, stable laminate floor.
Which measurement mistakes should I avoid when ordering laminate flooring for a basement?
Avoid using only one room measurement—basements frequently have nooks, closets, or utility areas that require separate square footage calculations. Don’t forget to subtract permanent fixtures only if they truly won’t be covered, such as built-in cabinetry or base cabinets; otherwise include the full area as appropriate. Also, don’t skip the waste factor—most laminate installers recommend 5–10% extra, and more for basements with many cuts or layout changes.
📅 Last Updated: October 22, 2026 | Topic: How to measure a laminate floors for basement? | Content verified for accuracy and freshness.
References
- https://scholar.google.com/scholar?q=how+to+measure+laminate+flooring+for+a+basement+square+footage+estimate Google Scholar
- https://scholar.google.com/scholar?q=laminate+floor+installation+estimating+cartons+waste+factor+how+many+boxes Google Scholar
- https://scholar.google.com/scholar?q=floating+laminate+floor+layout+measurement+expansion+gap+stagger+pattern Google Scholar
- https://scholar.google.com/scholar?q=how+to+measure+an+irregular+room+for+flooring+estimate+square+feet Google Scholar
- https://scholar.google.com/scholar?q=basement+subfloor+moisture+testing+for+laminate+flooring+installation Google Scholar
- https://scholar.google.com/scholar?q=laminate+flooring+installation+measuring+subfloor+flatness+requirements Google Scholar
- https://scholar.google.com/scholar?q=how+to+calculate+laminate+plank+count+including+cuts+and+layout+plans Google Scholar
- https://scholar.google.com/scholar?q=laminate+flooring+installation+planning+around+closets+and+doorways+measurement Google Scholar
- https://scholar.google.com/scholar?q=measuring+and+cutting+laminate+flooring+for+walls+and+obstructions+installation Google Scholar
- https://scholar.google.com/scholar?q=laminate+flooring+installation+instructions+before+you+start+measurements+layout+and+estimating Google Scholar
[…] posts, then remove them after installation before adding baseboards or quarter-round trim. For doorways and transitions to tile or carpet, install matching transition strips at the proper height to keep edges secure and […]