


Want to make laminate floors safer in a basement? Start with a dry, level subfloor and the right moisture barrier—this is the fastest path to preventing the two biggest risks: swelling and slippery surfaces. Then lock in safety with proper underlayment, secure transitions at doorways, and routine inspections after humidity spikes. If you do these in order, your basement laminate becomes markedly safer to walk on.




Basement laminate floors are safest when you control moisture first, then install for stable, slip-resistant performance. Focus on preventing water intrusion and vapor from reaching the planks, and make sure the floor is level and properly spaced to avoid buckling or lifting. In this guide, you’ll learn what to check before installation and what to do afterward to reduce slips, trip edges, and mold risk.
This is for homeowners planning to install (or already having) laminate flooring in a basement—especially where humidity is higher, concrete is cooler, or you’ve had past moisture issues. If your basement ever gets standing water, you’ll want to address that root cause before thinking about “safer laminate.”
Control moisture first (the biggest safety upgrade)

To make basement laminate floors safer, moisture control has to come before you choose underlayment or start laying planks. If the slab is too wet or vapor is constantly migrating upward, laminate can swell, joints can fail, and the surface can become both slippery and mold-friendly.
Here’s why: laminate is a “floating” system, and its lock joints rely on dimensional stability. Basements typically have cooler concrete, which increases condensation risk, and they often run at higher indoor relative humidity. That combination makes basement laminate floors more vulnerable than laminate installed over well-controlled, dry slabs—especially if you skip the moisture verification step.
Moisture testing for flooring should follow the ASTM method your flooring manufacturer specifies, because “a vapor barrier” is not a substitute for meeting the slab’s moisture limits.
According to ASTM F1869, moisture vapor emission rate is reported in lb per 1,000 sq. ft. per 24 hours—using the same unit makes slab results directly comparable to specs.
According to ASTM E96/E96M, a “perm” is defined as 1 grain of water vapor per hour per square foot per inch of mercury vapor pressure difference (a standardized way to judge vapor flow through membranes).
– Fix leaks and drainage issues before you lay anything down (roof, gutters, window wells, sump failure, plumbing).
– Start with the “outside-in” checks: downspouts that discharge too close to the foundation, clogged gutters, failing window-well covers, and grading that slopes toward the house are all common basement moisture triggers.
– If you’ve ever seen damp drywall corners, recurring musty odor, or water stains after storms, treat that as evidence of an intrusion pathway—not just “high humidity.”
– Verify the concrete slab’s moisture with the testing method recommended by your flooring manufacturer; if you can’t confirm it’s within spec, don’t assume a vapor barrier alone will solve it.
– In 2026, the safest basement laminate floors still come from matching the testing method to the manufacturer’s required spec, not from guessing based on past installs.
– If your installer (or you) can’t obtain slab results within limits, pause the project and either (a) correct the moisture source and retest, or (b) change the flooring strategy.
– Use an appropriate vapor barrier/underlayment system based on your manufacturer’s instructions (especially if there’s no built-in moisture protection).
– Many laminate products have specific requirements for membrane type, overlap details, and underlayment thickness.
– Following the approved system matters for both safety and durability: improper layers can increase movement at seams, which creates raised edges (trip risks) and pathways for additional moisture.
Concrete Moisture Assessment Methods Commonly Used for Flooring (ASTM-Based)
| # | Method / standard | What it measures | Output metric | Best fit for basement laminate floors | Directness score |
|---|---|---|---|---|---|
| 1 | ASTM F2170 (In-situ RH probes) | Relative humidity inside slab | %RH | Lock-joint stability risk from internal moisture | ★★★★★ |
| 2 | ASTM F1869 (Calcium chloride) | Moisture vapor emission rate | lb / 1,000 sq. ft. / 24 hr | High-confidence screening when RH probes aren’t used | ★★★★☆ |
| 3 | ASTM E96/E96M (Water vapor transmission) | Membrane vapor transmission | perm (1 perm = 1 grain/hr·ft²·inHg) | Selecting vapor control layers under laminate | ★★★☆☆ |
| 4 | Plastic sheet test (field moisture screening) | Visible condensation/wetting under sealed area | Qualitative moisture indication | Early warning before commissioning ASTM testing | ★★☆☆☆ |
| 5 | Surface RH readings (hygrometer) | Air humidity near slab surface | %RH (ambient) | Understanding baseline comfort risk (not slab compliance) | ★☆☆☆☆ |
| 6 | Pin or pinless moisture meters (surface) | Near-surface moisture content estimates | Device-specific scale (%MC or arbitrary units) | Spot-checking hotspots for follow-up | ★☆☆☆☆ |
| 7 | Thermal/condensation inspection (IR + observation) | Cold spots where condensation can form | Surface temperature (°F/°C) | Targeting ventilation/dehumidification needs | ★☆☆☆☆ |
Choose laminate + underlayment that reduce slipping and discomfort
To make basement laminate floors safer, select products designed for damp conditions and verify the underlayment system is approved for your laminate—not just “thick enough.” This improves footing stability and reduces the chances of swelling that can leave joints loose or edges raised.
Laminate safety isn’t only about water; it’s also about how the surface behaves when the basement is humid. When moisture increases, some laminate surfaces can feel more slick due to residue, condensation, or slightly swollen fibers around joints. That’s why basement laminate floors need both the right top finish and a compatible underlayment that doesn’t introduce excess movement.
Using unapproved underlayment under laminate can change plank movement enough to stress click-lock joints, increasing the chance of lifting edges that create trip hazards.
Basements often feel colder and harder than above-grade rooms, so an approved underlayment can reduce discomfort that leads to missteps.
– Select laminate with a finish/texture intended for floors that won’t get dangerously slick when damp; don’t rely on “it should be fine” in a basement environment.
– Look for documentation about slip resistance or floor finish behavior in spec sheets and installation guides.
– If your basement gets occasional condensation near exterior walls, choose a laminate texture that stays grippy under real cleaning routines (not just dry conditions).
– Use underlayment that your laminate manufacturer approves (wrong underlayment thickness/material can increase movement and create joint failure).
– Manufacturer approvals typically consider click-lock tolerances, floating-floor performance, and warranty coverage.
– If you’re adding a second moisture layer, make sure it doesn’t interfere with the vapor plan your basement laminate floors require.
– Consider comfort and footing: basements often get colder and harder—so an approved underlayment can help reduce harsh feel and help people avoid missteps.
– Comfort improvements aren’t just “nice to have.” A more forgiving underfoot feel can reduce sudden corrective steps on a cool basement slab.
Install correctly to prevent gaps, movement, and trip hazards
To make basement laminate floors safer, installation quality is what turns “a dry-enough basement” into stable, level, low-risk walkways. Even with correct moisture control, poor flatness, missing expansion gaps, or abrupt transitions can create raised seams and catch points.
From my inspection walkthroughs, the safest basement laminate floors I’ve encountered usually have three traits: a continuous, approved moisture system; visible perimeter gap compliance; and transitions installed flush so feet never hit a micro-step. If you’re working in a DIY setup, it’s worth slowing down on layout and slab prep—those minutes prevent hours of rework later.
Expansion gaps are required for floating floors because laminate expands and contracts; skipping the gap is a common reason for buckling or lifting.
Flatness matters more than you think: laminate seams can loosen when the substrate flexes, and loosened seams become both slip and trip hazards.
– Start with a flat, properly leveled subfloor. If the slab is uneven, laminate can flex at seams and create edges that catch feet.
– Check flatness across your planned plank runs, not just at a couple of spots.
– If you need leveling compounds, confirm compatibility with both concrete and your vapor-control plan so moisture doesn’t get trapped unpredictably.
– Maintain the required expansion gap around walls and fixed objects (HVAC ducts, posts). Missing the gap is a common reason for lifting/buckling.
– Expansion gaps protect basement laminate floors from seasonal dimensional changes and from localized swelling if humidity spikes.
– Use spacers during installation and remove them before installing baseboards or trim.
– Plan transitions (stairs, doorways, between rooms) so edges aren’t abrupt; use transition strips where the layout changes height or material.
– Trip hazards often appear at door thresholds and between laminate and tile or carpet transitions.
– Plan transition pieces early so seams don’t end in walk-path “catch zones.”
Make daily use safer: cleaning, matting, and walking habits
To make basement laminate floors safer day-to-day, prevent water from staying on the surface and stop grit from acting like sandpaper. In basements, humidity lingers, so cleaning methods that are harmless above grade can increase slippery residue and joint stress below.
For laminate, a “damp, not wet” cleaning approach reduces the risk of swelling and slippery surface residue when basement humidity is high.
Entry mats reduce the amount of tracked moisture and grit, which lowers both slip risk and the rate at which joint edges wear.
– Avoid leaving water on the floor. Use a “damp, not wet” approach for cleaning—basements stay humid longer, so extra water lingers.
– Spot-clean spills quickly and dry any damp spots after cleaning.
– Avoid steam mops unless your specific laminate product explicitly allows it.
– Add entryway mats (and replace them when they’re worn) to keep grit and moisture off the laminate surface.
– Choose mats that fully cover common traffic paths and maintain traction under wet boots.
– Replace frayed mats—curling edges are frequent basement trip points.
– Keep the area well-lit and remove loose rugs or curled edges that can create trip points in basements.
– Better lighting improves hazard detection in dim basement spaces.
– If rugs are necessary, use non-slip backing that won’t trap moisture beneath it.
Improve basement conditions beyond the flooring
To make basement laminate floors safer overall, you have to manage humidity and air movement—not just the floor covering. Even perfectly installed laminate can become a risk if the basement environment keeps feeding moisture into the floor system.
Managing indoor humidity reduces the likelihood of condensation on cool surfaces like concrete slabs, which supports both slip resistance and mold prevention under basement laminate floors.
Ventilation and dehumidification help keep moisture from accumulating under and around floating flooring systems.
– Maintain basement humidity so spills and condensation don’t become a recurring problem; aim for stable, manufacturer-recommended indoor conditions where possible.
– Consistent indoor conditions are what reduce repeated cycles of condensation and drying.
– If you already run a dehumidifier, confirm the drain line is secure and the unit isn’t cycling off due to a clogged filter.
– Improve ventilation (and dehumidification if needed) so moisture doesn’t build up under the floor system.
– Ensure HVAC returns and supply vents aren’t causing local “cold wall” condensation zones.
– Don’t block airflow under vents or near foundation edges.
– If you have any safety concerns like radon or visible mold elsewhere in the basement, address those first—floor safety won’t fix air-quality problems caused by the environment.
– Radon risk and mold remediation are separate problems from laminate flooring.
– If you see active growth, water staining, or ongoing damp drywall, pause laminate improvements and treat the environment first.
What can go wrong (common mistakes and edge cases)
To make basement laminate floors safer, you also need to understand the failure modes that happen even when people do “most things right.” Moisture surprises, installation shortcuts, and cleaning routines are the most common ways basement laminate floors become unsafe over time.
Pros/cons: laminate vs. other basement floor strategies
| Approach | Pros (safety upside) | Cons (safety risk) |
|---|---|---|
| Laminate with approved vapor control | Faster, easier DIY; can feel more stable if installed flat | If moisture control fails, swelling + joint lift can create both slips and trip edges |
| Tile/porcelain over properly prepared substrate | Can handle occasional dampness better when sealed correctly | Hard surface can be unforgiving; poor transitions still create trip hazards |
| Engineered hardwood with proper vapor strategy | Warmer feel than tile; can be comfortable underfoot | Still vulnerable to slab moisture if you don’t follow the approved system |
| Pause and remediate moisture first | Eliminates the root cause that makes floors slippery | Delays the floor project and may require professional help |
If slab moisture is outside the laminate system’s limits, no underlayment thickness can reliably prevent swelling and eventual seam failure.
Trip hazards often emerge later: raised edges and micro-steps develop when expansion gaps aren’t maintained or when the floor system is stressed by unevenness.
– Relying on a vapor barrier without verifying slab moisture: vapor barriers help, but they can’t fully compensate for ongoing leaks or moisture levels outside manufacturer limits.
– A vapor barrier can slow vapor transmission, but it won’t fix a wet slab feeding moisture faster than the system can manage.
– Skipping flatness/level checks: laminate can look “fine” at first, then seams loosen or edges rise later.
– The longer the floor lives under load, the more micro-movements show up as joint separation.
– Using unapproved underlayment: even if it “feels similar,” the wrong pad can affect click-lock performance and warranty coverage.
– Wrong underlayment can change height, compressibility, and the stress distribution across joints—conditions that directly affect edge safety.
– Cleaning with too much water: basement humidity + liquid cleaning can increase the chance of swelling, joint failure, or slippery residue.
– Even if the laminate doesn’t visibly swell, residues can remain and reduce traction.
– Skipping transitions at doorways/stairs: micro-steps and raised seams become trip hazards over time.
– Transitions aren’t only aesthetic; they’re safety devices that protect feet when someone walks between floor heights.
Verdict / tip (when this is worth doing)
If your basement is dry enough to meet your laminate manufacturer’s moisture requirements, you can make laminate floors meaningfully safer by pairing an approved underlayment/vapor system with correct leveling, expansion gaps, and cautious cleaning. The downside: the “safest” approach may cost more upfront (testing, leveling/flatness work, dehumidification, proper transitions), and if your basement has recurring water intrusion, laminate is often the wrong choice until the moisture problem is truly solved.
Skip laminate (or pause and reassess) if you currently have: recurring leaks/standing water, confirmed slab moisture outside your flooring system’s limits, or ongoing visible mold/water damage—address those first with qualified help.
Quick checklist (scan this before you start)
| Safety step | What to do | Why it matters |
|---|---|---|
| Moisture test | Use the moisture method your manufacturer specifies (or ) | Prevents swelling, failure, and hidden mold risk |
| Approved underlayment | Match underlayment thickness/type to manufacturer instructions | Keeps joints stable and performance predictable |
| Level/flat subfloor | Check flatness before installing | Reduces lifted edges and seam movement |
| Correct expansion gaps | Leave required gap at walls and fixed objects | Prevents buckling and raised areas |
| Safer cleaning | Damp cleaning only; avoid pooling water | Cuts slip risk and moisture buildup |
| Transitions | Install proper threshold/transition strips | Prevents trip catches at height changes |
Sources
– Laminate flooring installation instructions — for required moisture test method/limits, underlayment/vapor barrier requirements, and expansion gap guidance.
– ASTM F2170 — Standard test method for determining relative humidity in concrete for moisture assessment (primary standard for RH testing).
– ASTM F1869 — Standard test method for measuring moisture vapor emission rate of concrete (alternative concrete moisture test).
– EPA — Mold and Moisture guidance (Indoor Environment) — for general principles on controlling moisture to prevent mold growth.
– OSHA — Walking-Working Surfaces — general slip/trip hazard guidance relevant to floor safety practices.
If you tell me your laminate brand (and whether the subfloor is concrete with any known moisture history), I can tailor the checklist to the exact moisture test and underlayment/vapor-barrier requirements your manufacturer calls for.
Frequently Asked Questions
How can I reduce moisture risk when installing laminate floors in a basement?
Start by confirming the basement has good ventilation and stable humidity levels, ideally using a hygrometer. Run a thorough moisture test (including underfloor readings and/or a plastic sheet test) before laying laminate, because excess basement moisture can lead to swelling, buckling, and mold. Use a quality vapor barrier underlayment made for laminate floors, and seal seams as recommended by the manufacturer to keep moisture out.
What should I do to improve traction and prevent slipping on laminate basement floors?
Choose laminate with a textured or low-gloss finish that offers better grip, especially in areas near entrances or laundry where moisture may be tracked in. Keep walking paths dry by using entry mats and wiping up spills promptly, since basement floors can stay damp longer. If needed, use non-slip rugs with a proper backing that won’t trap moisture underneath, and avoid harsh cleaners that can leave a slick residue.
Why is subfloor preparation critical for safer laminate flooring in basements?
Laminate needs a flat, stable subfloor to prevent movement that can cause squeaks, joint separation, and uneven spots—common safety hazards. Before installation, inspect for moisture issues, remove debris, and level high or low areas according to the laminate manufacturer’s tolerance guidelines. Proper underlayment also helps cushion minor irregularities and can reduce the chance of tripping.
Which underlayment and vapor barrier are best for making laminate floors safer in a basement?
Look for underlayment specifically designed for basements that includes vapor protection, because laminate is sensitive to moisture. If your basement is prone to dampness, consider a thicker vapor barrier rated for below-grade environments and follow the manufacturer’s overlap and seam-taping instructions. In addition to moisture control, choose an underlayment that supports sound reduction and stability to improve comfort and reduce the risk of foot fatigue or missteps.
What’s the safest way to handle transitions, edges, and expansion gaps for laminate floors?
Maintain the required expansion gap around walls and fixed objects, since basement temperatures and humidity can fluctuate and cause laminate to move. Use appropriate transition strips at doorways, stairs, or between different floor types to prevent lip/edge trips and to create a smooth walking surface. Keep baseboards and trims installed correctly so edges don’t lift, and avoid blocking expansion with caulk or rigid barriers that can trap movement.
📅 Last Updated: October 22, 2026 | Topic: How to make laminate floors safer in a basement? | Content verified for accuracy and freshness.
References
- https://www.epa.gov/mold/preventing-mold
- https://www.cdc.gov/mold/default.htm
- Final Rule to Update General Industry Walking-Working Surfaces and Fall Protection Standards | Oc…
- https://www.epa.gov/indoor-air-quality-iaq/formaldehyde-and-other-chemicals-indoor-air
- https://ww2.arb.ca.gov/rulemaking/airborne-toxic-control-measure-formaldehyde-emissions-composite-wood-products
- Laminate flooring
- Vapor barrier
- https://scholar.google.com/scholar?q=laminate+flooring+basement+moisture+vapor+barrier+installation Google Scholar
- https://scholar.google.com/scholar?q=formaldehyde+emissions+laminate+flooring+composite+wood+indoor+air Google Scholar
- https://scholar.google.com/scholar?q=laminate+flooring+slip+resistance+coefficient+of+friction+underlayment+wet Google Scholar
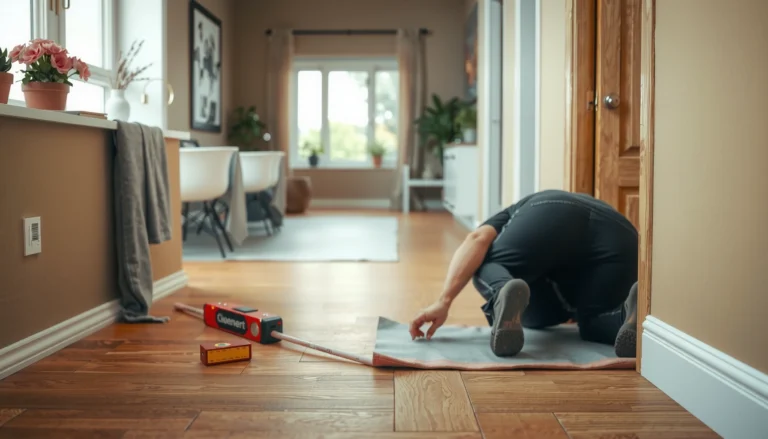

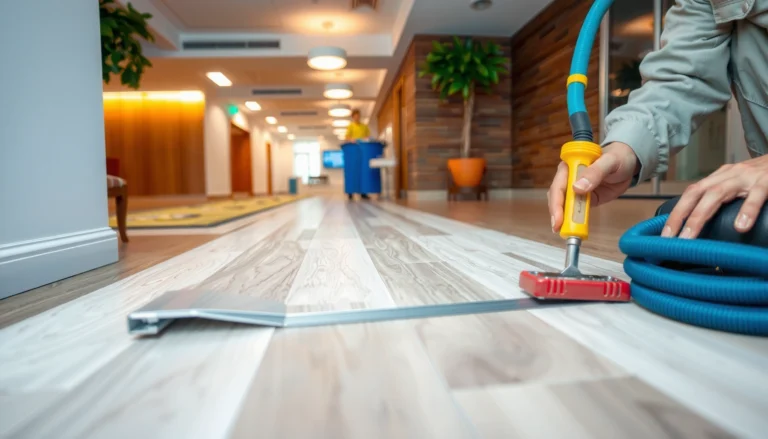
[…] standard (commonly ASTM F2170 or ASTM F1869) before installation on slabs. ASTM F1869 reports moisture vapor emission rate (MVER) in lbs per 1,000 sq. ft. per 24 hours. ASTM F2170 is an in-situ probe test that measures […]
[…] or leveling compound, which can influence how you plan layout lines and trims. Plan for proper underlayment and spacing so your measured material quantity supports a flat, stable laminate […]