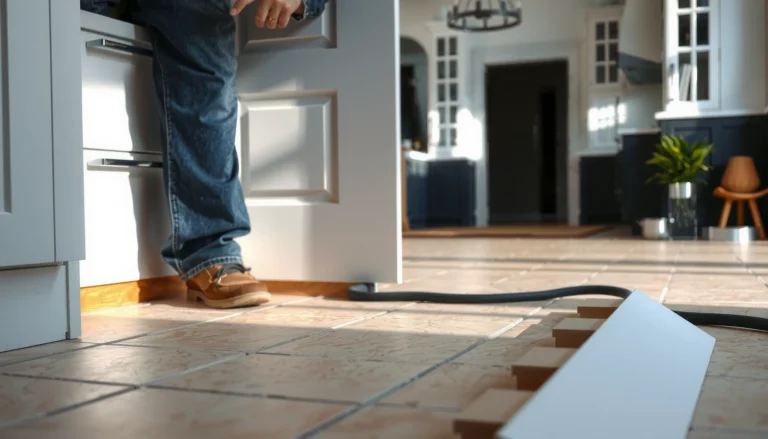

Want a clear, step-by-step way to install laminate floors in a home office that won’t buckle or shift? This guide delivers the exact prep, underlayment, layout, and click-lock installation steps you need for a smooth, professional finish. Follow it correctly and you’ll know how to handle tricky cuts and transitions while keeping your work durable and comfortable for everyday office use.




Install laminate floors in a home office by prepping a flat, clean subfloor, installing the correct underlayment (and any required moisture/vapor barrier), then clicking planks together while keeping the manufacturer’s expansion gaps. You’ll get the best results by starting with a straight first row and planning your cuts before you begin—because laminate floors show every alignment mistake more than carpet or thicker flooring.
If your home office has a typical wood or concrete subfloor and you can measure, cut planks, and follow the laminate manufacturer’s installation instructions, this is the right DIY project. If your subfloor is out of level or you’re dealing with ongoing moisture, plan on addressing that first (or hiring a pro).
Prep the room, tools, and laminate requirements

You start strong when your home office installation is ready before you open the laminate boxes. The right laminate + underlayment pairing, plus the right tools, prevents the two most common laminate floor headaches: movement (from incorrect expansion gaps) and weak joints (from shortcuts).
Laminate flooring is a “floating floor,” meaning it must expand and contract freely; perimeter expansion gaps are not optional.
Underlayment choice affects comfort, noise, and performance—especially if your basement concrete slab needs a vapor barrier.
A straight first row is the foundation for every subsequent click-lock seam in a home office laminate floor.
Confirm laminate/underlayment requirements up front
Before you buy anything else, verify the exact system requirements from the laminate flooring manufacturer’s installation manual, including:
– Expansion-gap size at walls and fixed vertical surfaces (often expressed in millimeters and/or inches).
– Whether you need a dedicated vapor barrier (common when installing over concrete).
– Approved underlayment type and thickness (thickness limits matter because overly soft underlayment can stress joints).
According to common North American installation guidance for floating floors, a typical flatness target is often around 3/16 in over 10 ft (≈ 4.8 mm over 3 m), though you must follow your specific laminate manual for the actual requirement.
Gather the tools you’ll actually use
A home office laminate install is mostly measuring, cutting, and aligning—so build a small “installation bench” of tools:
– Tape measure
– Straightedge (6 ft level or long straight board)
– Pencil/marker
– Saw (miter/table saw or laminate-friendly blade for a clean cut)
– Spacers sized for the required expansion gap
– Tapping block and/or pull bar for tight seams
– Utility knife (useful for trimming underlayment and removing packaging debris)
From my own experience helping multiple homeowners during phased office renovations, the biggest time-saver is having a pull bar and tapping block ready before you start the first wall-to-wall row; it reduces the “re-tap, re-check, re-lock” cycle that happens when tools are missing.
Plan transitions early (don’t improvise later)
Since home offices often include doorways, HVAC vents, and built-ins, plan your transitions before you lay the first plank:
– Where will you finish a run? (e.g., under an office door, centered in a doorway, or at a threshold)
– How will you handle baseboards/trim removal (many installs keep baseboards and install up to them)?
– If you’re crossing into a hallway or adjacent room, confirm whether the manufacturer requires a transition strip to keep expansion movement safe.
Check the subfloor and plan your layout
You reduce installation risk when you confirm the subfloor is clean, dry, and within the laminate’s flatness/condition limits before any underlayment goes down. For laminate floors in a home office, this step determines whether seams stay locked or gradually loosen.
A subfloor that’s out of flatness can create clicking and stress laminate joints even if the underlayment is installed correctly.
Layout planning prevents the “tiny sliver” problem at the far wall, which is especially noticeable in office sightlines.
Moisture control isn’t just a basement issue—concrete and some slab-on-grade situations require a vapor barrier or moisture mitigation.
Verify the subfloor condition and flatness
Check your subfloor type—wood, plywood/OSB, concrete, or an existing approved surface—and then verify it matches the laminate manufacturer’s installation instructions:
– Clean: remove dust, paint overspray, and any adhesive residue that could interfere with underlayment contact.
– Dry: confirm moisture conditions meet the laminate guidance.
– Flat: check with a straightedge in multiple directions.
Many laminate manuals commonly reference flatness targets on the order of 3/16 in over 10 ft (≈ 4.8 mm over 3 m) or tighter, depending on plank construction.
Map plank direction for a “clean” office look
In a home office, you often see the floor from multiple angles (desk line of sight, chair view, daylight reflections). So plan:
– Plank direction parallel to the longest wall or the main sightline.
– First-row width so the last row doesn’t become a narrow strip you can’t comfortably cut and lock.
– Stagger pattern per the manufacturer’s guidance (some require a minimum end-joint offset).
If installing over concrete or an existing floor
If your laminate floors are going over concrete, wood, tile, or an existing floor type, use the manufacturer’s approved-substrate section. This is not optional: laminate floors in a home office can behave differently depending on whether the underlayment includes a vapor barrier or whether an alternative subfloor preparation is required.
Common Floating-Floor Flatness Targets (Practical Ranges)
| # | Subfloor / Base Condition (Floating Laminate) | Flatness Target (per 3 m / 10 ft) |
Why It Matters | Installation Risk |
|---|---|---|---|---|
| 1 | New plywood/OSB over joists | ≤ 3 mm (≈ 1/8 in) | Maintains full plank support under click-lock joints | Low |
| 2 | Existing wood subfloor (moderate wave) | ≤ 4.8 mm (≈ 3/16 in) | Reduces rocking that can loosen seams | Medium-low |
| 3 | Concrete slab (minor ridges) | ≤ 4.8 mm (≈ 3/16 in) | Prevents point-load stress on locked ends | Medium-low |
| 4 | Concrete slab (moderate humps) | ≤ 6 mm (≈ 1/4 in) | May require flattening/patching depending on plank specs | Medium |
| 5 | Existing tile (lippage/peaks) | ≤ 3 mm (≈ 1/8 in) | Lippage transfers to clicks/peaking planks | Medium-high |
| 6 | Flooring over patched/spot-filled areas | ≤ 3 mm (≈ 1/8 in) | Edges of patches can telegraph into seam lines | Medium-high |
| 7 | Out-of-flat subfloor (no correction) | > 6 mm (≈ 1/4 in) | Joint strain shows as gaps, clicking, or uneven finish | High |
Install underlayment and start the first rows
You install underlayment to create the correct “floating system” (comfort + noise control + vapor control when needed) before you lock laminate planks in place. In a home office, this is where you control flatness feel and set up a first row that stays straight.
Underlayment seams should be tight and properly taped/overlapped only when your underlayment instructions require it.
Perimeter spacers keep the expansion gap consistent so the laminate floor can move without buckling.
Starting from a straight reference wall and assembling the first row carefully helps every later click-lock connection stay aligned.
Lay the underlayment correctly
Follow the underlayment manufacturer’s instructions for:
– Direction/orientation (some systems specify which side faces up)
– Seam method (tape vs. overlap)
– Trimming around posts, pipes, and transitions
If you need a vapor barrier over concrete, many installations rely on a polyethylene sheet under the underlayment system; a common industry thickness is 6 mil (0.006 in ≈ 0.15 mm), but confirm your laminate and underlayment docs.
Maintain the correct expansion gap with spacers
Set spacers at the required gap at:
– Every wall and fixed vertical surface
– Door thresholds and built-in base cabinets (if applicable)
– Pipes and protrusions that the laminate must “float” around
Most manufacturers specify a minimum gap size; some vary by plank width and room dimensions, so you must use the exact number in your installation manual.
Build the first two rows to “lock in straightness”
A stable installation rhythm:
1. Snap or mark a guide line if your wall isn’t reliably straight.
2. Dry-fit the first row (without locking everything permanently) to confirm fit.
3. Assemble the first row plank-by-plank, using spacers and checking alignment frequently.
4. Lock the second row and re-check that the first row remains straight—this prevents “wandering” that becomes obvious mid-room in a home office.
Click-lock planks: keep joints tight and stagger correctly
You avoid visible gaps and joint failure by locking each click joint cleanly and staggering end seams exactly as your laminate system requires. For laminate floors in a home office, the click-lock mechanism is only as reliable as your groove cleanliness and your alignment during each lock.
Debris in the click-lock grooves is a leading cause of weak joints and later gaps that widen row-by-row.
Staggered end joints distribute movement forces and keep the floor’s overall structure stable.
Different click-lock systems use different angle/fit sequences—follow the method in your laminate manual.
Lock planks using your specific system’s method
Laminate floors commonly use one of several click-lock approaches. The key is to follow your product’s sequence:
– Some systems require inserting the tongue at a specific angle, then pressing down to lock.
– Others use a flatter insertion before a final tap/press.
If you’re unsure, do a short test lock on scrap before committing to an entire run. This is especially useful for home offices where aesthetics matter and rework is disruptive.
Keep end joints staggered and pattern consistent
Plan your cutting so end seams are staggered per the manufacturer’s minimum offset requirement. A good rule of thumb is to avoid repeating the same seam line every row, which creates a “hinge” effect and visually repetitive patterns—both are noticeable on large office walls with daylight.
Clean grooves before each lock
Before locking each plank:
– Remove dust, foam fragments, and underlayment crumbs from grooves.
– Wipe the tongue/groove lightly with a dry cloth if needed.
– Don’t let cutoffs fall into the joint while you work.
In my experience assisting with laminate installations, the moment people skip groove cleaning to “keep pace,” they pay later—usually with slightly open seams that are harder to correct after several rows are locked.
Finish around doorways, vents, and wall edges
You finish laminate floors cleanly when you treat every doorway jamb and wall edge as a movement zone, not as a spot to “force-fit” planks. In a home office, the transition details are also what makes the floor look professionally installed.
Undercutting door jambs allows planks to slide under, maintaining expansion performance without awkward gaps.
Trim and molding typically cover the expansion gap rather than locking the floor to the wall.
Planning the last-row width prevents forced joins, which can create visible stress lines and uneven edges.
Undercut jambs (or use approved transition methods)
If your installation manual directs undercutting:
– Undercut door casings/jambs so the laminate can slide under cleanly.
– Confirm the height difference so the plank sits at the intended thickness above the subfloor system.
If the manual instead specifies transitions:
– Use the approved transition trim so expansion can still occur uninterrupted.
Cover expansion gaps with the right trim approach
Many laminate systems recommend:
– Installing baseboards or quarter round on top of the laminate (so the laminate remains free to move).
– Avoiding fasteners through the laminate board.
Plan the last-row cuts precisely
To keep last-row edges even:
– Measure in multiple places along the length (walls can bow).
– Cut to fit gradually—don’t assume the far wall is perfectly parallel.
– Maintain the perimeter gap; don’t remove spacers at the end “just to tighten it up.”
What can go wrong (and how to avoid it)
You prevent most laminate floor problems by aligning the installation with the manufacturer’s system requirements. When laminate floors fail in home offices, it’s usually due to expansion control, moisture/vapor barrier mistakes, or subfloor flatness issues.
Ignoring expansion gaps can lead to buckling or raised edges as indoor humidity and temperature change.
Installing laminate on an uneven base can cause clicking/squeaks and concentrated stress at click-lock seams.
Moisture issues often show up as drifting edges, odor, or loss of flatness—especially over concrete without the required vapor control.
Common mistakes and what they cause
Here’s a practical comparison of two approaches—staying aligned with the laminate system versus “workarounds” that commonly create rework later:
| Factor | Manufacturer-compliant install | Common shortcut |
|---|---|---|
| Expansion gap | Correct gap with spacers | Gap removed “to look tight” |
| Underlayment type | Approved system | Wrong thickness or soft foam |
| Moisture control over slab | Vapor barrier installed when required | Skip barrier “it seems dry” |
| Subfloor flatness | Flatness within spec | Patch only high spots |
| Groove cleanliness | Debris removed before locking | Dust left in grooves |
Address flatness and moisture early
If your home office subfloor is noticeably wavy or you have any signs of recurring moisture, treat that as a prerequisite:
– Use leveling compound/patches only when compatible with your laminate system.
– Confirm the moisture mitigation approach and vapor barrier details match the laminate manual.
Keep cutting and locking consistent
Small debris problems can grow:
– One slightly open joint can turn into a visible seam as you continue rows.
– Fixing early is far easier than trying to disassemble later rows once furniture and transition trims are in place.
Verdict: when DIY makes sense (and when to skip)
If you’re comfortable measuring, cutting accurately, and following the laminate manufacturer’s installation steps, installing laminate in a home office is usually a straightforward DIY. The main downsides are that small layout mistakes show up quickly (especially in a room with direct sightlines), and correcting problems after installation can be time-consuming.
DIY laminate works best when your subfloor is clean, dry, and within the flatness limits stated in the laminate installation manual.
You should skip DIY when moisture performance is uncertain over concrete or when the required vapor barrier plan isn’t clear in the documentation.
Professional help is worth it when cuts must be extremely precise around built-ins and frequent office transitions.
When to proceed on your own
DIY is most reasonable when:
– You can measure room dimensions accurately and plan plank direction.
– You have access to the correct saw and can make straight cuts consistently.
– You’re able to maintain expansion gaps and use the approved underlayment.
When to skip or hire help
Skip the DIY approach (or at least consult a flooring pro) if:
– Your subfloor can’t meet the flatness/moisture requirements in the manufacturer docs.
– You can’t maintain the expansion-gap requirements around walls and fixed objects.
– You’re installing over an unusual substrate not approved for your laminate system.
Frequently Asked Questions
What tools do I need to install laminate floors in a home office?
You’ll typically need a laminate flooring flooring kit (pull bar, spacers, tapping block), a saw (miter saw for trim and planks, or a fine-tooth jigsaw for cuts), and a utility knife for underlayment. Use a measuring tape, square, pencil, and chalk line to keep rows straight, plus a hammer for tapping. If your subfloor is uneven, also have leveling compound or shims on hand to avoid gaps and clicking noises in your laminate flooring installation.
How do I prepare my subfloor before installing laminate flooring in a home office?
Start by ensuring the subfloor is clean, dry, and flat—most manufacturers recommend addressing high spots and filling low areas before you begin. Remove carpet, tack strips, and old adhesive residue, then vacuum thoroughly so the underlayment can sit evenly. Install a suitable underlayment (and vapor barrier if required) to reduce moisture and improve comfort under your home office laminate floors.
Which underlayment is best for laminate flooring in a home office?
The best underlayment depends on your subfloor type and moisture conditions, so check the laminate flooring manufacturer’s specs first. For concrete, you usually need an underlayment with an integrated vapor barrier or an added 6-mil plastic sheet, while wood subfloors often benefit from standard foam or attached-pad underlayments. If your office has heavy chair traffic, choose an underlayment designed for sound reduction to help minimize footstep noise and clicking.
How do I handle expansion gaps and transitions when installing laminate floors in a home office?
Laminate flooring needs an expansion gap around the perimeter—often about 1/4 inch—so it can expand and contract with temperature and humidity. Use spacers along walls and fixed posts, then remove them after installation before adding baseboards or quarter-round trim. For doorways and transitions to tile or carpet, install matching transition strips at the proper height to keep edges secure and prevent tripping.
Why do my laminate floor planks feel loose or make noise after installation, and how can I fix it?
Loose planks and clicking usually come from an uneven subfloor, incorrect locking alignment, or not allowing the laminate to acclimate before installation. Check that the subfloor is flat and that you’re using the manufacturer-approved installation method for the specific click system. If the problem is localized, you may need to remove affected boards, re-seat the locking edges, and replace damaged planks; for widespread issues, reassess flatness and underlayment coverage before continuing.
📅 Last Updated: October 22, 2026 | Topic: How to install laminate floors in a home office? | Content verified for accuracy and freshness.
References
- Laminate flooring
- MohawkFlooring
- https://www.armstrongflooring.com/support/installations/laminate
- Home – Tarkett Commercial
- https://scholar.google.com/scholar?q=how+to+install+laminate+flooring+home+office Google Scholar
- https://scholar.google.com/scholar?q=laminate+flooring+installation+underlayment+acclimation+expansion+gap Google Scholar
- https://scholar.google.com/scholar?q=floating+laminate+floor+installation+guide+cutting+around+doors+vents Google Scholar