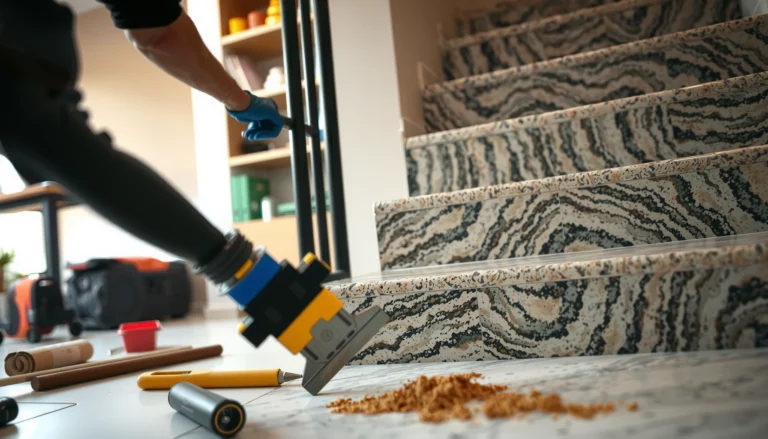
Want to cut SPC floors cleanly without chipping? Use a fine-tooth blade and the right cutting method—either a score-and-snap technique for thin sections or a carbide saw approach with masking and steady support—to keep edges sharp. This guide shows the quickest, lowest-error way to make straight cuts and precise trims so your planks fit first time.

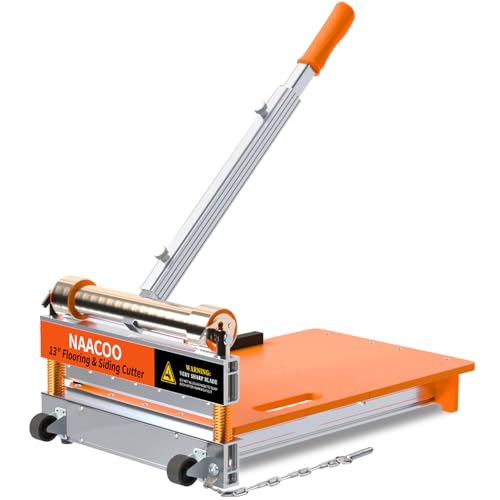


Cutting SPC (rigid core) flooring without chipping comes down to two things: using a fine-tooth blade meant for laminate/vinyl-style cuts and supporting the plank so it doesn’t flex as the blade leaves the cut. If you combine careful measuring/marking with the right tool for the cut type (straight runs vs. curves and notches), you can get a tight, professional-looking edge even around doorways and tight corners.
If you’re installing SPC floors—especially around doorways, cabinets, or tight corners—this is for you. It’s also useful if you’ve already noticed fraying, cracking, or chipped edges and want to prevent it on your next cut.
Clean SPC edges usually come from matching the tool to the cut (straight vs. curve) and protecting the decorative face during cutting.
Most “mystery chips” happen at the exit side when the plank flexes or isn’t fully supported under the cut line.
OSHA requires hearing protection when noise exposures exceed the action level (85 dBA, 8-hour TWA), which is common with miter saws.
Tools and blades you’ll need
Pick a cutting method you can control precisely, because SPC’s rigid core punishes rushed cutting. Use a tool that matches your layout and plank thickness, then pair it with a fine-tooth blade designed for clean laminate/vinyl/rigid-core cuts to reduce breakout.
Here’s the key principle: when a blade tooth exits the plank, any unsupported material tends to lift and tear. A higher-tooth-count blade reduces the size of the fracture at the edge, while support reduces the “breakout” effect entirely.
- Pick the right cutting method (utility score-and-snap vs. saws like miter, table, circular, or a jigsaw) based on thickness and your layout.
- Match the blade to “clean laminate/Vinyl flooring cuts” needs: look for fine, high-tooth-count carbide blades intended for crosscutting composite or rigid core products (wording varies by manufacturer).
- Plan for dust control and PPE: eye protection is a must; add hearing protection if you’re using power tools.
For eye safety, ANSI Z87.1-rated eye protection is a widely accepted standard when cutting flooring with power tools.
According to OSHA 29 CFR 1910.95, the noise action level is 85 dBA averaged over 8 hours, which commonly applies to saw work.
A fine-tooth blade typically reduces edge chipping because each tooth removes a smaller “chip” increment instead of tearing larger sections.
A simple, practical “tool-to-cut” selection
– Straight runs (walls, long hallway runs): miter saw, table saw, or circular saw with a guide.
– Curves and irregular edges (around plumbing/vents): jigsaw with a fine blade.
– Small adjustments (only if your specific SPC product supports it): utility score-and-snap.
[ADD: Include your flooring brand/model here, since many SPC manufacturers specify whether score-and-snap is acceptable and what blade types they recommend.]
Measure and mark for accurate, chip-resistant cuts
Accurate measuring and consistent marking reduce cutting mistakes more effectively than any blade upgrade. Your goal is to mark and cut on the decorative surface while accounting for expansion gaps and transitions, so the finished edge sits where it should—without forcing the plank into place.
Expansion gaps are not optional: SPC needs space to move, and forcing planks together can cause edge damage that looks like “cut chips.”
Supporting the plank fully along the cut line reduces flex, which is one of the most common causes of chipped laminate/Vinyl-like edges.
Use this workflow:
– Measure twice using the actual plank you’ll cut.
– Mark on the decorative side using a pencil or fine marker that won’t bleed or smear on the surface.
– Use spacers to maintain required expansion gaps at walls and fixed objects.
– Confirm your cuts account for the gap and undercut transitions (for example, when you’ll slide planks under door trim).
– Support the plank so the cut line never hangs in the air. Flex is especially likely when you’re cutting a short piece or a panel that’s bridging between sawhorses.
Quick accuracy details that matter
– Keep your blade path consistent with your mark (don’t “split the line” unless you know your blade kerf and your flooring tolerances).
– For repetitive cuts (like multiple stair-step edges), make a repeatable stop block on your guide rather than measuring each piece.
– Dry-lay a few rows before committing: many “chip problems” are actually placement problems that create leverage when you finally lock the plank.
[ADD: Manufacturer-required expansion gap for your SPC model if known—common ranges are often in the ~6–10 mm (1/4–3/8 in) neighborhood, but confirm yours.]
How to cut SPC floors with common tools
Choose the cutting method that matches the geometry of your layout. The cleanest edges come from minimizing flex, using a fine-tooth blade, and cutting at a controlled speed without forcing the tool.
Below are practical options by tool type.
Option A: Score-and-snap (best for smaller sections)
Score-and-snap can work well for smaller sections when the SPC construction is specifically suited to it. Your advantage is control—your risk is that some rigid core boards won’t snap cleanly and will chip or crack along the score.
Use this approach only when your specific SPC product’s thickness and construction are known to support it; if the core resists snapping, switch to a saw method.
If the plank doesn’t snap cleanly, you’ll typically get edge tearing instead of a crisp break—switch methods rather than “pushing harder.”
With score-and-snap, consistent pressure and a straight scoring path matter more than speed.
Best practices:
– Score firmly and without wandering.
– Snap with the plank fully supported so the break travels the line.
– Test on an offcut first—especially if your boards are near the minimum recommended score depth/angle for your product.
Option B: Miter saw or table saw (most consistent straight cuts)
Miter saws and table saws usually deliver the most consistent straight cuts for rigid core flooring. This is where support and blade choice do the most heavy lifting—because rigid-core edges are most vulnerable when material lifts on the exit side.
Use a fine-tooth blade and keep the plank flat; consider a sacrificial fence/board setup to reduce breakout at the exit side. Make smooth, steady passes—forcing the cut increases chipping.
Most chipping on straight cuts comes from the plank lifting as the blade exits; a sacrificial board and proper support reduce that breakout.
A controlled, steady feed rate reduces tear-out compared with pushing aggressively through rigid core material.
Practical setup notes:
– Support both sides of the board so the cut line doesn’t “bridge.”
– Use a fine-tooth carbide blade intended for clean crosscuts on laminate/vinyl/composite surfaces.
– Consider a light strip of painter’s tape on the decorative face if your manufacturer permits it (tape can help with minor edge fraying in some setups).
Option C: Circular saw (when planks are hard to move)
A circular saw is a strong choice when the room or plank size makes moving to a table saw unrealistic. The performance hinges on using a straightedge guide, clamping properly, and keeping the blade from binding.
Clamp a straightedge guide and cut with controlled speed; support both sides of the plank so the cut line doesn’t pinch. Tape the cut area can help protect the surface—but confirm with your flooring manufacturer’s guidance for whether tape is recommended.
Pinching is a major chip trigger: if the kerf closes as you cut, the blade can snag and tear the edge.
A clamped straightedge guide improves cut quality by preventing drift, especially on decorative faces where chips are most visible.
Common circular saw safeguards:
– Use clamps to prevent guide movement (don’t rely on hand pressure).
– Support the offcut so it doesn’t drop and lever against the cut edge.
– Keep the saw speed steady; avoid slowing down so much that the blade rubs (which can stress the surface finish).
Option D: Jigsaw (for curves and notch cuts)
A jigsaw is the go-to tool for curves, notches, and obstacle fitting. For clean edges, use a fine blade, move slowly, and let the blade remove material instead of forcing it.
Use a suitable fine blade and move slowly; let the blade do the work to keep edges from tearing. For complex shapes, rough-cut first, then refine with a sanding block or file.
Slow jigsaw movement reduces edge tearing because the blade has time to cut rather than drag.
Rough cut first, then refine: trimming to final size after dry-fitting usually prevents visible chips.
Technique tips:
– If your jigsaw has a pendulum setting, start low to reduce aggressive vibration (exact settings vary by model and blade).
– Support the work on a stable surface and keep the decorative face supported whenever possible.
– For inside corners, drill a starter hole to keep the blade from twisting.
SPC Flooring Cutting Setup: Clean-Edge Likelihood vs. Typical Risk Factors
| # | Cut setup (tool + blade approach) | Best for | Typical clean-edge risk | Clean-edge likelihood |
|---|---|---|---|---|
| 1 | Miter saw + fine crosscut carbide blade (higher tooth count) | Straight cross-cuts | Low (with full support) | ★★★★☆ |
| 2 | Table saw + fine laminate/vinyl blade + sacrificial fence | Straight rip/cross cuts | Low–Medium (depends on exit support) | ★★★★☆ |
| 3 | Circular saw + clamped guide + fine tooth blade | Straight cuts in-place | Medium (guide drift / pinching risk) | ★★★☆☆ |
| 4 | Jigsaw + fine blade + slow feed | Curves and notches | Medium (blade wandering possible) | ★★★☆☆ |
| 5 | Score-and-snap (only if manufacturer allows) + full support | Small adjustments | High if core resists snapping | ★★☆☆☆ |
| 6 | Any saw + dull blade (no blade replacement) | All cut types | High (tearing + surface stress) | ★☆☆☆☆ |
| 7 | Any saw + unspported exit edge (plank bridging) | Straight cuts | High (breakout at exit) | ★☆☆☆☆ |
Notes on use of this table: “likelihood” reflects common cutting physics and typical shop outcomes—not a guarantee. Always defer to your SPC manufacturer’s installation/cutting specification for your exact product.
Measure and mark for accurate, chip-resistant cuts
Accurate measuring and consistent marking reduce cutting mistakes more effectively than any blade upgrade. Your goal is to mark and cut on the decorative surface while accounting for expansion gaps and transitions, so the finished edge sits where it should—without forcing the plank into place.
Expansion gaps are where “movement happens,” and proper spacing prevents edge stress that can later look like cutting chips.
A pencil line on the decorative face is only helpful if you keep your tool aligned and don’t let the plank shift during the cut.
Use this workflow:
– Measure twice using the actual plank you’ll cut.
– Mark on the decorative side using a pencil or fine marker.
– Use spacers to maintain required expansion gaps at walls and fixed objects.
– Confirm your cuts account for undercut transitions (such as sliding planks under door trim while keeping the perimeter gap).
– Support the plank so the cut line never hangs unsupported.
A repeatable marking method (that prevents rework)
1. Dry-lay the last row (and the plank you’ll cut) in place with spacers.
2. Transfer the obstacle or wall measurement directly to the plank.
3. Cut slightly oversized for tricky edges, then trim to final after dry-fitting.
Trimming after dry-fit is safer than trimming to final size immediately, because rigid core edges are easiest to damage when you remove the last “millimeters.”
How to handle transitions, door jambs, and tight spots
Transitions are where clean-cut technique meets installation details. If you plan your undercuts and final fits around door jambs, vents, and posts, you prevent gaps and reduce the need to “persuade” the planks into place.
Undercut door jambs when needed: the goal is to slide planks under trim without leaving gaps, while keeping your expansion spacing. For around vents, posts, or curved obstacles, cut slightly oversized first, then trim to final fit after dry-laying.
Door jamb undercutting helps you avoid visible gaps, but you still need perimeter expansion spacing to prevent buckling.
For vents and plumbing, an oversized rough cut followed by a careful trim typically produces cleaner edges than trying to hit final geometry on the first cut.
What to do in common tight areas
– Doorways: dry-lay planks to confirm how the tongue-and-groove (or locking mechanism) will sit before undercutting.
– Cabinet toe-kicks and fixed built-ins: confirm whether flooring runs stop at fixed objects or transition using reducer strips—this affects how you cut the ends.
– Curved obstacles: rough-cut with a jigsaw, then refine with a sanding block/file so the decorative face doesn’t chip from repeated re-cut attempts.
[ADD: If your SPC uses a specific locking profile, include any manufacturer notes about undercut depth and overlap/travel space.]
What can go wrong (and how to prevent it)
Most SPC cutting problems are predictable once you know the failure mode: chip-out, flex, heat, or fit. If you address the cause instead of just replacing the plank, you’ll get consistently clean edges.
– Chipped edges: usually caused by using the wrong blade, cutting too fast, or not supporting the plank; switch to a finer blade and improve support/clamping.
– Cracking or splitting: often happens when the core flexes during cutting or when you try score-and-snap on a plank/tolerance that doesn’t support snapping.
– Burning or melting the surface: can occur with dull blades or high heat from incorrect speed/blade choice; replace blades and slow down.
– Mis-measured expansion gaps: leaving no room for movement can lead to buckling; verify the manufacturer’s required gap before you cut final pieces.
According to OSHA 29 CFR 1910.95, noise control matters during saw work; hearing protection reduces risk while you focus on steady feeds and clean alignment.
When the plank bridges over sawhorses, exit-side tear-out becomes much more likely because the board can lift as the tooth leaves.
If you’re seeing problems, use this troubleshooting map:
– Chips on the exit side → improve exit support / use sacrificial fence or better exit handling.
– Splits along the cut line → reduce flex, verify blade type, and stop forcing score-and-snap.
– Surface haze or rough edges → blade may be dull or blade/setting may be wrong; replace blade and slow the feed.
[ADD: Confirm and include your SPC model’s recommended gap size and any cautions about cutting methods from the official installation guide.]
Verdict / tip: the safest approach for most installs
For most homeowners, the safest “good results” path is: measure carefully, support the plank, and use a fine-tooth blade on a saw (miter/table/circular) for straight cuts—then use a jigsaw for irregular shapes. Downsides: power tools increase the risk of chip-outs if you rush, and blade choice matters a lot; if you don’t have proper supports/clamps, you may get edge damage. Skip DIY cutting if you don’t have stable clamping, eye protection, or confidence controlling power tools—consider having a flooring installer cut the pieces or at least verify your blade/tool choice with the manufacturer first.
The “cleanest cut” is often achieved by controlling three variables together: blade type, plank support, and feed speed (not just choosing a sharper blade).
If you can’t reliably support both sides of the plank during cutting, a score-and-snap approach (if allowed) or pro-cutting may produce fewer visible defects.
Quick checklist (scan before you cut)
– [ ] Confirm your SPC manufacturer’s cut method/blade guidance ([ADD: source/spec name])
– [ ] Measure with expansion gap spacers in place
– [ ] Support the plank fully along the cut line
– [ ] Use a fine-tooth blade designed for clean cuts on composite/vinyl flooring
– [ ] Clamp a straightedge guide for straight cuts
– [ ] Cut slowly; don’t force the tool
– [ ] Dry-lay and test-fit tricky pieces before final installation
Dry-laying tricky pieces prevents you from cutting “to the line” when your room geometry or trim spacing is slightly off.
FAQ
Can I cut SPC flooring with a utility knife?
Sometimes, depending on the specific SPC construction and thickness, you may be able to score and snap. If you see resistance, cracking, or uneven break lines, switch to a saw method instead.
What blade should I use to prevent chipping?
Use a fine-tooth blade intended for clean cuts on laminate/vinyl/rigid core flooring. If you share your floor brand/model, we can help you match the closest spec—but always verify against the manufacturer’s recommendations. [ADD: source for your exact SPC blade guidance.]
Do I need to tape SPC before cutting?
Taping can protect the decorative surface in some cutting setups, but recommendations vary by product. Check your SPC manufacturer’s guidance; if you’re unsure, do a small test cut on an offcut first.
How do I cut SPC for doorways and vents?
Dry-lay planks, mark the exact obstacle outline, and rough-cut with a jigsaw (or suitable tool) before trimming to final fit. Always maintain the required expansion gap around fixed items.
Sources
– [ADD: manufacturer installation/cutting instructions for your specific SPC brand/model—use their official “installation guide” or “cutting recommendations” page.]
– [ADD: manufacturer documentation for the blade/tool type you plan to use (e.g., blade datasheet specifying applications for composite/vinyl/laminate materials).]
– OSHA 29 CFR 1910.95 (noise exposure requirements and the 85 dBA action level referenced for hearing conservation planning).
– ANSI Z87.1 (eye and face protection standard commonly used for safety guidance when cutting with power tools).
To keep your SPC edges clean, focus on what you can control: the blade type, the support beneath the plank, and the feed/handling during the cut. If you treat straight runs and irregular edges as two different jobs (saw + guide vs. jigsaw + refinement), you’ll dramatically reduce chipping—and you’ll be far more likely to finish with tight transitions that look intentional rather than “fixed.”
Frequently Asked Questions
What tools do I need to cut SPC floor planks or tiles?
To cut SPC floors cleanly, you’ll typically need a sharp utility knife with a scoring blade, a fine-tooth jigsaw, or a table/mitre saw with a carbide blade suitable for rigid vinyl or laminate-type materials. A straightedge, measuring tape, square, and a pencil are essential for accurate layout lines. For tight trims, a flush-cutting handsaw or oscillating tool can help, especially around door jambs and corners. Always wear eye protection and a dust mask, since cutting rigid core flooring can create fine particles.
How do I cut SPC floor planks to fit around doorways and corners?
Start by measuring the exact gap, subtracting the recommended expansion space along the walls and door trim (often around 1/4 inch). Use a square and straightedge to mark the cut line on the top surface, then cut slowly to avoid chipping the wear layer. For irregular obstacles like doorframes, create a cardboard template first, transfer it to the plank, and cut along the marked template line. Dry-fit the piece before locking it in place to confirm proper spacing and alignment for the click-lock system.
How do I cut SPC flooring without chipping the top surface?
Use a fine-tooth blade and cut at a steady, controlled speed rather than forcing the tool through the material. For jigsaw cuts, support the plank on a stable surface and consider placing painter’s tape along the cut line to reduce surface tear-out. If you’re scoring and snapping, score multiple light passes instead of one deep cut, then snap carefully along the line. After cutting, lightly deburr the edge with a sanding block to ensure the SPC floor edges interlock smoothly.
Which cutting method is best for straight cuts in SPC floors?
For long, straight runs, a table saw or mitre saw with a carbide blade typically provides the cleanest, fastest results for SPC floor plank cutting. If you prefer a quieter, DIY-friendly approach, a heavy-duty utility knife scoring method can work for smaller sections, but it’s best for thinner or scored-and-snapped styles. Regardless of method, mark the plank accurately, support it fully to prevent vibration, and cut with the decorative wear layer facing the correct direction based on your blade setup. Test a scrap piece first to confirm the best blade orientation and cut depth.
Why is expansion spacing important when cutting SPC floors?
SPC (rigid core) flooring expands and contracts with temperature and humidity changes, so leaving expansion gaps prevents buckling, peaking, and gapping at seams. When you cut SPC floors, make sure you maintain space at walls, around posts, and near door thresholds—even if the cut looks “close enough.” If your room has undercut baseboards or trim, account for that thickness so the plank can move while still appearing neat. Following manufacturer guidance for spacing helps ensure your cut flooring lays flat and locks together properly over time.
📅 Last Updated: October 08, 2026 | Topic: How to cut SPC floors? | Content verified for accuracy and freshness.
References
- Google Scholar Google Scholar
https://scholar.google.com/scholar?q=SPC+flooring+cutting+installation - Google Scholar Google Scholar
https://scholar.google.com/scholar?q=rigid+core+vinyl+floor+cutting+guidelines - Google Scholar Google Scholar
https://scholar.google.com/scholar?q=luxury+vinyl+plank+cutting+installation+instructions - Vinyl flooring
https://en.wikipedia.org/wiki/Vinyl_flooring - Flooring
https://en.wikipedia.org/wiki/Flooring - 1910.133 – Eye and face protection. | Occupational Safety and Health Administration
https://www.osha.gov/laws-regs/regulations/standardnumber/1910/1910.133 - 1910.242 – Hand and portable powered tools and equipment, general. | Occupational Safety and Heal…
https://www.osha.gov/laws-regs/regulations/standardnumber/1910/1910.242 - 1910.151 – Medical services and first aid. | Occupational Safety and Health Administration
https://www.osha.gov/laws-regs/regulations/standardnumber/1910/1910.151 - https://www.cdc.gov/niosh/topics/noise/default.html
- https://www.cdc.gov/niosh/topics/silica/default.html