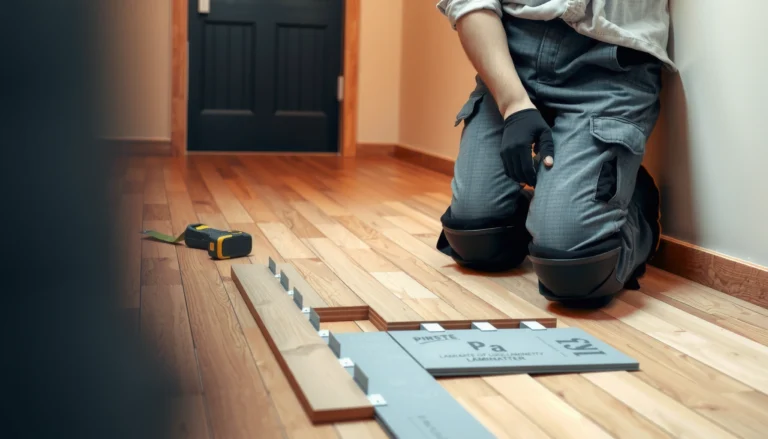

Learn how to install engineered wood floors in a kitchen without buckling, gapping, or voiding your warranty. You’ll get a clear, step-by-step method for prepping the subfloor, choosing the right underlayment, and handling transitions around cabinets, appliances, and moisture-prone areas. Follow this approach and you’ll know exactly when to nail, glue, or float—and how to finish so the floor holds up to daily kitchen traffic.




Engineered wood can hold up in a kitchen when you install it on a properly prepped, flat subfloor, follow the exact moisture-underlayment plan for your product, and keep required expansion gaps around all fixed objects. Most kitchen failures trace back to moisture control errors, skipping floor prep, or using the wrong fastening method for the specific engineered wood construction.
If you’re installing as a homeowner, DIYer, or installer (especially in a space with daily spills, frequent wet cleaning, and temperature swings near the dishwasher, oven, fridge, and range hood), this guide walks you through a reliable order of operations based on common manufacturer requirements and industry testing methods. As of 2026, the fundamentals still center on moisture management, subfloor flatness, and expansion control—those three variables dominate whether an engineered floor stays stable.
Check Your Engineered Wood, Subfloor, and Moisture Conditions
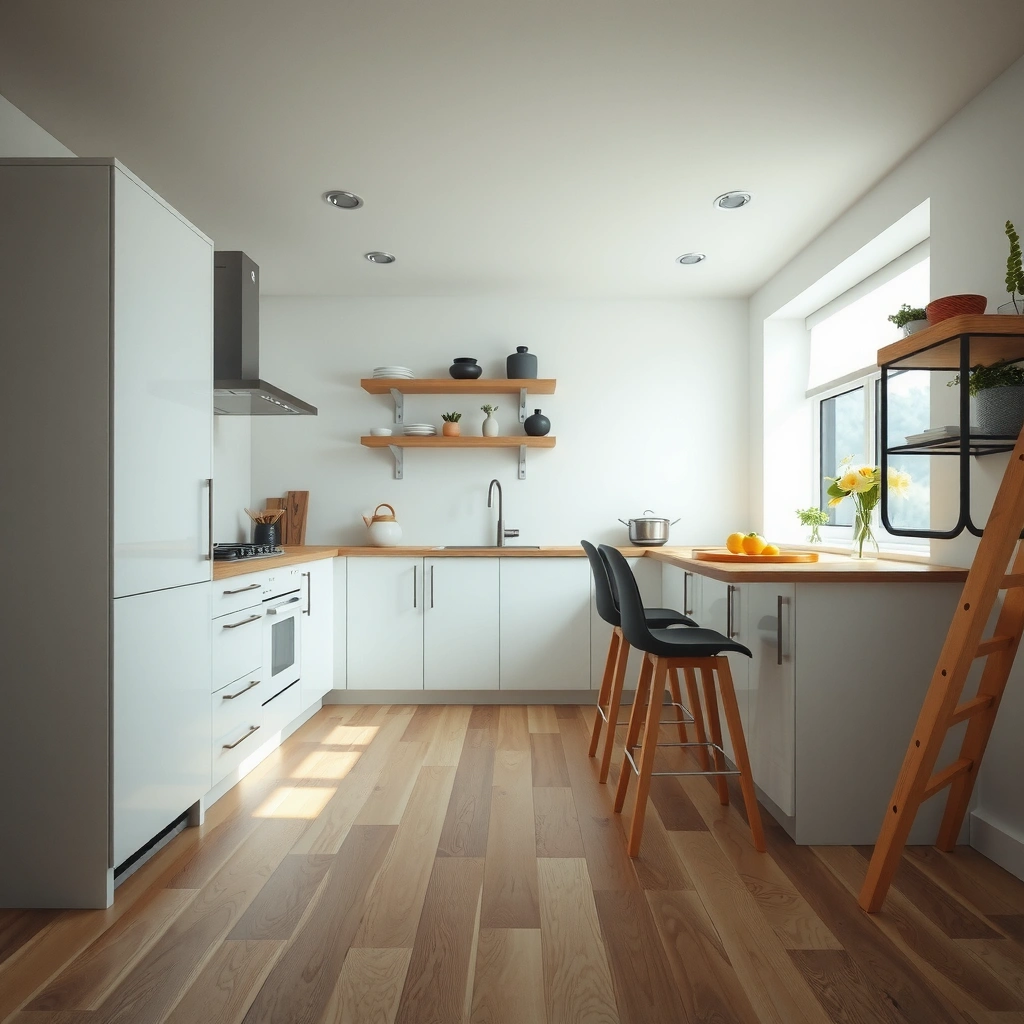
Installing engineered wood in a kitchen starts with matching the installation method and moisture strategy to your exact product and subfloor—not “making it work.” Your engineered floor’s warranty and long-term stability depend on whether it’s click-lock floating, glue-down, or nail/staple, plus what your manufacturer allows for kitchens and for the specific substrate (plywood subfloor vs. concrete slab).
Engineered wood planks are only as durable as the installation system specified by the manufacturer (method, underlayment/moisture layer, and fastening/adhesive).
Moisture testing standards for flooring typically use ASTM methods such as ASTM F2170 (in-situ RH) and ASTM F1869 (calcium chloride), and manufacturers often require these results to be within limits before installation.
Kitchen performance is often limited by subfloor flatness and moisture gradients; even engineered wood can telegraph high spots and joint stress if the substrate is out of tolerance.
First, confirm your engineered wood installation method from the spec sheet:
– Click-lock floating: the planks float over an approved underlayment/moisture layer and do not get glued to the subfloor.
– Glue-down: you apply an adhesive per the guide (including the right trowel notch/coverage and cure requirements).
– Nail/staple (indirectly bonded or mechanically fastened): fasteners and spacing must match the engineered floor’s thickness and backing.
Next, verify the subfloor type and condition:
– On plywood/OSB subfloors, check for water damage, delamination, squeaks, and loss of fastening.
– On concrete slabs, you can’t assume “dry-looking” means “dry enough.” Concrete can emit moisture upward even when it appears fine.
Finally, plan for moisture with the system the manufacturer requires for kitchens:
– If the installation guide specifies a vapor barrier/moisture barrier, use it exactly (material type, overlap/taping method, seam treatment, and whether it should turn up at walls).
– If the guide requires specific testing (common in adhesive systems), follow those requirements before laying a single plank.
A practical way to anchor your moisture approach:
– According to ASTM F2170, in-situ relative humidity testing for slabs measures moisture conditions inside the concrete (not just surface dryness).
– According to ASTM F1869, calcium chloride testing quantifies moisture vapor emission rate from the slab surface (often used to set adhesive approval thresholds).
– According to ASTM F710, practice for preparing concrete includes moisture considerations and surface conditions appropriate for resilient floor systems and bond-related installations.
> [ADD: source for your engineered wood manufacturer’s specific kitchen/moisture requirements, including their approved underlayment/vapor barrier and any moisture test standard and numeric limits.]
Mandatory Data Table
Moisture-Control Steps That Most Kitchen Installations Require
| # | Moisture Step | Kitchen-Relevance | Typical Verification Method | Impact Rating |
|---|---|---|---|---|
| 1 | Confirm manufacturer-approved vapor/moisture layer | High | Spec sheet + underlayment system install guide | ★★★★★ |
| 2 | Perform slab moisture testing (when applicable) | High | ASTM F2170 or ASTM F1869 per floor system needs | ★★★★☆ |
| 3 | Maintain underlayment seams and overlaps | Medium | Manufacturer seam tape / overlap detail verification | ★★★★☆ |
| 4 | Check HVAC-driven temperature swings | Medium | Jobsite monitoring of daily temperature/humidity stability | ★★★☆☆ |
| 5 | Protect against standing water from cleaning | Medium | Owner maintenance practices + quick wipe protocol | ★★★☆☆ |
| 6 | Address spills quickly and avoid wet mopping | High | Maintenance instructions aligned to finish type | ★★★★☆ |
| 7 | Verify subfloor flatness before install | High | Straightedge and gap measurement per spec | ★★★★★ |
Acclimate and Prepare the Room (Don’t Skip)
Acclimation is the fastest way to prevent early buckling and joint stress, because engineered wood needs to reach the home’s typical temperature and humidity. Preparation—removing obstacles, ensuring subfloor cleanliness, and planning expansion space—protects your layout from cumulative errors in the first few rows.
Manufacturers commonly require acclimation of engineered wood to jobsite conditions before installation to reduce dimensional movement after placement.
Expansion gaps are not optional in most systems; they allow the floor to move with seasonal humidity changes without pushing against walls or fixed cabinetry.
A straight reference line matters because a small error in the first row can compound into visible misalignment near islands or doorways.
Here’s what to do before you open the full cartons:
– Acclimate planks exactly per your manufacturer’s written conditions (temperature/humidity range) and the time window they specify. Don’t “wing it” based on another room’s experience.
– Control the room environment as much as practical: run HVAC to typical living conditions (as the manufacturer allows) so humidity doesn’t spike mid-install.
– Remove baseboards/trim where required so you can maintain expansion gaps and achieve a clean edge.
– Leave the required expansion space at walls, cabinet perimeters (as allowed), door jambs, and transitions. If your plan includes stopping at cabinets, confirm the rules for your floor type.
From my experience as a consultant supporting installs, the most common “mystery” floor problems start as layout friction: a toe-kick that isn’t accounted for, a vent register that forces a cut too close to a joint, or an island that removes your ability to correct a skewed first row. Use a dry layout pass with a pencil and a visual reference line.
> [ADD: source for your manufacturer’s acclimation time window and expansion gap width; include the exact inches/mm from the spec sheet.]
Install Underlayment / Moisture Layer the Correct Way
Underlayment and moisture protection are where kitchen failures often begin—especially with floating systems. If you use an underlayment that isn’t specified for your product, or you install it with seam errors, you can cause click-joint failure, cupping, or slow dimensional movement.
Floating engineered floors rely on an approved underlayment system for stability and moisture control; incorrect materials can void warranties and reduce joint performance.
Moisture barrier installation details—seam taping, overlap, and keeping the layer flat—directly affect whether moisture migrates upward or concentrates at edges.
Underlayment that buckles or has gaps can transfer micro-movement to plank joints, which is a common precursor to separation.
Follow these rules:
– Use only the underlayment/moisture layer approved for your engineered floor (especially for click-lock). If you’re switching between systems—say, from a “moisture barrier” product to a “sound” product—confirm compatibility.
– Tape seams as directed. Seam taping is not cosmetic; it is part of the barrier system.
– Keep the layer flat. Remove wrinkles and overlap ridges that can create uneven support.
– Maintain consistency: if your manufacturer requires the moisture layer to run throughout the room (not just near wet areas), do it. Avoid improvising at edges.
Kitchen installs often include transitions—hallways, laundry areas, or adjacent rooms. Maintain the moisture plan through these zones if the manufacturer’s instructions treat them as a single installation area.
Lay the First Rows with the Right Layout and Spacing
The first rows determine how straight and stable the rest of the installation will look—and whether the floor can move seasonally. Start from a reference line, verify plank direction, dry-lay for joint rhythm, and keep expansion gaps uninterrupted at all fixed edges.
Most plank joint problems trace to incorrect first-row alignment, inadequate joint spacing strategy, or failure to meet the manufacturer’s minimum stagger requirements.
Expansion gaps should be continuous around walls and fixed objects; trimming baseboards doesn’t “solve” blocked movement.
Dry-laying a few rows helps you avoid forcing end joints, which can lead to weak engagement in click systems.
Practical steps:
– Snap or mark a starting line using a straight edge; measure diagonals to detect room skew.
– Dry-lay a few rows before fastening/locking everything: confirm plank direction, cut requirements around doorways, and where end joints land.
– Stagger end joints per manufacturer guidance (common failure is end joints that bunch together and don’t lock/fit as intended).
– Maintain expansion gaps everywhere required, then plan trim to cover them cleanly.
Quick pros/cons: floating vs glue-down for kitchens
| Method | Pros (common) | Cons / watch-outs (common) |
|---|---|---|
| Click-lock floating | Quicker installs; easier plank replacement if needed. | Requires meticulous underlayment/moisture layering; sensitive to subfloor movement/flatness. |
| Glue-down | Can feel more “solid” and reduce some floating-related movement. | Requires exact adhesive, trowel coverage, and slab moisture conditions; mistakes can cause bond or finish issues. |
Cut Cleanly Around Kitchen Features and Maintain Stability
Kitchen layouts are rarely open rectangles—door jambs, islands, toe-kicks, and HVAC vents force precision. Clean cuts and correct transition planning protect joint engagement and reduce the chance of edge damage where movement is most likely.
Clean cuts around door jambs and fixed cabinetry bases reduce stress on plank edges and help maintain required expansion spacing.
Threshold transitions (tile-to-wood and wood-to-hallway) should use the transition hardware or approach specified by the installation guide to manage movement.
Protecting floors during construction is essential because scratches and point loads (appliances) can permanently damage finishes even when the install “works.”
Key points:
– Use the right blade and technique for engineered wood (a sharp blade reduces chipping at edges).
– Plan transitions carefully at thresholds and where the room opens into other flooring types. Transition strips are often the correct answer when the install guide calls for them.
– Protect the floor during/after installation:
– Spread protective covers for heavy appliance moves.
– Avoid dragging metal tool parts across the surface.
– Be mindful of point loads from appliance feet—use manufacturer-recommended mats or proper leveling as needed.
> [ADD: source for your engineered wood manufacturer’s guidance on transitions, door jamb undercut clearance, and how to handle flooring at cabinet bases.]
Fastening, Gluing, or Floating: Match the Method Exactly
Your engineered wood’s long-term stability depends on using the correct installation method mechanics—locking technique, adhesive coverage, or fastener pattern. The wrong method (or wrong technique within the method) is a common reason kitchens develop joint separation, hollow spots, or permanent movement.
Click-lock floors require correct tongue-and-groove engagement; forcing joints with excessive force increases the risk of edge damage and separation.
Glue-down installs depend on adhesive type, trowel geometry, and coverage; improper adhesive selection or insufficient spread is a known failure driver in flooring systems.
Nail/staple systems require fastener type and length matched to the engineered wood thickness and backing profile to achieve consistent engagement.
If your floor is click-lock floating
– Lock planks correctly and gently. Use the tapping method (if specified) rather than brute force.
– Ensure you’re not skipping the intended click/engagement steps on the first row and ends.
If your floor is glue-down
– Use adhesive exactly as described in the guide, including:
– adhesive product/approved brand (if listed),
– trowel notch size,
– coverage/spread rate,
– open time and cure time requirements.
– Do not “stretch” adhesive open time while you hunt for tools—bond performance is time- and condition-sensitive.
If your floor is nail/staple
– Use the correct fastening pattern and fastener type/length for your plank thickness and backing.
– Drive fasteners straight and consistent—overdriving or underdriving can cause edge failure or loose planks.
> [ADD: source for your engineered wood manufacturer’s exact fastening pattern and any spacing tolerances.]
What Can Go Wrong in a Kitchen (And How to Avoid It)
Kitchen issues are predictable: moisture exposure, traffic patterns, cleaning practices, and appliance heat cycles create repeating stress on wood floors. If you address these failure modes early—especially moisture and expansion—you reduce the risk of visible gaps, cupping, or joint separation months later.
Moisture-related failures in wood floors often appear as cupping, gapping, or edge movement even when the finish looks intact initially.
Subfloor flatness tolerances matter because engineered wood still relies on consistent support to prevent joint strain.
Ignoring expansion gaps can cause buckling or “cushion” behavior, because the floor has nowhere to expand when humidity rises.
Common problems and prevention:
– Moisture problems
– Skipping the required vapor/moisture barrier
– Installing over a damp slab
– Ignoring moisture testing requirements (especially for glue-down)
– Poor subfloor flatness
– High spots can stress joints; low spots can cause movement and squeaks.
– Wrong install approach
– Example: floating where glue-down is required (or vice versa) can void warranties and compromise performance.
– Expansion gaps ignored
– Tight runs to walls or cabinets reduce movement allowance and can lead to buckling.
– Damage during the job
– Sand and metal debris act like abrasives.
– Moving appliances without protection can scratch or dent finishes.
Verdict / Tip
Engineered wood floors work very well in kitchens when you treat moisture control, subfloor flatness, and expansion spacing as non-negotiables—and you install using the exact method your product specifies. If your slab moisture conditions are questionable, your subfloor isn’t flat within the manufacturer’s tolerance, or your spec sheet restricts kitchen installations under certain conditions, pause and confirm requirements (or hire a pro for moisture/subfloor checks) before installing.
The downside: precision matters. You’ll spend more time upfront on prep, testing, and underlayment details than you might with a forgiving “one-day” flooring approach—and you may need transitions or installation stopping rules near cabinets and thresholds.
Quick Checklist (Scan Before You Start)
– [ ] Confirm install type: click-lock, glue-down, or nail/staple
– [ ] Verify subfloor is flat, clean, and meets spec
– [ ] Follow manufacturer acclimation rules
– [ ] Use the exact underlayment/moisture barrier specified
– [ ] Plan starting line and stagger joints as directed
– [ ] Keep required expansion gaps at all walls and fixed objects
– [ ] Use correct adhesive/fasteners (if applicable) and follow coverage/pattern
FAQ
Do I need a moisture barrier for engineered wood in a kitchen?
Often yes, but it depends on your subfloor type (especially concrete) and the engineered wood’s installation instructions. Follow the manufacturer’s required underlayment/moisture protection system for kitchens.
Can I install engineered wood under cabinets in a kitchen?
It depends on whether cabinet bases are fixed and whether your manufacturer requires stopping the floor at cabinet bases (a common approach). Always follow the clearance and fastening rules in your spec sheet.
Should engineered wood be glued down or can it be floating in a kitchen?
Both may be allowed depending on your product and the substrate. Only use the installation method(s) your engineered wood model explicitly approves for kitchen conditions.
What’s the biggest mistake people make installing engineered wood floors in kitchens?
Usually it’s ignoring the moisture plan/testing requirements or skipping expansion gaps. Those mistakes commonly show up later as cupping, gapping, or joint separation.
Sources
– [ADD: Manufacturer installation instructions/spec sheet for your engineered wood planks] (acclimation, underlayment/moisture barrier, expansion gaps, fastening/glue requirements)
– [ADD: Underlayment/moisture barrier manufacturer installation guidelines] (vapor barrier specs, seam taping/overlap rules, and edge treatment)
– ASTM F2170 (Standard Test Method for Determining Relative Humidity in Concrete for Moisture-Related Flooring Problems)
– ASTM F1869 (Standard Test Method for Measuring Moisture Vapor Emission Rate of Concrete Subfloor Using Anhydrous Calcium Chloride)
– ASTM F710 (Standard Practice for Preparing Concrete Floors to Receive Resilient Flooring)
If you want, share your engineered wood brand/model and whether you’re installing over plywood or a concrete slab, and I’ll help you translate the spec sheet requirements into a room-specific installation plan (including expansion-gap planning and the moisture system approach).
Frequently Asked Questions
What is the best way to prepare a subfloor before installing engineered wood floors in a kitchen?
Start by checking that the subfloor is flat, clean, and structurally sound—engineered wood floors need a stable surface to prevent squeaks and gaps. Remove old flooring, scrape adhesive residue, and repair any low spots or high ridges with appropriate patching compounds. Use a moisture test to confirm conditions are within the engineered wood manufacturer’s tolerance, especially important for kitchen engineered wood floors where spills are more likely. Finally, install the recommended underlayment (or vapor barrier) if your flooring system calls for it.
How do I install engineered wood flooring in a kitchen with moisture and spills in mind?
Use a moisture-rated underlayment or vapor barrier where required, and follow the flooring manufacturer’s guidance for climate and subfloor moisture levels. Keep wood acclimation in mind—allow the planks to adjust to the kitchen’s temperature and humidity before installation to reduce expansion or cupping. Seal transitions and perimeter gaps properly with the recommended sealant or trim system, since kitchens often see humidity changes and occasional standing water. For best results, avoid flooding the floor and clean spills quickly using a well-wrung damp mop.
Which installation method (click-lock vs glue-down vs nail-down) is best for engineered wood floors in kitchens?
Click-lock (floating) engineered wood floors are popular for DIY because they’re fast and reduce subfloor sensitivity, but you still must ensure proper underlayment and a flat subfloor. Glue-down installation can create a tighter bond and may help with stability, though it requires careful adhesive selection and surface prep. Nail-down or staple-down can work well when your subfloor supports it, but it must be done with correct fasteners and spacing. For kitchen engineered wood flooring, the “best” choice is the one your specific product system is designed for, with strong moisture protection and correct subfloor flatness.
How do I handle transitions, cabinets, and doorways when installing engineered wood floors in a kitchen?
Plan your layout before you start so seams and joints fall in less visible areas and planks run perpendicular to the longest wall when possible. Under cabinets, leave appropriate expansion space around the perimeter and only install where the manufacturer allows—many installers stop short of fixed cabinets to avoid trapped movement. For doorways and transitions to tile or laminate, use matching transition strips or reducer profiles rather than forcing the flooring to fit tightly. Accurate trimming around baseboards and using expansion gaps helps prevent buckling as temperatures and humidity fluctuate.
Why is acclimating engineered wood floors before installation important, and how long should I wait?
Acclimation helps the wood adjust to your home’s temperature and humidity, which reduces the risk of gapping, peaking, or cupping after installation. Keep the planks in the room where they’ll be installed (not on exterior walls or in direct sun) and allow time based on the manufacturer’s specification—often several days, with more time for significant climate differences. In kitchens, humidity can vary due to cooking and dishwashing, so acclimating engineered wood floors and maintaining stable conditions improves long-term performance. Always follow the product’s written acclimation instructions for the most reliable results.
📅 Last Updated: October 07, 2026 | Topic: How to install in a kitchen engineered wood floors? | Content verified for accuracy and freshness.
References
- Google Scholar Google Scholar
https://scholar.google.com/scholar?q=engineered+wood+flooring+installation+moisture+subfloor+humidity - Google Scholar Google Scholar
https://scholar.google.com/scholar?q=engineered+hardwood+floor+installation+underlayment+acclimation+guidelines - Google Scholar Google Scholar
https://scholar.google.com/scholar?q=kitchen+engineered+wood+flooring+installation+best+practices+moisture+mitigation - Engineered wood
https://en.wikipedia.org/wiki/Engineered_wood - Wood flooring
https://en.wikipedia.org/wiki/Hardwood_flooring - NWFA | National Wood Flooring Association
https://www.nwfa.org/ - Northern Research Station | US Forest Service Research and Development
https://www.fpl.fs.usda.gov/ - https://www.britannica.com/technology/flooring
- Google Scholar Google Scholar
https://scholar.google.com/scholar?q=How+to+install+in+a+kitchen+engineered+wood+floors? - https://en.wikipedia.org/wiki/Special:Search?search=How+to+install+in+a+kitchen+engineered+wood+floors?