
Estimating the cost of laminate floors in a workshop is straightforward once you calculate material, underlayment, labor, and waste based on your square footage and plank layout. This guide gives you a fast, usable per‑square‑foot pricing method—and the exact add-ons that typically swing the total, like edging, transitions, and fitting around doors or built-ins. By the end, you’ll know what your workshop laminate floor will cost before you order anything.



Estimating laminate floor cost in a workshop comes down to three numbers: the room’s square footage, how much laminate you’ll need (including waste), and the add-ons like underlayment and trim—then you decide DIY vs. hired labor. This guide walks you through a practical, workshop-aware method to total your materials first, then layer in prep and installation time so your budget doesn’t get surprised at the end.
If your workshop has a lot of cuts (doors, cabinets, irregular angles) or a concrete/mixed subfloor, your cost can change more than a typical home room. This guide is for anyone planning a new laminate install and wants a practical way to total it up before buying.
Measure the workshop floor and plan the layout

If you want a realistic laminate budget, measure for usable install area—not just the room’s footprint. In my estimating workflow, the biggest time-saver is mapping the floor into rectangles so every cut and boundary (posts, drains, built-ins) has a clear effect on square footage and waste.
– Measure length and width (and break the floor into smaller rectangles for anything odd-shaped)
– Note obstacles and boundaries: doorways, posts, built-ins, trench drains/sumps, and any height transitions
– Decide on the direction of the planks (layout affects waste and cutting time)
Convert a messy workshop into installable rectangles
Workshops rarely behave like clean bedrooms: you may have lifting bays, floor openings, curbs, or a trench drain running across the path where plank seams would land. Break the floor into rectangles you can measure individually, then sum those areas—this gives you a “starting coverage number” that’s far more dependable than guessing.
As of 2026, laminate retail listings still make it easy to overbuy or underbuy because box coverage is fixed while workshop geometry isn’t. Start by drawing a simple sketch (even a photo with measurements marked works) so the calculation matches what you’ll actually install.
Box coverage is printed on the carton/spec sheet, so the only measurement that matters for ordering is the total install area you’ll cover with planks ().
Workshops change the “effective room shape,” so splitting irregular areas into rectangles reduces waste surprises compared with using only one overall length × width number.
Track obstacles that create cuts (and waste)
Create a quick list of every feature that interrupts a plank run:
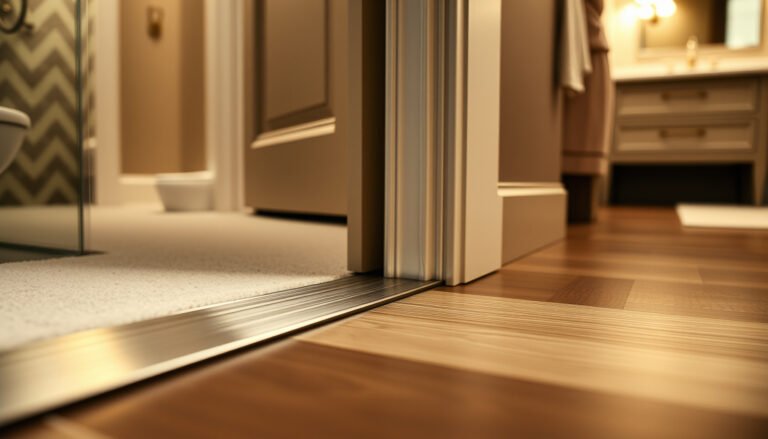
– Doorways and thresholds (including any transition strip)
– Posts, columns, or workbenches that you’re flooring up to
– Cabinets or fixed built-ins you can’t remove
– Trench drains, sumps, or grates (often treated as carve-outs)
– Stair-step or thickness transitions to other flooring types
From a cost-estimation perspective, these features show up twice: they increase plank waste and they increase installation time because you’ll make more edge finishing cuts (jigsaw or fine-tooth saw blade) and more test-fitting.
Choose plank direction to reduce seam “stress”
Plank direction isn’t just aesthetics—it affects the number of partial-width boards you’ll create. A workshop with a long wall might make seam patterns “cleaner” if you run boards lengthwise, but it can also create narrower pieces near doors or equipment bays. Plan early so you can estimate the cut-heavy areas and choose the waste allowance that matches your layout.
Plan for a consistent expansion gap around edges, because laminate needs room to float without binding ().
Calculate laminate quantity (and plan for waste)
If you want an accurate laminate order, use square footage plus a waste allowance—then divide by the box coverage. In workshops, it’s usually safer to budget waste higher than you would for a simple rectangle.
– Convert your measured area to square feet (sq ft) and use it as the base coverage
– Add a waste factor for workshop complexity (often higher when you have many cuts or a tricky shape)
– Use the product’s coverage per box (printed on the package/spec sheet) to calculate boxes needed:
– Boxes needed = (Total sq ft × (1 + waste allowance)) ÷ Coverage per box
Turn “area” into “orderable boxes”
Start with this chain:
1) Workshop install area (sq ft) = sum of measured rectangles (minus carve-outs like drains you’re not covering)
2) Ordered laminate sq ft = install area × (1 + waste allowance)
3) Boxes needed = ordered laminate sq ft ÷ coverage per box
Keep waste and coverage numbers in the same units and don’t mix “estimated coverage” with “spec coverage.” Manufacturer coverage-per-box is the number that prevents under-ordering.
Boxes needed uses coverage per box from the laminate spec sheet, not an online estimate, because carton dimensions and included planks vary by model.
Waste allowance is a multiplier on install area, so changing waste from 10% to 15% increases ordered material by 5% of the base square footage.
Workshop complexity and realistic waste allowances (rule-of-thumb)
Below is a practical way to translate workshop complexity into an ordering waste allowance. Use it as a starting point, then sanity-check against your layout sketch (how many doorways, trench breaks, and partial planks you’ll create).
Waste Allowance Guide for Workshop Laminate Layouts (Typical Ordering Starts)
| # | Workshop layout complexity | Common cut drivers | Starting waste allowance | Coverage confidence |
|---|---|---|---|---|
| 1 | Clean rectangle (minimal interruptions) | 1 doorway, straight perimeter | 5% | ★★☆☆☆ |
| 2 | Rectangle + one fixed obstacle | post or built-in toe-kick | 8% | ★★★☆☆ |
| 3 | Typical workshop (2 doorways) | door openings, thresholds | 10% | ★★★☆☆ |
| 4 | Odd corners / partial walls | angled edges, jogs | 12% | ★★★★☆ |
| 5 | Built-ins (cannot remove) | cabinet runs, irregular cutouts | 15% | ★★★★★ |
| 6 | Trench drain / sump interruption | carve-outs, edge finishing | 18% | ★★★★★ |
| 7 | Highly irregular + many transitions | height changes, multiple thresholds | 20% | ★★★★★ |
(These waste allowances are starting points for estimation. Your exact model’s installation guide can override them, especially if it dictates specific installation methods.)
Price the full materials bundle (not just the planks)
If you’re only pricing laminate planks, your total will almost always come in low. A realistic workshop estimate includes underlayment, moisture/vapor protection where required, and trim/transition pieces sized to your edges and doorways.
– Include required layers beyond laminate: underlayment, vapor/moisture barrier (if required), and transition/shoe trim
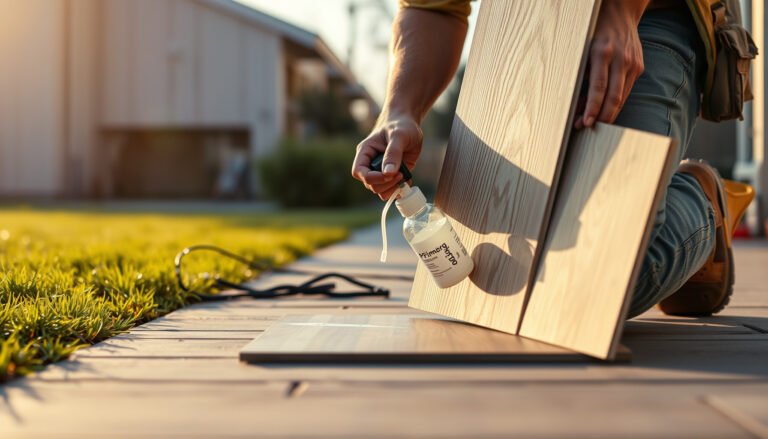
– Add “consumables” that often get forgotten: spacers, sealant/adhesive where the system requires it, and extra trim for matching edges
– Build your materials total by summing each item’s cost from the manufacturer’s recommended accessories (use )
Underlayment and vapor barrier: follow the laminate system
Laminate can be “floating,” but it’s not “layer-agnostic.” Underlayment type depends on the laminate model and subfloor. For concrete slabs, many systems require a vapor barrier; for wood subfloors, you might need underlayment for impact reduction and to address minor subfloor issues.
Laminate installation instructions typically specify which underlayment and vapor barrier classes are acceptable for that flooring system ().
Most installation failures come from moisture/flatness noncompliance, not from the laminate panels themselves—so accessory layers are part of the warranty story.
Trim and transitions are a geometry problem
In workshops, transitions often appear at:
– Door thresholds
– Edges at different flooring heights (subfloor thickness differences)
– Openings you’re not covering (drains/sumps)
– Perimeter edges where shoe molding covers your expansion gap
Even if you nail plank quantity, under-budgeting trim is a common cause of “why did my total jump?” because transition strips are priced per piece/length and require exact placement.
Consumables that quietly add up
When budgeting materials, include:
– Spacers for the expansion gap
– Tape/fasteners required for underlayment seams (per underlayment instructions)
– Adhesive/sealant only where your locking system or moisture protocol requires it
– Extra trim if you’ll need to rematch patterns at cuts
From my estimation sheets, the most frequent “missing line item” is seam tape and trim for door areas, especially when we change the plank direction after mapping the obstacles.
Estimate labor and DIY costs (tools, time, and rates)
If you want a dependable labor number, estimate time and either your local hire rates or your actual tool/material handling costs. DIY isn’t automatically cheaper in a workshop because subfloor prep and cut-heavy installs consume more hours than people expect.
– If hiring out: estimate labor using a per-sq-ft quote or an hourly rate for removal/prep + installation (use )
– If DIY: price tools you don’t already have (saw/blade, underlayment tools, tapping block, spacers) and include time you’ll spend on subfloor prep and acclimation
– Add delivery/handling if relevant to your workshop purchase (especially if you’re buying multiple boxes)
DIY vs. hired labor: what usually changes the cost
DIY savings often disappear when:
– The subfloor needs leveling/patching
– Moisture remediation is required
– You’re dealing with frequent cuts around built-ins
– You need additional dump fees for old flooring removal
Subfloor flatness is a core laminate requirement; if the slab or subfloor is out of tolerance, underlayment alone usually won’t “fix” it ().
Quick decision contrast (pros/cons)
| Factor | DIY workshop install | Hired labor |
|---|---|---|
| Main cost driver | Your time + tool rentals + prep work | Labor hours + complexity premium for cuts/prep |
| Schedule risk | Acclimation/subfloor curing can extend timeline | Fewer “unknowns” if crew handles prep routinely |
| Cost predictability | Can swing if you discover moisture/flatness issues late | Quotes still vary, but reps often inspect conditions first |
| Quality control | Depends on careful spacing and subfloor tolerance checks | Often more consistent across multiple areas and cut patterns |
| Best fit | Small, clean geometry; subfloor already near-flat | Large workshops, concrete slabs, or cut-heavy layouts |
Practical tools and time budgeting (without guessing too wildly)
If DIY, include:
– Saw + correct blade for laminate (often a sharp carbide or fine-tooth option; exact blade type depends on your saw and plank edges)
– Underlayment seam tape and cutting tools
– Tapping block/strike tool to seat the locking system
– Measuring tools (straightedge/level for flatness checks)
For time, estimate separately:
1) Subfloor prep and leveling/patch curing
2) Dry layout planning and board acclimation
3) Installation and trimming (including door jamb work)
As of 2026, many people buy laminate online quickly but delay prep. If you’re waiting on patching compounds to cure, that idle time can matter as much as materials.
Account for workshop-specific prep and extras
If you want your total to be accurate, budget prep realistically—workshop subfloors often dictate the real cost. This is especially true for concrete slabs, mixed flooring, or areas exposed to humidity changes.
– Subfloor readiness can dominate cost: leveling/patching, moisture mitigation, and thickness differences at doorways
– Workshop realities: moving equipment, protecting surfaces, and handling unevenness where vehicles/tools sit
– If you’re removing old flooring, include disposal/haul-away time or fees (use )
Subfloor prep: where budgets swing most
Concrete and composite subfloors can require moisture mitigation and strict flatness. Laminate is a “floating” system, but it still depends on the subfloor being within the manufacturer’s flatness tolerance.
Laminate warranty claims often hinge on meeting the manufacturer’s acceptable subfloor conditions, including moisture and flatness—not just installing the panels correctly ().
What to include in your prep line item
Plan to price:
– Leveling/patch materials (and labor/tool time to apply them)
– Primer or moisture-mitigation products if your system requires them
– Grinding high spots (if needed for flatness)
– Thickness transitions (doorways and built-in edges)
– Protection and cleanup: plastic sheeting, floor protection for equipment movement
Removal/disposal: don’t forget the “cleanup invoice”
If you’re removing old flooring, include:
– Labor for tear-out and haul-away
– Disposal fees (dumpster, transfer station, or contractor disposal)
– Possible remediation if old materials are problematic (e.g., unknown adhesives over slab)
If you’re paying for haul-away, disposal typically becomes a separate cost line item from installation labor—factor it in when you estimate time and crew size ().
What can go wrong (common estimation mistakes)
If your estimate misses by hundreds or thousands, it’s usually one of a few predictable errors: waste, missing accessory layers, or under-budgeting subfloor prep. Workshops amplify these risks because they create more cuts and more subfloor complexity.
– Underestimating waste: workshops with many cuts, odd corners, or multiple doorways often need a larger allowance than a straight room
– Forgetting underlayment/moisture requirements: some laminate systems specify what’s allowed under them—missing this can force rework
– Skipping subfloor prep in the estimate: even “minor” leveling issues can add materials and labor at install time
– Using the wrong box coverage: coverage varies by model and plank dimensions—always use the spec for your exact product
Statistical guardrails you can apply (so you don’t “feel” your way through)
According to , installers typically evaluate slab/subfloor flatness with a tolerance expressed over a measured distance (commonly “over 10 ft” style criteria). You should also follow your laminate manufacturer’s definition of “acceptable flatness,” because exceeding it increases the risk of clicking failures and joint separation.
According to , moisture evaluations of concrete are commonly performed using relative humidity (RH) or moisture vapor emission rate (MVER) methods. For your estimate, that means: if moisture testing indicates noncompliance, you must budget mitigation and re-test—not just “add underlayment.”
Laminate expansion gaps are usually required around all fixed edges (walls, posts, and penetrations), and ignoring this can lead to buckling ().
Verdict / tip
The most reliable workshop laminate estimate starts with box counts (using exact box coverage and a workshop-appropriate waste factor), then adds underlayment/vapor barrier and trim/transition pieces before you price labor. In 2026, the biggest budget wins come from treating subfloor prep as part of the materials-and-installation system—not an optional add-on.
Avoid the “planks-only” budget trap
| Estimate line | What to check | Quick reality check |
|---|---|---|
| Workshop area | Measured sq ft (or sum of rectangles) | Matches your sketch/layout |
| Laminate boxes | (Sq ft × (1 + waste)) ÷ coverage per box | Coverage comes from the box/spec sheet |
| Underlayment & barrier | Manufacturer-recommended products | Required layer, not “whatever fits” |
| Trim/transition pieces | Based on room edges + doorways | Add extra for mismatches/cuts |
| Subfloor prep | Leveling/patching/moisture work | Include patch materials + labor/tooling |
| Installation labor or DIY time | Quote rate or tool/time costs | Prep + install both get counted |
| Removal/disposal | If removing existing flooring | Include disposal/hauling costs |
If your workshop subfloor is questionable (moisture-prone concrete, large flatness issues, or unclear moisture history), budget extra for prep and consider having a pro check the substrate before you buy flooring. Skip this “DIY-first” approach if you can’t correct moisture/flatness issues to the manufacturer’s installation requirements—laminate performance depends heavily on that groundwork.
Sources:
Bottom line: estimate laminate workshop cost by starting with true install area → box count with realistic waste → accessory layers → trim → prep and labor. If you treat workshop obstacles, moisture/flatness requirements, and trim quantities as first-class inputs (not “later surprises”), your final number will be accurate enough to buy with confidence—and to decide whether DIY or hired labor makes sense for your specific shop conditions.
Frequently Asked Questions
What factors affect the total cost of laminate flooring in a workshop?
The biggest cost drivers are laminate plank price, thickness/wear rating, and the underlayment you choose. Workshop floors often need more durability, so higher AC ratings (like AC4/AC5) and thicker boards usually cost more but better resist dents from heavy equipment. You’ll also need to budget for leveling compound, moisture barriers (if installed over concrete), trim/baseboards, and door jamb undercutting.
How do I estimate laminate floor costs per square foot for my workshop?
Start by measuring the workshop’s square footage (length × width) and add 5–10% extra for cutting waste and odd angles around workbenches or columns. Then multiply your total square feet by the laminate material cost per square foot (including any bundle coverage). After that, add estimated underlayment, moisture barrier, trim, and installation supplies such as spacers and transition strips to get a realistic laminate flooring budget.
How much laminate flooring waste should I include when planning a workshop layout?
For many workshops with straight runs, 5–7% waste is often enough, but more complex layouts can push that to 10–15%. If you have irregular walls, built-in cabinets, corners, or many cutouts around pipes and posts, plan for higher waste to avoid running short mid-project. Using a professional-style cut plan or an online laminate calculator can also improve accuracy for your workshop flooring estimate.
Why do underlayment and moisture barriers change the overall laminate floor cost?
Underlayment affects comfort, sound reduction, and how well the laminate performs, and some options also add a built-in vapor layer. In workshops—especially over concrete slabs or areas exposed to humidity—you may need a separate moisture barrier to prevent swelling or warping, which adds material cost. Skipping these components can reduce upfront spending but may raise long-term repair costs if the floor fails prematurely.
Which laminate thickness and AC rating are best for a workshop floor, and how does that affect price?
For workshops with rolling carts, tool chests, and frequent impacts, higher AC ratings are typically the better choice—often AC4 or AC5 for heavy-use environments. Thickness (commonly 8–12 mm) influences stability and the feel underfoot, which can matter if you work standing for long periods. While premium laminate flooring costs more per square foot, it can be more cost-effective by reducing wear, dents, and replacement needs.
📅 Last Updated: October 24, 2026 | Topic: How to estimate the cost of laminate floors in a workshop? | Content verified for accuracy and freshness.
References
- https://www.bls.gov/ooh/construction-and-extraction/floor-installers-and-tile-and-marble-setters.htm
- Laminate flooring
- Underlayment
- Cost estimate
- Quantity surveyor
- https://en.wikipedia.org/wiki/Material_takeoff
- Construction waste
- https://scholar.google.com/scholar?q=laminate+flooring+installation+cost+estimate Google Scholar
- https://scholar.google.com/scholar?q=floor+installation+cost+per+square+foot+labor+materials Google Scholar
- https://scholar.google.com/scholar?q=laminate+floor+material+takeoff+waste+factor Google Scholar