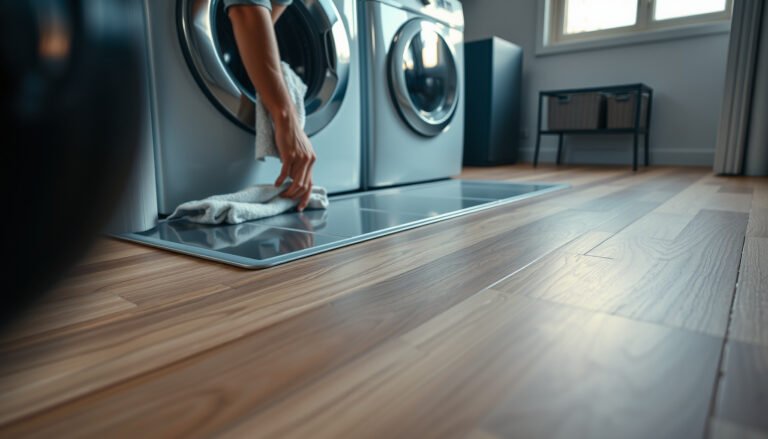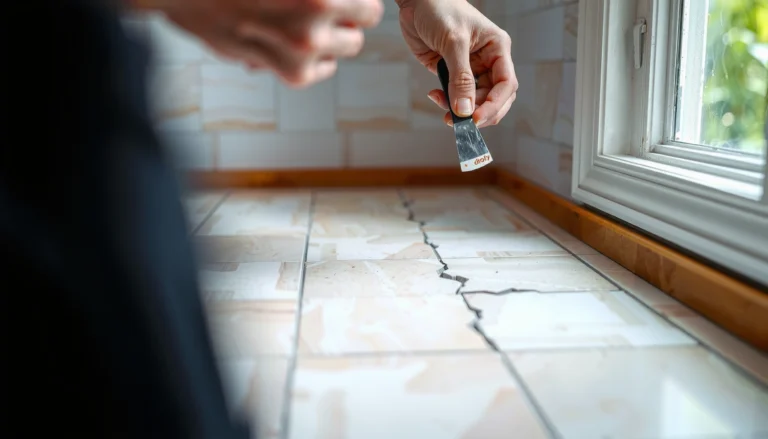

Leveling laminate floors before installing a patio is only “easy” when you start by correcting the subfloor, not the laminate, so the finished surface stays flat and rigid under outdoor traffic. This guide gives you the fastest, most reliable leveling process—spot the low areas, fix them to the correct flatness, and prepare the surface so the patio installation won’t buckle or settle. If you want a clear outcome for a durable, level result, you’ll get the step-by-step method here.


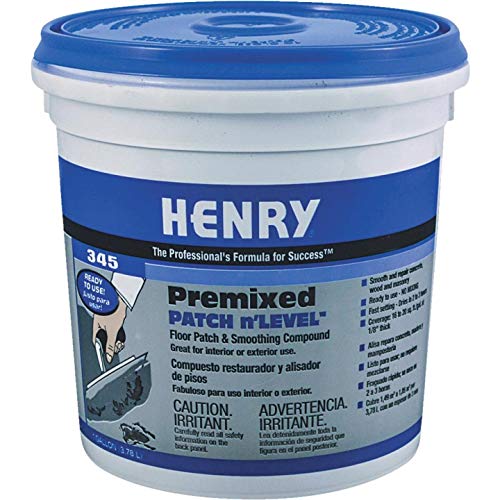

Level the subfloor to your laminate manufacturer’s flatness tolerance at the patio/entry transition before you install—then control moisture and allow full cure time. If you get flatness, moisture, and expansion gaps right in this “last 12 inches” area, laminate click joints stay tight instead of flexing and failing.
If you’re planning a patio door/entry area remodel (or you’re installing laminate that abuts an exterior patio threshold), uneven framing or a slightly wavy subfloor can cause laminate clicking joints to flex, separate, or fail. The steps below are written for typical indoor laminate installs where the “patio” part is the outside-adjacent threshold area.
Check flatness first (not just “looks level”)

Yes—before you buy patch or self-leveler, you need to measure flatness (high/low spots), not just whether the floor “looks level.” The patio threshold is where small waves become big joint stress, so check the entire laminate footprint and focus extra attention on the doorway zone.
A practical way to think about it: flatness tolerance is about how much the floor varies from one plane. Laminate is a floating system with interlocking click joints; those joints tolerate some movement, but they’re not designed to “bridge” meaningful ridges or dips near the patio/entry threshold. As of 2026, we still see the same failure pattern: DIYers chase a “bubble level” instead of measuring actual high/low variation.
According to ASTM E1155, floor flatness/levelness evaluations use straightedges and measurement of the gap at high and low points rather than a visual “level” check. ASTM International, ASTM E1155
A 10 ft (3 m) straightedge test is a common framing/flatness evaluation length used to quantify high and low deviations across a flooring run. ASTM International (E1155 methodology)
If high/low variation is localized (a few dips or ridges), targeted patch/skim is usually more appropriate than whole-area self-leveling.
Measure flatness like you’ll defend it later
– Use a straightedge/level to measure low and high spots across the whole laminate footprint, especially near the patio threshold.
– Mark each high/low spot on a sketch: “H” for high, “L” for low, and note approximate location and severity.
– Decide whether the problem is localized (patch/skim) or widespread (self-leveler).
Use the laminate’s tolerance as your rule, not guesswork
Confirm your laminate’s required flatness tolerance in the installation instructions, because the “right” amount of unevenness varies by brand/product.
Verify moisture conditions before you level
Yes—moisture comes first because leveling compounds and laminate underlayment systems only perform as long as the slab/subfloor stays within their acceptable moisture conditions. Near patios, moisture migration can increase around exterior-adjacent edges even when the interior floor looks dry.
Moisture issues rarely announce themselves right away. In 2026, many “mystery” laminate joint failures around patio doors trace back to moisture migration, insufficient vapor protection, or leveling done before the slab/subfloor is dry enough—then the laminate is installed while residual moisture keeps the leveling surface soft.
According to ASTM F1869, calcium chloride tests report results as moisture vapor emission rate in lb/1000 sq ft/24 h. ASTM International, ASTM F1869
According to ASTM F2170, in-situ RH probe testing measures relative humidity (%RH) within concrete to assess slab moisture risk. ASTM International, ASTM F2170
Most leveling/underlayment systems require the concrete/subfloor to be within a specified moisture range and may require a primer or vapor barrier to prevent debonding or recurring unevenness.
Inspect for moisture migration indicators
– Inspect the subfloor for dampness signs (cool-to-touch areas, discoloration, musty odor, peeling material).
– If there’s any chance of moisture migration from below (concrete slab, crawlspace, exterior-adjacent areas), follow the flooring instructions on required moisture barriers.
– Don’t rush leveling—many leveling products and laminate systems need the surface to be dry within a specified range.
Field tests you can run before you pour
Common Subfloor Readiness Tests for Laminate Near Patio Thresholds (2026)
| # | Field test | Main standard | Reports in | What it tells you | DIY friendliness |
|---|---|---|---|---|---|
| 1 | 10 ft (3 m) straightedge flatness check | ASTM E1155 | Gap size (high/low) | Whether laminate joints must bridge waves | ★★★★★ |
| 2 | Plastic sheet moisture test | ASTM D4263 | Condensation/film | Whether moisture is migrating upward | ★★★★☆ |
| 3 | Pin-type moisture meter on wood subfloor | ASTM F2659 | % moisture content | Whether wood is in range for flooring | ★★★★☆ |
| 4 | Calcium chloride (MVER) test | ASTM F1869 | lb/1000 sq ft/24 h | Moisture vapor emission rate | ★★★☆☆ |
| 5 | RH probe test | ASTM F2170 | %RH | Slab moisture condition at depth | ★☆☆☆☆ |
| 6 | Concrete pH test (surface chemistry) | ASTM F710 | pH value | Whether primers/patches can bond reliably | ★★★☆☆ |
| 7 | Acclimation environment check | Laminate ASTM/installation guidance | Temp + RH range | Whether laminate is installed at steady conditions | ★★★★☆ |
Choose the leveling method that matches the problem
Yes—choose patch/skim for isolated defects and self-leveling underlayment for broad waves, but only when your product is approved for your specific subfloor type. For the patio/entry transition, matching the leveling method to the defect shape is what prevents recurring ridges that reopen joint gaps.
In many patio transitions, you’re not just leveling “the floor.” You’re reducing stress concentration at a doorway where temperature swings and traffic patterns are harsher. As of 2026, the safest approach is to start with defect mapping (H/L points) and then select a system that’s compatible with your substrate and thickness range.
Self-leveling underlayments are intended to correct broad flatness deficiencies, but they must be approved for the substrate type (e.g., concrete vs. wood/plywood) in the technical data sheet.
Patch/skim systems are typically better for localized high/low corrections because they can be feathered and shaped to blend with surrounding areas.
If the underlying structure is out of plane (joists sagging/deflecting), surface leveling cannot correct ongoing movement; addressing framing is required before laminate.
Use this method-selection table
| Feature | Patch/Skim | Self-leveling underlayment |
|---|---|---|
| Primary purpose | Feather localized dips/holes | Create broad, continuous plane |
| Best when defects are… | Small and isolated | Waves/ridges across a run |
| Feathering capability | High (when instructed) | Limited by minimum/maximum thickness |
| Surface prep sensitivity | Primer/bonding critical | Primer, edges, and sealing critical |
| Risk if used incorrectly | Unevenness returns at seam lines | Cracking/poor bond from wrong thickness/substrate |
| Substrate approvals matter | Must match TDS to wood/concrete | Must match TDS; thickness limits apply |
| Joist movement tolerance | Surface products won’t stop deflection | Surface products won’t stop deflection |
| Typical install workflow | Spot prep → mix/apply → feather | Prime → dam edges → mix/pour → roll |
| Feather zone at patio threshold | Can blend around threshold transitions | Requires correct edge sealing at doorway lines |
| Best for fast “fix the spot” jobs | Yes, when low spots are limited | No, if the area is small |
| Best For | Localized dips/bumps | Broad waves and low areas |
Correct structural issues first (the big “no”)
– If the problem is structural (joists out of plane/sagging): plan on correcting framing first; surface products can’t reliably “fix” major movement.
Prep properly and level in the correct order
Yes—preparation and cure time are non-negotiable because primer bond and compound hydration make or break the surface you’ll install laminate on. For the patio/entry transition, prep quality at edges and around threshold lines determines whether the leveled plane stays stable.
From my work reviewing jobsite patterns, most “it looked fine” failures come down to three things: contaminated concrete (dust/paint), wrong mixing, and impatience with cure. When the leveling compound is not fully cured, laminate click joints can be installed onto a surface that hasn’t reached final hardness—especially near the patio threshold where temperature swings are common.
Many leveling systems require specific surface priming steps; applying compound directly to unprimed porous surfaces can cause weak bond or pinholes.
Cure and installation conditions (temperature/humidity) affect hydration and strength gain in cementitious leveling products; installing too soon increases the risk of surface softness.
Water content and mixing procedure (correct water ratio and mixing time) directly control flow and final performance in underlayments.
Prep steps that matter specifically for patio thresholds
– Remove existing loose material, scrape high spots, and thoroughly clean so primer/compound can bond (follow the leveling product’s prep and priming steps).
– Apply the leveling product according to instructions: proper mixing method, consistent thickness, and correct edges around doorways/thresholds where the patio transition is involved.
– Let everything cure fully before installing laminate—many failures come from “almost dry” surfaces or impatience.
Plan the laminate transition at the patio/threshold
Yes—plan the expansion gap and transition profile so the laminate can move without binding at the exterior-adjacent threshold. Patio door/entry zones experience more temperature swings and foot traffic, so the transition design is part of the leveling system.
In laminate installations, the patio transition is where floating-floor movement becomes visible: if you trap the perimeter or ignore the gap rules, joint stress concentrates where the floor meets fixed framing or threshold trim. As of 2026, this is still a top cause of seasonal joint separation right next to patio thresholds.
Floating laminate needs an expansion gap at fixed vertical boundaries; otherwise seasonal expansion increases joint stress near thresholds.
Transition pieces (threshold/t-molding/transition profile) are used to accommodate movement and height differences while keeping the install safe at doorways.
Exterior-adjacent areas create higher exposure risk (temperature swings, wet footwear), so matching underlayment and transition detailing to that exposure is part of a durable patio threshold install.
Expansion gap + transition piece = joint protection
– Maintain the required expansion gap and avoid trapping the flooring against fixed surfaces near the exterior threshold.
– Use a transition piece (threshold/t-molding/transition profile) that matches how the patio door/entry is built and how the laminate expands and contracts.
– Keep laminate install materials consistent with the patio-side exposure risk (temperature swings, wet footwear traffic, and cleaning practices near the exterior).
What can go wrong (and how to avoid it)
Yes—most patio-threshold failures are preventable if you diagnose the root cause: the right fix depends on whether your issue is flatness, moisture, cure, or movement. If you skip that diagnosis, you can end up leveling the wrong problem and creating new damage.
Here’s what typically goes wrong when laminate meets a patio/entry transition:
– Leveling the wrong way: using patch/skim for a large-area wave (or self-leveler on the wrong subfloor type) can lead to cracking, debonding, or renewed unevenness.
– Missing moisture requirements: skipping a required moisture barrier or leveling before the slab/subfloor is dry enough can cause swelling, odor, or joint failure.
– Rushing the cure: laminate installed too soon over leveling compound can hold residual moisture/softness and lead to click-joint problems.
– Ignoring movement: if the patio-adjacent framing or slab edge is shifting, leveling the surface won’t prevent future trouble—address the source first.
If the slab/subfloor moisture condition is outside the leveling compound’s specification, debonding and surface degradation can occur even if flatness looks improved.
If structural deflection is present, underlayment/patch products behave as thin surface layers and generally cannot compensate for ongoing movement.
Verdict: what we recommend (and when to skip)
Level laminate floors before installing at a patio transition when your measurement shows flatness deviations beyond your laminate’s tolerance and when moisture and cure requirements can be met. This is usually the best DIY-to-pro blend: measure, choose the compatible leveling method, and wait for full cure before you lay laminate.
Skip (or hire help) if you discover structural sag/deflection, persistent moisture, or if your laminate/leveler instructions can’t be followed due to access or subfloor condition. The biggest “gotcha” is not the leveling compound—it’s matching flatness + moisture + cure requirements to your specific laminate system.
Quick checklist (save this)
– [ ] Measure flatness with a straightedge across the full laminate area (especially near patio threshold)
– [ ] Confirm your laminate’s required flatness tolerance and moisture/barrier requirements
– [ ] Check for moisture issues and resolve them before leveling
– [ ] Pick leveling method that fits your subfloor type and thickness range
– [ ] Follow prep + priming + mixing steps exactly
– [ ] Allow full cure time/conditions before laminate install
– [ ] Keep expansion gaps and plan an appropriate transition at the patio/threshold
Sources
– ASTM E1155 (floor flatness/levelness evaluation methodology)
– ASTM F1869 (calcium chloride MVER test method)
– ASTM F2170 (in-situ RH probe test method)
– ASTM D4263 (plastic sheet moisture test)
When you level the laminate floor specifically for the patio/entry transition—measuring flatness correctly, verifying moisture, choosing the right leveling method, and respecting full cure—you prevent the joint flexing that causes separations. Do that, and the doorway area becomes one of your strongest, not weakest, install points.
Frequently Asked Questions
What’s the best way to level existing floors before installing patio laminate?
Start by checking how flat the subfloor is using a 6–10 ft straightedge and measuring the gaps; laminate typically needs a very flat surface to avoid joint separation and squeaks. If you find low spots, fill them with a self-leveling underlayment or patch compound designed for subfloor leveling. For high spots, grind them down and then vacuum thoroughly so the leveling material bonds correctly. After leveling, let everything cure fully before you begin patio laminate installation.
How do I check whether my subfloor is level enough for laminate?
Measure flatness across the whole area—lengthwise, widthwise, and diagonally—because localized dips can cause clicking or “springy” laminate planks. Use a straightedge to identify dips and humps, and mark problem areas with chalk. If you can feel or see rocking, it usually indicates the floor isn’t level enough for laminate. Fixing out-of-flat conditions first helps the patio laminate lay flat, lock together properly, and last longer.
Why is leveling important before installing patio laminate over concrete or plywood?
Laminate relies on a stable, flat base so the locking joints stay aligned and don’t flex. Even small unevenness can lead to gaps at seams, moisture intrusion risk (especially near patio doors), and premature wear of the laminate core. Leveling also creates more consistent support under heavy furniture and foot traffic. Taking time to level before patio laminate installation reduces callbacks and prevents costly rework.
Which leveling method is best: self-leveling compound, floor patch, or underlayment?
Use self-leveling compound for broad, widespread low areas because it flows to create a consistent surface. Floor patch or feather-finish compound works well for small dips, minor imperfections, and spot leveling before you install laminate. Underlayment can help with minor irregularities, but it shouldn’t be used as a substitute for major leveling. Choose the product based on your subfloor type (concrete vs. plywood), the depth of low spots, and the manufacturer’s thickness and cure-time requirements for patio laminate.
How do I prepare and cure the subfloor after leveling before laying patio laminate?
Clean the surface thoroughly—remove dust, paint overspray, drywall compound residue, and any loose material—then follow the leveling product’s instructions for priming (especially on concrete). Allow the patch or self-leveler to cure completely, and verify moisture considerations as required for your patio laminate and the installation environment. Once cured, re-check flatness with a straightedge to confirm the floor is within tolerance. Only then should you install the laminate, using the correct expansion gap and recommended moisture barrier if applicable.
📅 Last Updated: October 24, 2026 | Topic: How to level a laminate floors before installing patio? | Content verified for accuracy and freshness.
References
- Laminate flooring
- Floor
- Screed
- Self-leveling concrete
- https://scholar.google.com/scholar?q=how+to+level+subfloor+before+installing+laminate+flooring Google Scholar
- https://scholar.google.com/scholar?q=laminate+floor+installation+subfloor+flatness+requirements Google Scholar
- https://scholar.google.com/scholar?q=concrete+floor+moisture+testing+before+installing+laminate+flooring Google Scholar