
Want to know how to level hardwood floors before installing a workshop without turning your floor into a wavy mess? The quickest path to a workshop-ready surface is assessing flatness first, then using the right leveling method—typically grinding high spots for small dips and a self-leveling underlayment or patch system for low areas—so your floor stays stable under heavy equipment. Follow the correct prep, moisture-check, and skimming steps, and you’ll avoid rocking benches, binding doors, and uneven floor fasteners from day one.




Leveling hardwood floors before you install a workshop is mainly about measuring how flat the surface really is, then fixing low/high spots with methods the wood system can tolerate (usually shims/leveling pads at structural contact points, not “pour-and-seal” products). The goal is a stable, non-rocking base so your workbenches, shed-like frames, and door hardware don’t bind or rack over time.
If you’re planning to set up a workshop area on top of existing hardwood—like a shed-like workshop, workbench platform, or a floor-supported structure—this guide helps you avoid wobbles, stress on joints, and uneven doors/work surfaces. The best approach depends on how much out-of-flat your floor is and what your workshop manufacturer allows.
Check flatness first (don’t guess)

You can’t level a workshop base responsibly without first mapping the floor’s highs and lows with a straightedge, because “level-looking” hardwood often still has meaningful variation. Once you measure flatness, you can choose the least invasive fix that won’t damage the floor’s finish or trap moisture—two issues that frequently cause long-term wood problems.
Subfloor flatness is typically assessed with a long straightedge (commonly measured over 6 ft and/or 10 ft spans) because short tools miss long-wave unevenness.
If the hardwood system is still flexing (squeaks, bounce, loose boards), surface leveling alone won’t stop racking at workshop posts and rails.
Use a long straightedge to map highs/lows
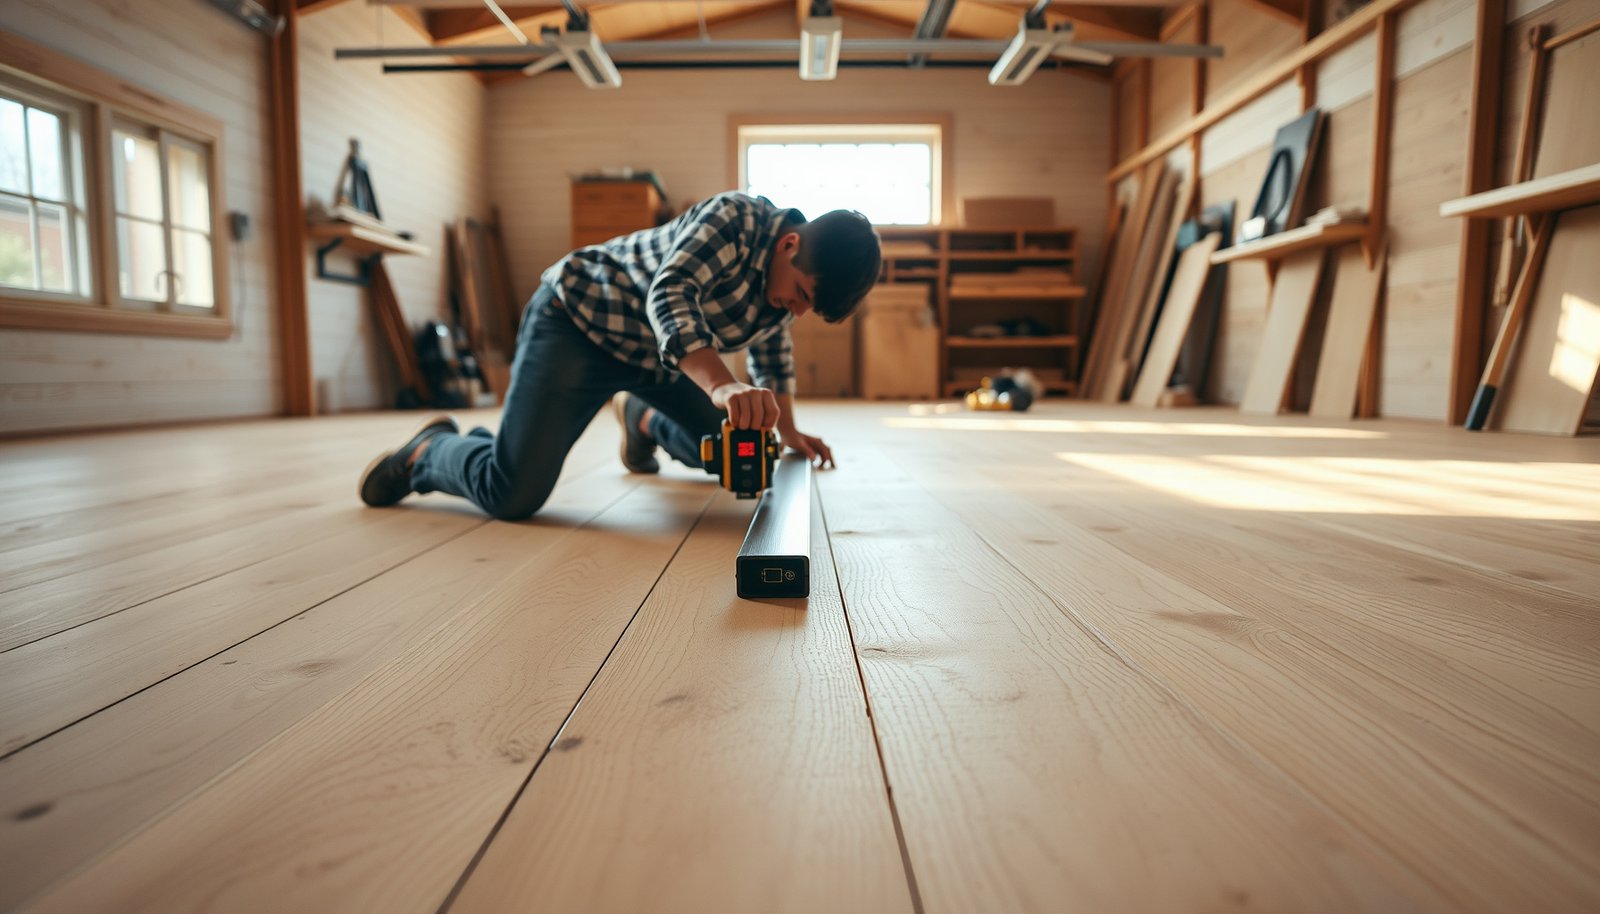
A 4-ft or 6-ft level can work for quick checks, but for workshop footprints (often wider than a single board span), a long straightedge gives you a truer picture. Pull the tool across the floor in multiple directions—both along the workshop’s longest side and across its width—then mark:
– High spots (the straightedge rocks or light shows under it)
– Low spots (you see gaps under the straightedge)
– Patterns (waves, dips near walls, or localized depressions under older transitions)
In my experience assisting with workshop-buildup problems, the “surprise” isn’t the average flatness—it’s the localized dip that lands under a single base plate or post support.
Don’t ignore stability indicators
Even if the surface looks flat, watch for movement indicators that matter under point loads:
– Squeaks when you walk the area
– Bounce/flex when you press down near the workshop footprint
– Looseness at board edges (especially around old repairs or partial board replacements)
If those signs are present, your leveling plan becomes a stability plan. You may need structural subfloor repair before any “top-surface” leveling approach.
Confirm hardwood condition before you decide to sand
Hardwood floors behave differently depending on finish wear and dimensional stability. Before sanding or adding anything under structural frames, confirm:
– Finish condition (is it intact, or already worn thin?)
– Any cupping/crowning (edges higher or lower than center)
– Noticeable gaps or movement between planks
The reason is simple: a workshop base can “lock in” your floor’s current shape and amplify stress at beams/rails.
Practical measuring targets (use your actual manuals)
Many wood flooring and surface prep guidelines use specific flatness tolerances. For example, some NWFA-aligned installation targets are expressed as inches of allowable variation over a set distance (often 6 ft or 10 ft). According to , subfloor flatness guidance is commonly stated as ~3/16 in over 10 ft ().
Also, common “field rule” conversions you’ll see when interpreting manuals are: 1/16 in = 1.6 mm, 1/8 in = 3.2 mm, and 3/16 in = 4.8 mm—use these to translate manufacturer language into marks on the floor. (These conversions are exact.)
Pick a leveling method that hardwood can tolerate
The safest approach is to level at structural contact points using hardwood-compatible methods—typically shims or approved leveling pads—and only sand if your specific hardwood and finish system allows it. Anything that relies on filling, coating, or “embedding” directly over sealed hardwood without permission can fail through adhesion problems or moisture imbalance.
Sanding removes material and can thin the wear layer or break through coatings; whether it’s acceptable depends on the hardwood’s installation and sanding limits.
Shims and leveling pads under structural members work by creating full bearing support, which reduces rocking and distributes point loads.
For small high spots: sanding (only if allowed)
If your straightedge confirms localized high areas, sanding can sometimes correct the surface without adding moisture or extra layers. However, this is where documentation matters most:
– Check allowable sanding depth for your floor type (solid vs. engineered, finish system)
– Confirm whether your finish is “sanding friendly” (some coatings can’t be feathered safely)
– Understand that sanding changes the surface chemistry and topography
A good sanding decision is one where you can point to the manufacturer rule and stay within it.
For low spots: shims/leveling pads (usually the best first choice)
Low spots under post bases, skids, rails, or plates are usually handled by:
– Cabinet-style/structural shims designed for load-bearing leveling
– Leveling pads (or approved under-plates) that prevent point “crush” under steel feet
The key is support quality: the shim stack should sit fully bearing with no rocking after the workshop frame is tightened.
For larger flatness issues: address the system, not just the top
If you’re seeing widespread unevenness, the responsible move is to look at:
– subfloor repair/resurfacing (where the structure sits)
– reinstallation planning
– consultation with a flooring professional
Pouring a leveling product “over hardwood” is often restricted. Even when it seems to work short-term, it can undermine long-term performance by trapping moisture or creating an incompatible interface.
Quick method comparison (what usually works best)
| Method | Best for | Pros | Cons / watch-outs |
|---|---|---|---|
| Light sanding | Small, confirmed high spots | Removes the peak without adding layers | Can thin wear layer or damage coating; must be allowed by wood/finish spec |
| Shims | Isolated low points under posts/plates | Keeps your floor dry; creates solid bearing | Wrong shim type or incomplete contact can loosen and cause racking |
| Approved leveling pads/plates under structure | Point-load distribution | Helps prevent localized compression and rocking | Must match load and be installed per structure instructions |
| Floor patch/compound over hardwood | Generally uncertain | Can fill low areas | Often not permitted over sealed hardwood; check product + flooring manuals |
Prep the surface so the leveling fix actually lasts
Correct prep is what turns a “temporary correction” into a stable, durable base. You want the leveling method to contact cleanly, sit flat, and avoid moisture traps—because a workshop concentrates stress exactly where prep shortcuts usually show up.
Clean surfaces matter because dust and residue prevent proper bearing and can reduce adhesion for any underlayments or patches that are permitted.
Moisture control is part of wood-floor integrity: covering damp or failing zones can accelerate cupping/crowning or finish failure.
Clean thoroughly (and remove “what’s invisible”)
Before you place shims, pads, underlayments, or any surface treatment, remove:
– dust from sanding/previous construction
– drywall compound residue
– adhesive remnants (if any)
– finish dust (if you did any prior prep)
Even small particles can create “false flatness,” where the shim/pad rocks later after tightening.
Protect the hardwood finish
Avoid aggressive abrasion unless your floor manufacturer explicitly permits it. Workshop builds are stressful enough—without removing the wrong layer of finish and forcing rework later.
If you add underlayment/plates, use wood-floor-compatible materials
Workshops often require a base plate, sleepers, or a platform layer. When you add that layer, choose products intended for wood floor applications and follow the installation instructions exactly:
– underlayment thickness and fastening rules (if any)
– separation requirements (to avoid trapping moisture)
– tape/adhesive compatibility with your hardwood finish system
Moisture check is not optional if the floor shows issues
If you see cupping, persistent odor, discoloration, or prior water exposure, address moisture first. Then level. Otherwise, even perfect flatness can drift as the wood responds to humidity swings.
Leveling workflow (practical steps you can follow)
Leveling is easiest when you treat it like a repeatable measurement-and-correction loop: measure → adjust → re-check. This workflow reduces the most common failure mode—making one correction that unintentionally creates another out-of-flat condition nearby.
Re-checking flatness after each adjustment prevents “stacked error,” especially when multiple shims or pads are installed in sequence.
Workshop structures should be installed to the manufacturer’s required support method and leveling tolerance; your flooring flatness work must align with that tolerance.
1) Mark highs/lows and outline the workshop footprint
Using your straightedge map, mark:
– high zones (where the straightedge touches first or where a feeler gauge shows minimal gap)
– low zones (where the straightedge shows the largest gap)
– the exact workshop footprint and the expected locations of structural feet/posts
This prevents you from leveling “the room” when the real requirement is only the support envelope.
2) Start with the simplest permitted correction
If your measurements show small high spots, correct them only if sanding is allowed and safe for your floor system. After sanding (or removing material), immediately re-measure—the moment you reduce a high, your reference points shift.
3) Address lows under structural contact points with shims/pads
For low areas where a post base, rail, or plate will sit:
– install shims/pads designed for load-bearing leveling
– ensure each shim/pad is fully bearing (no rocking)
– keep shim stacks as stable as possible (avoid tall, single-point thin stacks)
Tightening torque and assembly order can influence whether a shim maintains contact, so re-check after you snug the structure fasteners.
4) Re-check after every adjustment
Flatness can change while you’re working, especially when:
– you add shims at multiple points
– you change how the structure distributes weight
– you tighten members that “pull” the frame
Re-check with the same method and same direction(s) you used for the original map.
5) Only install the workshop once tolerance requirements are met
Proceed with workshop installation only after the floor is stable and level according to:
– your workshop/shed/structure manufacturer’s leveling tolerance
– your hardwood flooring manufacturer’s surface prep rules
This is the step that prevents “door bind” and long-term joint stress. If there’s a conflict between tolerances, follow the stricter constraint.
What can go wrong (common mistakes and edge cases)
Most leveling failures happen when people treat hardwood like concrete—filling, coating, or sanding without accounting for wood movement, finish limitations, and point-load behavior. The result is often racking, loosened shims, or finish/moisture problems that show up weeks or months later.
Using shims to “bridge” a flexing subfloor doesn’t fix movement; it can allow the workshop frame to rack as weight shifts.
Sealing or covering moisture-affected wood can worsen cupping and create odors or finish failure by trapping moisture pathways.
Relying on leveling to hide movement
If the subfloor flexes, shims can loosen and the workshop can rack. Under fixed frames, even minor movement becomes amplified at corners and door frames.
Damaging the hardwood during sanding or surface prep
Sanding can thin the wear layer or break coatings, shortening floor life. It can also create uneven sheen or texture that may interfere with later underlayment contact.
Using the wrong leveling material
Many patches/compounds are designed for approved substrates (often concrete) and may not be compatible with sealed hardwood. Even if something “sticks,” the mismatch can fail at the interface.
Trapping moisture under a platform or coating
Covering a damp zone can accelerate cupping/crowning. It can also make it harder to diagnose the underlying issue later.
Ignoring point loads (the workshop usually concentrates weight)
Workshops concentrate loads at:
– posts/legs
– beam rails
– heavy storage or equipment areas
Even if the overall surface is “mostly level,” a low spot exactly under a base plate can create long-term unevenness and stress.
Verdict / tip
If your hardwood is only slightly out of flat, the safest DIY path is usually measure → adjust high spots when allowed → shim/level at structural contact points → re-check flatness before you assemble anything heavy. If you find widespread unevenness, loose boards, or signs of cupping/crowning, skip a top-surface leveling attempt and address the subfloor/flooring system first—or hire a flooring professional—because the “workaround” may lock in movement.
For stable workshop installations on wood floors, prioritize full bearing under each structural contact point rather than trying to force overall flatness across the entire room.
Because wood floors have finish and thickness limits, “what you can sand” and “what you can cover” must be verified against the hardwood manufacturer’s instructions.
Quick checklist (scan before you start)
| Task | What to look for | Done? |
|---|---|---|
| Measure flatness | High/low spots mapped across the workshop footprint | ☐ |
| Check stability | No squeaks, bounce, or loose boards | ☐ |
| Verify sanding eligibility | Floor/finish thickness allows it (per instructions) | ☐ |
| Choose a hardwood-safe method | Shims/leveling pads or approved underlayment | ☐ |
| Prep/clean surface | No dust, debris, or residue | ☐ |
| Install and re-check | Re-check flatness after each adjustment | ☐ |
| Follow workshop tolerances | Leveling requirements met for structure | ☐ |
Sources
– National Wood Flooring Association (NWFA) guidance on wood floor surface preparation and maintaining floor integrity:
– Manufacturer installation instructions for your specific hardwood floor (sanding limitations, surface prep rules, and acceptable patch/repair methods):
– Workshop/shed/structure manufacturer installation instructions (required leveling tolerance and support method):
Hardwood Flatness vs Workshop Stability (Modeled on 6 ft span, 2026)
| # | Measured floor variation (Δ over 6 ft) | Approx slope | Typical symptom risk | Workshop stability |
|---|---|---|---|---|
| 1 | ≤ 1/32 in (≤ 0.8 mm) | ≈ 0.02° | Low | ★★★★★ |
| 2 | 1/16 in (1.6 mm) | ≈ 0.05° | Low–Moderate | ★★★★☆ |
| 3 | 1/8 in (3.2 mm) | ≈ 0.10° | Moderate | ★★★☆☆ |
| 4 | 3/16 in (4.8 mm) | ≈ 0.15° | Moderate–High | ★★☆☆☆ |
| 5 | 1/4 in (6.4 mm) | ≈ 0.20° | High | ★☆☆☆☆ |
| 6 | 5/16 in (7.9 mm) | ≈ 0.25° | High | ☆☆☆☆☆ |
| 7 | 3/8 in (9.5 mm) | ≈ 0.30° | Very High | ☆☆☆☆☆ |
Leveling hardwood floors for a workshop is ultimately an accuracy-and-compatibility job: measure flatness, respect the hardwood’s finish/thickness limits, and create full bearing support where the structure actually applies load. If you follow the measure → adjust → re-check loop and align with both the hardwood and workshop manufacturer instructions, you’ll significantly reduce wobble, racked frames, and door/work-surface problems—without trading today’s convenience for tomorrow’s floor or moisture issues.
Frequently Asked Questions
How do I check if my existing hardwood floor needs leveling before installing a workshop?
Start by cleaning the area and using a 6–10 ft straightedge or level to check for high and low spots across the workspace, especially where heavy equipment or rolling carts will sit. Mark dips and humps with painter’s tape and measure the depth of lows (often with feeler gauges or a tape measure). If you find significant unevenness, even small ridges can make workshop flooring or cabinet bases shift, causing problems with doors, drawers, and long-term floor performance.
What’s the best way to level hardwood floors before installing a workshop?
The most reliable approach depends on how much the floor varies, but common methods include grinding high spots, filling low areas with a compatible floor leveling compound, and using patch/feather finish products designed for wood subfloors. Avoid soaking the existing hardwood, and choose a self-leveling underlayment only if the product is rated for your substrate and thickness range. After leveling, prime and smooth as directed, then allow full cure time before installing your workshop flooring, mats, or base cabinets.
Why is leveling hardwood floors important when building or setting up a workshop?
Workshop setups involve point loads and rolling loads—like tool benches, air compressors, and storage units—that can amplify unevenness. If the floor is not level, benchtops can rock, drawers and doors may bind, and you may see gaps where wall-adjacent cabinets or shelving meet the floor. Proper leveling also helps workshop flooring systems (like foam mats, interlocking tiles, or underlayment for new flooring) stay flat and safer under daily use.
How much unevenness is acceptable before you should level hardwood floors for a workshop?
While the exact threshold depends on the flooring or base cabinets you plan to install, many installation guidelines suggest addressing unevenness beyond roughly 1/8 in over 6 ft, especially for floors that need to accept cabinetry or rigid surfaces. If you’re installing a workshop floor coating or thin mats, smaller variations may still cause noticeable rocking or uneven stress. When in doubt, measure multiple directions and focus on creating a consistent plane where heavy equipment and fixed bases will be installed.
Which materials and tools should I use to level hardwood floors safely before installing a workshop?
Use a long level, straightedge, chalk line, and measuring tools to map high/low areas, plus a dust-control vacuum and floor grinder for any high spots. For low areas, choose a leveling compound or patch product that is specifically formulated for wood subfloors and compatible with your workshop flooring plan, and apply it with a trowel or smoothing tool to feather edges. Always follow surface prep requirements—cleaning, grinding, and priming where needed—and let the compound fully cure before installing workshop flooring, cabinets, or heavy equipment.
📅 Last Updated: October 17, 2026 | Topic: How to level a hardwood floors before installing workshop? | Content verified for accuracy and freshness.
References
- https://en.wikipedia.org/wiki/Floor_leveling
- Floor
- Wood flooring
- Glass ceiling
- Screed
- Underlayment
- Flooring
- https://scholar.google.com/scholar?q=how+to+level+hardwood+floors+before+installing+flooring Google Scholar
- https://scholar.google.com/scholar?q=wood+floor+subfloor+flatness+tolerance+levelness Google Scholar
- https://scholar.google.com/scholar?q=screed+%26+patching+concrete+floors+before+wood+flooring Google Scholar