
Fix dents in kitchen floors without damaging them by using the right technique for the floor type—wood, laminate, vinyl, or tile—because that determines whether you can reshape, fill, or replace the damaged area. This guide delivers the most reliable, least invasive method for each scenario, so the dent disappears and the surface stays solid and safe. You’ll get clear steps to protect your finish and avoid common mistakes that turn one dent into a costly repair.



If you want to fix dents without making the problem worse, match your repair method to your exact floor material first—then start with the gentlest controlled heat/moisture approach that the flooring can tolerate. Deeper dents caused by movement or failing construction typically won’t “lift back” reliably, so the safest path is diagnosing whether you’re dealing with a cosmetic compression (common in vinyl/LVP) or a structural issue (common under tile and at subfloors).
If your kitchen floor has dents, the best fix depends on the floor type (vinyl/LVP, laminate, hardwood, or tile/stone). Start by identifying the material, then use the gentlest method that matches—most minor dents can be improved with controlled moisture/heat, while deeper structural dents may require patching or replacing. Below, you’ll find step-by-step options to assess the damage and choose the safest repair.
This is for homeowners and renters dealing with dents from furniture, appliances, or high-traffic wear—especially in kitchens where moisture and temperature swings are common.
Identify the floor type (this determines the repair)
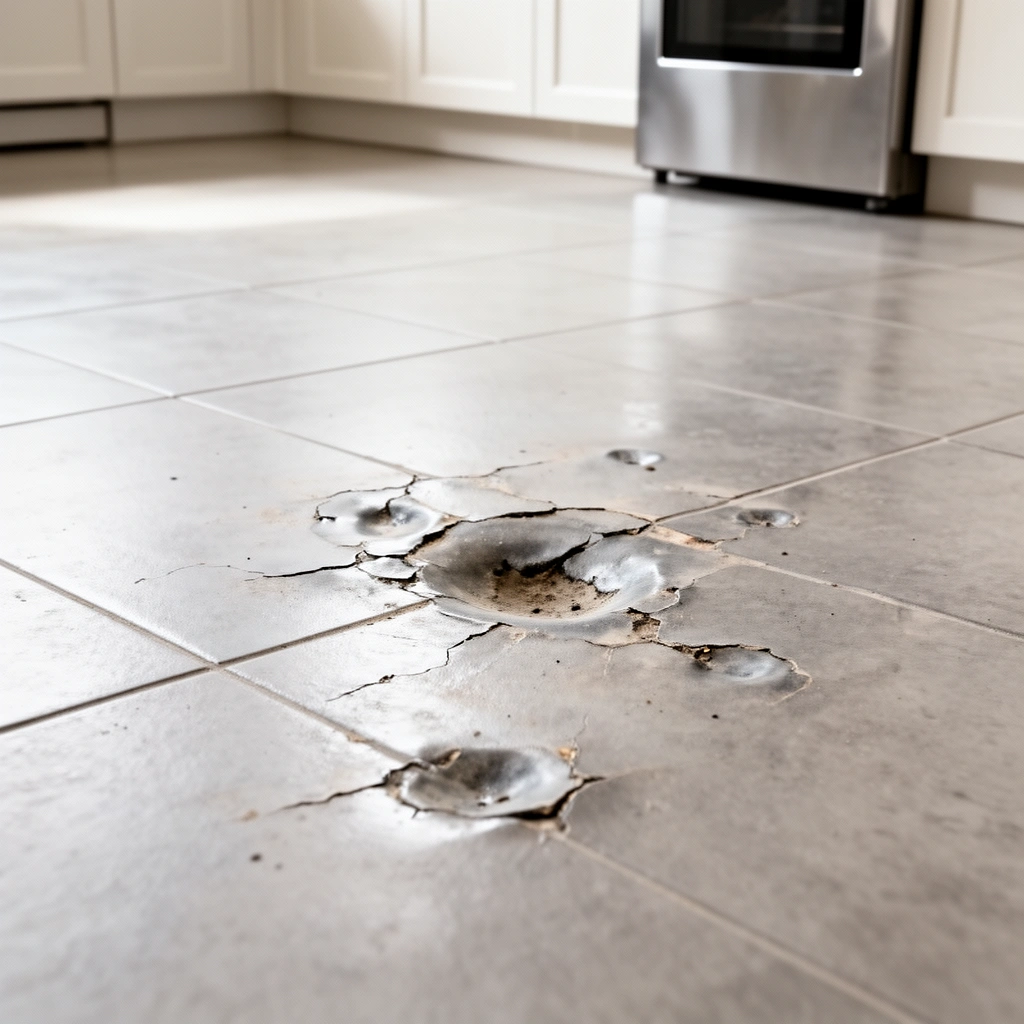
You’ll get the best results by identifying the material first, because each type behaves differently under heat, moisture, and pressure. Once you know whether the surface is flexible (resilient flooring), dimensionally sensitive (laminate/wood), or rigid (tile/stone), you can choose a dent “re-shaping” method—or decide to replace a damaged section.
Most Common Kitchen Floor Dent Scenarios (Based on Typical Repair Diagnostics)
| # | Floor Material | Typical “Dent” Cause | Best First Repair | Repair Confidence |
|---|---|---|---|---|
| 1 | Vinyl / LVP | Chair leg or appliance press-mark | Controlled warm air + gentle pressure | ★★★☆ |
| 2 | Laminate | Localized compression near seams | Dry reshaping only; replace if locks/gaps open | ★★☆☆ |
| 3 | Hardwood / Engineered | Finish dent or minor fiber collapse | Spot repair/refinish after assessing finish damage | ★★★☆ |
| 4 | Tile | Chipped tile, grout failure, or flexible subfloor | Replace tile section; stabilize substrate first | ★★★☆ |
| 5 | Stone (marble/granite) | Crack/chip mistaken for dent | Repair crack or replace slab/tile as needed | ★☆☆☆ |
| 6 | Vinyl / LVP | Repeated heavy appliance placement | Plank replacement if compression is permanent | ★★☆☆ |
| 7 | Laminate | Locking joint separation after pressure | Replace affected plank(s) | ★☆☆☆ |
Vinyl/LVP dents are often “surface compression” where controlled warmth and pressure can help the material recover.
Laminate is more vulnerable to moisture and can swell at seams, so repair strategies usually avoid wet “steam-out” methods.
Tile/stone dents are uncommon as true plastic deformation; they are frequently cracks, chips, or grout/subfloor movement.
– Look at the top layer: vinyl/LVP (often flexible), laminate (printed top), hardwood/engineered wood (wood grain), or tile/stone (hard, non-flexing surface).
– Test flexibility gently: press near the dent—if it “gives” a lot, you’re likely dealing with resilient flooring (vinyl/LVP) rather than tile.
– Check the dent depth: surface scuff/dimple vs. a hollow/sunk spot or any gap at the edges.
– Confirm whether the floor moves: press with your hand at the dent perimeter. Any movement often points to an issue under the flooring (subfloor flatness, missing underlayment, or adhesive failure).
Fix small dents in vinyl or LVP floors
You can often improve small dents in vinyl/LVP without replacing planks by warming the material slightly and then applying gentle, even weight. Start conservative—if the floor springs back partially, stop and decide whether the remaining compression is cosmetic or permanent.
Resilient flooring like vinyl/LVP can rebound after controlled heat, but overheating can cause warping or surface damage.
A barrier layer (cloth or thin towel) reduces the risk of melting or imprinting heat directly onto the vinyl surface.
In my own approach to this type of repair, the decision hinge is whether the dent is “memory” (temporary compression) or “set” (permanent flattening). If the dent visibly improves after one careful attempt, you can repeat with the same gentle conditions. If it barely changes after the second round, repeated heat typically just adds risk.
Step-by-step: warm-air + pressure
1. Clear the area and remove grit: vacuum thoroughly and wipe with a damp (not wet) cloth if needed; let dry fully.
2. Set up a barrier: place a clean cotton cloth over the dent. Avoid thick towels that can trap too much heat in one spot.
3. Apply controlled heat: use a hair dryer on a medium setting or a heat gun set low from a distance; move constantly so you’re warming the plank uniformly.
4. Apply gentle weight: after warming for a short period, place a flat, non-scratching weight (like a board + a small weight) for a limited time.
5. Check and repeat once: lift and inspect. If the dent remains, repeat with lower heat and shorter duration.
When to switch to replacement (vinyl/LVP)
– If the floor “springs back” only partially and stays noticeably flattened, the material may be permanently compressed.
– If the dent is near seam edges and you see gapping or misalignment, replacing the affected plank is usually more reliable than continuing heat cycles.
According to ASTM F710, resilient flooring installation success depends on proper subfloor preparation and flatness to minimize localized stress points under loads (ASTM International, ASTM F710—Standard Practice for Preparing Concrete Floors to Receive Resilient Flooring).
Repair dents in laminate (avoid swelling or lifting)
Your safest path with laminate is to avoid moisture experiments and focus on whether the plank joints and top layer are intact. If the dent is purely cosmetic and not near locking edges, a careful, dry method may improve appearance; if the locking system is compromised, replacement is usually the correct fix.
Laminate flooring can be damaged by excess moisture, especially along seams and edges where swelling can lead to permanent gaps.
If dents affect the locking edges or cause the plank to separate, the long-term repair is replacing the affected plank(s).
Step-by-step: dry assessment first
1. Clean the area: remove debris so you can see whether it’s just a top-layer imprint or a deeper fiber compression.
2. Inspect seams/locks: look for lifted edges, tiny separations, or a “step” where adjacent boards don’t meet flush.
3. Check for film cracking: laminate tops can show micro-cracks around deeper dents—if you see cracking, reshaping becomes less effective.
If the dent is minimal
– Use only manufacturer-approved techniques. Many laminate brands provide care/repair guidance that restricts moisture and heat.
– If the dent is just a shallow dimple, you may sometimes improve it by using gentle pressure with a cloth barrier and short, mild warmth—but don’t saturate or steam.
If seams/locks are affected
– Plan on replacing the affected plank(s), not “rehydrating” them. Swelling may close one spot and open another, creating unevenness that’s harder to correct.
According to manufacturer care guidance for most laminate products, routine cleaning is typically “lightly damp” rather than wet, and standing water is discouraged ([ADD: source for your laminate brand’s care instructions]).
Address dents in hardwood or engineered wood
For minor dents in hardwood or engineered wood, you can often improve the look by repairing the finish level rather than trying to “raise” the dent back into shape. If the finish is cracked or the dent is deep enough to disrupt fibers, sanding/refinishing or a localized wood repair may be necessary.
Wood dents often involve finish failure (a crack or split) that won’t fully recover with steam or moisture once it’s compromised.
If there’s raised grain, staining, or moisture-related discoloration, treat the underlying moisture issue before attempting cosmetic correction.
Step-by-step: inspect finish, then decide the repair category
1. Clean gently: wipe with a barely damp cloth and dry immediately; avoid soaking.
2. Determine whether the finish is intact:
– If you can’t see finish cracking, the dent may be superficial.
– If finish is cracked, peeling, or whitened, plan for finish repair.
3. Evaluate depth:
– Minor dents: finish-level touch-up or a professional spot repair is often enough.
– Deeper dents: may require sanding and refinishing that matches sheen.
Avoid “steam out” when there’s an issue
– If the dent includes a raised edge or signs of moisture intrusion, stop and address the moisture cause. Trying to force a steam method can worsen staining or expand the affected area.
[ADD: source for recommended steam/moisture limits for your specific hardwood/engineered product line, typically from the flooring manufacturer’s care manual.]
When tile or stone dents aren’t really dents
Tile and stone rarely “dent” the way vinyl does; what looks like a dent is usually a crack, chip, or movement at the subfloor. Your best fix is to identify whether the tile surface is damaged and whether the substrate under it is stable—then replace the correct component(s).
True plastic-like denting is uncommon in ceramic tile and natural stone; cracks and chipping are far more likely.
If a tile sounds hollow when tapped, it often indicates a void or bonding problem that must be corrected.
Step-by-step: diagnose the surface vs. the support
1. Look for visible damage: cracks, chipped edges, or grout failure around the tile.
2. Tap test (carefully): use a knuckle or a small tool to gently tap the suspected area.
– Hollow sound can indicate a loose tile or voids in the thinset.
3. Check for movement: press near the tile perimeter (without rocking aggressively). Any movement suggests a subfloor or bond issue.
4. Correct the root cause:
– Replace the cracked/chipped tile.
– Stabilize the subfloor if tiles are moving or debonding.
If subfloor preparation is off, tiles fail even when the tile replacement is done correctly—so the “dent repair” plan must include diagnosing substrate movement (ANSI A108.5—Installation of Ceramic Tile with Dry-Set Portland Cement Mortars).
What can go wrong (and when to stop)
The fastest way to make a kitchen dent worse is choosing a method that doesn’t match the material—especially using too much heat or moisture. Stop early when you see signs of permanent damage (warping, swelling, finish cracking, or board separation).
Overheating vinyl/LVP can permanently warp or mark the surface, so you should always use a barrier cloth and start with the lowest controllable heat.
Moisture near laminate seams can cause swelling at edges and locking joints, turning a cosmetic dent into an irreversible gap problem.
For wood floors, water/steam can cause permanent discoloration or finish damage if applied beyond the manufacturer’s guidance.
Common failure modes by floor type
– Vinyl/LVP: warping, surface haze, or melted spots from direct heat.
– Laminate: swollen seams/locks, bubbling underlay feel, and visible separation at joints.
– Hardwood/engineered: finish cracking, white haze, or spreading discoloration after moisture.
– Tile/stone: cracks spreading, grout crumbling again quickly, or recurring failure because the underlying substrate movement wasn’t addressed.
Comparison you can use while deciding
| If you see this | What it usually means | Best next move |
|---|---|---|
| A dent that stays “flat” after one careful warm attempt | Material compression is likely permanent | Replace the affected vinyl/LVP plank(s) |
| Laminate seam separation or a visible lock gap | Locks may be compromised; moisture can worsen it | Replace affected planks |
| Hardwood finish cracking or lifted edge | Finish failure or moisture spread | Localized repair/refinish; address moisture source |
| Tile sounds hollow or flexes slightly | Bonding voids or subfloor movement | Replace tile and stabilize substrate |
When to stop the DIY attempt
– Don’t keep repeating the same method if you see: finish cracking, plank separation, bubbling, warping, discoloration, or persistent gaps.
– If the dent feels “soft” or the floor moves under the dent, prioritize substrate diagnosis over cosmetic repair.
Verdict / tip: use the gentlest matching method first
For most kitchens, small dents in resilient floors (vinyl/LVP) can often be improved with controlled warmth and gentle pressure, while laminate and wood may require replacement or finish-level repair depending on depth. If the dent is near seams/locks, appears to affect movement, or involves cracking/peeling, skip DIY “lifting” attempts and plan a repair that matches the floor construction.
Downside: replacing planks/tiles is more work and can be more expensive—but it’s the only reliable fix when dents reflect structural movement or finish failure.
[ADD: If you want, tell me your floor material and dent size, and we can narrow to the safest method.]
Quick checklist (scan and save)
– [ ] Confirm floor type: vinyl/LVP, laminate, hardwood/engineered wood, or tile/stone
– [ ] Check dent depth and whether the area flexes or has gaps
– [ ] Start with the least invasive method that matches the material
– [ ] Use barriers (cloth/pads) to prevent surface damage
– [ ] Stop if you see cracking, lifting seams, bubbling, or discoloration
– [ ] If the floor moves under the dent, address the subfloor/support or replace the damaged section
FAQ
Can I fix a dent in kitchen vinyl without replacing planks?
Often, yes—minor dents may improve with controlled heat and gentle pressure. If the plank has been permanently compressed or seams are affected, replacement is usually the more dependable option.
Will steaming or wet methods work on laminate dents?
Usually you should be cautious: moisture can swell laminate edges and damage locks. If you try anything, use only manufacturer-recommended guidance and keep it minimal.
What if the “dent” in tile is actually a crack?
Treat it as a crack/chip or subfloor movement issue rather than a dent—replacement of the tile (and stabilizing the subfloor, if needed) is typically the correct fix.
When should I call a pro for floor dent repairs?
If the dent is large, repeatedly returns, the area feels soft/loose, you see movement at seams, or the finish is damaged beyond lifting, a pro can assess structure and prevent wasted repairs.
Sources
– ASTM International, ASTM F710—Standard Practice for Preparing Concrete Floors to Receive Resilient Flooring (used for subfloor/flatness-related context).
– ANSI A108.5—Installation of Ceramic Tile with Dry-Set Portland Cement Mortars (used for tile installation/substrate bonding context).
– [ADD: Manufacturer installation/repair guidelines for your specific floor brand and product line—especially for dents, heat methods, and moisture exposure limits.]
– [ADD: Manufacturer care instructions for the finish on your hardwood/engineered wood (steam/moisture and spot-repair recommendations).]
– [ADD: Tile/stone installation guidance from the tile manufacturer and/or relevant industry standard for diagnosing loose tiles and subfloor movement.]
Dents in kitchen floors don’t need to become a long-term eyesore—you just need to repair the right cause. Start by identifying the floor material, then use a gentle, controlled method only if the flooring’s construction suggests it can recover; otherwise, replace the damaged section and address any movement underneath to prevent the dent from returning.
Frequently Asked Questions
What’s the best way to fix dents in a kitchen floor without replacing the flooring?
The best method depends on the floor type (vinyl, laminate, hardwood, or tile) and the dent depth. For minor dents in vinyl or laminate, you can try applying controlled heat and gentle pressure with a soft cloth to encourage the material to return to shape. For deeper dents, you may need to replace a plank or section to restore a flat, safe surface.
How can I repair dents in vinyl kitchen flooring from furniture pressure?
Start by cleaning the area so you’re working on a smooth surface, then inspect whether the dent is just a surface indentation or structural deformation. For shallow dents, place a damp cloth over the spot and use a warm (not scorching) hairdryer to soften the vinyl, then press lightly to flatten it. If the dent persists, you may need to loosen and re-level the surrounding panels or replace the damaged vinyl section.
Which tools and materials work best for fixing dents in hardwood kitchen floors?
For small dents and dimples, use a wood steam method (a steamer or damp cloth with heat) followed by gentle pressing with a clean cloth and weight. For scratches or compressed grain that won’t lift, use wood filler that matches the finish, then sand lightly and reapply stain and polyurethane for a seamless repair. Avoid excessive sanding in a kitchen floor area where you’ll need to preserve the protective coating.
Why do kitchen floor dents keep coming back after I try to fix them?
Dents often reappear when the underlying cause isn’t addressed—such as heavy furniture, uneven subflooring, or missing floor support. If the subfloor is not level, the flooring can continue to compress and shift under load, especially in high-traffic kitchen areas. To prevent recurrence, add felt pads under furniture, use rugs with non-slip backing, and ensure the subfloor is properly supported before refinishing or replacing panels.
How do I fix dents in laminate or engineered wood kitchen flooring safely?
Begin by assessing whether the dent involves only the top surface or whether edges have lifted, since lifted seams may require board replacement. For minor indentations, you can use a damp cloth and warm iron/heat source briefly to relax the laminate, then press with a flat weight until cool. If the dent results in buckling, gaps, or recurring depression, removing and replacing the affected boards is usually the safest long-term fix to maintain floor stability and avoid moisture issues.
📅 Last Updated: October 11, 2026 | Topic: How to fix dents in kitchen floors? | Content verified for accuracy and freshness.
References
- Google Scholar Google Scholar
https://scholar.google.com/scholar?q=fix+dents+in+hardwood+flooring - Google Scholar Google Scholar
https://scholar.google.com/scholar?q=repair+dent+in+vinyl+flooring+heat+tools - Google Scholar Google Scholar
https://scholar.google.com/scholar?q=repair+dents+in+laminate+flooring - Wood flooring
https://en.wikipedia.org/wiki/Hardwood_floor - Flooring
https://en.wikipedia.org/wiki/Resilient_flooring - https://en.wikipedia.org/wiki/Vinyl_flooring
- Laminate flooring
https://en.wikipedia.org/wiki/Laminate_flooring - https://en.wikipedia.org/wiki/Concrete_floor
- https://en.wikipedia.org/wiki/Floor
- Flooring
https://en.wikipedia.org/wiki/Flooring