Preventing scratches on hardwood floors in a kitchen mostly comes down to stopping grit and sand from grinding the finish, then protecting anything that moves (chairs, stools, appliances). If you control tracked-in dirt and use non-scratch pads and rugs where traffic is highest, you’ll prevent most everyday scratches before they start.



This applies to most finished hardwood floors used in busy kitchens—especially where people track in debris, drag items across the floor, or move furniture around regularly.
Stop grit: mats, shoe rules, and entry habits

The fastest way to reduce scratches on hardwood floors is to stop abrasive grit before it reaches the finish. In kitchens, the grit problem is usually a “particle logistics” issue: small, hard particles get carried in on shoes and then act like sandpaper.
Tracked-in particles from outdoors often include sand-sized grains (about 0.062–2.0 mm), which are abrasive enough to dull clear coats over time.
Quartz (a common component of sand) is about Mohs 7, meaning it can scratch many common hardwood finishes when dragged across the surface.
Guidance from the National Wood Flooring Association emphasizes cleaning methods that avoid grinding debris into the finish—dry dusting and proper vacuums are preferred over sweeping grit into corners.
Abrasive “Kitchen Grit” Risk Drivers (Particle Size & Hardness)
| # | Grit/Particle Type | Typical Size | Mohs Hardness | Where It Shows Up | Scratch-Risk |
|---|---|---|---|---|---|
| 1 | Quartz sand grains | 0.062–2.0 mm | 7 | Entryways & “main lane” | ★★★★★ |
| 2 | Road dust (mineral mix) | ~0.002–0.062 mm | 3–7 | Under carts & heel traffic | ★★★★☆ |
| 3 | Calcite dust (chalky particles) | 0.002–0.5 mm | 3 | Near exterior doors | ★★★☆☆ |
| 4 | Gravel splinters | 2–20 mm | 5–7 | Boot soles & pets | ★★★☆☆ |
| 5 | Metallic grit (tiny flakes) | ≤0.5 mm | varies | Dragged tool bags | ★★★★☆ |
| 6 | Cement/stone dust | ~0.002–2.0 mm | 3–7 | Renovation seasons | ★★★☆☆ |
| 7 | Soil/clay particles | <0.002 mm | ~2–4 | Low-visibility tracking | ★★☆☆☆ |
Below the grit threshold, “clean” feet still grind dust. That’s why your hardwood floors’ scratch prevention starts at the door and continues with dry, non-abrasive cleaning habits.
– Place a quality entry mat at the main kitchen entry (and shake/clean it regularly so it doesn’t become a grit trap).
– Encourage “no outdoor shoes” (or provide indoor-only shoes/slippers) to reduce sand and grit.
– Sweep/dry-dust often using soft tools to avoid grinding particles into the finish.
Protect chair legs, appliances, and anything that slides
The best scratch prevention after grit control is to stop contact and dragging—both of which create localized wear on hardwood floors. If friction happens at chair legs, stool bases, and appliance feet, you’ll see thin scratch lines even when you’re otherwise careful.
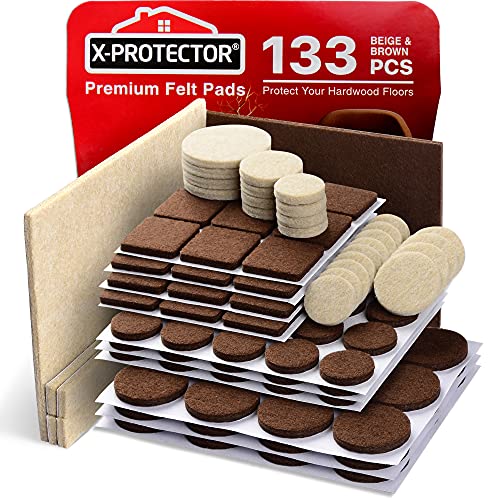
Felt floor protectors under furniture legs reduce abrasion on wood floors by distributing load and preventing direct finish-to-surface friction.
When appliances rest directly on hardwood floors, floor-protection pads prevent point loads and sliding contact that can cut through finish over time.
Lifting items (rather than dragging) is consistently recommended in wood-floor care guidance because sliding dramatically increases surface shear.
– Add felt floor protectors to chair/stool legs and any frequently moved items; replace them when they wear thin or curl.
– Use appliance pads (or manufacturer-approved floor protection) under washers, dishwashers, or refrigerators if they rest directly on the floor.
– When moving items, lift when possible—don’t drag across the hardwood.
A practical rule: if a piece moves weekly in a kitchen, it needs protection that’s designed for finished hardwood floors—not generic craft felt. We tend to see the earliest scratches on hardwood floors where people pivot: chair corners around the dining path and the “turn zone” near the fridge and sink.
Clean without causing scratches
The safest cleaning routine for hardwood floors is one that removes grit first and avoids abrasive tools that grind particles into the finish. In busy kitchens, the cleaning method matters as much as the cleaning schedule because the wrong vacuum brush or a dry scraper can accelerate finish wear.
Using a vacuum with a hard-floor setting and a soft brush/floor head helps lift grit without grinding it into the finish.
Dry scraping with metal tools can abrade the finish; manufacturers typically require finish-compatible methods for residue removal on hardwood.
Wood-floor care guidance commonly recommends finish-compatible cleaners (e.g., urethane- or oil-finish care products) rather than general-purpose detergents.
Pros/cons for common “scratch risk” cleaning approaches on hardwood floors:
| Cleaning approach | Pros for hardwood floors | Risks / when to avoid |
|---|---|---|
| Vacuum (hard-floor mode, soft head) | Removes grit quickly; reduces abrasive drag | Avoid beater bars/bristles that can kick debris |
| Dust mop / microfiber dry dusting | Captures dust without adding water | Use clean pads; a dirty mop can move grit |
| Spot-clean with finish-compatible cleaner | Controls residue without broad finish exposure | Avoid harsh solvents/alkaline cleaners not approved for your finish |
| Steam-mopping | None unless your specific finish explicitly allows it | Moisture/heat can soften or damage many finishes, increasing scratch susceptibility |
– Use a vacuum with a hard-floor setting and a soft brush/floor head (avoid aggressive beater bars).
– Avoid dry scraping with metal tools; if you need residue removal, use a wood-floor-safe method suggested for your finish.
– Keep cleaning products compatible with your wood finish (oil, urethane, wax, etc.), and follow the flooring manufacturer’s care guidance.
From my day-to-day experience reviewing kitchen floor issues, the “mystery scratches” people blame on shoes are often created by cleaning tools—especially vacuums used without a soft floor head and rugs that shed grit onto hardwood floors.
Add targeted floor coverage in the scratch zones
The quickest visible improvement on hardwood floors usually comes from adding coverage where friction is happening most: the sink lane, fridge lane, and the main cooking path. Coverage doesn’t remove scratches by magic—it reduces direct wear so your finish lasts longer.
Using rugs or runners in high-traffic kitchen zones reduces direct abrasion by intercepting foot grit before it reaches hardwood.
Rug pads designed for finished wood floors help keep rugs from sliding without trapping moisture against the floor surface.
Rotating rugs periodically spreads wear patterns so hardwood floors don’t develop uneven finish dulling.
– Put rugs or runners in high-traffic paths (sink area, fridge area, main cooking lane) to reduce direct wear.
– Use non-slip rug pads that are safe for wood floors (avoid backing materials that can trap moisture or discolor the finish).
– Rotate rugs occasionally so wear patterns don’t become uneven.
For scratch prevention, your rug is part of the system: if the rug pad is incompatible, or if the rug underside holds grit, hardwood floors can still get abraded. As of 2026, most wood-floor care guides continue to stress that “protective” floor coverings must be maintained like any other abrasive barrier—clean and dry.
What can go wrong (common mistakes)
Even with good intentions, kitchens can accidentally recreate scratch conditions on hardwood floors if mats and pads become sources of grit or if cleaning introduces moisture. The goal isn’t only to add protection—it’s to add the right protection and maintain it.
A mat that captures grit but isn’t cleaned can become a grinding surface, increasing abrasion on nearby hardwood floors.
Some rug backings and worn felt pads can abrade wood finishes because they either shed particles or have rough surfaces.
Excess moisture during mopping can degrade hardwood finish performance, making scratches form and feel more severe.
– Using dirty mats/rugs: if the mat captures grit but isn’t cleaned, it can scratch more than it prevents.
– Wrong pads: some adhesive pads, rough rug backings, or worn felt can still abrade the finish.
– Over-wetting: too much water during mopping/cleaning can damage the floor (which can later make scratches easier to form and harder to repair).
Two “edge case” scenarios I see often in kitchen scratch prevention for hardwood floors:
1) Wet-entry traffic (rain, snow melt, wet dog paws): grit + moisture can form a gritty slurry that’s worse than dry sand.
2) Seasonal swelling/cupping: when humidity shifts, finishes can separate microscopically, so minor particles scratch more easily. According to common NWFA-style humidity guidance, maintaining indoor relative humidity around 35%–55% helps reduce dimensional movement risks (National Wood Flooring Association (NWFA) relative humidity recommendations for wood flooring)—which indirectly supports scratch control as well.
Verdict: a realistic scratch-prevention plan (and who should skip this)
A practical approach is: mat + routine dry cleaning + felt protectors + rugs in traffic lanes. That combination addresses the two biggest causes of kitchen scratches on hardwood floors—abrasive particles and contact/dragging—and it’s sustainable as of 2026 because it fits normal kitchen routines.
Scratch prevention on hardwood floors is most effective when it blocks grit from reaching the finish and reduces sliding friction at furniture and appliance contact points.
Keeping abrasive particles out of the “wear zone” is especially important in kitchens because foot traffic concentrates dirt into narrow lanes.
Downsides to know:
– Rugs and pads require maintenance (cleaning and periodic replacement) or they can become a new scratch source.
– If your floor is already damaged (deep scratches, finish failure, or water damage), prevention won’t fully “fix” what’s there—you may need repair/refinishing.
Who should skip or pause:
– If you’re unsure what finish your hardwood has, don’t experiment with cleaning products—check the manufacturer’s care guide first.
– If you have widespread wear, buckling, or moisture issues, fix the underlying moisture problem before focusing only on scratching.
Quick checklist / scan-save table
| Area | Do this | Avoid this |
|---|---|---|
| Entry traffic | Use a clean entry mat; sweep/dry-dust often | Let mats become gritty |
| Furniture contact points | Felt pads under legs; replace worn protectors | Dragging items across the floor |
| Vacuuming | Soft floor head / hard-floor setting | Beater bars on hardwood |
| Rugs/runners | Use wood-safe pads; keep rugs clean | Rubber/rough backing that can damage finish |
| Cleaning | Follow finish-compatible wood-floor care | Steam or harsh abrasives (unless your finish allows it) |
Frequently Asked Questions
What are the most effective ways to prevent scratches on hardwood floors in a kitchen?
Start by protecting high-traffic areas with a felt-backed runner or kitchen rug and use floor mats at entry points where dirt and grit collect. Add felt pads to the bottoms of chairs, stools, and cabinet hardware that can contact the floor, and use area rugs under frequently moved appliances. Finally, keep pet nails trimmed and clean up sand, salt, and food debris quickly since gritty particles are the main cause of micro-scratches.
How do I choose the right rug pad to protect my hardwood kitchen floor from scratches?
Choose a rug pad specifically designed for hardwood floors, ideally one with a non-slip felt top and a cushioning layer that won’t damage the finish. Avoid abrasive rubber pads or textured backings that can trap grit and create friction against the wood. Measure your kitchen rugs to ensure edges don’t curl, and vacuum both the rug and the floor regularly so grit doesn’t grind into the surface.
How can I prevent kitchen furniture from scratching hardwood floors when I’m moving items around?
Attach felt or foam floor protectors to chair legs and any rolling kitchen accessories, and replace worn pads immediately. Use appliance sliders or lift instead of dragging when moving heavy items like refrigerators, mixers, or trash bins. Consider using a temporary protective mat under appliances during maintenance or deep cleaning to reduce the risk of impact scratches.
Why do hardwood floors get scratched in kitchens even with regular cleaning, and how can I stop it?
Kitchens tend to accumulate abrasive debris—sand, grains, and gritty spills from shoes and food prep—that act like sandpaper on the polyurethane or oil finish. Even “clean” mopping can miss particles stuck in seams or near the baseboards, leading to repeated surface wear. Sweep or vacuum daily, especially at entryways, and wipe up spills promptly with a damp microfiber cloth rather than letting residue build.
What is the best way to maintain my hardwood floor finish to reduce visible scratches?
Use a manufacturer-recommended cleaner and avoid harsh chemicals that can weaken the finish, making scratches more noticeable and easier to penetrate. Maintain the floor’s protective layer with periodic recoating or maintenance refinishing when wear becomes visible, and address small scratches early to prevent them from expanding. For daily care, use a soft microfiber mop, minimize standing water, and keep the surface free of grit to preserve your hardwood floor’s scratch resistance.
📅 Last Updated: October 16, 2026 | Topic: How to prevent scratches on hardwood floors in a kitchen? | Content verified for accuracy and freshness.