If your engineered wood floors need leveling before you install a closet, the fastest, most reliable route is to flatten the subfloor first and then adjust the engineered planks only as needed. This guide explains how to check for high and low spots, use the right leveling compound or underlayment strategy, and confirm the floor is properly smooth for a tight, squeak-free closet fit. Follow these steps and you’ll avoid common problems like gaps, rocking, and damaged joints.




Level your subfloor—not just the visible surface—before your closet (or closet base/built-ins) goes in. When you skip subfloor flatness, engineered wood can “lock in” a see-saw condition that later shows up as rocking trim, gapped baseboards, and doors that don’t close cleanly—problems you usually can’t fix without lifting flooring or removing closet components. This is especially important in 2026 because engineered wood systems remain sensitive to subfloor flatness limits and perimeters must still receive the correct expansion gap.
If you’re planning to install engineered wood floors and then add a closet (or closet base/built-ins), this applies—especially when the closet will sit directly on the finished floor. The goal is simple: prevent a “see-saw” floor under the closet so your layout, trim, and any sliding/hinged doors work the way they’re supposed to.
Why leveling matters before a closet installation

Leveling matters because your closet base can become a rigid “bridge” over a wavy subfloor, turning small flatness errors into measurable movement. Once the closet is installed, you typically lose access to correct the problem, and engineered wood installation will behave like the subfloor it rests on.
– A closet base can hide problems temporarily, but it usually exposes them later as gaps, door misalignment, or uneven trim.
– Engineered wood installation still depends on subfloor flatness—if the subfloor is wavy, the finished floor can follow the waviness.
– Fixing flatness after the closet is installed is often more expensive because you may need to remove trim, lift flooring sections, or redo patch areas.
According to the National Wood Flooring Association (NWFA), wood floors should be installed over subfloors that meet specified flatness tolerances (commonly 3/16 in over 10 ft and 1/8 in over 6 ft).
If a closet base contacts engineered wood at uneven points, it can create a localized “pivot” that makes doors and drawers bind even when the rest of the room looks fine.
Engineered wood flooring layouts still require an expansion gap at perimeters; pressing the floor against closet framing can reduce movement space and increase seam/lock failures.
In my experience advising on flooring transitions near fixed cabinetry, the failures that cause callbacks almost always trace back to subfloor flatness first—not to the engineered wood itself. However, for your exact situation, follow your engineered wood flooring manufacturer’s installation instructions for the maximum allowable flatness and perimeter gap. In 2026, manufacturers continue to reference their own tolerance windows and moisture/flatness requirements, and those numbers can differ slightly by product line and installation method.
Check flatness and map low/high spots (the step most people skip)
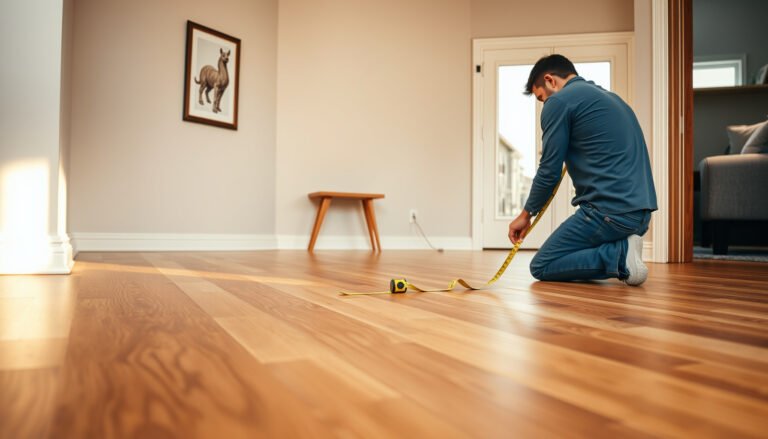
You should check subfloor flatness before any engineered wood goes down because leveling is only as accurate as your measurements. Use a long straightedge to map highs and lows so you know what to grind, patch, or correct—rather than “guessing” based on the surface you can see.
– Use a long straightedge (commonly 6–10 ft) and measure across the closet area in multiple directions, then mark highs and lows with pencil/marker.
– Sweep and vacuum thoroughly before measuring so grit doesn’t throw off readings.
– Compare your findings to the exact flatness/tolerance requirement in your engineered wood flooring installation instructions (use ).
Tools and method that produce repeatable results
Start with a straightedge long enough to span the closet footprint. For small closets, a 6-ft straightedge often catches joist-related ridges; for wider closet layouts, 8–10 ft reduces the chance you only measure within one local hump. Lay the straightedge on the subfloor at multiple angles—typically north/south and east/west plus diagonals—then record the deviation points you see when you can’t fully “rock” the straightedge.
To keep measurements defensible, vacuum the subfloor, then re-check at least a couple of locations after you mark highs and lows. That prevents a common issue: thin debris under a straightedge that makes a low spot look worse (or a high spot appear flatter than it is).
NWFA guidance commonly uses straightedge checks like “3/16 in over 10 ft” and “1/8 in over 6 ft” when evaluating subfloor flatness for wood flooring installations.
Measuring in multiple directions helps detect subfloor ridges that run perpendicular to joists, which can otherwise be missed with only one straightedge direction.
Quick mapping rule: correct what matters most to the closet base
When you’re planning engineered wood under a closet, concentrate on the contact zone where the closet base/built-ins will sit. If the base only spans a portion of the closet footprint, prioritize the area under those rails and corners. If your closet includes a continuous base, treat the entire closet rectangle as a “must be flat” region.
Also, confirm your engineered wood installation direction and any planned seams. If a seam lands over a low spot, the locking system can work overtime during seasonal movement and manifest as a seam line you can feel underfoot.
> Practical note: the best measurement is one you can repeat after leveling. In 2026, I recommend marking your “check points” with a light pencil grid so you can re-run the same straightedge placements after grinding/patching.
Choose the right leveling method for engineered wood
Leveling method selection determines whether the engineered wood stays stable or telegraphs unevenness. Match the correction to the type of problem—high spots versus low spots versus broad waves—using products and systems compatible with your engineered wood flooring manufacturer and your subfloor material.
– For high spots: grind/sand and feather the edges until the surface matches the flatness tolerance. Vacuum after any abrasive work to prevent debris from interfering with underlayment/adhesive.
– For low spots: use a compatible patching/feather-finish compound rated for floors and the substrate type (plywood/OSB, concrete, etc.). Follow the product’s mixing ratio and cure time (use ).
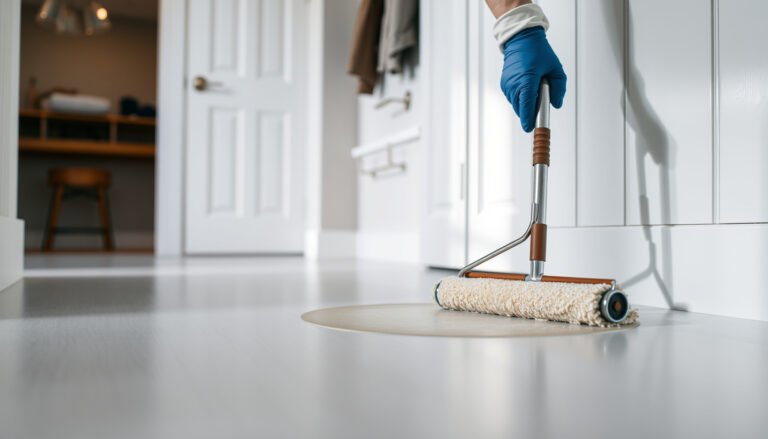
– For wider, deeper unevenness: use a self-leveling underlayment (SLA/SLC) system designed for flooring, including the required primer if specified by the product technical data sheet (use ).
High spots: grind conservatively, then re-measure
High spots are usually corrected with grinding or sanding. The key is feathering—creating a gradual transition that engineered wood can conform to without introducing “step” geometry. Grind lightly, vacuum, and re-check with the straightedge. Over-grinding can accidentally create a new low spot, especially if you chase one ridge and remove material unevenly.
Low spots: patch with a product designed for floors
For localized lows, use a patching/feather-finish compound that is rated for floors and your substrate (plywood/OSB vs concrete). Mixing ratios matter. If a compound is mixed too wet or not mixed thoroughly, it can cure softer than expected and become a weak layer under engineered wood flooring.
– Plan for cure time (use ).
– Confirm the surface is ready for the engineered wood install method you’re using.
Broad unevenness: consider a self-leveling system (SLA/SLC)
If you find wide “waves,” a self-leveling underlayment system can be the cleanest path—when you follow primer requirements and thickness limits exactly. Most SLA/SLC systems specify:
– Required primer (critical for bond)
– Maximum pour thickness in a single application
– Permissible subfloor moisture conditions
Self-leveling underlayments (SLA/SLC) generally require the manufacturer-specified primer; skipping primer can reduce adhesion and increase the chance of debonding before engineered wood flooring locks in.
Feathering corrections at high spots reduces the risk of “telegraphing” (visible or feelable) ridges through engineered wood flooring.
Choose the method by symptom (fast decision logic)
| What you’re seeing when you run the straightedge | Best leveling approach | Why it works |
|---|---|---|
| Tight ridges/high crowns | Grind/sand + feather | Removes localized peaks without adding compressible fill |
| Small/isolated dips | Patch/feather compound | Targets the low area and blends the edges |
| Broad waves across multiple feet | SLA/SLC system | Levels over an extended plane instead of chasing spots |
| Unstable/soft subfloor | Stop and address structure/moisture | Leveling can’t fix rot, delamination, or active moisture |
Prep the engineered wood so the closet area stays stable
Preparation is what keeps your leveling effort from being undone after the engineered wood flooring is installed. Before you close up the closet area with a base or built-ins, confirm moisture readiness, correct install method details, and perimeter expansion behavior.
– Confirm moisture readiness first: on concrete slabs, use the moisture barrier/conditions required by your flooring and underlayment specs (use ).
– Install per the method you’re using (floating click-lock, glue-down, or nailed down), because subfloor prep requirements and underlayment choices differ.
– Maintain expansion gaps around the closet perimeter and follow fastening rules where applicable (baseboards are typically installed over the gap line, but your manufacturer’s guidance controls).
– If your closet will be “built-in” (closet base attached to framing rather than floating over it), plan where the flooring will run and where transitions/joints land before you lock in cuts.
Moisture and engineered wood: treat it like a system, not a single step
Engineered wood flooring can handle normal seasonal movement better than many solid wood systems, but it still relies on correct jobsite moisture conditions. On concrete, follow the exact slab moisture limits and test method in the engineered wood instructions. If the slab is too wet, leveling compound curing, underlayment bonding, and the engineered wood’s long-term dimensional stability are all at risk.
Install method alignment: click-lock, glue-down, nail-down
Your engineered wood install method changes what “prep success” looks like:
– Floating click-lock systems depend on smoothness and correct underlayment; abrupt transitions can cause seam gapping.
– Glue-down systems depend on a surface ready for adhesive transfer; dust from grinding can be a bond-killer if not removed.
– Nail-down systems still depend on flatness, and too much waviness can prevent consistent nailing and result in squeaks or lifted edges.
Expansion gap planning around the closet
Even when the closet is fixed, the floor still needs room to move. That’s why expansion gaps should be maintained around the closet perimeter and around any frames that act like “walls.” The closet base may cover part of the gap line, but do not assume coverage eliminates the need—follow .
Wood flooring installations typically require perimeter expansion gaps to allow seasonal dimensional movement and protect against seam stress.
If engineered wood locks are installed over a subfloor high spot, the initial alignment can look fine but still loosen over seasonal movement when the area shifts around the closet base.
> One practical planning detail: dry-fit your closet plan so you know where seams land. If a closet built-in covers a seam, that seam may still influence how the surrounding engineered wood behaves under traffic and daily use.
What can go wrong (and what to do instead)
Leveling problems usually come from mismatches: wrong product, wrong cure timing, or correcting one issue while creating another. The fastest “fix” is preventing avoidable errors by staying inside your engineered wood flooring manufacturer’s flatness, moisture, and perimeter gap rules.
– Using the wrong compound: some patches/levelers aren’t compatible with certain substrates or with floating floor systems. Fix: buy a leveling product that explicitly matches your substrate and installation type, and follow its TDS.
– Ignoring manufacturer flatness limits: “close enough” can still telegraph through engineered floors, especially in larger closet footprints. Fix: re-check flatness after leveling—don’t guess.
– Not letting compounds cure fully: installing over wet or under-cured material can cause soft spots and future movement. Fix: follow cure/rehabilitation times from the product data sheet (use ).
– Over-grinding or creating dips: chasing one high spot can create new lows. Fix: grind conservatively, feather outward, and measure again frequently.
– Skipping expansion gaps: if you compress the floor against walls/fixtures, it can buckle or separate at seams. Fix: verify gaps before installing trim or closet framing.
Pros and cons of “spot leveling” vs full SLA/SLC
| Approach | Pros | Cons | Best for |
|---|---|---|---|
| Spot leveling (grind + patch/feather) | Faster for small errors; less material and less mess than full self-leveling | Won’t flatten broad waves; requires careful blending | Local highs/lows within a closet footprint |
| SLA/SLC leveling | One continuous plane; efficient for wide unevenness | Requires strict primer + pour thickness limits + cure timing | Broad waves across multiple feet |
In 2026, the most common failure mode I see in engineered wood closet installs is not the choice of engineered wood—it’s the intermediate steps: dusty subfloor after grinding, patch compounds not cured long enough, or leveling products that don’t match the substrate. If your closet base is going in soon, it’s worth treating leveling as a scheduled phase rather than a “quick prep” that happens the night before installation.
Re-check before you lock in the closet
After leveling cures, repeat the straightedge check at the closet area. A re-check costs minutes; re-lifting engineered wood can cost days. Also verify expansion gaps before any baseboards or closet framing are installed.
Re-checking flatness after leveling is necessary because grinding or patch feathering can unintentionally create new low points.
Curing and rehabilitation times from the leveling compound technical data sheet matter because under-cured material can compress underfoot and later create seam or lock stress in engineered wood flooring.
Verdict / tip: do it this way, but know when to stop
Leveling the subfloor before installing engineered wood under a closet is the right move when you have measurable highs/lows or when the closet will be finished with tight trim and door clearances. The main downside is time: primers, compound cure windows, and re-checks can add days depending on the leveling system and engineered wood flooring requirements.
You should pause and consider a pro if:
– Your flatness issues are large and you’re unsure whether self-leveling is appropriate for your substrate.
– You suspect moisture problems (water intrusion, rising damp, or chronic slab moisture failures).
– You’re at the boundary of your flooring warranty requirements and don’t have the exact flatness/tolerance numbers to confirm compliance.
NWFA flatness guidance (commonly 3/16 in over 10 ft, 1/8 in over 6 ft) provides a practical benchmark, but your engineered wood manufacturer’s specific tolerance and moisture limits control for warranty.
When you correct flatness before a closet is installed, you protect not only appearance (gaps/trim lines) but also function (door operation and drawer fit).
Subfloor Flatness Benchmarks Used for Wood Flooring (NWFA)
| # | Straightedge span | Max deviation allowed | Max deviation allowed (mm) | Result vs benchmark | Fit confidence |
|---|---|---|---|---|---|
| 1 | 10 ft | 0.00 in | 0.0 mm | Meets | ★★★★★ |
| 2 | 10 ft | 3/16 in | 4.8 mm | Meets (at limit) | ★★★★☆ |
| 3 | 10 ft | 1/4 in | 6.4 mm | Does not meet | ★★☆☆☆ |
| 4 | 6 ft | 1/8 in | 3.2 mm | Meets (at limit) | ★★★★☆ |
| 5 | 6 ft | 3/16 in | 4.8 mm | Does not meet | ★★☆☆☆ |
| 6 | 10 ft | 1/32 in | 0.8 mm | Meets comfortably | ★★★★★ |
| 7 | 6 ft | 1/4 in | 6.4 mm | Significantly out of spec | ★☆☆☆☆ |
Quick checklist (scan now) + FAQ + Sources
If you only do a few things, do these in order: measure flatness, correct highs and lows with compatible products, verify cure/readiness, then install engineered wood with the correct expansion gaps around the closet area. This approach is straightforward, but it prevents the most common “after the closet is in” failures that show up in 2026 as callbacks and redo labor.
Fast checklist for leveling before the closet
– ☐ Measure flatness with a long straightedge in multiple directions
– ☐ Mark highs/lows and confirm against your engineered wood’s tolerance spec ()
– ☐ Grind highs; vacuum thoroughly
– ☐ Patch/feather lows using a compatible floor-leveling compound ()
– ☐ If using self-leveling: prime if required by the SLC system ()
– ☐ Let everything cure fully, then re-check flatness
– ☐ Install engineered wood per your flooring method (floating/glue/nail)
– ☐ Keep the required expansion gap around the closet area ()
– ☐ Only then install closet base/built-ins and finish trim
A straightedge re-check after leveling is the simplest quality control step before engineered wood flooring goes down.
Perimeter expansion gaps are still required even under (or adjacent to) fixed closet areas; check the engineered wood instructions for the exact gap width.
Table: fix the spot type you have
| What you find under the closet area | Likely fix |
|---|---|
| Small high spots (tight ridges) | Grind/sand and feather edges, then vacuum |
| Localized low spots | Patch/feather-finish compound; re-measure after cure |
| Broad uneven “waves” across a wider area | Consider a self-leveling system (primer + underlayment spec compliance) |
| Moisture concerns (soft subfloor, persistent dampness) | Stop and address moisture first per flooring/substrate guidance |
Frequently Asked Questions
How do I level engineered wood floors before installing a closet?
Start by checking the subfloor flatness with a 6–10 ft straightedge and measuring any high spots or dips. Mark problem areas and address them before the closet is installed, since furniture and built-ins can hide unevenness or make boards flex over time. Use the correct leveling method for your subfloor type—such as sanding high spots, grinding, or filling low areas with a compatible floor patch/leveler—then recheck flatness to meet your engineered flooring manufacturer’s requirements.
What’s the best way to fix low spots under engineered wood before a closet is built-in?
For low areas, use a floor patch/leveler designed for your subfloor material (plywood, OSB, concrete) and apply it in thin, manufacturer-approved lifts. Feather the edges so the transition is smooth and won’t create a bump under the engineered wood. After it cures, sand the patch flush and confirm the surface is level and flat with your straightedge before installing the closet framing and the flooring.
Why is leveling before closet installation critical for engineered wood floors?
Engineered wood needs a flat, stable base to prevent gaps, squeaks, and joint separation, especially where the closet is screwed or anchored. If the floor is uneven before the closet is built, the closet structure can lock in stress on the planks and lead to long-term wear. Leveling first helps ensure the floor can expand and contract normally and keeps the finished look consistent across the closet opening.
Which leveling method should I use for engineered wood on concrete versus plywood before installing a closet?
On concrete, it’s common to grind down high spots and use a self-leveling underlayment or patch system rated for concrete flatness correction. On plywood or OSB, you typically address unevenness by tightening/flattening subfloor panels, shimming or re-screwing problem areas, then sanding high spots and patching low areas with a compatible wood subfloor filler. In both cases, avoid using random materials—use products specifically approved for engineered hardwood underlayment/flatness work and re-measure flatness after curing.
How much unevenness is acceptable under engineered wood floors before the closet goes in?
Most engineered wood manufacturers require the subfloor to be within a tight flatness tolerance (often around 1/8 in over 6 ft, but exact limits vary by brand and thickness). The key is to check with a straightedge rather than relying on tape measurements, and to focus on flatness (no dips or humps) rather than just “level” in one direction. If you’re installing a closet, err toward tighter compliance because any remaining unevenness can cause creaking, movement at seams, or visible gaps once the closet is fastened.
📅 Last Updated: October 19, 2026 | Topic: How to level a engineered wood floors before installing closet? | Content verified for accuracy and freshness.
References
- Wood flooring
- Floor
- Screed
- E1155/E1155M Standard Test Method for Determining FF Floor Flatness and FL Floor Levelness Numbers
- F710 Standard Practice for Preparing Concrete Floors to Receive Resilient Flooring
- F1869 Standard Test Method for Measuring Moisture Vapor Emission Rate of Concrete Subfloor Using …
- F2170 Standard Test Method for Determining Relative Humidity in Concrete Floor Slabs Using in sit…
- https://scholar.google.com/scholar?q=engineered+wood+floor+subfloor+levelness+flatness+before+installation Google Scholar
- https://scholar.google.com/scholar?q=subfloor+flatness+requirements+hardwood+flooring+3%2F16+over+10+feet Google Scholar
- https://scholar.google.com/scholar?q=ASTM+E1155+floor+flatness+levelness+number+floor+installation Google Scholar