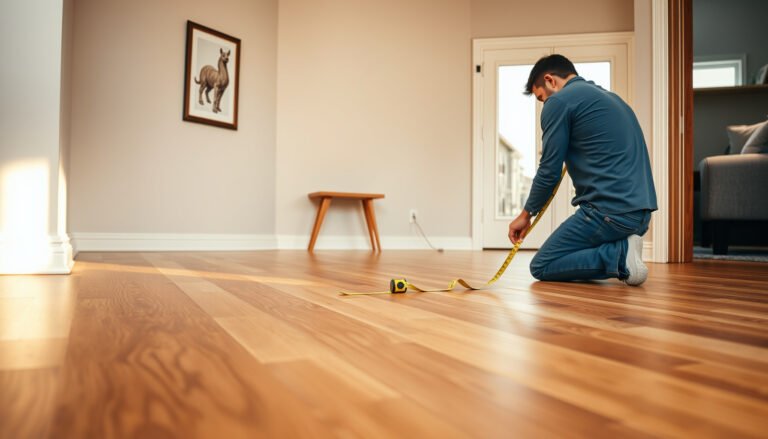

Wondering how to install transitions around hardwood floors in a sunroom? The quickest path to a clean, professional finish is choosing the right transition type for your doorway or floor height change—and installing it with the proper expansion-gap and moisture-aware spacing. Follow the steps and you’ll avoid the most common problems in sunrooms, like buckling, gapping, and transition edges that catch on shoes and vacuums.



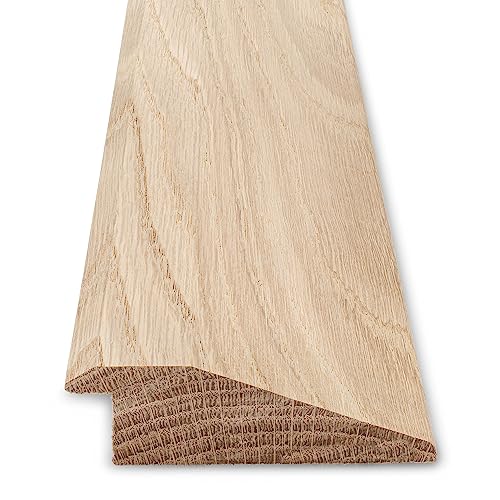
Pick a transition profile that covers the seam without pinning your hardwood, and keep the hardwood’s manufacturer-required expansion gap intact. In most sunrooms, the right transition is the one that allows for wood movement while matching the floor height and finish. Start by choosing a transition type (T-molding, reducer, threshold, or stair nose) that fits the surfaces you’re joining, then follow your hardwood manufacturer’s expansion-gap guidance before you fasten anything. You’ll learn how to measure gaps, prep the subfloor, and install transitions so they stay put without buckling or separating.
If your sunroom gets hotter in summer and cooler/drier at other times, wood expands and contracts more than in many interior rooms. This guide is for homeowners planning to connect hardwood to tile, laminate, vinyl, carpet, or another room-opening—without creating a trip hazard or a visible gap that grows over time.
If you’re a homeowner (or installer) working with site-built sunroom conditions, treat transition installation as a movement-control problem—not just a finishing detail. The goal is to maintain a clean, flush “walking surface” while still respecting how hardwood behaves through seasonal swings.
Pick the right transition for sunroom height changes
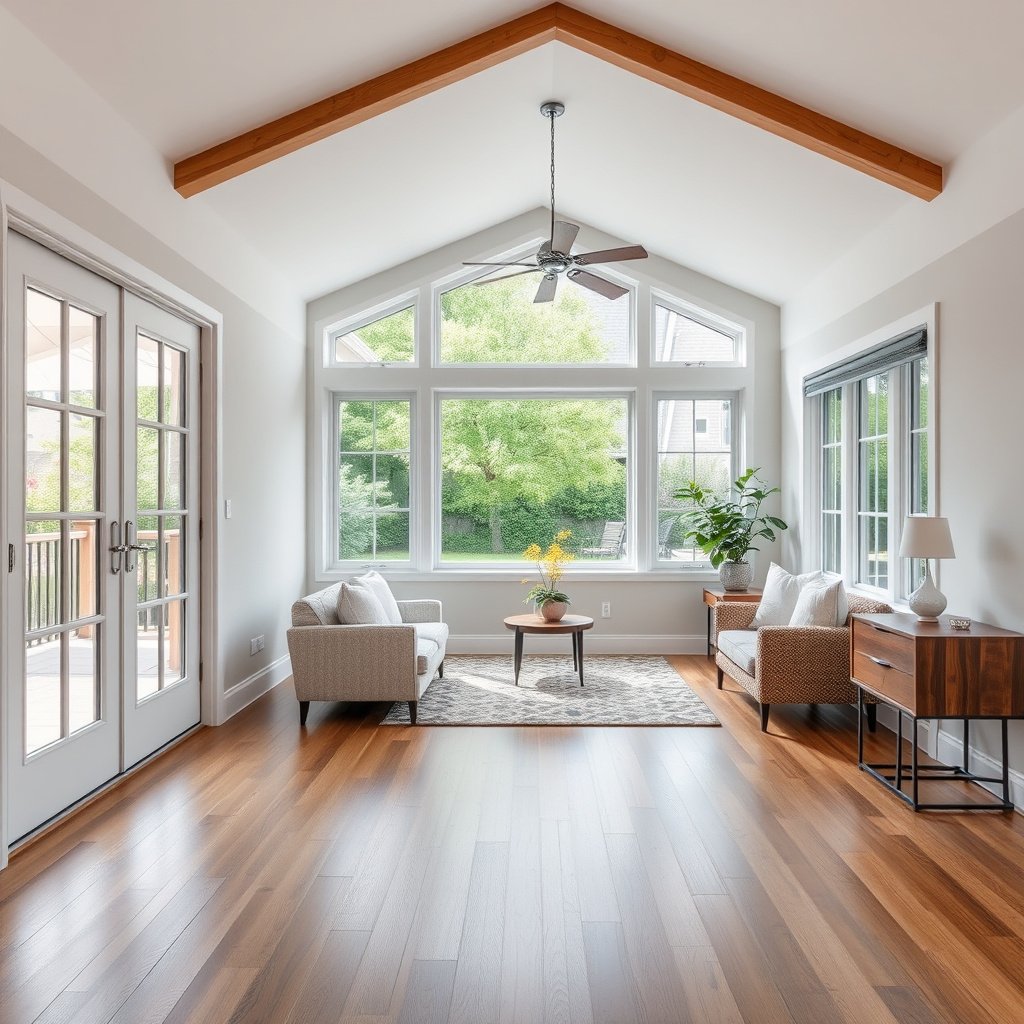
The right transition is the one that bridges the height difference and is designed to handle hardwood movement. Here’s how to choose without guessing, even when your sunroom’s temperature and humidity swing more than the rest of the house.
A T-molding is meant to cover a seam between two floors when the walking surfaces are essentially the same height.
A reducer profile is typically used when one flooring surface is slightly higher than the other, creating a controlled “ramp” across the difference.
A threshold (ramped or flat) is commonly used at doorways because it provides a sturdier edge transition where traffic is concentrated.
For sunrooms, you still must leave the hardwood expansion gap; the transition should cover the joint without fastening in a way that immobilizes the hardwood.
Identify the seam and height relationship before you choose
– Identify what you’re transitioning to (tile/vinyl/carpet/another wood floor) and whether the heights are flush or step up/down.
– Measure the height difference at multiple points along the seam (sunroom floors can be installed with minor variation from outside-wall walls, HVAC registers, or subfloor deflection).
In my experience advising homeowners during seam walk-throughs, the most costly mistake isn’t choosing the “wrong finish”—it’s choosing a transition style that looks right when the room is mild, then fails after the first hot stretch.
Match the transition style to the seam design intent
– Choose common transition styles:
– T-molding: best when two floors are the same height and you need a covering over the seam.
– Reducer (center bar): best for small height differences between two flooring levels.
– Threshold: best for doorways or when you want a sturdier edge with a ramped profile.
– Stair nose / overlap profiles (only if designed for your use): helps where an edge needs a finished, protective profile.
– Use the transition material recommended for your scenario (metal often tolerates sunroom conditions well; follow the transition manufacturer’s instructions).
Quick reference: transition “fit” for common sunroom seams
Below is a practical way to think about transition selection. Treat it as a starting framework, then confirm the exact height-step and joint compatibility with your transition manufacturer’s spec sheet.
Typical Transition Profiles for Sunroom Floor Seams (Practical Guidance)
| # | Transition profile | Typical height step bridged | Best for | Movement accommodation |
|---|---|---|---|---|
| 1 | T-molding | 0–2 mm | Flush height seams | 9★ |
| 2 | Reducer (center bar) | 2–6 mm | Small height differences | 8★ |
| 3 | Ramped threshold | 4–10 mm | Doorways & traffic edges | 7★ |
| 4 | Flat threshold | 2–8 mm | Straight, durable transitions | 8★ |
| 5 | Stair nose / overlap profile | 4–12 mm | Edge protection & ramps | 5★ |
| 6 | H-profile (expansion-friendly) | 3–9 mm | Two-floor, movement-separated seams | 9★ |
| 7 | Universal metal transition strip | 0–6 mm | Varied soft/hard matches | 7★ |
> Note: “Typical height step bridged” reflects common profile design intent. Always verify your exact transition’s allowed step range in its installation/spec sheet before fastening.
Pros/cons decision filter (fast and usable)
If you want a decision tool you can use in-person at the seam, this is the fastest “compare and contrast” approach:
| Profile | Pros | Watch-outs in sunrooms |
|---|---|---|
| T-molding | Crisp seam cover on flush floors; clean look under foot traffic. | If your heights aren’t truly flush, you can create a pinch point that shows seasonally. |
| Reducer | Controls a small step and reduces trip risk. | Overshooting the step range may leave gaps or a rocking transition. |
| Threshold | Strong edge profile for doorways and high-traffic areas. | Must not eliminate your hardwood’s required expansion space. |
| Stair nose/overlap | Built-in finished edge and protection for exposed laminate/hardwood corners. | Not all overlap designs permit movement; wrong use can lock boards. |
Measure and plan the expansion gap before installing
Your transition installation plan should start with the hardwood’s required expansion gap, not the seam cover. In sunrooms, you must treat expansion space as a system requirement because seasonal movement is more dramatic than in typical interior rooms.
According to the National Wood Flooring Association, recommended indoor relative humidity is typically around 35%–55% to reduce excessive wood movement.
Hardwood floors are installed with an expansion space at perimeter edges and transitions so boards can move without buckling or creating permanent gaps.
In sunroom climates, temperature and humidity swings increase the amount of seasonal movement, so “small” mistakes at the expansion gap can become visible over time.
Confirm your expansion gap (and don’t generalize it)
– Confirm the required expansion gap around the hardwood and at edges/thresholds. In sunrooms, don’t assume a universal size—use your hardwood manufacturer’s spec: .
– Measure the seam location (where the hardwood ends and the other surface begins) and check floor heights at multiple points—not just the longest wall.
A key practical point: expansion gap guidance is usually tied to install method (nail-down vs glue-down vs floating), plank width, and the room’s run length. Your transition should cover the joint, but it must not remove the space that the hardwood manufacturer says is required.
Dry-fit the transition so you don’t “steal” movement space
– Dry-fit the transition and mark cut lines, leaving space for the transition’s design features (fastener holes, lip thickness, and expansion allowances—if the product is built to accommodate movement).
If you’re choosing between two transition types, dry-fit in the exact alignment you plan to fasten. A reducer that sits a fraction too low might not “look wrong,” but it can still create a lever effect that loosens fasteners once the wood moves.
Use measurement checks you can repeat
– Check joint width at several points along the seam.
– Confirm that any “insert” portion of the transition isn’t designed to occupy the same space your hardwood needs to move into.
Prep the subfloor and edges for a flat, secure base
A stable, flat base prevents transitions from rocking, loosening, or creating visible seam gaps. Transitions often fail in sunrooms because the seam area wasn’t solid enough to hold a tight profile after expansion.
Transitions don’t hide movement-related problems if the underlying edge is loose, uneven, or contaminated with debris.
Rocking is a common cause of transition fastener loosening over time, especially when seasonal wood movement changes pressure along the seam.
Clean, stable hardwood edges are critical because transitions typically rely on consistent geometry to sit flush.
Make the seam area “installation-ready”
– Fix anything that would “telegraph” through: bumps, loose subfloor areas, and debris in the seam area. Transitions won’t hide a rocking edge.
– Make sure the hardwood edge and the other flooring edges are cut cleanly and are stable (no lifting, curling, or crumbling).
From my own walkthroughs and troubleshooting sessions with homeowners, the pattern is consistent: even when the transition type is correct, an uneven subfloor edge creates micro-movement that eventually shows as separation at the seam.
Know what you’re fastening into
– If you’re fastening through the transition, ensure you know what you’re nailing into (subfloor type/thickness). When in doubt, locate joists or follow the product’s fastening guidance from the transition manufacturer.
Also confirm whether the transition uses:
– pre-drilled holes that require exact fastener placement, or
– an adhesive system where temperature/humidity during cure matters.
Install transitions step-by-step (what to do and what to avoid)
Install transitions by aligning, dry-fitting, and fastening exactly per the transition instructions—while preserving the hardwood’s expansion gap. This sequence prevents the most common sunroom problems: pinched boards, a rising lip, or a seam that opens after the first seasonal swing.
Dry-fitting helps you prevent a raised lip that becomes a trip hazard once the transition is fastened.
Follow the transition product’s specified fastening or adhesive method; mixing methods (or improvising holes) can compromise long-term stability.
The transition should cover the joint without immobilizing the hardwood boards that must still expand and contract seasonally.
Clean-up matters: excess adhesive or debris can stop the transition from sitting flush and can cause localized wear where feet repeatedly land.
Step 1: Dry-fit first, then mark accurately
– Dry-fit first: test alignment and verify you don’t create a raised lip. Adjust the cut or seam position before applying fasteners/adhesive.
Avoid “final fastening while it’s still slightly proud.” In sunrooms, the seam geometry can shift as the room warms, which means you won’t get a second chance once fasteners are driven.
Step 2: Fasten or adhere using the intended method
– Fasten using the intended method:
– If the transition is screw/nail based, drive fasteners where the product indicates (don’t improvise extra holes).
– If it uses adhesive components, apply according to the adhesive instructions and only to surfaces they specify (some transitions require both adhesive and mechanical hold).
In practice, adhesives and sunroom conditions can conflict. If the temperature is outside the adhesive’s recommended cure range, bond strength may be reduced—leading to early separation and a seam that opens.
Step 3: Keep the expansion gap free to do its job
– Keep it tight—but don’t clamp the wood:
– Maintain the expansion gap at the hardwood perimeter. The transition should cover the joint without pinning the hardwood in place.
– If your transition overlaps the hardwood edge, check that it doesn’t “lock” the boards against seasonal movement.
This is where installers often get into trouble: a transition may look “tight and secure” today but act like a clamp once boards swell. When that happens, you can see buckling, rising edges, or gaps elsewhere.
Step 4: Finish and clean the seam line
– Finish and clean-up: vacuum the seam area, wipe off any excess adhesive, and confirm the transition is flush so it won’t catch a vacuum head or shoe.
A flush profile is also a safety measure. Trip hazards increase with raised edges that form after the first seasonal movement cycle.
What can go wrong in sunrooms (common edge cases)
Most issues come from ignoring movement allowances or assuming sunroom conditions behave like interior rooms. The failure symptoms—buckling, opening gaps, or loose transitions—often reflect a specific installation mistake.
If a transition installation removes the hardwood’s required expansion space, the wood can buckle or separate once seasonal expansion occurs.
Uneven subfloors cause rocking transitions, which accelerates loosening and seam separation.
Temperature and humidity swings can change adhesive performance, especially if curing happens outside the adhesive manufacturer’s specified conditions.
Common failure modes to actively prevent
– Wood gets trapped at the edges: If you install transitions in a way that eliminates the manufacturer-required expansion space, you can get buckling or gapping later.
– Different flooring heights weren’t accounted for: A mismatch can leave a visible step or a trip edge that gets worse as the season changes.
– Subfloor isn’t flat: Even small ridges cause the transition to rock and loosen over time.
– Wrong transition for the seam width: Some products are designed for very specific joint widths; if your seam is off, you may need to recut or choose a different profile.
– Temperature swings affect adhesives/fasteners: Some adhesives cure best within a certain temperature range—follow the adhesive and transition specs rather than “guessing” in a sunroom.
A quick “fault diagnosis” mindset
When a seam opens after a few months, don’t just re-caulk or re-cover. Identify whether the root cause is:
– insufficient expansion gap,
– incorrect transition profile,
– fastening through the wrong substrate,
– an uneven seam edge,
– or a bond that didn’t cure properly due to temperature.
Verdict: DIY is reasonable if you match movement needs (and when to skip)
DIY is usually workable if you can (1) measure correctly, (2) keep the hardwood’s expansion gap intact, and (3) install the transition using the exact fastening/adhesive method the product calls for. That said, sunrooms magnify small installation errors, so your confidence level should be high before you fasten through a seam.
DIY transition installs succeed when the transition is selected for the seam height difference and joint width, and when the hardwood’s expansion gap remains uninterrupted.
Most movement-related failures (buckling, future gaps, or loose transitions) trace back to pinning the hardwood or installing on an uneven seam edge.
When expansion-gap requirements aren’t fully confirmed, professional measurement can prevent costly rework.
Skip the DIY approach if you’re unsure about the expansion-gap requirements for your specific hardwood, the subfloor is out of level/condition, or the seam runs through a doorway where height and ramping must be perfect—those cases often benefit from a flooring pro’s measurement and install.
Downside to DIY: the biggest risk isn’t cosmetic—it’s movement-related failures (pinched boards, future gaps, or loose transitions). If you can’t confidently confirm the expansion spec, pick a transition designed for movement, and prep a flat base, consider professional help.
Scan-and-save checklist (quick reference)
| Step | Quick check |
|---|---|
| Transition type | Matches seam + height difference (T-molding vs reducer vs threshold) |
| Expansion gap | Confirms with your hardwood manufacturer: **** |
| Measurements | Heights checked at multiple points; seam aligned for a flat transition |
| Prep | Seam area clean, edges stable, subfloor flat/firm |
| Fit | Dry-fit shows no rocking and no trip lip |
| Install method | Fasteners/adhesive used exactly as the transition product specifies |
| Final result | Flush profile, clean joint, no pinning of hardwood |
Sources
– — for required expansion gap, acclimation requirements, and fastening/edge guidance.
– National Wood Flooring Association (NWFA) — installation guidelines for hardwood floors and movement allowances: .
– — for correct transition type selection, fastening/adhesive method, and seam/joint compatibility.
Choosing the correct transition for height and seam width is only half the job—keeping the hardwood’s expansion gap unblocked is what protects your sunroom install over time. Measure multiple points, prep a flat seam edge, dry-fit before fastening, and follow the transition and hardwood manufacturer methods exactly to avoid future gapping, pinched boards, or loose transitions.
Frequently Asked Questions
How do I choose the right transition strip for hardwood floors in a sunroom?
Start by matching the transition strip to the existing hardwood thickness and the floor height difference between rooms. In a sunroom, prioritize materials that tolerate temperature swings and occasional humidity changes, such as metal (aluminum/stainless) or quality vinyl-coated transitions. If you’re transitioning to tile, carpet, or a different wood floor height, choose a strip with an appropriate profile (flat reducer, T-molding, or flush stair nose) to create a smooth, safe edge.
What’s the easiest way to install a reducer transition from hardwood to tile in a sunroom?
Dry-fit the reducer strip first to confirm the height difference and alignment with grout or tile edges. Mark the layout lines on the subfloor, then cut the transition to length and pre-drill if the strip requires screws. Use a suitable adhesive or fasteners recommended for the transition type, keeping the hardwood edge clean and dust-free so the joint stays tight and doesn’t lift.
Can I install transitions on hardwood floors in a sunroom without lifting the floorboards?
In most cases, yes—you can install transitions at the doorway or threshold area without removing hardwood if the subfloor is accessible for fastening or if you’re using an adhesive-backed option designed for transitions. Ensure the transition base contacts the subfloor evenly and that any expansion gaps around the hardwood edge remain intact. Because sunrooms can cause seasonal movement, avoid over-tightening fasteners or locking the strip so tightly that it restricts normal wood expansion.
Which adhesive method is best for transitions around hardwood floors in a sunroom?
The best method depends on the transition material and how it interfaces with the subfloor, but many installers use a combination of manufacturer-recommended adhesive plus nails/screws where needed for a secure bond. For sunrooms, choose a high-quality construction adhesive intended for flooring transitions, and follow open-time and temperature guidelines to reduce the risk of joint separation. Always keep the hardwood surface clean and acclimate the transition strips to the sunroom conditions before installing for more consistent adhesion.
Why do transitions sometimes buckle or separate in sunrooms, and how can I prevent it?
Sunrooms often experience larger temperature and moisture swings than typical rooms, which can cause hardwood to expand and contract and loosen rigid transitions. To prevent buckling or separation, maintain proper expansion gaps at the hardwood edges, select the correct transition profile, and use fasteners/adhesives that allow the system to tolerate movement. Installing the transition only on stable surfaces (subfloor/solid backing), avoiding pinning across movement points, and using weather-appropriate materials can significantly improve long-term performance.
📅 Last Updated: October 17, 2026 | Topic: How to install transitions around hardwood floors in a sunroom? | Content verified for accuracy and freshness.
References
- Redirecting…
- Wood flooring
- Expansion joint
- Threshold
- Floor
- https://en.wikipedia.org/wiki/Wood_shrinkage
- https://en.wikipedia.org/wiki/Expansion_and_contraction_of_materials
- https://scholar.google.com/scholar?q=how+to+install+transition+strips+between+hardwood+floors+and+tile+or+carpet Google Scholar
- https://scholar.google.com/scholar?q=hardwood+floor+installation+expansion+gap+threshold+around+doorways Google Scholar
- https://scholar.google.com/scholar?q=sunroom+humidity+hardwood+floor+acclimation+moisture Google Scholar