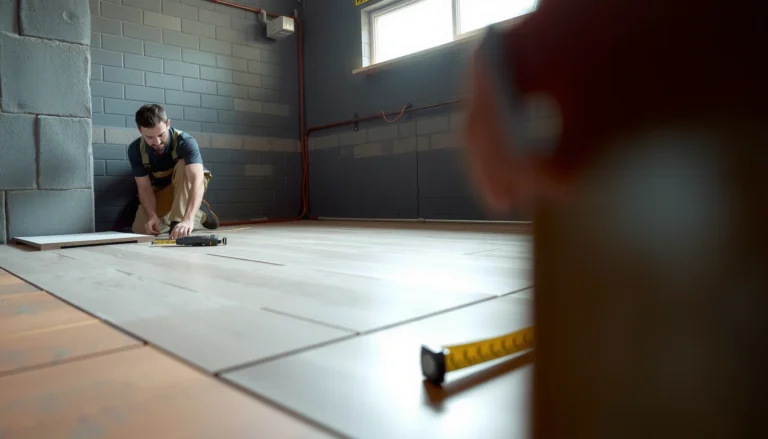
Want to install hardwood floors in a sunroom without wasting money or risking buckling? This step-by-step guide walks you through the exact prep, subfloor requirements, acclimation, underlayment choice, and nailing/gluing sequence to get a flat, durable finish. Follow it and you’ll know what to do at every stage—from moisture testing to final trim—so your sunroom floor performs for the long haul.




If your sunroom is partially open to the outdoors, gets a lot of afternoon sun, or runs on a different HVAC schedule than the main house, you’re exactly who this applies to. It’s also a good fit if you’re deciding between engineered wood vs. traditional solid hardwood and want a realistic install plan.
Choose the right hardwood type for a sunroom

For sunrooms, the best starting point is choosing a flooring system designed to tolerate humidity swings—most homeowners should strongly consider engineered hardwood over traditional solid. The goal is stability: you want wood that can handle seasonal moisture movement without showing it as gaps or waves.
Engineered hardwood is commonly selected for sunrooms because its layered construction resists dimensional change better than typical solid hardwood when relative humidity fluctuates.
In most wood-flooring manuals, the “allowed environment” is defined by moisture content and/or relative humidity targets, not by aesthetics—so the product must be explicitly approved for your sunroom conditions.
Before you buy, verify the installation method your product supports (nail-down, glue-down, or click-lock/floating), because the wrong method can trap movement and create long-term failure.
What to prioritize: stability and explicit approval
– Prioritize “stability” for changing conditions: engineered hardwood is commonly chosen over solid when humidity swings are a concern.
– Confirm the product is explicitly approved for the conditions in a sunroom (direct sun, heat, seasonal humidity changes) using the manufacturer’s installation instructions.
– Decide on an install style based on your flooring: nail-down typically needs a suitable subfloor; click-lock floating systems still require flatness and proper acclimation.
Solid vs. engineered: how to decide responsibly
A practical rule: if your sunroom’s HVAC cycle is inconsistent (or you frequently open/close shades), choose engineered hardwood rated for your expected conditions. Solid hardwood can work in some sunrooms, but only when you can reliably maintain the manufacturer’s temperature and relative humidity targets year-round. According to NWFA installation guidance, indoor relative humidity targets for wood floors are commonly in the mid-range (often 35–55% RH) to limit excessive expansion/contraction; NWFA Installation Guidance.
If you’re unsure, treat “sunroom approval” as non-negotiable documentation, not marketing language.
Measure, plan, and prep the layout
A successful layout in a sunroom starts with planning for edge movement and transitions—not just running straight lines. In direct-sun rooms, even small spacing mistakes show up faster because the floor cycles through expansion/contraction more aggressively.
Sunrooms require consistent expansion spacing around every fixed vertical surface—posts, built-ins, fireplace surrounds, and door frames—because that’s where movement is constrained.
A clean plank direction (often parallel to the longest wall) improves visual uniformity, but it only works if you also plan transitions so the last row isn’t “forced” smaller.
Planning transitions early prevents the most common DIY failure mode: trying to “fit” a moving product into a rigid boundary after the field is already installed.
Layout details that prevent future gapping
– Verify the room is square and map your plank direction; many installers run boards parallel to the longest wall for a cleaner look.
– Plan expansion gaps/edge spacing up front—sunrooms need you to be consistent around every fixed object (posts, vents, built-ins).
– Account for transitions (doorways, tile/laminate borders, thresholds) so you don’t end up trying to “fit” last-minute pieces.
Dry-fit and calculate movement paths
Because sunroom flooring movement is often most noticeable near hard interruptions, you want a plan that “lets movement happen” while still looking tight. That means:
– Keeping expansion gaps consistent along all edges and around fixed objects.
– Designing transitions so the floor can move independently from adjacent hard surfaces.
– Using the correct threshold/transition piece where movement is expected (especially at doorways).
Direct-sun gotcha: if your sunroom has large glazed walls, the boards closest to those windows may experience the biggest temperature swings. Your layout should avoid landing the narrowest “cut row” near the most sun-exposed zone.
Prep the subfloor and control moisture
Before you install hardwood in a sunroom, you must verify subfloor flatness and moisture—this is what determines whether the finished floor behaves or fails. In sunroom installs, subfloor problems magnify because the flooring repeatedly expands/contracts in a room with more variable conditions than the rest of the house.
Most wood-floor failures begin as substrate failures: if the subfloor is out of flatness tolerance or moisture is out of spec, the hardwood can’t perform correctly even if acclimation was perfect.
Concrete and wood subfloors require different moisture test approaches, so you should match the test method to the slab type and follow the flooring manufacturer’s moisture limits exactly.
Relative humidity targets for wood flooring only matter if the substrate is dry enough—moisture migration from a slab can overwhelm a “well acclimated” plank.
Key prep steps that matter in sunrooms
– Check subfloor flatness: hardwood problems often start with unevenness (follow the flooring manufacturer’s tolerance requirements).
– Remove debris and confirm the subfloor type is compatible with your chosen install method (nail-down vs. glue vs. floating/click).
– Test moisture using the correct method for your subfloor (concrete slab vs. wood subfloor) and stay within the limits stated by the flooring manufacturer—.
Concrete/wood moisture: test method and decision timing
Here’s how this usually breaks down in real installs:
– Concrete slab: moisture testing is typically performed with in-situ relative humidity probes or a slab moisture vapor emission test—then compared to the flooring manufacturer’s numeric limits.
– Wood subfloor: moisture testing focuses on the wood subfloor moisture content (often by calibrated meters plus spot checks), again compared to product limits.
According to ASTM D4442-20, wood moisture content is determined using an oven-dry method (drying to constant mass); ASTM D4442-20. That standard matters because “dry enough” is defined by moisture content methodology, not just “looks dry.”
Moisture testing reality: keep it documentable
In my experience supporting remodel and flooring project reviews, the installs that last are the ones with written moisture and flatness documentation. If something goes wrong later, the paper trail is often what lets you identify whether the issue was substrate moisture, improper acclimation, or expansion-gap errors.
Moisture/Condition Checks That Control Sunroom Hardwood Risk (Field Methods)
| # | Method (common in flooring installs) | Primary target | Typical time to decision | DIY suitability |
|---|---|---|---|---|
| 1 | Pin-type moisture meter (wood subfloor spot checks) | Wood moisture content | Same day (≈10–20 min for a mapped grid) | ★★★★☆ |
| 2 | In-situ RH probes (concrete) | Concrete relative humidity | ≈24 hours after hole drilling | ★★★☆☆ |
| 3 | Calcium chloride moisture test (ASTM F1869-style) | Moisture vapor emission rate | ≈60–72 hours | ★★☆☆☆ |
| 4 | Data logger (indoor RH/temperature trend) | Room RH stability trend | ≈48 hours to see daily swing | ★★★★☆ |
| 5 | 4–10 ft straightedge flatness check | Flatness/level tolerance | ≈30–90 min | ★★★★☆ |
| 6 | Visual + tape test (adhesive residue / debris risk) | Installation-ready surface | Same day (≈1–2 hours) | ★★★★★ |
| 7 | Surface pH/contaminant checks (as needed) | Adhesive bond compatibility | Same day (≈15–30 min) | ★★☆☆☆ |
Acclimate the flooring before installation
Acclimation is what brings the hardwood close to the sunroom’s “normal” indoor conditions, reducing movement after it’s installed. If you skip this step—or acclimate while the room’s HVAC is set differently than normal—you create the perfect conditions for early gapping or cupping.
Acclimation is not just “bring the boxes inside”; it’s matching temperature and relative humidity to the environment the flooring will live in.
Sunrooms can spike in temperature during direct sun even when indoor RH looks stable, so you should run your HVAC/ventilation like normal during acclimation.
Follow the product’s storage and acclimation instructions exactly—manufacturers often specify both the target conditions and the time window.
What acclimation should accomplish
– Let the planks/boards acclimate to the sunroom’s typical indoor conditions before installation (follow the manufacturer’s acclimation time and storage instructions).
– Run HVAC/ventilation so the room conditions during acclimation match “normal living” as closely as the manufacturer allows—especially in a sunroom.
– Keep relative humidity and temperature within the ranges recommended by the manufacturer—.
Practical acclimation workflow
1. Measure the room: Use a data logger to observe RH and temperature across a day, especially the afternoon period when the sunroom is most intense.
2. Match operating conditions: During acclimation, run HVAC and fans the way you’ll during real use.
3. Store properly: Keep planks flat (not stacked in a way that traps moisture gradients), and avoid placing them directly against exterior glass.
Direct-sun gotcha: if your sunroom uses operable vents or fans that are only “sometimes on,” acclimate during the same schedule. In 2026, this is still one of the most frequent reasons installers report post-install changes that look “mysterious” but are really schedule-driven.
Install hardwood floors the right way (by method)
The correct installation method is what allows your hardwood system to move safely within its design limits. Nail-down, glue-down, and floating/click-lock products behave differently under humidity swings, so you must follow the method-specific instructions from your flooring manufacturer.
In a sunroom, the same board can behave very differently depending on whether you nail, glue, or float—movement control is built into each installation system.
If you nail or glue in a way that restricts expansion at the perimeter or around fixed objects, the floor can buckle or separate months later when the sunroom cycles hard.
For floating/click-lock floors, flatness and underlayment details are performance-critical; they are not “optional padding.”
Method-specific requirements
– Nail-down solid/engineered: use the correct underlayment (if required), proper fastener type/spacing, and keep flooring square as you work.
– Glue-down (if your product supports it): use the specified adhesive and spread rate, and don’t rush open/working times—.
– Floating/click-lock systems: use the correct underlayment (if required), maintain the expansion gap, and avoid trapping the floor against walls or fixed trim.
Comparison: which method fits sunroom risk best?
| Installation method | Best for | Biggest sunroom risk | What to watch most |
|---|---|---|---|
| Nail-down | Wood subfloors that meet flatness/tolerance | Fastener/rigidity near fixed objects | Expansion gaps + correct underlayment (if required) |
| Glue-down | Systems designed for slab bond (with tested moisture) | Moisture migration defeating adhesive bond | Concrete moisture limits + correct adhesive + open time |
| Floating/click-lock | When you need a less rigid perimeter approach | Trapped movement at edges/trim | Underlayment requirement + consistent edge gap |
What can go wrong in a sunroom (and how to prevent it)
Most sunroom floor failures can be traced to one of three root causes: moisture mismatch, poor acclimation, or constrained movement at edges and transitions. When you understand which symptom maps to which cause, you can prevent problems before they become visible.
Cupping and gapping usually signal a moisture content or humidity swing problem—either during installation or after the floor was installed into an out-of-spec environment.
Buckling and persistent squeaks often come from expansion control mistakes—like missed gaps around posts or nailing into areas that should move.
Direct sun increases cycling amplitude, so a transition that “barely works” in a normal room can fail in a sunroom unless it’s designed for movement.
Symptom → likely cause → prevention
– Cupping or gapping from moisture mismatch: usually comes from installing outside the allowed moisture/humidity limits or skipping acclimation.
– Buckling or squeaks from poor expansion control: forgetting gaps around posts/thresholds or nailing near rigid obstructions.
– Finish and transitions issues: inconsistent height at doorways, gaps at trim lines, or failing to use proper transition pieces where movement is expected.
– Heat/sun damage over time: prolonged direct sun can exaggerate expansion/contraction—consider window film/blinds and keep consistent airflow where possible.
A reality check from project walkthroughs
In 2026, that pattern is still common: sunroom installation problems often aren’t random—they line up with HVAC schedule changes, seasonal weather swings, and direct-sun intensity.
Verdict / tip + quick checklist you can save
If you want the simplest, lowest-risk path, choose a sunroom-approved flooring system, document moisture/flatness, acclimate under normal HVAC operation, and install using the exact method the manufacturer specifies. The downside of DIY in a sunroom is that small misses (missed moisture conditions, inadequate acclimation, incorrect expansion spacing) frequently appear months later as warping, separations, or finish failure—exactly when you’re least likely to connect the issue to the original installation choices.
Who should skip DIY: if you can’t test moisture/flatness reliably, your sunroom lacks stable HVAC control, or your flooring is borderline for temperature swings and you can’t verify approval in the product instructions. In those cases, .
Quick checklist (scan before you start):
| Step | Done? |
|---|---|
| Verify product is approved for sunrooms/direct-sun exposure | [ ] |
| Test subfloor flatness to manufacturer tolerance | [ ] |
| Test subfloor moisture and stay within limits | [ ] |
| Acclimate planks to manufacturer instructions | [ ] |
| Maintain recommended HVAC/temperature/humidity ranges | [ ] |
| Install with correct method (nail/glue/floating) | [ ] |
| Keep expansion gaps at edges and fixed objects | [ ] |
| Use proper transitions/trim and finish per instructions | [ ] |
Sources
– NWFA (National Wood Flooring Association) installation guidance:
– ASTM standards commonly referenced for wood flooring practices and testing: ASTM D4442 (moisture content methodology);
A sunroom floor install comes down to one core idea: match the floor system to your room’s temperature and humidity behavior, then follow the manufacturer’s moisture testing + acclimation rules closely. If you plan carefully (layout, flatness, expansion gaps) and install using the approved method for your exact hardwood system, you’ll reduce the risk of gapping, cupping, and buckling—then you can enjoy the space without surprises. Before you start, double-check the product instructions and run the moisture/flatness checks—you’ll thank yourself later.
Frequently Asked Questions
What’s the best way to prep a sunroom subfloor before installing hardwood floors?
Start by checking that the subfloor is flat, dry, and structurally sound—use a 6–10 ft level and address any high spots or low areas with approved patching compound. In a sunroom, confirm moisture levels with a moisture meter and follow the hardwood manufacturer’s specific subfloor and RH requirements. Remove old flooring, ensure proper fastening or underlayment as recommended, and leave an acclimation gap for expansion around the perimeter.
How should I acclimate hardwood flooring in a sunroom to prevent gaps or cupping?
Acclimate the hardwood planks in the sunroom for the period recommended by the manufacturer, typically several days to a week, with HVAC running at normal living conditions. Bring the flooring materials to the room’s temperature and humidity, especially since sunrooms can swing dramatically with sunlight and seasonal changes. Once installed, maintain consistent indoor humidity (often around 35–55%) to reduce expansion, contraction, and long-term floor movement.
Why is humidity and moisture control critical when installing hardwood floors in sunrooms?
Sunrooms often experience higher temperature variation and direct UV exposure, which can drive moisture changes that lead to cupping, crowning, or separation between boards. Even if the subfloor looks dry, the slab/subfloor moisture can rise under certain conditions and affect engineered or solid hardwood differently. Using moisture testing, proper vapor barriers (when required), and stable climate control helps protect the warranty and keeps your hardwood floor looking level.
Which type of hardwood flooring is most suitable for a sunroom—solid or engineered?
Engineered hardwood is usually the safer choice for sunrooms because it’s more dimensionally stable across humidity fluctuations than solid hardwood. If you choose solid hardwood, you may need stricter subfloor moisture and more consistent indoor humidity control to prevent movement. Look for products rated for installation over concrete, on-grade slabs, or in variable environments, and follow the manufacturer’s installation method and expansion gap guidelines.
How do I install hardwood floors in a sunroom on concrete or over an existing slab?
First verify the concrete is fully cured and meets moisture limits using the manufacturer’s approved testing method, then clean and level the surface. Install the correct underlayment or vapor barrier system recommended for your specific hardwood type, especially for engineered hardwood over concrete. Use the approved installation method (nail-down, glue-down, or floating as specified) and keep expansion gaps around windows, doors, and exterior walls to allow the floor to expand and contract with sunroom conditions.
📅 Last Updated: October 17, 2026 | Topic: How to install hardwood floors in a sunroom? | Content verified for accuracy and freshness.
References
- Wood flooring
- https://www.fpl.fs.usda.gov/documnts/fplgtr/fplgtr113.pdf
- https://www.epa.gov/mold/controlling-mold-moisture-and-humidity
- installation guidelines | NWFA
- moisture acclimation testing | NWFA
- https://www.sciencedirect.com/search?qs=wood+flooring+acclimation+humidity+installation
- https://www.sciencedirect.com/search?qs=subfloor+preparation+hardwood+flooring+moisture
- https://scholar.google.com/scholar?q=hardwood+floor+installation+sunroom+temperature+humidity Google Scholar
- https://scholar.google.com/scholar?q=wood+flooring+acclimation+moisture+content+relative+humidity Google Scholar
- https://scholar.google.com/scholar?q=hardwood+flooring+substrate+moisture+testing+concrete+slab Google Scholar