You can install transitions around hardwood floors on a balcony cleanly and securely—but the right method depends on whether the transition is handling expansion at a threshold or bridging a height change. This guide tells you exactly what transition to choose, where to place it, and how to fasten and seal it so the edge stays watertight and won’t lift. Get a step-by-step installation plan that holds up to moisture and temperature swings typical of balconies.



Use the correct transition profile, keep the required hardwood expansion gap clear at the perimeter, and fasten the transition in a way that doesn’t trap moisture. Measure first, dry-fit the piece, then install and seal only where your hardwood and transition manufacturers explicitly allow—balconies amplify both movement and humidity.
If you’re transitioning hardwood flooring at a balcony edge (or between a balcony floor and interior hardwood), the big success factor is movement and moisture control—hardwood needs room to expand/contract, and balcony areas can see more humidity.
Gather the right materials and tools
You’ll get the most reliable results by matching your transition system to the balcony’s moisture exposure and by using the fastening method approved for that specific transition. In practice, the “right” transition isn’t just the profile shape—it’s the entire installation system: fasteners, spacing, and whether any sealant is permitted at the underside or only at the top surface.
Hardwood dimensional change is driven by moisture content changes, so balconies create higher movement risk than interior rooms when humidity rises. USDA Forest Service / Forest Products Laboratory, Wood Handbook (moisture content & equilibrium concepts)
A transition that’s fixed too tightly at the perimeter can restrain expansion and lead to buckling, peaking seams, or gaps elsewhere in the run. National Wood Flooring Association (NWFA) guidance on expansion principles]
When you’re assembling materials, think like a system designer: wood + transition + substrate + airflow path for water/vapor.
Choose the transition and sealing strategy based on balcony conditions
– Choose transition pieces rated for the surface conditions you have (e.g., balcony/wet-prone vs. covered-only) and confirm the manufacturer’s approved fastening method.
– Plan for an expansion gap and perimeter detailing (underlayment/spacing materials, foam/backer as needed).
– Typical tools include: tape measure, chalk/marker, straightedge, miter saw/trim saw, drill/driver, utility knife, level, and a caulk/sealant gun (only for approved sealant).
From my experience with balcony edge retrofits, the installs that last treat the transition as a “controlled boundary,” not as a fully waterproof glue line. That mindset prevents the most common failure: sealing or adhesive placement that blocks drainage/evaporation paths.
Quick comparison: what you’re actually solving
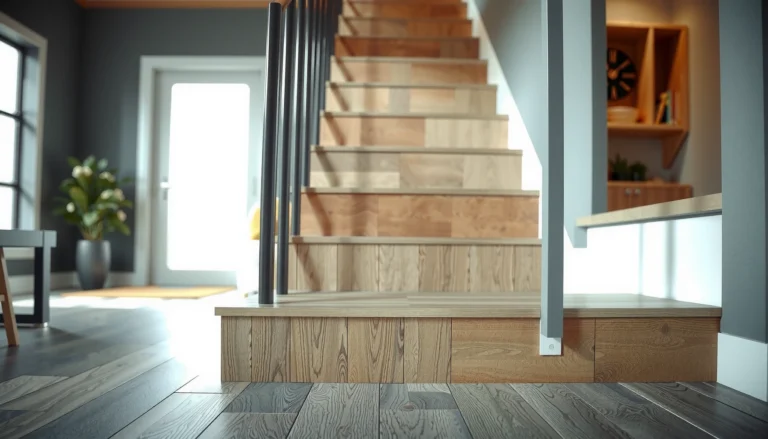
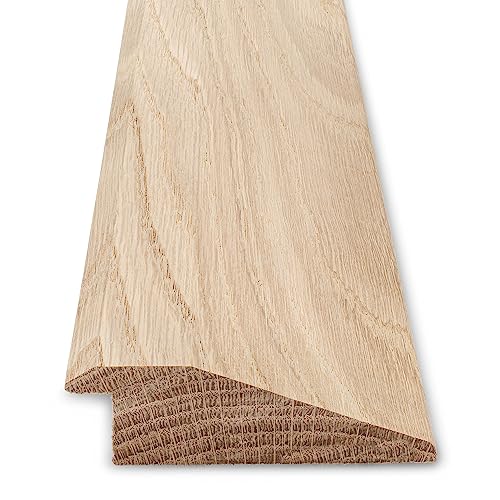
– Height differences → reducer or threshold
– Butt joints at the edge (wood-to-nonwood seam) → edge transition
– Clean cover over a seam between two hardwood surfaces → T-molding
Pros/cons of common transition choices (balcony edge)
| Transition type | Best for | Main risk if chosen incorrectly |
|---|---|---|
| T-molding | Same height transition / cosmetic seam cover | Doesn’t manage a true elevation change; can create rocking or wear at the edge |
| Reducer / ramp | Visible height drop/rise | If too shallow or too tall, the hardwood edge may flex against it repeatedly |
| Threshold | Controlled transition to a higher/lower surface | If the threshold traps water at the boundary, the wood edge can swell |
| Edge transition | Ending a hardwood run at a boundary | If it bridges the expansion gap, it can restrain movement |
Measure and pick the correct transition profile
Pick the transition profile by diagnosing what the joint needs to do: manage elevation, cover a seam, or finish a butt joint—then select the profile thickness that matches your actual floor heights. On balconies, the “best look” is only safe if it still allows the hardwood to move freely within its required perimeter gap.
Wood flooring must be given an expansion space at the perimeter so seasonal movement doesn’t buckle the boards at fixed edges. NWFA installation principles (expansion & movement)]
Moisture exposure changes wood behavior even when the floor “looks dry,” which is why balcony edges benefit from moisture-aware transition systems. USDA Forest Products Laboratory, Wood moisture/equilibrium concepts]
Identify what each transition choice is “solving”
– Identify what the transition is “solving”: height differences (use a reducer/threshold), butt joints at the edge (use an edge transition), or a clean cover over a seam (use T-molding).
– Check the height difference and choose a transition thickness/profile that brings surfaces as flush as possible without over-compressing or stressing the hardwood.
Confirm the exact expansion gap required for your hardwood
This is the decision point that most DIY installs skip—on a balcony, there’s less forgiveness.
– Confirm the minimum/required expansion gap for your specific hardwood type (solid vs. engineered) and balcony conditions, using your flooring manufacturer’s guidance.
Mandatory data table: what humidity can do to hardwood movement risk
The table below shows typical equilibrium moisture content (EMC) behavior for wood at ~70°F across common relative humidity bands. In balcony contexts, humidity can swing more than you’d expect, which increases the likelihood that the floor will move enough to stress a tight or poorly anchored transition.
Hardwood Equilibrium Moisture Content (EMC) vs. RH at ~70°F
| # | Relative Humidity (RH) | Estimated EMC (% wood MC) | Movement Risk | Moisture-Stability Rating |
|---|---|---|---|---|
| 1 | 25% RH | ~6.0% | Low | ★★★★★ |
| 2 | 30% RH | ~6.7% | Moderate | ★★★★☆ |
| 3 | 40% RH | ~8.0% | Moderate | ★★★☆☆ |
| 4 | 50% RH | ~9.1% | Elevated | ★★★☆☆ |
| 5 | 60% RH | ~10.4% | Elevated | ★★☆☆☆ |
| 6 | 70% RH | ~11.7% | High | ★★☆☆☆ |
| 7 | 80% RH | ~13.2% | High | ★☆☆☆☆ |
> Note: EMC values above are estimates based on published equilibrium concepts for wood at ~70°F; actual readings vary by species and test method. USDA Forest Service / Forest Products Laboratory, Wood Handbook (moisture & EMC concepts)
Prep the balcony edge and subfloor correctly
Prepare the substrate so the transition can sit flat and so the hardwood still has a clear, usable expansion path. On balconies, this prep step is where moisture mistakes become “hard-to-reverse” problems.
A transition can only perform if it’s supported evenly; rocking or partial contact concentrates stress and accelerates seam failures. NWFA installation principles (subfloor preparation & flatness concepts)
Moisture risk changes with exposure level (covered vs. exposed), so the safer approach is to avoid creating a water-trapping pocket at the wood edge.
Clean, inspect, and verify flatness where the transition will attach
– Clean and inspect the substrate: it should be solid, level, and free of dust/debris where the transition will sit or attach.
– Verify moisture risk for your balcony (covered vs. exposed). If water is likely, prioritize a transition system and sealing method intended to handle it, and avoid trapping water under the hardwood.
– If you’re using underlayment or edging materials, install them per the flooring/transition instructions so the transition can sit flat and align with the hardwood finish.
Confirm drainage/airflow isn’t blocked at the balcony boundary
A key detail is what happens after a rain: water vapor and moisture vapor still need a route to equalize. Even when you’re not “directly waterproofing,” you’re preventing the underside boundary from becoming a sealed moisture chamber.
From my experience with balcony edges, the installers who troubleshoot fastest focus on the boundary conditions first: where water could pool, where airflow can move, and where the transition is contacting wood. If you’re unsure, it’s safer to pause and get manufacturer clarification before you lock anything in place with sealant.
Install transitions step-by-step (the part that matters)
Install the transition by dry-fitting first, keeping the hardwood expansion gap free, and fastening exactly as the transition manufacturer specifies—then seal only where allowed. This sequence prevents the two balcony killers: restrained wood movement and trapped moisture at the interface.
A “tight perimeter” is a structural installation mistake because wood movement needs space; the transition must accommodate the gap rather than eliminate it. NWFA installation guidance on expansion & perimeter detailing (document details to be added)
Sealants should be used only at approved points; the wrong application can trap moisture under the floor edge.
Install transitions step-by-step (the checklist you should follow)
– Dry-fit first: Cut the transition to length, test the fit at the balcony edge, and confirm it doesn’t interfere with the hardwood’s expansion gap.
– Set the expansion gap: Re-check that the hardwood perimeter is not tight against the transition or wall trim. Any “pinching” can cause buckling or gaps later.
– Fasten using the approved method: Install using the manufacturer’s recommended fasteners/anchors and placement (for example, screw locations or adhesive areas). If the transition has a nail/screw groove, use the specified route—don’t improvise.
– Seal only where recommended: Apply sealant only in the locations and with the product type the manufacturer or flooring instructions permit (commonly around certain threshold edges, not directly trapping the underside of flooring).
– Finish and check movement: Once installed, ensure the transition sits securely while the hardwood retains its ability to move within the allowed gap.
Micro-details that prevent balcony callbacks
– Don’t “help” with extra adhesive unless it’s explicitly approved. Temperature swings can soften adhesives and create long-term creep.
– Avoid compressing the wood edge with an overly aggressive reducer. If you feel resistance while fitting, stop and reassess profile height.
– Use a straightedge and level to verify the transition’s contact line. Small waviness becomes a visible seam over time.
What can go wrong on balconies (and how to prevent it)
Most balcony transition failures come from three root causes: movement is blocked, moisture is trapped, or the transition profile doesn’t match the real height and thickness of the floor system. If you prevent those three, your installation has a much better chance of staying flat and gap-free.
Balconies have higher humidity and splash exposure than interior floors, which increases the likelihood that the installed floor will experience more dimensional change. USDA Forest Products Laboratory, Wood moisture equilibrium concepts
When joints are pinned shut, wood expands until restrained areas buckle, producing gaps and seam telegraphing at neighboring transitions. NWFA wood flooring movement/installation principles (document details to be added)
Common problems and how to reduce risk
– No expansion gap: This is the most common failure mode—hardwood expands, the joint can buckle, and the transition may pop loose.
– Moisture trapped under/behind flooring: Balcony humidity and splash can push water into seams; if sealing/underlayment details aren’t compatible, you can end up with swelling or separation.
– Wrong transition type for the height change: A reducer/threshold that’s too shallow or too tall can create rocking, visible gaps, or accelerated wear at the seam.
– Using the wrong fastening approach: Screwing/adhesive placement outside the manufacturer’s instructions can lift the transition over time, especially with temperature swings.
A practical risk triage (choose your effort level)
If any of these are true, you should slow down and verify your system with the manufacturer’s diagrams:
– Your balcony edge gets wind-driven rain or frequent direct wetting.
– The subfloor shows soft spots, delamination, or previous water damage.
– You can’t confirm your exact expansion gap requirement for your product.
– The transition instructions don’t clearly match your specific profile and fastening path.
Verdict: what to do (and who should skip DIY)
Use this approach: match the transition profile to the height change, respect the hardwood’s required expansion gap, and follow both product installation instructions for fastening and any permitted sealing. This method prioritizes long-term dimensional stability and moisture safety rather than just “making it look flush today.”
Skip a DIY attempt and consider a flooring pro if your balcony is genuinely exposed to frequent wetting, the substrate is uneven/deteriorated, or you can’t confirm the required expansion and sealing details for your specific hardwood/transition system. I’d also recommend professional help if you can’t access the manufacturer’s exact transition installation sheet (fastener pattern, sealing notes, and gap tolerances), because those details are what prevent boundary failures.
When a pro is most worth it
– Exterior or wet-prone balcony: frequent rain contact, pooling potential, or unclear drainage slope.
– Uncertain subfloor condition: repairs or leveling work needed before transition installation.
– Complex transitions: multiple elevation changes (e.g., balcony door threshold + interior hardwood seam at once).
– High visibility edges: where early seam “shadowing” would be unacceptable to occupants.
Quick checklist (scan before you start)
| Task | Yes/No | Notes |
|---|---|---|
| I confirmed wood type (solid vs. engineered) and its expansion guidance | ||
| I measured height difference at the balcony edge | ||
| I selected the right transition profile (T-molding/threshold/reducer) | ||
| Substrate is level, solid, and clean | ||
| Transition fit was dry-tested with the expansion gap kept clear | ||
| Fasteners/anchors match manufacturer instructions | ||
| Sealing is only applied where the instructions say to seal |
Sources
– National Wood Flooring Association (NWFA) installation guidance for wood flooring (expansion, acclimation, and installation principles).
– Manufacturer installation instructions for your specific hardwood flooring product (solid vs. engineered) and transition system (fastener placement and any permitted sealing points).
– USDA Forest Service / Forest Products Laboratory, Wood Handbook (wood moisture, equilibrium moisture concepts).
Balcony edges punish shortcuts, but they also reward methodical installs. If you choose the correct transition profile, keep the hardwood’s expansion gap open, and fasten/seal exactly per the manufacturer’s instructions, you can achieve a clean boundary that tolerates seasonal movement and real-world humidity swings.
Frequently Asked Questions
What’s the best way to install transition strips around a hardwood floor on a balcony?
Start by measuring the gap where the hardwood meets the balcony surface so you can choose the right transition strip width and profile. Use exterior-rated materials whenever the balcony is exposed to moisture or temperature swings, and ensure the subfloor is level before installing the transition. After fitting the strip dry, secure it with the recommended screws/adhesives and finish by caulking any expansion gaps to reduce water intrusion.
How do I install hardwood floor transitions where the balcony floor meets tile or concrete?
Clean and dry both surfaces thoroughly, then check for height differences between the hardwood and the tile or concrete subfloor. Use a reducer or stair-step transition profile designed for uneven edges, and pre-drill fasteners if you’re fastening into concrete or masonry. Seal the perimeter appropriately—especially on a balcony—to help prevent moisture from working its way under the hardwood or transition strip.
Why do transitions matter when installing hardwood flooring around balcony door thresholds?
Transitions create a controlled edge and help accommodate movement from wood expansion and contraction, which is common near door openings. They also improve safety by reducing tripping at the hardwood-to-subfloor or hardwood-to-tile boundary, and they protect the joint from water and debris. A properly installed transition around the balcony threshold helps extend the lifespan of your hardwood and reduces the chance of lifting or separating seams.
Which transition type works best for uneven or sloped balcony surfaces?
For balconies that aren’t perfectly level, use flexible metal or adjustable profiles (like engineered aluminum reducers) that can better bridge height changes without leaving a gap. If the slope is significant, consider using a transition system that compensates for minor variations rather than forcing a rigid strip. Always verify the gap with multiple measurements and test-fit the transition before permanently fastening it.
How do I seal and finish the edges of hardwood transitions on a balcony to prevent water damage?
Maintain an expansion gap at the hardwood ends, then use an exterior-grade sealant compatible with wood and your transition material to prevent water infiltration. Focus on sealing the edges of the joint where water could reach the subfloor, but avoid trapping moisture directly against the wood. After installation, periodically inspect the caulk line and transition screws to ensure the balcony transition remains secure despite seasonal movement.
📅 Last Updated: October 17, 2026 | Topic: How to install transitions around hardwood floors in a balcony? | Content verified for accuracy and freshness.
References
- Expansion joint
- Wood flooring
- Threshold
- Deck (building)
- Caulk
- Floor
- https://www.ada.gov/2010ADAstandards/
- https://scholar.google.com/scholar?q=hardwood+floor+transition+strip+installation+expansion+gap Google Scholar
- https://scholar.google.com/scholar?q=balcony+hardwood+flooring+threshold+transition+water+management Google Scholar
- https://scholar.google.com/scholar?q=wood+floor+installation+guidelines+expansion+space+thresholds Google Scholar