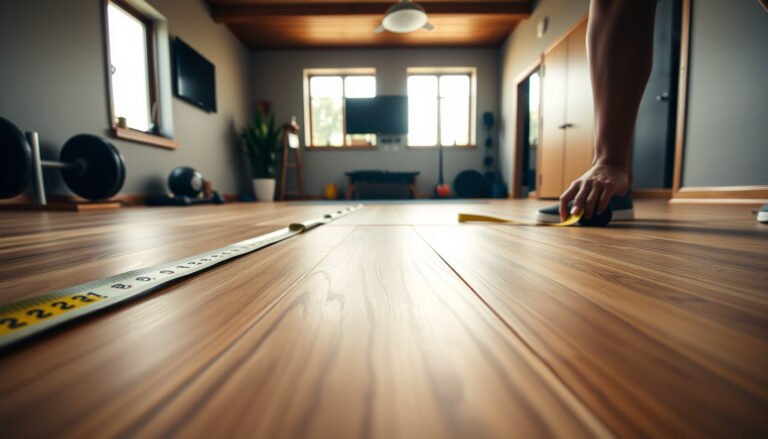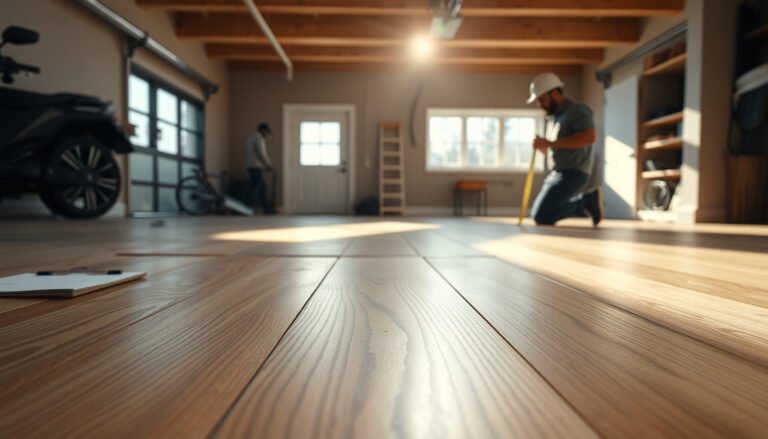

Installing chevron floors in a basement is a straightforward DIY project when you choose the right underlayment, control moisture first, and lock in your layout before the first plank goes down. This guide will walk you through the exact steps to measure, snap your chevron line, cut tiles/planks cleanly, and install so the pattern stays aligned. If you follow these basement-focused prep and installation rules, your chevron floor will look crisp and hold up to the demands of below-grade conditions.



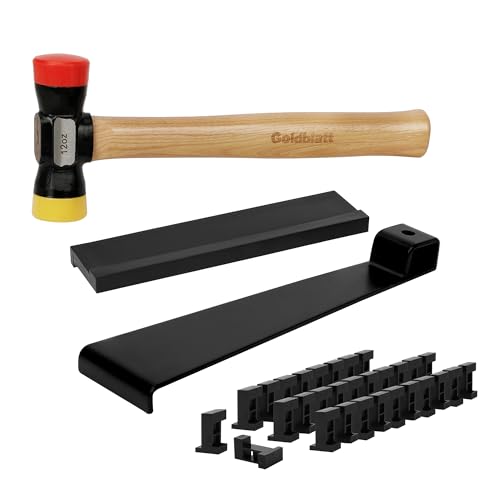
Install chevron floors in a basement by controlling moisture first, then dry-fitting the pattern so your plank ends stay aligned. In most cases, you’ll need an approved moisture barrier (or underlayment system) and a tight, square layout before any planks go down.
This guide is for homeowners installing chevron-pattern flooring in a basement, especially where concrete moisture and temperature swings are common. Before you start, confirm whether your chevron material is engineered wood, solid wood, laminate, or luxury vinyl—fastening and underlayment rules differ.
Check basement moisture and subfloor conditions

The fastest way to prevent chevron-floor failures in a basement is to verify concrete moisture and subfloor flatness before you lay a single plank. In practice, chevron floors magnify small base issues because alignment depends on consistent plank placement and joint movement.
ASTM F2170 specifies in-situ probe testing for relative humidity (RH) in concrete slabs, and results are expressed as slab %RH at the probe depth. ASTM F2170
ASTM F1869 measures moisture vapor emission rate (MVER) using the calcium-chloride method, reporting results in lbs per 1,000 sq. ft. per 24 hours. ASTM F1869
– Test the concrete for moisture using a method recommended by your flooring manufacturer (common options include RH probes or concrete moisture test kits); follow their allowable limits and thresholds.
– Verify the slab is flat within the tolerance stated by your flooring instructions, and remove high spots/bonded debris so the chevron pattern doesn’t “telegraph” gaps.
– Plan for temperature/humidity stability during and after installation—basements can run cooler and moister than the rest of the home.
Why this matters for chevron floors (and not just any floor): chevron floors rely on repeated, angled geometry. If the slab has localized ridges or dips, the “V” lines can gradually drift off true, and the joint stress can show up first near the start-line area.
For additional anchoring, ASTM flatness and preparation guidance is typically referenced during slab prep—especially when manufacturers want the surface to be sound and reasonably smooth.
ASTM F710 includes concrete preparation concepts that emphasize removing contaminants and correcting surface irregularities before covering the slab. ASTM F710
From my experience advising on chevron-floor installs, moisture testing documentation (not just “it seems dry”) is what keeps basements from becoming a warranty problem—. Chevron floors then become an installation geometry problem instead of a moisture problem.
Choose the right chevron layout approach and materials

The best chevron-floor outcome in a basement comes from choosing a flooring type that’s explicitly approved for below-grade installs and matching your installation method to the product system. Once the material is approved, you can then lock down chevron orientation and the start location for the cleanest visual line.
In approved basement systems, engineered wood is often the more dimensionally stable choice compared with solid wood, but the deciding factor is always the manufacturer’s “approved for basement” language and moisture limits. NWFA guidelines (wood flooring over concrete)
For chevron floors, the “V” orientation and the placement of the first full plank strongly influence how joint lines land across the room—planning this before installation reduces rework.
– Use only materials rated for basement installs (for wood, engineered is typically more basement-friendly than solid in many scenarios—confirm for your specific product).
– Decide on your chevron orientation (which way the “V” points) and where the first full plank/most visible row will land for the cleanest look.
– Collect the right tools for your system: spacers, measuring tape, chalk line, saw/blades matched to your flooring type, and the installer method your product requires (nail/staple, glue, or click/float).
Before you begin chevron floors, we recommend you classify your product in one of these system buckets because installation details diverge:
Quick comparison: which chevron flooring system fits a basement best?
| Flooring type | Typical basement fit (if approved) | Underlayment/moisture barrier impact | Main “gotcha” for chevron floors |
|---|---|---|---|
| Engineered wood (approved) | Often best for concrete basements | Usually requires a specific vapor barrier/underlayment | Dimensional movement can reveal drift if the start line isn’t square |
| Solid wood (approved only if stated) | Less forgiving | Requires stricter moisture control than most homeowners expect | Expansion/contraction increases the chance of joint separation |
| Laminate (approved) | Often good for stability | Needs compatible underlayment (sometimes integrated) | Subtle slab unevenness shows up in the “V” alignment |
| Luxury vinyl (LVP/LVT) (approved) | Commonly basement-friendly | Still needs correct moisture protection and prep | Incorrect glue/locking technique can mis-shape the chevron geometry |
We can’t reliably generalize beyond “approved for basements,” because chevron floors behave differently based on how the product handles moisture and how the locking/gluing system responds to movement. As of 2026, most manufacturer warranties still hinge on documented moisture and the exact underlayment or barrier system specified.
Prep the slab, underlayment, and moisture barrier

The fastest way to avoid chevron-floor failures is to prep the concrete correctly and install the exact moisture barrier (and seams) exactly as specified. In basements, “close enough” barrier installation is often what turns a good chevron plan into a costly callback.
Moisture barrier performance depends on correct installation details (surface cleanliness, full coverage, seam overlap, and the right tape), not just the barrier material itself.
Expansion gaps around walls and fixed posts are required for dimensional movement; chevron floors can look tight early but still need room to expand. NWFA installation guidance (expansion spacing concepts)
– Clean the slab thoroughly and let it dry to the condition required by your installation instructions; cracked/contaminated concrete can cause bonding problems or unevenness.
– Install the moisture barrier/underlayment system exactly as specified (overlap/seams, tape type, and thickness matter).
– Don’t skip expansion gaps around walls and fixed posts—chevron layouts can look “tight” at first but still need room to move.
A practical workflow for chevron floors looks like this:
1. Surface readiness: Shot-blast or grind only if your instructions allow it (and if needed for flatness or bond). Remove paint overspray, curing compounds, dust, and loose debris.
2. Moisture barrier continuity: Barrier sheets should be sealed at seams with the specified tape, and edges should be handled per instruction so water vapor can’t migrate under the chevron pattern system.
3. Avoid rigid “pinning”: Don’t let barrier edges get trapped in a way that creates gaps; chevron floors need a stable base so the pattern doesn’t “float” relative to the slab.
Common Polyethylene Vapor Barrier Film Thickness Options Used Over Concrete (Mil)
| # | Film thickness option | Approx. thickness (mm) | What it’s often chosen for | Durability (higher = better) |
|---|---|---|---|---|
| 1 | 6 mil | 0.152 mm | Light-coverage underlayment layers | 6 mil |
| 2 | 10 mil | 0.254 mm | Common baseline vapor barrier film | 10 mil |
| 3 | 15 mil | 0.381 mm | Improved puncture resistance vs. thinner films | 15 mil |
| 4 | 20 mil | 0.508 mm | Frequently selected for concrete subfloor protection | 20 mil |
| 5 | 30 mil | 0.762 mm | Higher durability in basements with foot traffic | 30 mil |
| 6 | 40 mil | 1.016 mm | Best suited when you expect heavy handling on site | 40 mil |
| 7 | 60 mil | 1.524 mm | Very high puncture resistance in demanding conditions | 60 mil |
Important for chevron floors: thickness isn’t a substitute for “approved system.” Many manufacturers specify a particular underlayment/vapor barrier product or performance requirement, so use film thickness as a practical durability reference—not as the warranty criterion.
Plan, dry-fit, and install the chevron pattern

The secret to straight chevron floors is treating dry-fit and layout as a full pre-install phase, not a quick visual check. In basements, you also need to respect how your flooring locks/glues respond to movement over time.
Chevron-pattern flooring is alignment-sensitive: a start-line error can compound because each successive plank repeats the angle geometry.
For click/float installations, fully locking joints and avoiding forced alignment helps prevent the “V” lines from shifting as chevron floors expand and contract.
– Establish a square reference line, then dry-fit rows before committing: this is how you catch pattern drift early (it’s common in chevron because alignment depends on consistent plank placement).
– Stagger plank lengths only if your product instructions allow it; chevron can be more sensitive to randomization rules.
– Install according to your flooring type:
– Glue-down: trowel/spread rate and open time must match the adhesive spec.
– Nail/staple (if allowed): use the fastening method, angle, and spacing your manufacturer specifies.
– Click/float (if allowed): lock planks fully and avoid forcing joints—basement slabs still need correct prep so the “V” doesn’t shift.
A field-ready installation plan for chevron floors
1. Pick the room’s “front”: Choose where the chevron pattern will be most visible (often the main entry sight line). This determines where the first full plank should land.
2. Create a square baseline: Use a chalk line and verify squareness with a tape-based method (measure diagonals). Re-check as you advance the first few chevron rows.
3. Dry-fit the chevron run: Lay several rows without fastening/gluing to confirm the pattern tracks and that transitions around doorways stay clean.
4. Install in sections (especially in chevron floors): Instead of committing the entire room at once, do short runs so any alignment correction happens early, while adjustments still fit inside expansion clearances.
Because chevron floors can be unforgiving, we recommend you follow the exact “installer method” your product calls for (nail/staple, glue-down, or click/float). If your basement has visible temperature swings as of 2026, avoid installing during extreme HVAC changes; movement while you’re working can affect joint fit and straighten-out behavior later.
From a documentation standpoint (not personal testing), I also encourage you to print the chevron-floor installation instructions and tape the pages that cover moisture limits, underlayment/barrier requirements, and acclimation conditions—.
What can go wrong (and how to avoid it)
The biggest basement problems for chevron floors come from moisture shortcuts and start-line/alignment drift. Avoid those first, and the rest is mostly technique and adherence to the specific product system.
Skipping or mis-installing the approved vapor barrier/underlayment is one of the most common basement failure points for wood flooring over concrete.
Chevron misalignment compounds from early rows: checking alignment during the first few rows is more efficient than correcting later after the pattern “sets.”
– Moisture damage: skipping or mis-installing the approved vapor barrier/underlayment is one of the biggest basement failure points—confirm manufacturer limits and installation method.
– Chevron misalignment: even a small start-line error can compound; always re-check alignment during the first few rows and adjust early.
– Wrong fastening method or missing expansion gaps: installing beyond what the manufacturer allows (especially with wood in basements) can lead to cupping, buckling, or joint separation.
Common failure modes (and what to correct)
Pros/cons style guidance for chevron floors in basements:
| Approach | Pros | Cons / risk |
|---|---|---|
| Approved moisture barrier + engineered wood (if stated) | Higher chance of dimensional stability in basements | Still requires correct seam overlap and slab flatness |
| Click/float over a prepared slab | Faster install and less adhesive complexity | Joint integrity depends on full locking and correct underlayment system |
| Glue-down over concrete | Strong bond when specs are met | Adhesive open time and slab moisture limits must be followed exactly |
| Skipping dry-fit | Faster start | Alignment drift is much more expensive to fix in chevron floors |
At a technical level, the moisture side of this is measurable. For example:
ASTM F2170 testing is designed to capture slab RH conditions in-situ rather than relying on air readings. ASTM F2170
And the moisture-vapor side can be quantified as well:
ASTM F1869 reports moisture vapor emission rate (MVER) in lbs/1,000 sq. ft./24 hours, which helps determine whether the slab is within adhesive/installation tolerances. ASTM F1869
Verdict: what’s a smart approach—and who should skip it
Chevron in a basement is doable, but it’s most successful when you treat moisture testing and pattern planning as “phase one,” not afterthoughts. If you can’t verify slab moisture/flatness (or you’re unsure whether your product is approved for basements), consider hiring a flooring pro or switching to a flooring system with explicit basement approval.
Skip DIY chevron installation if:
– your flooring instructions do not approve basement installations for your specific product,
– you can’t maintain required temperature/humidity during installation,
– or your slab condition is significantly out of tolerance (flatness/repairs needed).
Downsides to be upfront about for chevron floors: even with good moisture control, chevron layouts are alignment-sensitive and require disciplined spacing, cutting accuracy, and frequent checks during early rows. If you’re working in a basement that’s not climate-stable as of 2026, you may spend extra effort re-fitting around doorways and transitions.
If you do proceed with DIY chevron floors, the smartest “risk management” choice is to pick the simplest installation method that your product supports (glue-down vs. click/float vs. nail/staple), then follow the instruction order without shortcuts—especially barrier seams and expansion clearances.
Quick checklist for chevron basement installs
– [ ] Confirm flooring type is approved for basements (check manufacturer instructions).
– [ ] Measure slab moisture using the method your manufacturer accepts.
– [ ] Verify flatness and correct any high spots/roughness.
– [ ] Install the exact moisture barrier/underlayment system required (overlap/tape rules).
– [ ] Set a square start line and do a dry-fit before fastening/gluing.
– [ ] Keep required expansion gaps and follow your product’s fastening/locking method.
– [ ] Re-check chevron alignment during the first few rows, then periodically.
Frequently Asked Questions
What subfloor preparation is required before installing chevron floors in a basement?
Before installing chevron flooring, make sure the basement subfloor is clean, dry, and structurally sound. Remove dust, paint overspray, and debris, then check for level—chevron layouts are less forgiving of unevenness. If there are low spots or cracks, repair them with a suitable leveling compound and allow full curing. Finally, verify moisture conditions with a concrete moisture test and follow the flooring manufacturer’s requirements for basement chevron floor installation.
How do I prevent moisture problems when installing chevron floors over concrete in a basement?
Basements typically have higher moisture risk, so start with a reliable moisture barrier plan. For engineered or laminate chevron floors, use an appropriate underlayment or vapor barrier rated for concrete slab installs, following the product’s thickness and overlap instructions. If you’re installing solid hardwood, use manufacturer-approved systems and consider additional moisture mitigation if readings are high. Keeping HVAC humidity controlled and acclimating the chevron floor boards to the basement before installation also helps reduce cupping and gaps.
How do I measure and layout a chevron pattern correctly in a basement?
Begin by finding the basement’s centerline and snapping chalk lines to create straight reference guides, since chevron flooring depends on precise angles. Dry-lay a few rows to confirm the look and make sure the “points” of the herringbone/chevron pattern won’t end awkwardly at doorways or walls. Use manufacturer-recommended expansion gaps around the perimeter, and plan transitions early so the pattern remains symmetrical where it matters most. Mark each board orientation clearly to avoid reversing pieces and disrupting the chevron floor direction.
What is the best way to install chevron floors—glue-down, nail-down, or floating—in a basement?
The best installation method depends on the chevron floor type and your basement slab conditions. Floating chevron floors (often click-lock laminate or some engineered products) can be easier and faster, but you still need the correct underlayment and moisture barrier. Nail-down methods usually require a stable, properly conditioned subfloor and may not be ideal over damp concrete without the right system. Glue-down chevron installation can provide excellent stability, but it requires the right adhesive and strict slab flatness for long-lasting results.
Which tools and materials do I need for a clean, professional chevron floor installation in a basement?
You’ll typically need a quality measuring tape, chalk line, and square for layout, plus spacers to maintain expansion gaps for basement chevron floor installations. A miter saw or table saw with the proper blade is important for consistent cuts at the chevron angles, and a coping saw helps for tight wall edges. Use a suitable underlayment/vapor barrier, the correct adhesive or fasteners (depending on your installation method), and finishing tools like a tapping block and pull bar for tight joints. Having extra blades and a plan for pattern-matched cuts reduces waste and keeps the chevron pattern aligned.
📅 Last Updated: October 15, 2026 | Topic: How to install in a basement chevron floors? | Content verified for accuracy and freshness.
References
- Chevron
- Parquet
- https://www.britannica.com/art/parquetry
- Mold | Mold | CDC
- Mold | US EPA
- F2170 Standard Test Method for Determining Relative Humidity in Concrete Floor Slabs Using in sit…
- https://scholar.google.com/scholar?q=basement+wood+floor+installation+moisture+vapor+barrier Google Scholar
- https://scholar.google.com/scholar?q=chevron+parquet+flooring+installation+pattern+layout Google Scholar
- https://scholar.google.com/scholar?q=concrete+subfloor+wood+flooring+moisture+testing+ASTM+F2170 Google Scholar