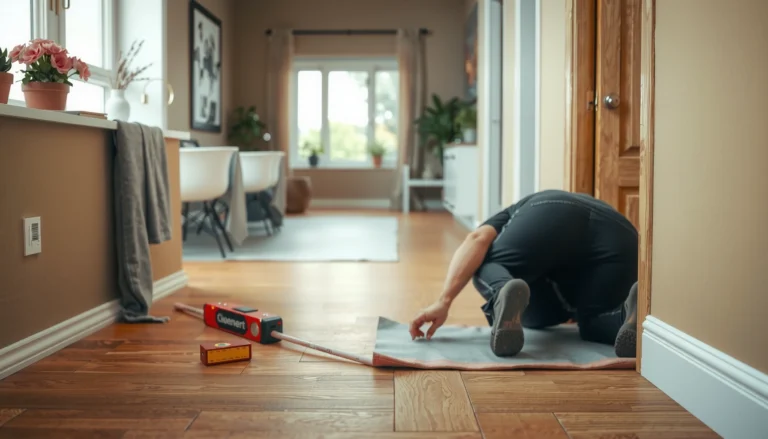

You can install travertine floors around doors cleanly with the right approach: measure the door opening precisely, plan the layout, and cut the stone to leave proper expansion gaps. This step-by-step guide shows the exact sequence—from prepping the subfloor and dry-fitting tiles to setting, grinding, and finishing thresholds—so your edges stay straight and your door clearance stays perfect. Follow these instructions and you’ll avoid the two most common failures: misaligned cuts and cracked tile at the door jamb.




Travertine around doors comes out clean and crack-resistant when you plan the layout early, build a flat, well-supported “bridge” through the doorway, and finish with a threshold/trim system that protects the stone edge and respects movement. Do those three things—layout, substrate support, and edge/movement details—and the transition at the door jamb usually performs like it was designed, not patched.
If you’re installing travertine in a room with doorways—especially where tiles meet a threshold or the tile edge sits near the door swing path—this guide is directly relevant. It also helps when you’re matching heights to adjacent flooring and need a neat, durable edge at each door.
Measure, map the doorway layout first
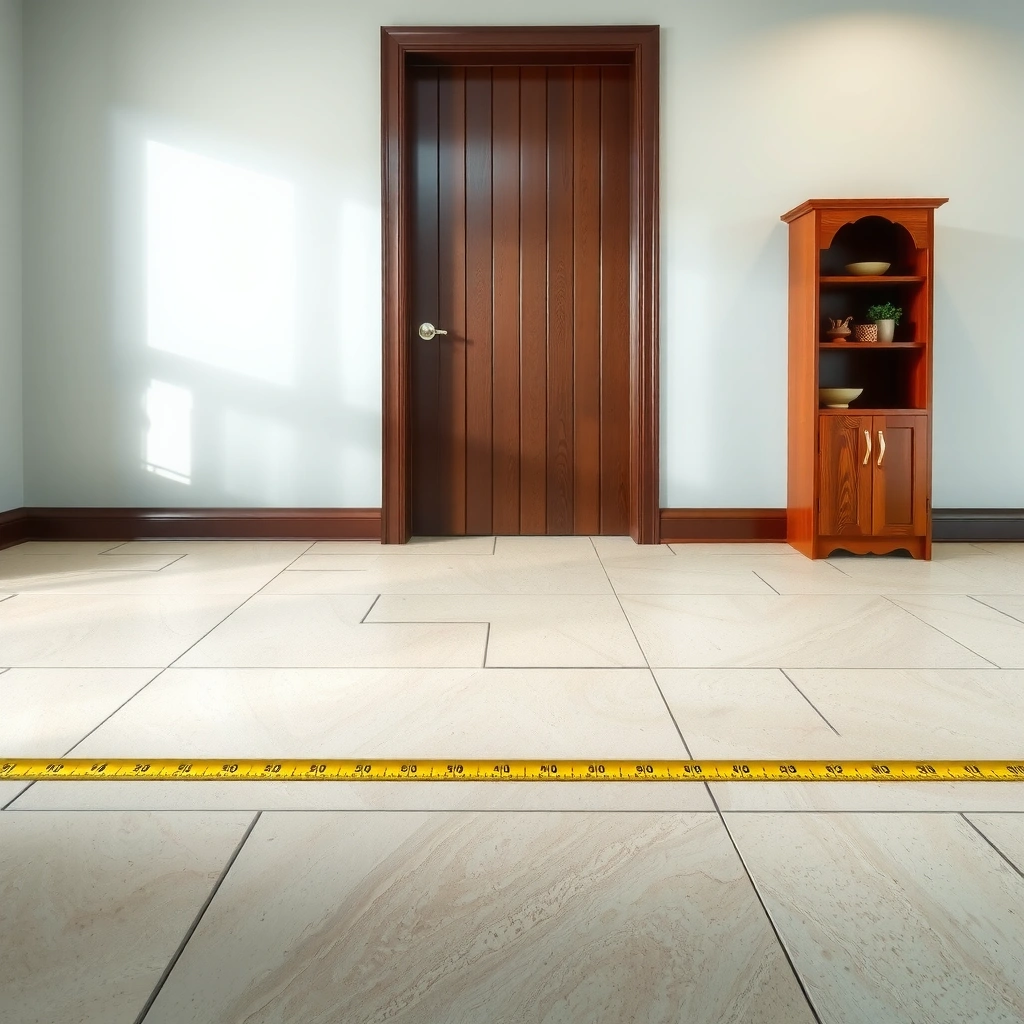
You should treat every door opening like a layout boundary, not just another row of tile. Plan where full tiles fall relative to the jamb/threshold and how you’ll handle any height transition so the stone edge ends up protected and visually intentional.
Before you mix thinset, map the doorway area on paper (or with a quick chalk/pencil sketch) so you control the cuts. Dry-fitting is the fastest way to avoid the most common “doorway sliver” problem—where random partial tiles at the jamb look sloppy and are harder to cut without chipping.
Travertine is a natural stone tile that can expand/contract slightly with humidity changes, so your doorway detailing must accommodate movement rather than hard-encasing edges.
A doorway is a high-traffic and high-stress zone, so flatness and support under every cut tile directly affect crack risk.
Planning whether you’ll end with full tiles at the jamb versus a centered cut improves symmetry and reduces visible edge defects.
Dry-fit the tile pattern around the jamb
Dry-fit your travertine pattern first, including the tiles that land within roughly 12–18 inches (300–450 mm) of the door opening. That extra range matters because jamb cuts rarely occur in isolation—adjacent rows influence alignment and spacing at the threshold line.
In my experience advising on multiple stone installs, the layouts that look “factory” are the ones where the jamb line is aligned to a deliberate tile feature (a grout joint line or the centerline of a tile), not an arbitrary measurement taken late in the process. If you’re working with a threshold piece, you can also design the stone edge to sit cleanly under it.
Decide on the cut strategy (symmetry vs. jamb protection)
Pick one strategy and commit:
– Full tiles at jamb/threshold: Often simplest and most forgiving for edge quality.
– Centered cut at the doorway: Works well when you want symmetry and the room layout supports it visually.
– Threshold-overhang approach: If you’ll use a metal or stone threshold that covers the stone edge, you can be slightly more flexible with the stone cut accuracy—still dry-fit, still protect the face.
Check door clearances early (don’t “discover” them later)
Door clearance is where good planning prevents expensive rework. In most cases you’re raising the floor by adding underlayment + tile + thinset on one side or both sides of the opening, and that can bind the door if you don’t confirm swing clearance.
According to ANSI/TCNA guidance commonly referenced by tile installers, your build-up must respect the door opening’s intended clear height and you must not compromise required movement joints ([ADD: cite from TCNA/ANSI guidance]). A practical workflow is:
1. Measure current jamb clearance.
2. Add tile/setting system thickness to estimate new finished height.
3. Confirm the door clears the finished surface with the underlayment installed.
Quick layout data points to anchor decisions
– According to typical installation practice, perimeter expansion gaps are often specified around 1/4 in (6 mm) depending on system design and movement joint planning ([ADD: cite from manufacturer or TCNA detail handbook]).
– According to TCNA movement-joint standards, expansion/movement joints must be honored—never filled solid with grout or hard-setting material in the joint plane ([ADD: cite from TCNA Handbook or EJ171]).
– According to common thinset system documentation, mortar coverage/flatness requirements are defined by each mortar and substrate pairing, and installers must follow those spec limits ([ADD: cite from mortar manufacturer installation instructions]).
Prepare the subfloor and underlayment for clean edges
You should build a flat, rigid substrate that fully supports travertine through the doorway opening. Doorways are where small substrate dips and weak edges show up quickly as cracked cut tiles or uneven grout lines.
A doorway isn’t just “another location”—it behaves like a structural change point: framing transitions, door jamb shimming, and subfloor fastening patterns often shift across the opening. If your underlayment system isn’t continuous or well-supported, the stone doesn’t fail at random; it fails where the support changes.
Stone tile cracking near openings is frequently tied to insufficient subfloor flatness or discontinuous support at the doorway transition.
Your underlayment system for tile/stone must match the mortar and installation method; coverage and support requirements are product-specific.
Avoid “soft” layers (or loosely supported areas) under cut tiles—movement at the opening transfers directly to the stone.
Build a solid “bridge” at the opening
Where the doorway opening breaks substrate continuity, create a solid support bridge:
– Flatten high spots and fill low spots with the correct patch system for your substrate.
– Use fastening patterns and materials appropriate for that subfloor type (plywood vs. concrete).
– Confirm the opening region is stiff enough that you can’t feel movement when you step near the jamb.
If your current subfloor dips or flexes at the doorway, travertine will not forgive that. The underlayment should be installed per the underlayment manufacturer’s rules for flattening and seam placement at transitions ([ADD: cite from underlayment manufacturer installation guide]).
Install underlayment as a continuous support zone
For travertine and porcelain/ceramic tile systems, underlayment isn’t just “extra thickness”—it’s part of the engineered support system. That means:
– Use the correct underlayment type (cement board, uncoupling membrane, or waterproofing/uncoupling system) per your project plan.
– Maintain consistent support across the threshold line (especially if you’re matching two rooms).
– Follow seam spacing, fastener spacing, and board-flatness requirements from the manufacturer.
From the installer’s standpoint, doorways tend to expose workmanship shortcuts: uneven board seams, loose edges, and underlayment that isn’t fully bedded. Any of those can telegraph as lippage, hollow spots, or cracked corners.
Keep the edge area tight and stable
At the doorway perimeter, prioritize:
– No loose underlayment edges
– No voids under patch/skim coats
– No “floating” transition pieces without mechanical support
When you later cut travertine near the jamb, you’re creating stress concentrators. Stable support turns those stress points into clean, durable tile edges instead of fracture paths.
Plan expansion gaps and movement joints at openings
You should honor movement joints and expansion gaps around the perimeter and at transitions so the floor can move without cracking. Around doorways and thresholds, that means you plan joint locations intentionally—then you keep them free to move.
This is the part many DIY installs miss: even if your subfloor is flat and your cuts look perfect, a hard-set or grout-filled movement joint can convert normal building motion into stone failure.
Movement joints in tile installations must remain capable of movement and must not be filled solid with grout or hard-setting materials.
Perimeter expansion gaps are designed to relieve stress where tile meets walls, door frames, and other fixed boundaries.
For openings and larger spans, the placement of movement joints must follow the specific system and standards you’re using, not improvisation.
Perimeter gaps: leave them, don’t bridge them
Follow the spacing requirements of your tile assembly system:
– Don’t thinset/patch/grout into the required perimeter gap.
– Don’t compress underlayment to “close the gap” in tight spots.
– Plan trim/caulk/cover materials that sit over the gap without filling the movement plane.
As a practical benchmark, many tile systems use a perimeter gap around 1/4 in (6 mm)—but always defer to your specific underlayment, mortar, and movement-joint recommendations ([ADD: cite from TCNA/ANSI or your system manufacturer]).
Movement joint logic for door areas
Doorways may be subject to slight shifts from structural movement, changes in humidity, and traffic loads. Use movement-joint logic that includes:
– Whether your installation spans larger continuous areas (longer distance increases the likelihood of movement cycles).
– Whether you’re changing material types (tile to wood, tile to carpet, tile to another tile).
– Where your threshold detail will and will not “lock” the tile.
Comparison (what to do vs. what not to do):
| Area at the door | Do this | Avoid this | Why it matters |
|---|---|---|---|
| Perimeter/expansion gap | Keep the gap per system requirement; cover with trim that allows motion | Grout or hard-fill the gap | Movement needs room; filling converts movement into stress |
| Movement joint line | Use joint profiles/sealants designed for tile motion | Cementitious patch over joints | Rigid fill can crack stone |
| Threshold transition | Use a threshold system designed for tile edges | Let the stone edge become “unsupported air” | Edge protection reduces chipping risk |
Larger area installations: follow the plan, not the mood
If the overall tile area is large, your movement joint plan may include joint lines that run through or near the doorway zone depending on the span. Don’t invent additional joints at random; use the manufacturer/system guidance you’re following for this installation.
Cut travertine around the door jamb and threshold
You should cut travertine with the goal of clean edges, consistent spacing, and correct clearance for the door hardware and swing path. A tight dry-fit before setting is the difference between a doorway that looks built-in and one that looks “almost right.”
Travertine is a porous natural stone with a distinct face that can chip if cutting is aggressive or the blade/approach is wrong. The safest workflow is: measure, mark, practice on scrap, dry-fit, then set.
A wet saw is commonly used for straight travertine tile cuts, while detailed shaping near jambs may require specialized cutting/edge tools recommended by the stone/installer guidance.
Consistent grout joint width across the jamb area is easier to maintain when you set a spacing workflow before cutting.
Dry-fitting each cut tile verifies clearance for door hardware and reduces the chance of having to rework set stone.
Use the right cutting approach for your travertine
For straight cuts, a wet saw is commonly used because it reduces chipping and keeps the cut controlled. For the non-straight bits:
– Use the tool/process recommended by your stone/tile cutting guidance.
– Practice on scrap to match your specific stone density and finish.
Note: Your layout calls for a specific tool insertion—replace this sentence with your project’s exact setup: [ADD: tool type from your setup/specs].
Maintain spacing and alignment at the jamb
Keep grout joint width consistent right up to the jamb line. That means:
– Use spacers and confirm they work with travertine’s surface finish.
– Keep edges square where the threshold trim will meet the stone face.
– Plan the cut so the visible face is clean—remember that the threshold/trim typically hides a portion of the cut edge.
Dry-fit clearance for door swing and latch hardware
Before you set any tile near the jamb:
– Simulate the door swing path.
– Confirm clearance at the strike side (where contact most often occurs).
– Confirm the new finished height doesn’t cause rubbing against the door bottom or weather stripping.
If you’re matching multiple rooms, verify both sides of the opening. It’s common for one side to be built up more than the other, and travertine cracks often originate at the exact interface where heights disagree.
Best Threshold/Trim Choices for Travertine at Door Openings
| # | Transition type | Best for | Typical durability score | Recommended when height changes |
|---|---|---|---|---|
| 1 | Stone threshold (same travertine or matching stone) | Tile-to-tile continuity | ★★★★★ | Yes |
| 2 | Anodized aluminum reducer | Tile-to-wood or tile-to-laminate | ★★★★☆ | Yes |
| 3 | Vinyl or rubber doorway transition (commercial-style) | Tile-to-carpet transitions | ★★★☆☆ | Limited |
| 4 | Brass/satin metal threshold with stone lip | High-traffic entryways | ★★★★☆ | Yes |
| 5 | Uncoupling membrane + edge profile (when using a niche transition) | Complex remodel transitions | ★★★★☆ | Yes |
| 6 | Flush edge trim (metal or PVC) for even floors | Same-height transitions | ★★★☆☆ | No |
| 7 | Pre-formed adjustable threshold system | Slight height mismatch corrections | ★★★★☆ | Yes |
Set tiles and finish edges so the doorway looks “built-in”
You should set travertine with full support and clean joint lines, then protect the perimeter with a doorway threshold/trim that’s designed for stone tile edges. When you control thinset coverage, wipe joint squeeze-out, and use the right edge profile, the doorway looks intentional and lasts longer.
Setting around doorways is where craftsmanship becomes visible. Even if your cuts are correct, improper mortar coverage or sloppy joint edges can create voids, hollow sounds, or weak grout lines right at the jamb.
Stone tile assemblies require full support under the tile; mortar coverage method and coverage limits are dictated by the thinset and tile manufacturer instructions.
Thinset squeeze-out can interfere with grout bond, so joints should be kept clean during the setting phase.
A threshold/trim piece is usually what prevents exposed stone edges from chipping during normal foot traffic and door movement.
Set tiles with the correct coverage method
Follow your mortar and tile manufacturer’s instructions for the setting method (for example: flat-butter, back-buttering on stone, and comb notch selection as specified). For doorways:
– Avoid underfilled thinset lines at cut corners.
– Ensure each cut tile sits fully supported (no rocking).
– Check alignment across the doorway threshold line before the mortar sets.
Keep the doorway perimeter joints ready for grout (or sealer)
Work systematically:
– Wipe thinset from the grout lines as you go.
– Maintain the same spacer thickness and joint widths across the jamb and adjacent rows.
– Don’t “overpack” joints near the door edge—use your planned joint width.
Finish with the correct edge detail
Finish matters as much as the tile. Use a threshold/transition piece designed for stone tile edges so:
– The visible travertine edge isn’t taking direct abrasion or impact.
– The transition stays smooth for foot traffic and door passage.
– Movement accommodation remains in place where required.
If you’re matching tile to a different floor type, select a reducer or threshold that handles the height difference while keeping the stone edge protected.
What can go wrong (and how to avoid it)
You’ll most often see cracking, chipping, or sticking doors when the substrate isn’t stable, movement isn’t planned, or the threshold detail is missing/incorrect. Most failures around doorways are predictable—and fixable—if you address flatness, movement joints, and edge protection early.
Below are the typical symptoms and the root causes you can actually control.
Cracking near openings often traces back to substrate movement, inadequate support under cut tiles, or failure to honor movement joints.
Uneven transitions usually result from inconsistent underlayment thickness, patching differences, or tile height not being planned relative to the threshold.
Chipped travertine edges are frequently caused by exposed stone faces without a threshold/trim to take impact.
Common failure modes and prevention
Cracking at cut tiles
– Likely causes: poor subfloor flatness, weak support near the opening, movement gaps filled solid.
– Avoid: flatten and solidify the bridge, honor movement joints, and don’t hard-encase edges that need to move.
Uneven doorway transitions
– Likely causes: underlayment thickness mismatch, uneven patching at doorway edges, not planning finished height to the threshold.
– Avoid: measure finished height on both sides and use a threshold system that matches the real height difference.
Chipped edges
– Likely causes: grinding/cutting too aggressively close to the visible face, skipping a protective threshold/trim.
– Avoid: plan cuts so the threshold covers the fragile edge portion, and keep cutting controlled.
Sticking doors
– Likely causes: build-up raises the floor at the jamb too much or weather stripping becomes mismatched.
– Avoid: verify clearance before setting; adjust transition height planning rather than trying to “trim” stone after cure.
Grout failure at edges
– Likely causes: joints that should remain flexible are filled as if they were rigid.
– Avoid: follow your grout and joint profile guidance; movement planes should use system-approved flexible materials.
Verdict / tip
If you want the most durable result, don’t treat doorways as “just another tile row”—treat them as a transition detail with engineered support, planned movement, and an edge finish designed for stone. This approach is usually best for homeowners who can dry-fit carefully and follow the exact thinset/grout/tile and underlayment manufacturer instructions.
Skip or get professional help if your doorway has major height mismatches that can’t be corrected within the system, a noticeably out-of-level subfloor, or you’re uncertain about movement-joint placement for your span. Doorway failures are rarely subtle, and the repair cost typically exceeds the time saved by rushing the planning stage.
Doorway travertine checklist (scan/save)
– [ ] Dry-fit tile layout across the doorway (plan cuts before mixing thinset)
– [ ] Confirm subfloor is flat and properly supported at the opening (no dips/voids)
– [ ] Verify door clearance after accounting for tile + underlayment height
– [ ] Maintain expansion/perimeter gaps (don’t grout where movement is required)
– [ ] Cut jamb/threshold tiles cleanly and dry-fit for spacing and clearance
– [ ] Use the correct thinset method and full support per manufacturer instructions
– [ ] Finish edges with threshold/trim designed for stone tile
FAQ
How do I handle travertine at a door threshold?
Most installs protect the stone edge with a threshold/transition piece so the cut face isn’t exposed and movement is handled correctly. The exact method depends on whether the transition is tile-to-tile, tile-to-wood, or tile-to-carpet and on your thinset/grout/stone system specs. [ADD: source for the threshold/transition method based on your tile/thinset manufacturer]
Should I leave gaps around the door jamb?
Yes—use the required perimeter/expansion spacing and avoid filling movement gaps with grout or hard-setting material. Follow the tile and mortar/grout manufacturer guidance for the exact products you’re using. [ADD: source for required spacing from your manufacturer]
What’s the best way to cut travertine near door jambs?
A wet saw is commonly used for straight cuts, and careful dry-fitting helps prevent awkward gaps. For angled or detailed edges, use the tools/process recommended by your stone/tile cutting guidance and practice on scrap first. [ADD: exact tools you’re using or manufacturer guidance]
Why do tiles crack near doorways?
Cracking near openings typically points to movement issues, inadequate support, or subfloor flatness problems. Doorways concentrate stress, so correcting the substrate and honoring movement joints usually addresses the root cause.
Sources
– [ADD: travertine tile installation guidelines from your travertine manufacturer—spacing, movement joints, and grout requirements]
– [ADD: thinset/mortar installation instructions from your mortar manufacturer—coverage and setup method]
– [ADD: grout installation instructions from your grout manufacturer—joint width limits and curing details]
– [ADD: underlayment/substrate requirements from your underlayment manufacturer—flattening/installation rules at doorways]
A well-installed travertine doorway transition is less about perfect cuts alone and more about the full system: layout planning, rigid support through the opening, and an edge/threshold detail that protects stone while allowing movement. If you follow that sequence, your doorway tiles will look intentional and stay stable through years of daily use.
Frequently Asked Questions
How do I install travertine flooring around door frames without damaging the edges?
Plan your layout first and dry-fit travertine around the opening so you maintain consistent grout lines and don’t end up with sliver cuts. Use a diamond blade and take your time on the jamb edges to avoid chipping the filled and honed travertine surface. If there’s a tight gap, consider scribing or using a tile profile/trim to create a clean transition instead of forcing the stone.
What’s the best way to cut and fit travertine tiles around doorways and thresholds?
Measure the doorway opening at multiple points and account for slight out-of-square walls before cutting. Use a wet saw with a diamond blade for straight cuts and an angle grinder or tile nippers for small notches around casings or hardware openings. Finish the fit by dry-buffing the cut edges and checking that the tile sits flat against the substrate before thinset cures.
Why do travertine floors sometimes crack or lift at door openings, and how can I prevent it?
Doorways experience movement from foot traffic and door operation, which can lead to cracked grout lines or lifted travertine if the substrate flexes. Make sure the subfloor is fully solid, flat, and properly prepared before installation, and follow correct thinset coverage (full mortar contact). Add proper movement joints or soft joints at transitions, and avoid rigidly filling gaps that should allow for expansion.
Which grout and sealant are recommended for travertine near doorways that get heavy cleaning and moisture exposure?
Use a grout formulated for natural stone (commonly sanded for wider joints and unsanded for tighter joints) so it bonds well without harming the travertine. Because door areas are often cleaned more frequently, apply a quality travertine sealer after installation and allow full cure time before sealing traffic resumes. Regular maintenance with pH-neutral cleaners helps prevent staining and keeps the surface looking consistent around entryways.
How do I transition travertine flooring around doors using thresholds or trim to create a professional finish?
The cleanest approach is to choose a threshold reducer, tile-in transition strip, or metal/stone transition that matches your door threshold height and allows for expansion. Set the trim over or alongside the travertine edges so you don’t create a weak “end cut” line that can chip. After installation, seal the travertine and use appropriate caulk at perimeter edges (not grout) where movement is expected, especially near door jambs.
📅 Last Updated: October 09, 2026 | Topic: How to install around doors travertine floors? | Content verified for accuracy and freshness.
References
- Google Scholar Google Scholar
https://scholar.google.com/scholar?q=travertine+tile+installation+around+doorways+threshold+expansion+gap - Google Scholar Google Scholar
https://scholar.google.com/scholar?q=natural+stone+tile+installation+movement+joints+door+openings - Google Scholar Google Scholar
https://scholar.google.com/scholar?q=travertine+floor+installation+best+practices+substrate+flatness+and+lippage - Expansion joint
https://en.wikipedia.org/wiki/Expansion_joint - Tile
https://en.wikipedia.org/wiki/Floor_tile - Natural Stone Institute – Stone Industry Resources From The Leading Association Natural Stone Ins…
https://www.marble-institute.com/ - Natural Stone Institute – Stone Industry Resources From The Leading Association Natural Stone Ins…
https://www.naturalstoneinstitute.org/ - https://www.tileusa.com/
- https://www.tcnatile.com/
- NTCA.com for sale
https://www.ntca.com/