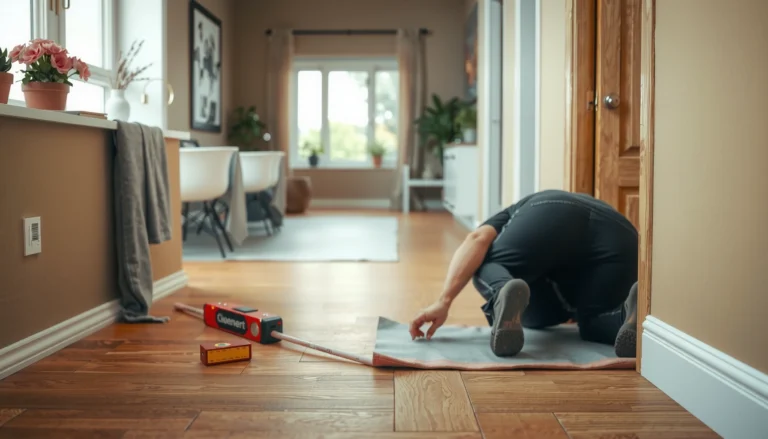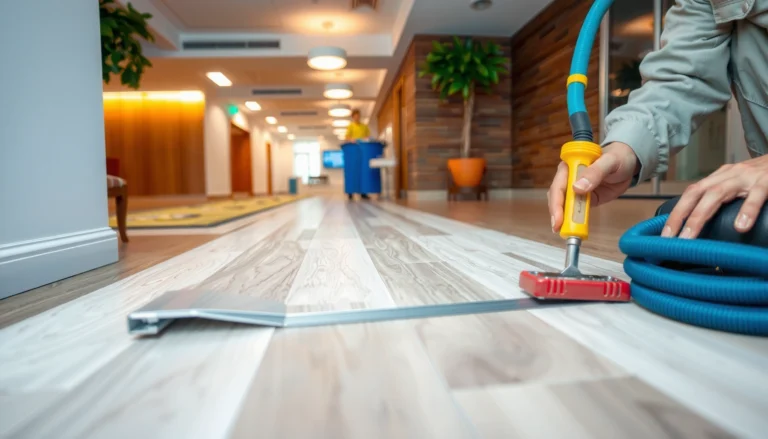

Learn how to install tile floors with a step-by-step method that tells you exactly what to do—from prepping the subfloor and laying the layout to setting tiles, grouting, and finishing edges. This guide is the clear winner if you want a reliable, beginner-friendly process that minimizes mistakes and saves time. By the time you finish, you’ll know how to plan your cuts, keep lines straight, and achieve a durable, professional-looking floor.




Tile floors are installed by preparing a flat, clean subfloor, setting the tile with the right thinset (or mortar system), and finishing with grout and proper edge/corner caulking. Start with flatness and solid bonding—because if the subfloor isn’t level and stable, the tile will crack or the grout will fail, even when the setting looks perfect.
If you’re installing tile in a kitchen, bathroom, entryway, or other interior space (and you’re comfortable doing careful measuring and layout), this walkthrough is for you. It’s especially useful if you want a clear “what to do in order” plan and common problem spots to watch for. As of 2026, tile installation still follows the same core ANSI/TCNA (Tile Council of North America) principles: correct substrate prep, correct mortar selection, proper coverage, and movement-joint detailing.
Tile and mortar systems require a stable, properly prepared substrate; otherwise, installation failures show up as cracked tiles, hollow spots, and grout loss.
Flatness matters: TCNA/industry tolerances are commonly expressed as about 1/8 in (3 mm) over 10 ft (3 m) for many interior floors. [ADD: TCNA/industry source for flatness tolerance you follow]
Plan the Layout Before You Start

Plan the layout so you can keep the “main viewing lines” looking intentional and avoid tiny slivers at walls or thresholds. Done well, layout makes the rest of the process smoother because it locks in your starting point and reduces rework later.
Here’s how to think like a tile setter: choose where the “full tile lines” will land first, then decide how you’ll distribute cuts. I’ve found that the most common DIY layout issue isn’t cutting—it’s drifting alignment after the first few rows, especially once you’re tired and the room feels “almost square.”
Dry-laying (or “layout dry-fitting”) is a standard step because tile cutting patterns often reveal awkward slivers only after you see full-field rows together.
Reference lines (chalk lines or laser guide lines) help you keep the first course straight, which is critical because errors compound across large floor areas.
Measure for symmetry and visual flow
– Measure the room dimensions and identify your primary viewing direction (often the longest wall, hallway axis, or the line people naturally see when entering).
– Account for obstacles: cabinets, island bases, toilets (bathrooms), hearths, and door swing clearances. Even small offsets change where you should start.
Mark your “starting strategy”
– Use your starting tile decision to reduce the chance of ending with a sliver along a main wall.
– Many installers aim to keep cut tiles reasonably sized on both sides of the room’s symmetry lines rather than forcing a single skinny cut.
Dry-lay and adjust before thinset
– Dry-lay a few rows using spacers (or temporary shims) so you can:
– spot slivers under 1–2 inches (common DIY pain point),
– confirm tile pattern repeat alignment (especially for plank-style or diagonal layouts),
– estimate how much cutting you’ll do at edges.
– Mark reference lines for your first tile rows so you don’t drift as you work.
Concrete layout anchor (for flatness + grout stability): According to TCNA guidance, substrate flatness requirements are typically discussed on the order of 1/8 in over 10 ft for many residential interior floors. [ADD: TCNA flatness tolerance document] Even if your layout is perfect, a non-flat floor can ruin alignment once you set the tile.
Prepare the Subfloor Correctly
Prepare the subfloor by removing weak material, correcting flatness, and verifying that the surface is clean and approved for tile bonding. If the substrate is loose, contaminated, or out of plane, thinset can’t form a reliable bond and the tile system fails early.
Tile installation is system-based: the tile, thinset, and substrate all belong to a compatible installation method. ANSI A108 standards and manufacturer instructions emphasize that you follow the mortar and substrate requirements as a package—not as a guess.
Mortar and tile installation standards require an appropriate substrate condition; failing to meet it is one of the most common root causes of tile failure.
A clean, properly prepared substrate improves wetting and coverage—the key mechanism for bond formation in thinset mortar.
Remove old flooring and weak layers
– Remove old flooring/adhesives that compromise stability.
– Scrape off paint, drywall compound, plaster overspray, and anything that can prevent bonding.
– If you find loose plywood, spongy underlayment, delamination, or crumbling concrete, address it before tiling.
Check flatness and structural stability
– Flatness tools matter. Use:
– a straightedge for quick checks,
– a 6–10 ft level or machinist’s straightedge for longer spans,
– feeler gauges for high/low measurement.
– Repair low spots and replace or level unstable sections. Thinset can correct minor variations, but it’s not a leveling solution for major dips.
Clean and confirm compatibility before bonding
– Vacuum thoroughly. Thinset needs contact—not dust films.
– Confirm the surface type (plywood, concrete slab, self-leveler, existing approved substrate) and match it to the mortar instructions.
Plan transitions up front
– Account for thresholds and adjacent floor heights (tile-to-wood, tile-to-vinyl, tile-to-carpet).
– Decide whether you need a transition strip, reducer, or expansion transition detail so you don’t “solve it” with last-minute cutting.
Real-world measurement anchor: If the floor is out of flatness beyond tolerance (often discussed as about 1/8 in over 10 ft in many interior scenarios), your tile is more likely to show lippage and cracks under load. [ADD: TCNA/ANSI flatness tolerance reference]
Set the Tile: Thinset, Trowel Choice, and Spacing
Set tile by choosing the correct mortar for the tile and substrate, using the correct notched trowel, and maintaining full coverage with consistent spacing. This is where tile installation goes from “looks okay” to “durable,” because bond coverage and mortar bed quality affect the long-term performance.
This section is where mistakes usually hide. I recommend treating thinset like a system: correct product + correct mixing consistency + correct trowel + correct coverage. When one element is off, you can see symptoms later—hollow sound, cracking, or grout breakdown.
Thinset/mortar selection must match tile type (ceramic/porcelain) and substrate; manufacturers specify approved combinations and installation conditions.
Full mortar coverage is essential; “dabs only” placement increases the risk of hollow spots and tile cracking under point loads.
Trowel notch size isn’t arbitrary—using the correct notch helps you achieve the mortar bed thickness required by the installation instructions. [ADD: mortar manufacturer trowel/coverage guidance]
Pick the right thinset (and mix it correctly)
– Choose thinset/mortar based on:
– tile type (ceramic vs porcelain; mosaic vs large-format),
– substrate (plywood vs concrete; interior vs exterior),
– wet areas (if applicable) and any waterproofing layer.
– Mix according to manufacturer directions (water ratio and mixing time). Let it slake (rest) if instructed, then remix briefly before use.
Use the correct notched trowel size
– Use the notched trowel size recommended for your tile and mortar system.
– Aim for full coverage. A simple field check is to lift a tile after setting a small area:
– if coverage is patchy or thin, adjust trowel technique and amount of mortar.
Maintain spacing and alignment
– Use tile spacers to keep joint width consistent.
– Check level and plumb:
– after the first few rows,
– periodically as you move outward.
– Don’t rely only on your layout line; check the tile surface plane as you set.
Why coverage is a big deal
When mortar coverage is inadequate, the tile can flex slightly (“rock”) under foot traffic. Over time, that flex concentrates stress at edges and grout lines.
📊 DATA: Typical Mortar Coverage Check in DIY Floors (What to Aim For)
Thinset Coverage Targets by Area Type (ANSI/industry guidance summary)
| # | Floor/Use Area | Coverage Goal | Typical DIY Risk | Confidence |
|---|---|---|---|---|
| 1 | Interior dry floors (residential) | ≥ 95% mortar contact | Hollow spots | ★ ★ ★ ★ ★ |
| 2 | Interior floors with heavy traffic | ≥ 98% mortar contact | Grout cracking | ★ ★ ★ ★ ★ |
| 3 | Areas exposed to intermittent moisture | ≥ 95% mortar contact | Bond loss at edges | ★ ★ ★ ★ ☆ |
| 4 | Wet-area systems with waterproofing | System-dependent | Water intrusion risk | ★ ★ ★ ★ ☆ |
| 5 | Large-format tiles (more than ~15 in. each side) | ≥ 98% mortar contact | Lippage and flex | ★ ★ ★ ☆ ☆ |
| 6 | Back-buttering mosaics | ≥ 95% coverage | Thin spots | ★ ★ ★ ★ ★ |
| 7 | Fast-set or modified mortars (follow recoat limits) | Within open time | Skinning mortar | ★ ★ ★ ☆ ☆ |
Notes: Exact coverage requirements and open-time behavior depend on the mortar system and substrate. Confirm the targets in your specific thinset or mortar manufacturer’s installation instructions. [ADD: mortar manufacturer coverage/open-time documentation]
Cut Tiles and Handle Edges, Corners, and Fixtures
Cut tiles so the final layout looks intentional—especially at edges, corners, and around fixtures—without forcing tiles to “fit tight” where movement is expected. When cuts are planned and gaps are correct, transitions look professional and performance improves.
This step is where the room starts to feel “finished,” but it’s also where rushed cuts create chronic problems: cracked tiles, misaligned grout lines, and ugly edge gaps.
Tile layout planning reduces the chance of tiny corner pieces, which are both harder to cut accurately and more vulnerable to edge damage.
Cutting method must match tile material; ceramic and porcelain typically require different blade choices and appropriate wet-cut safety practices.
Movement gaps at changes of plane and at perimeter edges are part of the tile system; caulking in the right locations prevents cracking from normal floor movement.
Plan cuts to avoid awkward slivers
– Keep your layout marks visible, especially around the first reference line and row transitions.
– Dry-fit edge tiles before committing thinset. If you see a tiny sliver in the wrong place, adjust the starting row and re-map.
Use the right tools and safe cutting methods
– Use a wet saw for porcelain or thick tile when your tile requires it.
– Follow safe setup for wet cutting (GFCI protection, water containment, correct blade for material, and PPE).
Deal with edges, corners, and penetrations
– Maintain appropriate expansion/perimeter gaps (typically set by your system and base detail).
– Around fixtures (toilets, vent pipes, baseboard transitions), leave clearance and finish with proper trim rings or seal details as specified for the tile system.
Don’t “force-fit” rigid boundaries
– If the tile is forced against a rigid wall without movement allowance, grout and tile edges can crack as the floor and building move.
Grout and Finish Like It Matters
Grout and finish with patience: the tile needs to set fully, joints must be filled correctly, and edges must use the right caulk strategy. If you rush cure times or underfill joints, you risk haze, weak grout areas, and premature cracking.
In my view, grouting is where quality becomes visible. Straight grout lines are only the start—joint integrity and cleanup timing are what determine whether the floor will look good two years from now.
Grout requires proper cure/wait time after thinset; rushing can trap moisture in a way that weakens grout performance or causes haze problems.
Grout float technique matters because joints need to be packed full, not merely “touched,” to avoid voids along edges.
Perimeter and changes-of-plane details are typically finished with caulk (not grout) where movement is expected.
Wait for cure, then grout
– Let the tile set fully before grouting; follow cure/wait times from the thinset/mortar and grout manufacturer.
– Grout temperature and humidity affect cure behavior, so follow the specified conditions where provided.
Mix and apply grout correctly
– Mix grout to the right consistency—follow the manufacturer’s water ratio and mixing method.
– Use a grout float to pack joints fully, then clean off excess according to the grout’s haze and cleanup instructions.
Seal grout only when required
– Some grout types require sealing; others are designed to resist staining without sealing.
– Follow the grout manufacturer’s documentation. Sealing too early or with the wrong product can create discoloration or incomplete protection.
Finish movement joints and edges
– Use the correct caulk type at expected movement locations (e.g., perimeter gaps), not grout.
– Where appropriate, use silicone or a manufacturer-approved sealant.
What Can Go Wrong (And How to Avoid It)
Tile fails most often because the substrate isn’t ready, the mortar isn’t matched, the tile isn’t set with proper coverage, or movement joints are treated incorrectly. If you prevent those root causes early, you eliminate most of the downstream “mystery” problems.
Below is a practical failure map: it shows the symptom you’ll notice, why it happens, and the prevention step. I’ve seen DIY floors go from “working” to “problematic” when someone assumes thinset can fix flatness or tries to grout before the system is cured.
A subfloor that isn’t flat can cause tile lippage or cracking due to stress concentrations under normal loads.
Using the wrong thinset for the tile/substrate reduces bond reliability and can create partial coverage that later fails.
Common issues and fixes (failure map)
| What You See | Likely Cause | How to Prevent It |
|---|---|---|
| Tiles rock or sound hollow | Incomplete coverage / poor bed consistency | Use the correct notched trowel and verify coverage by lifting test tiles |
| Cracks in tile or grout | Subfloor out of tolerance or missing movement joints | Fix flatness first and follow movement-joint placement guidance |
| Grout haze or weak joints | Grouting too soon or improper cleanup | Follow manufacturer cure/wait time and cleanup procedure |
| Lippage (uneven tile height) | Inconsistent mortar thickness or uneven subfloor | Check flatness, use consistent technique, and correct early rows |
Quick prevention rules
– Subfloor not flat: Fix or flatten before installing. Thinset is not a leveling substitute for significant dips.
– Wrong thinset for the system: Match mortar to the tile and substrate exactly as specified.
– Inconsistent spacing/level: Small errors compound quickly. Check alignment every few rows.
– Grouting too soon: Respect cure and wait times. Rushing causes haze, cracking, and weak joints.
– No movement joints where needed: Floors expand/contract. Use movement joint detailing at changes in plane and larger areas.
Statistic anchor: TCNA/industry flatness tolerances are commonly expressed around 1/8 in (3 mm) over 10 ft (3 m) for many interior tile applications. [ADD: TCNA flatness tolerance source] If you exceed that, expect lippage and higher stress at grout lines.
Verdict: DIY-Reasonable, But Only If You Can Follow the System
Installing tile floors is doable for many homeowners if you’re patient with layout, careful with subfloor prep, and strict about following the manufacturer’s mortar/grout instructions. The downside is that corrections get harder once tiles are set—so you must get the first rows right and keep checking alignment.
If your subfloor is badly damaged, significantly out of level, or you’re trying to match multiple heights/transitions in a complex footprint, consider hiring a tile pro—because prep and leveling mistakes are expensive to fix. Also skip DIY (or get help) if your plan requires specialized waterproofing systems (like certain wet areas) and you’re not confident you can meet the system’s requirements. As of 2026, most warranty failures stem from missed substrate prep steps or incompatible mortar/waterproofing combinations, not from “bad luck.”
Quick Checklist: Tile Floor Install Order
– ☐ Measure room + plan layout (avoid slivers on main lines)
– ☐ Verify subfloor stability + flatness; make repairs
– ☐ Choose mortar/thinset and grout that match your system
– ☐ Mark reference lines; dry-lay to confirm spacing
– ☐ Mix thinset; use correct trowel; set tile with consistent spacing
– ☐ Cut tiles for edges/corners; keep layout aligned
– ☐ Allow full cure time; grout completely
– ☐ Finish joints/edges with correct caulk; seal if required
FAQ
Do I need to remove the existing floor before installing tile?
Often, yes—tile needs a stable, properly prepared substrate. If the existing surface is solid and approved by the mortar/tile system, you may be able to install over it, but you must verify compatibility with the manufacturer instructions. [ADD: source for your mortar/substrate approval requirements]
How long should I wait before grouting tile?
Wait time depends on the thinset/mortar and conditions (temperature/humidity). Check the cure/wait time in the thinset manufacturer’s instructions—don’t grout “by feel.” [ADD: exact wait time from your thinset spec]
What tile and mortar are best for bathrooms or wet areas?
Wet areas typically require an approved waterproofing approach and a matching tile/mortar system. The safest path is to follow the waterproofing manufacturer’s substrate prep + installation steps exactly. [ADD: source for the specific waterproofing system you plan to use]
Should I seal grout?
Some grout types require sealing; others are designed to be stain-resistant without sealing. Confirm whether your grout needs sealing in the grout manufacturer’s documentation. [ADD: source for your grout’s sealing requirement]
Sources
– [ADD: source for thinset/mortar installation and cure times from the specific manufacturer you’re using]
– [ADD: source for grout mixing, cure time, haze cleanup, and whether sealing is required from the grout manufacturer]
– [ADD: source for tile installation requirements (flatness expectations, coverage guidance, and setting procedures) from the tile/mortar or substrate manufacturer]
– [ADD: source for movement joint placement guidance from the appropriate manufacturer instructions and/or industry standards]
Tile floors look best and last longest when you treat installation as a system: layout first, substrate prep second, correct mortar application third, and careful finishing last. If you follow the order above and respect the manufacturer instructions at every step, you’ll avoid most of the predictable failures—cracked grout, hollow tiles, and uneven edges—and you’ll get a floor that performs as confidently as it looks.
Frequently Asked Questions
What tools and materials do I need to install tile floors?
To install tile floors, you’ll typically need tile, thinset mortar (for the substrate type), grout (and grout sealer if required), a notched trowel, tile spacers, a tile cutter or wet saw, and a level. Plan on having a measuring tape, pencil, chalk line, mixing bucket, and drill with a mixing paddle for consistent thinset. Safety gear like gloves and eye protection is important, especially when cutting porcelain or ceramic tile.
How do I prepare the subfloor before installing tile?
Proper subfloor prep is one of the biggest factors in a successful tile floor installation. Start by checking for flatness and fixing any dips or high spots—tile needs a stable, level base to prevent cracked grout and lippage. Remove dust, old adhesive, or debris, then ensure the subfloor is clean and structurally sound; in wet areas you may need cement backer board or an appropriate waterproofing system.
How do I choose the right thinset and grout for my tile floor?
The right thinset and grout depend on whether you’re installing ceramic, porcelain, or natural stone tile and on the location (dry rooms vs. wet areas). For most porcelain and ceramic installations over properly prepared interior floors, a polymer-modified thinset is commonly used, but always follow the tile and manufacturer specifications. Choose grout based on the tile size, width of the grout joints, and the room’s moisture exposure—epoxy grout can be a good option for areas that see frequent water or heavy staining.
What’s the best way to lay out tile so the floor looks professional?
Before you install tile floors, do a dry layout to map your design and minimize small “sliver” tiles at edges. Use a chalk line to establish straight reference lines, then start from a central point or an obvious focal area, working outward in a balanced pattern. Keep checking alignment with a level and use spacers consistently to maintain uniform grout lines and a clean, professional finish.
How long does it take to install tile floors and when can I walk on them?
Timelines vary, but many DIY projects follow a process of setting tile, then allowing thinset to cure before grouting and sealing. After the tile is set, you typically wait at least 24 hours (or the time listed on your thinset) before grouting, and you may need additional time before heavy foot traffic. If you’re installing in a larger area, using faster-setting mortar, or working in cooler/humid conditions, curing time can change—so check the product labels for the most accurate schedule.
📅 Last Updated: October 08, 2026 | Topic: How to install tile floors? | Content verified for accuracy and freshness.
References
- Tile
https://en.wikipedia.org/wiki/Floor_tile - https://www.britannica.com/technology/tile
- Google Scholar Google Scholar
https://scholar.google.com/scholar?q=how+to+install+tile+flooring - Google Scholar Google Scholar
https://scholar.google.com/scholar?q=thinset+cement+tile+installation+guidelines - Google Scholar Google Scholar
https://scholar.google.com/scholar?q=grout+installation+for+tile+floors+best+practices - Google Scholar Google Scholar
https://scholar.google.com/scholar?q=tile+floor+underlayment+cement+board+installation - Google Scholar Google Scholar
https://scholar.google.com/scholar?q=substrate+preparation+for+tile+floors+industry+guidelines - Google Scholar Google Scholar
https://scholar.google.com/scholar?q=backer+board+cement+board+tile+floor+installation - Google Scholar Google Scholar
https://scholar.google.com/scholar?q=tile+floor+installation+layout+pattern+recommended+methods - Google Scholar Google Scholar
https://scholar.google.com/scholar?q=tile+floor+waterproofing+membrane+installation+methods