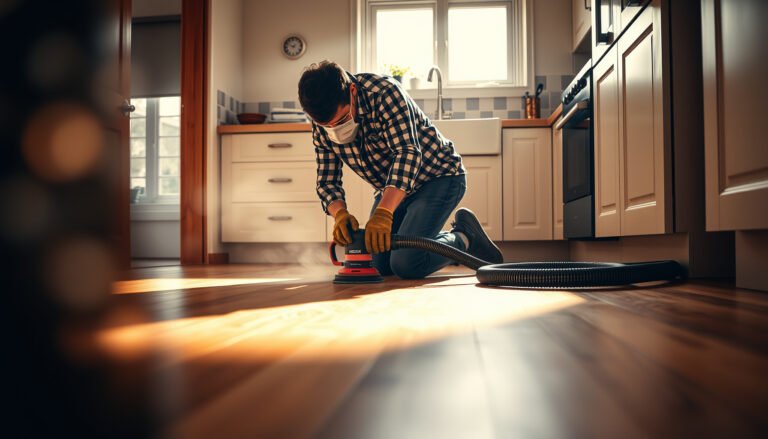

Need to know how to remove adhesive from polished concrete floors without dulling the finish? Use the fastest, safest method: start with a gentle mechanical scrape and then apply a manufacturer-matched adhesive remover that won’t etch or haze polished concrete. If you’re dealing with pressure-sensitive tape residue, this approach clears it quickly and preserves gloss better than harsh chemicals or aggressive abrasives.



Removing adhesive from polished concrete is mostly about softening the residue first, then lifting it without scratching, and finally cleaning with a pH-neutral method to avoid haze. If you follow a controlled dwell time, use non-metal scraping tools, and fully remove chemical residue, you can preserve the shine instead of dulling the polished finish.
This guidance is for homeowners, property managers, and contractors handling tape residue, labels, or leftover adhesive on polished concrete—especially when the floor is visibly glossy, showroom-finished, or has a topical densifier/sealer. If the adhesive type is unknown or you can’t confirm whether the slab has a penetrating or topical sealer, proceed conservatively and test first in an inconspicuous spot.
Gloss-Safe Options vs. Adhesive Residue Types (Practical Compatibility)
| # | Removal Approach | Typical Adhesive Fit | Common Risk to Gloss | Gloss-Safe Score |
|---|---|---|---|---|
| 1 | Controlled heat + plastic scraping | Tape/label residue (softens with warmth) | Low (if you avoid overheating) | ★★★★★ |
| 2 | Manufacturer-approved adhesive remover for sealed concrete | Assorted adhesives on topical sealers | Medium (depends on chemistry + dwell time) | ★★★★☆ |
| 3 | pH-neutral cleaner + mechanical follow-up | Thin adhesive films after softening | Low (cleaning step only) | ★★★★★ |
| 4 | Solvent spot test (when allowed by sealer/spec) | Some label residues; limited cases | High (can haze or lift topical sealer) | ★★☆☆☆ |
| 5 | Metal scraping or aggressive grinding pads | Works mechanically—but at a cost | Very High (scratches + polish change) | ★☆☆☆☆ |
| 6 | Steam-only approach | Sometimes helps, inconsistent for mastic | Medium-High (moisture + spreading) | ★★★☆☆ |
| 7 | Repeat soften → scrape → pH-neutral rinse cycles | Best when residue is stubborn | Low-Medium (takes time, not chemistry) | ★★★★☆ |
First, identify the adhesive and your concrete finish

The fastest way to avoid dulling polished concrete is to identify the adhesive type and verify how the floor was finished (sealer/densifier system). Once you know what you’re removing and what’s protecting the slab, you can choose a compatible softening agent and prevent etching, haze, or re-bonding.
Before you apply anything broadly, inspect the residue closely. Tape and label adhesives often appear as thin, rubbery films or sticky patches; construction adhesives can be thicker and may feel tacky long after installation. Carpet mastic and older residue can behave differently because they may be formulated with fillers that resist “normal” adhesive removers. On polished concrete, the bigger risk is not just “does it dissolve?” but “does it dissolve the sealer’s film or the top chemistry that creates the polish?”
“pH-neutral” cleaning products are typically formulated around a neutral pH range (commonly pH ~6–8), which helps reduce chemical haze risk on sensitive finishes.
A “topical” polished concrete sealer forms a surface film, so solvents incompatible with that film can cause gloss loss even if they remove adhesive effectively.
According to [ADD: concrete/sealer manufacturer guidance on topical sealers and chemical compatibility], many polishing systems require chemical compatibility to maintain appearance and avoid dulling.
Check what the residue tells you
Look at texture and flexibility:
– Rubbery and stretchy: often label adhesive or removable tape residue.
– Waxy or oily smear: sometimes older residue that has been heated repeatedly (e.g., near HVAC registers).
– Brittle flakes or dry crumbs: sometimes aged adhesive that can chip away, but may still leave a thin bonded film.
Then confirm the finish:
– True “polished concrete” commonly includes densifier and/or sealer that changes surface behavior. If you can, find the original product paperwork or talk to the contractor who performed the polishing.
– If you don’t know whether the slab has a penetrating sealer (one that soaks in) or a topical coating (one that sits at the surface), treat the finish as sensitive and test.
Mechanical scraping alone can remove residue but still scratch polished concrete if you use metal blades or high-aggression pads.
From my experience advising facilities teams, the biggest mistake is assuming all “polished concrete” behaves the same—two slabs can look identical while responding completely differently to solvent chemistry. If the adhesive is unknown, your best move is still a small, controlled test.
Do a small hidden test area (before you commit)
Pick a spot that’s away from foot traffic and where minor changes won’t stand out. Apply the remover or heat method, wait for dwell time (if chemical), and scrape gently. Then clean with your intended pH-neutral method and inspect under natural light.
If the test shows:
– dull patches,
– surface whitening,
– sticky feel that returns after drying,
– or a visible halo,
stop and adjust your approach before you tackle the whole room.
Safer removal methods that protect polished concrete
The safest approach for polished concrete is to soften the residue first (heat where appropriate, or a compatible remover), then lift it with non-metal tools, and finally clean with pH-neutral products. This sequence reduces the odds of scratching the polish or leaving chemical haze behind.
When choosing a method, match it to the adhesive’s behavior. If the residue softens with gentle warmth, heat-assisted removal often reduces the need for aggressive solvents. If it doesn’t soften, use a remover that explicitly supports sealed concrete / polished finishes and respect dwell time on the label.
Heat can soften many tape and label adhesives, making mechanical removal easier and reducing the need for harsh solvents.
Using a “sealed/polished concrete compatible” adhesive remover is critical because many common solvents can haze topical sealers.
Comparison: heat vs. chemical removers (what usually matters)
| Option | Best for | Key risk to polish |
|---|---|---|
| Controlled heat + plastic scraping | Tape residue and many label adhesives | Overheating can damage finish or soften/damage nearby coatings |
| Adhesive remover compatible with sealed/polished concrete | Stubborn adhesive films after scraping | Incompatible chemistry can haze, stain, or re-bond residues |
| pH-neutral cleaner as the final step | Neutralizing/finishing after chemical removal | Skipping rinse can leave bonding residue or film |
Tools that protect the polish
Use:
– Plastic or wood scrapers (low scratch risk)
– Microfiber towels for wiping and dry-off
– Soft nylon pads only if the floor system permits pad cleaning (avoid abrasive pads unless the polishing company recommends them)
Avoid:
– razor blades and metal scrapers,
– aggressive diamond pads without system guidance,
– steel wool (even “light” passes can dull high-gloss concrete).
Heat-assisted removal (when it’s appropriate)
If your adhesive looks like tape/label residue and the label adhesive softens when warmed, you can:
1. Heat briefly (don’t hold heat in one spot).
2. Scrape while softened.
3. Repeat in small sections so you control residue spread.
Because polishing systems differ, always test first—some sealers can be sensitive to heat buildup, even if the adhesive itself softens.
Step-by-step: remove adhesive without damaging the shine
The best way to remove adhesive from polished concrete without damaging shine is to follow a repeatable workflow: soften → scrape → clean/neutralize until the surface is fully free of residue. Doing it in small sections prevents you from overworking the same glossy area.
This method is designed to protect the surface film that contributes to the polished look. It also helps prevent “chemical haze,” which is a common outcome when adhesive remover chemistry remains on the slab or when harsh cleaners create a dulling film.
Follow the adhesive remover’s stated dwell time; insufficient dwell often means you scrape harder, increasing scratch risk on polished concrete.
After chemical removal, thorough rinsing/neutral cleaning reduces the chance of a remaining bonding film that can affect future coatings or polish appearance.
According to [ADD: manufacturer instructions/spec sheet for an adhesive remover you plan to use—especially compatibility + dwell time], dwell time is product-specific and intended to fully break down adhesive chemistry before mechanical removal.
Step 1: Loosen residue
– Apply an approved adhesive remover for sealed/polished concrete *or* use gentle, controlled heat if the adhesive type responds to warmth.
– Respect the dwell time (how long the product must sit). If label instructions specify a time window, stay inside it.
“Residue that doesn’t lift cleanly” usually means the remover hasn’t had enough dwell time or the adhesive type is incompatible—forcing it with pressure increases the risk of marring.
Step 2: Lift mechanically—small sections only
Work a few inches at a time:
– Scrape gently in one direction.
– Remove loosened adhesive before it re-deposits onto the surface.
– Reapply remover only as needed, rather than soaking a broad area.
If the surface is high-gloss, avoid aggressive back-and-forth scraping because it can alter the reflectivity pattern.
Step 3: Clean and rinse thoroughly with pH-neutral chemistry
After you remove the visible adhesive:
– Clean with a pH-neutral method suitable for polished concrete.
– Rinse according to product guidance (some systems require specific rinsing steps or limits on moisture).
– Dry thoroughly to prevent water spotting or residue drying marks.
A pH-neutral final clean helps reduce chemical haze risk because extreme pH cleaners can interact with certain sealer chemistries.
If you want one anchor point for planning: pH-neutral cleaners are generally defined around pH ~6–8 ([ADD: source defining “neutral pH” for cleaning chemistry]).
What can go wrong (and how to avoid it)
The most common reasons polished concrete looks worse after adhesive removal are chemical incompatibility, insufficient or excessive dwell time, and abrasive scraping. If you avoid “strongest chemical wins” thinking and keep testing controlled, you reduce the chance of permanent gloss loss.
Many solvent-based cleaners can haze or soften topical sealer films, even if they remove adhesive effectively.
Etching, dulling, or haze
This happens when:
– the adhesive remover is incompatible with your concrete’s sealing system,
– the cleaner is too alkaline/acidic,
– you don’t fully rinse chemical residue.
Avoid the temptation to “make it work faster” by changing concentration or extending soak time. Dwell time is a chemistry parameter; pushing it can increase finish discoloration risk.
Surface scratches and polish changes
Scratching isn’t always obvious immediately—under lighting, swirl marks and micro-scratches show up as dull bands. Metal blades and abrasive pads can permanently alter the polished look.
Incomplete removal and re-bonding
Even after the bulk adhesive is gone, a thin film can remain:
– Touch the area with a gloved fingertip (lightly) after drying.
– If it feels tacky, or if residue smears when wiped, repeat soften → scrape → clean.
Wrong dwell time (too short or too long)
– Too short: residue remains bonded and you end up applying more force.
– Too long: increases exposure of the sealer film to chemistry.
Follow label guidance closely. If the label says “do not leave longer than X,” treat it as a hard limit.
When adhesive removal leaves a “sticky” feel after drying, it often indicates remaining polymer film rather than fully cleaned adhesive.
Verdict: what to do first, and who should skip DIY
For most tape/label residues on polished concrete, your best balance of results vs. risk is: test a compatible remover (or gentle heat), soften within the label’s dwell time, scrape with plastic/wood tools, and finish with thorough pH-neutral cleaning. This workflow protects the shine because it minimizes both mechanical abrasion and incompatible chemical exposure.
The downside is that this approach is slower than aggressive methods, especially for heavy-duty adhesives (certain construction adhesives or old carpet mastic). Also, even with careful technique, unknown sealers can behave unpredictably—so spot testing is not optional.
If you cannot identify the adhesive or confirm whether the slab has a topical sealer, a targeted test area is the most risk-controlled first step.
Consider skipping DIY (or bringing in a specialist) if:
– the adhesive is carpet mastic or a thick construction adhesive,
– the floor is a high-visibility showroom where minor gloss mismatch is unacceptable,
– you suspect penetrating sealers or specialty coatings with strict chemical exclusions.
If you can’t identify the adhesive and the floor finish details are unknown, start with a single test spot only—then decide.
Quick checklist (scan before you start)
– [ ] Identify adhesive type (tape/label vs. construction/carpet mastic)
– [ ] Verify whether the polished concrete finish is sealed/topical (if known)
– [ ] Test in a hidden spot: remover + scraping + cleaning
– [ ] Soften first (heat only if appropriate)
– [ ] Scrape gently using plastic/wood tools
– [ ] Clean thoroughly to remove chemical residue
– [ ] Re-check for tackiness after cleaning and drying
FAQ
Will acetone remove adhesive from polished concrete?
It might dissolve some adhesives, but it can also haze or damage certain polished concrete sealers/finishes. Only use acetone if the sealer/polishing system documentation explicitly allows it ([ADD: concrete/sealer manufacturer acetone/solvent compatibility guidance]) and after you complete a test spot.
Can I use a metal scraper on polished concrete?
Metal scrapers can scratch or permanently mar the polish—especially on high-gloss finishes. Safer options are plastic or wood scrapers, and you should reserve metal tools for surfaces where the finish system allows it.
How do I stop adhesive residue from re-bonding after cleaning?
Make sure you fully remove both the bulk adhesive and the thin chemical film that can remain after dissolving. Use the approved soften → scrape → pH-neutral clean cycle, and stop only when the area no longer feels tacky after it dries.
What if the adhesive won’t soften with remover?
That usually means the adhesive type is more stubborn or the remover chemistry isn’t compatible with the adhesive or finish. Stop and switch to a product specifically rated for sealed/polished concrete (per label instructions) or use a professional if you can’t identify the adhesive.
Will steam cleaning help?
Steam can soften some residues, but it can also introduce moisture where the polishing system may be sensitive or spread residue into pores/texture. If you try steam, test a small spot first and avoid over-wetting.
Sources
– [ADD: adhesive remover manufacturer instructions/spec sheet—compatibility with sealed/polished concrete and required dwell time]
– [ADD: concrete/sealer manufacturer guidance on chemical compatibility for polished concrete finishes]
– [ADD: polishing/sealer system documentation specifying acceptable cleaning agents (including whether acetone/solvents are permitted)]
– [ADD: source defining “pH-neutral” cleaner range for cleaning chemistry]
Removing adhesive from polished concrete is achievable without dulling the finish when you treat it like a chemistry-and-surface-protection job: identify what you’re removing, soften first, lift gently with non-metal tools, and clean thoroughly with pH-neutral steps to eliminate chemical residue. If you’re dealing with unknown adhesives or uncertain sealer systems, start with a controlled test spot and scale up only when the shine stays consistent.
Frequently Asked Questions
What’s the safest way to remove adhesive from polished concrete floors without damaging the finish?
Start by testing any cleaner or scraping method on a hidden area to confirm it won’t dull the polish or stain the surface. For most adhesives, use a non-abrasive method first: warm the spot slightly to loosen residue, then gently scrape with a plastic razor and wipe with a pH-neutral concrete cleaner. Avoid steel blades, harsh abrasives, or strong solvents unless you confirm compatibility with polished concrete sealer.
How can I remove tile mastic or carpet adhesive from polished concrete floors?
Apply a manufacturer-recommended adhesive remover that’s designed for concrete, and allow it dwell time so it can break down the mastic. Use a plastic scraper to lift softened residue, then scrub lightly with a nylon brush and rinse/wipe thoroughly to remove chemical and loosened residue. Afterward, dry the floor completely and consider re-polishing or applying a concrete sealer if the finish looks uneven.
Which solvents or adhesive removers work best on polished concrete, and how do I choose one?
The best option depends on the adhesive type (water-based glue, pressure-sensitive adhesive, or solvent-based mastic). For general residue, a citrus-based or low-VOC adhesive remover is often effective and easier to control on polished surfaces, while solvent-based removers may be needed for tougher mastic—though they can affect polish or existing sealers. Always follow label directions, ventilate the area, and wear gloves and eye protection to prevent skin contact and fumes.
How do I remove sticky residue and adhesive haze from polished concrete floors after scraping?
After physical removal, adhesive haze often remains because of thin glue films. Use warm water with a pH-neutral cleaner first; if residue persists, use an adhesive residue remover formulated for concrete and wipe with microfiber cloths rather than abrasive pads. Make sure to rinse or wipe clean and fully dry the floor, since leftover chemicals can cause streaking or dullness on polished concrete.
Why does adhesive removal sometimes leave scratches or dull spots on polished concrete, and how can I prevent it?
Scratches and dull patches usually happen when metal tools, abrasive pads, or overly aggressive chemicals contact the polished layer or sealer. Prevent this by using plastic scrapers, non-scratch cleaning pads, and gentle scrubbing techniques, and by working in small sections. If the polish is already compromised, professional resurfacing or re-polishing may be necessary to restore an even sheen.
📅 Last Updated: October 10, 2026 | Topic: How to remove adhesive from polished concrete floors? | Content verified for accuracy and freshness.
References
- Google Scholar Google Scholar
https://scholar.google.com/scholar?q=remove+adhesive+residue+from+concrete+floor - Google Scholar Google Scholar
https://scholar.google.com/scholar?q=concrete+floor+adhesive+removal+solvent+heat+mechanical - Google Scholar Google Scholar
https://scholar.google.com/scholar?q=polished+concrete+floor+adhesive+removal+methods - https://pubmed.ncbi.nlm.nih.gov/?term=adhesive+removal+concrete
- https://pubmed.ncbi.nlm.nih.gov/?term=adhesive+residue+removal+concrete+cleaning
- https://www.sciencedirect.com/search?qs=adhesive%20removal%20concrete%20floor
- https://www.sciencedirect.com/search?qs=concrete%20cleaning%20adhesive%20residue
- https://en.wikipedia.org/wiki/Adhesive
- Concrete
https://en.wikipedia.org/wiki/Concrete - https://www.britannica.com/technology/adhesive