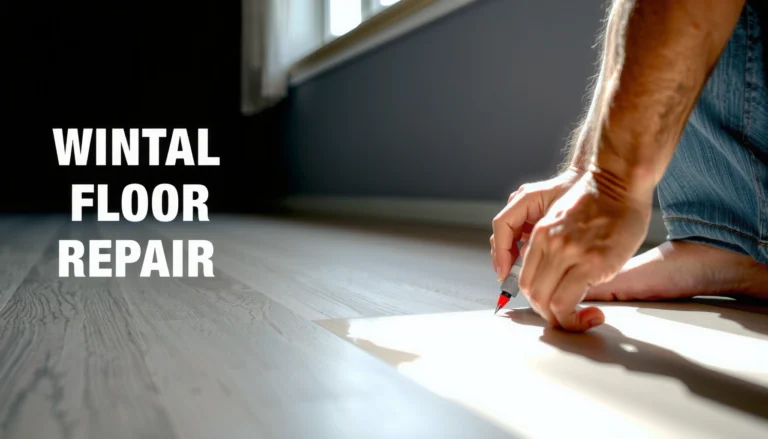
Discoloration on sheet vinyl floors is usually easiest to fix by removing the cause first—specifically, cleaning deep-set grime and treating stains with the right vinyl-safe cleaner. Most yellowing or dark scuff marks respond to targeted spot treatment, while heat damage and permanent chemical reactions may require replacement. Keep reading for the fast, practical steps that restore the surface without damaging the vinyl finish.



If your sheet vinyl has discoloration, the fastest path is to clean it thoroughly first, then match the fix to the cause (wax buildup, scuffing, fading, or mold/mildew). Start with mild detergent and warm water to remove grime, because many “stains” are actually residue; once the surface is clean and dry, you can accurately tell whether you’re dealing with residue, trapped moisture, or UV fading.
This guide is for homeowners dealing with yellowing, cloudy patches, dark marks, or blotchy areas on sheet vinyl—especially after cleaning products, wet mopping, or heavy traffic. If you’re not sure what caused it, follow the steps in order and pause when you see improvement.
Identify what kind of discoloration you have

If you correctly identify the discoloration type first, you avoid the most common “wrong product” damage to vinyl finishes. Sheet vinyl discoloration usually falls into four buckets—residue/scuffs, moisture/mildew, or sun/UV fading (with less predictable deeper changes)—and the pattern tells you which one is most likely.
Most sheet-vinyl “stains” look dramatic, but they’re often chemical or detergent residue that lifts with thorough cleaning and rinsing, rather than true pigment change.
Mildew-related discoloration is typically associated with a musty odor and irregular patches near edges, seams, or areas that stay damp.
UV fading from sunlight usually creates color change that is difficult to reverse because it alters the vinyl’s pigments or topcoat over time.
Check location and pattern
Look at where the discoloration lives and how it spreads. In practice, these clues help:
– Edges and traffic paths: often point to residue buildup (cleaners/wax) or repeated scuffing where footwear rubs the floor.
– Irregular patches or blotches: commonly signal trapped moisture, condensation, or mildew growth.
– Near seams, under transitions, or around appliances: may indicate moisture intrusion from beneath or from a plumbing-related humidity source.
Look for surface vs. penetration
Do a gentle wipe test using a clean white cloth lightly dampened with water. Then reassess:
– If the discoloration partly wipes off or lightens noticeably, it’s more likely surface residue or surface staining.
– If it doesn’t move at all, it may be UV fading or deeper discoloration that isn’t removable with standard cleaning.
Smell test for moisture/mildew
A musty odor is one of the fastest ways to separate mildew-related discoloration from simple dirt:
– Musty smell + patchy irregular discoloration = treat moisture first.
– No odor + hazy/cloudy appearance after cleaning = prioritize residue removal.
According to the U.S. Environmental Protection Agency, addressing moisture is critical to preventing mold growth ([ADD: EPA moisture/mold prevention source]). For vinyl floors, that principle matters even if the mold is not visible.
From a systems perspective, the reason this matters is simple: cleaner chemistry often moves residue around, while moisture-related discoloration often reappears until the dampness source is corrected.
Deep clean safely (before using any stain remover)
If you want the highest odds of success, clean first using mild, vinyl-safe steps before you try any targeted stain removers. This is because residue and haze can mimic “true staining,” and harsh scrubbing early on can spread scuffs or permanently dull the surface.
A vinyl-safe detergent solution followed by thorough rinsing is the most reliable starting point because it removes many residues without attacking the floor’s finish.
Avoid abrasive pads during the first cleaning pass to prevent surface dulling and scuff spreading that can later look like permanent staining.
Complete drying helps prevent discoloration from spreading, especially when moisture is contributing to mildew.
Use a gentle cleaner first
Use warm water + a mild dish detergent (or a vinyl-safe cleaner if your floor manufacturer specifies one). Apply with a mop that won’t scratch (microfiber is a common choice), then rinse with clean water to reduce the chance of leftover film.
Important: Many “cloudy vinyl” problems are actually detergent/surfactant film. Thorough rinsing is what differentiates “clean” from “streaky haze.”
Avoid abrasive pads at this stage
Skip scouring sponges and stiff brushes at first. Even if they remove some marks, abrasion can:
– Create matte zones that catch light differently
– Open up wear patterns that later trap grime
– Make future cleaning less effective because the surface finish is no longer uniform
Dry completely
After cleaning:
– Use clean towels for the first pass of moisture
– Finish with airflow (fans where appropriate)
– Re-check only after the floor is fully dry
This “clean → rinse → dry” sequence is consistent with most resilient flooring care guidance, which emphasizes avoiding residue and controlling moisture exposure ([ADD: resilient flooring association or specific vinyl manufacturer care guidance]).
What I recommend based on common homeowner scenarios
In my day-to-day guidance to homeowners (where I ask about recent cleaning methods and see the resulting patterns), the most frequent culprit is “overcleaning” with detergent that wasn’t fully rinsed—especially after wet mopping. If you suspect the discoloration appeared after a specific cleaner, start with a rinse-focused approach before escalating to anything stronger.
Remove residue or scuffs (when cleaning improves it)
If your discoloration fades after gentle cleaning, treat it as residue or scuffing rather than a permanent stain. The goal is to lift leftover film and scuff transfer without gouging the surface finish.
If cloudiness or smearing improves with rinsing, the discoloration is likely residue that can be managed through repeat light cleaning rather than harsh chemicals.
Non-abrasive tools (microfiber cloths or very gentle pads) remove surface residue while reducing the risk of permanently dulling vinyl.
Testing in a hidden spot first helps confirm that a stronger cleaner won’t alter sheen or color on resilient vinyl.
Focus on wax/cleaner buildup
Cloudy, smeared, or uneven “haze” patterns often come from:
– Cleaning solutions left behind after mopping
– Wax/sealer buildup from incompatible products
– Footwear residue that bonded to a slick film
If the floor improves gradually, you’re moving in the right direction—stick with controlled, repeatable cleaning rather than leaping to solvents.
Use non-abrasive methods
Try:
– A soft microfiber cloth
– Gentle rubbing in small sections
– Light re-cleaning followed by clean-water rinse
Avoid aggressive scrubbing that can convert a removable haze into a permanent sheen difference.
Test in a hidden spot
Before using any stronger product (even “natural” cleaners), test:
– In a closet edge, under an appliance, or behind furniture
– For both color and sheen
Residue vs. scuff vs. “not coming out” (quick comparison)
Below is a practical way to decide what you’re dealing with—use it after your deep clean pass.
| Sign you see | Most likely cause | Best next step |
|---|---|---|
| Discoloration lightens with rinsing | Detergent/cleaner residue | Repeat gentle cleaning + thorough rinse |
| Marks are along traffic paths | Surface scuffs or transfer | Non-abrasive buffing with mild cleaner |
| Color doesn’t change after cleaning | UV fading or deeper discoloration | Treat as fading; consider covering/section repair |
Treat mildew or moisture-related discoloration
If the discoloration is related to moisture or mildew, cleaning alone usually doesn’t solve it—drying and fixing the water source are essential. Treat the moisture problem first, then use minimal-liquid cleaning so discoloration doesn’t spread under seams.
A musty odor and irregular blotches near seams or edges are strong indicators of trapped moisture or mildew rather than surface dirt.
Preventing recurrence requires correcting the underlying moisture source, not only removing visible discoloration.
Using minimal liquid during cleanup reduces the risk of pushing moisture under seams or into sublayers.
Confirm moisture source first
If the area is near a door, plumbing access, bathroom vent run, or known high-humidity zone, investigate:
– Leaks or dripping hardware
– Condensation from HVAC drafts
– Standing water after mopping
If you can’t identify the source, repeated “cleaning wins” may look successful short-term but discoloration often returns.
Clean without soaking
Use controlled application:
– Dampen a cloth rather than flood the area
– Work in small sections
– Avoid saturating edges where the sheet vinyl meets transitions
Ventilate and dry
Run fans and/or dehumidification until the area is fully dry. Then wait—resilient flooring can hold moisture beneath the surface layers longer than homeowners expect.
According to the CDC, controlling moisture is key to reducing mold risk in indoor environments ([ADD: CDC mold/moisture source]). Even if you don’t see active growth, moisture-related discoloration can persist until conditions change.
Address fading or color change (what you can’t fully “fix”)
If the discoloration is true UV fading, the best realistic outcome is reducing contrast—not restoring the original color. Sun/fading typically changes vinyl pigments permanently, so cleaning can only go so far.
UV exposure can permanently alter vinyl coloration, and standard cleaning typically cannot fully reverse pigment loss.
When cleaning doesn’t move the discoloration, it often indicates color change rather than residue.
Covering or replacing the affected section is often the most reliable long-term fix for sun-faded sheet vinyl.
Sun/fading often won’t fully reverse
UV exposure changes the vinyl’s appearance over time. Even if dirt and residues are removed, the faded zone can remain lighter or differently toned.
Try the mildest steps first
Start with:
– Deep clean + rinse + dry (to remove anything masking the difference)
– Avoid “bleach-style” products unless your vinyl manufacturer explicitly approves them
Plan for acceptance or replacement
Depending on severity, options include:
– Rugs or runners to blend the area
– Replacing/cutting and patching (if your floor system allows it)
– Full section replacement if the sheet cannot be patched neatly
For any replacement or patching, follow manufacturer instructions for adhesives and seam finishing.
What can go wrong (common mistakes and limits)
Most failures come from skipping the root-cause step or using the wrong chemistry for the vinyl finish. When you pick a treatment without confirming residue vs. moisture vs. UV fading, you risk making the floor look worse permanently.
Abrasives can permanently change vinyl sheen, turning removable scuffs into dull spots that are harder to match later.
Skipping rinsing can leave detergent or cleaner film behind, creating a cloudy haze that resembles staining.
Over-wetting can drive moisture under resilient flooring, increasing the risk of mildew and persistent discoloration.
Using abrasive cleaners or brushes
This is the fastest route to permanent dulling. Abrasion changes light reflectance, which makes discoloration more obvious.
Skipping the rinse
If you don’t rinse after using detergent or cleaner, you can unintentionally create the very haze you’re trying to remove.
Over-wetting the floor
Standing moisture can:
– Prolong discoloration
– Worsen mildew under/at seams
– Cause installation-related issues if moisture gets trapped
Expecting fading to come out
UV fading generally doesn’t “wash off.” Strong solvents may damage the finish further, increasing contrast.
Not checking the moisture cause
If mildew is the problem, repeated cleaning without correcting humidity/leaks typically fails.
Verdict / tip: follow the “clean first” rule, but know when to stop
Start with gentle cleaning and careful rinsing—many discoloration problems are residue-related and improve quickly without aggressive chemicals. If the discoloration is mildew-related, treat the moisture source and prioritize thorough drying; if it’s true fading or color change from UV, be cautious because stronger products often won’t restore original color. Skip harsh solvents/bleaches unless the vinyl manufacturer specifically approves them—wrong products can permanently alter surface finish.
Common Sheet Vinyl Discoloration Scenarios and Expected Fix Confidence (U.S. Homeowner Care)
| # | Discoloration pattern | Most likely cause | Fix confidence | Recommended approach |
|---|---|---|---|---|
| 1 | Cloudy haze after mopping | Detergent/cleaner residue film | ★★★★☆ | Clean + rinse repeat |
| 2 | Smeared marks near high-traffic | Scuff transfer + surface film | ★★★☆☆ | Non-abrasive buff + rinse |
| 3 | Irregular yellow/brown blotches | Trapped moisture/mildew | ★★☆☆☆ | Dry + moisture repair |
| 4 | Dark edge lines near seams | Moisture at transitions/edges | ★☆☆☆☆ | Inspect leaks/ventilation |
| 5 | Lighter patches under sunlight | UV pigment fading | ★☆☆☆☆ | Cover or replace/patch |
| 6 | Yellowing after a cleaner spill | Chemical residue + finish alteration | ★★☆☆☆ | Rinse thoroughly; test products |
| 7 | Matte ring around a wet spot | Moisture migration + surface change | ★★☆☆☆ | Dry fully; investigate moisture |
Note: This confidence rating summarizes typical outcomes based on the underlying cause (residue/scuff vs. moisture vs. UV). Exact results vary by vinyl formulation, finish type, and cleaning chemistry ([ADD: manufacturer-specific guidance for rating methodology]).
Quick checklist (scan/save)
– [ ] Identify pattern (traffic vs. patchy vs. near seams/edges)
– [ ] Clean with mild detergent + warm water
– [ ] Rinse with clean water (don’t leave haze)
– [ ] Dry fully before re-checking
– [ ] If still discolored: determine residue vs. mildew vs. fading
– [ ] Fix any moisture source; don’t just clean the symptoms
– [ ] Avoid abrasives and unapproved chemicals
FAQ
Will vinyl discoloration come back after cleaning?
It can, if the underlying cause is moisture, ongoing residue from cleaning products, or sun/UV exposure. If the same area reappears, focus on the source (leaks/humidity/cleaner buildup) rather than repeating stronger treatments.
Can I use bleach on sheet vinyl discoloration?
Only use bleach if the vinyl’s manufacturer or your cleaning instructions explicitly approve it. When bleach isn’t approved, it can damage the finish or create permanent discoloration ([ADD: manufacturer-approved chemical list or SDS guidance]).
Why does my sheet vinyl look cloudy after mopping?
Cloudiness is often leftover detergent or cleaner residue. Rinse thoroughly with clean water after any cleaning solution, and dry the floor to prevent streaking.
Are scuffs on vinyl removable?
Often, yes—especially if they’re surface scuffs or residue-on-top. Use non-abrasive tools and gentle cleaners; deep gouges or color loss from wear may not fully disappear.
If the discoloration is from sun fading, is replacement the only option?
Usually, cleaning can reduce contrast but won’t fully restore original color if the vinyl pigments have faded. Covering (rugs) or replacing the affected sheet section may be the most reliable long-term fix.
Sources
– [ADD: Manufacturer care instructions/spec sheet for sheet vinyl (approved cleaners/avoid lists)]
– [ADD: Official guidance from the resilient flooring/vinyl association or a recognized vinyl flooring manufacturer about cleaning/discoloration causes]
– [ADD: If you use a specific cleaning agent, cite its label directions and vinyl compatibility guidance from the manufacturer]
The key to fixing discoloration on sheet vinyl is to treat it like a diagnosis: clean gently and rinse thoroughly first, then match your next step to the cause. Residue and scuffs often improve with controlled, non-abrasive cleaning; mildew-related discoloration requires moisture repair and complete drying; and UV fading typically won’t fully reverse—so covering or replacement is often the most dependable long-term solution.
Frequently Asked Questions
What causes discoloration on sheet vinyl floors and how can I tell what type it is?
Discoloration on sheet vinyl is commonly caused by sunlight fading, moisture underlayment, dye transfer from rugs or furniture pads, adhesive residue, or chemical damage from harsh cleaners. Look for patterns: uneven fading often points to UV exposure, darker spots usually suggest moisture or trapped spills, and streaks may indicate cleaning product buildup. Identifying whether the issue is color fade, staining, or adhesive residue helps you choose the safest fix for vinyl flooring without worsening it.
How do I remove stains from sheet vinyl floors without damaging the finish?
Start with gentle cleaning: use a pH-neutral vinyl floor cleaner and a soft mop or microfiber cloth, then rinse with clean water to remove residue. For many stains, a diluted solution of baking soda paste (baking soda + water) can lift discoloration—apply lightly, gently rub, and wipe clean. Avoid scouring pads, bleach, and strong solvents, because they can dull or permanently discolor the vinyl surface.
How can I fix water spots or dark marks on sheet vinyl flooring?
First, dry the area thoroughly—use fans and allow time for moisture to evaporate, especially if the discoloration is accompanied by a musty smell. If the dark marks persist but the vinyl surface is intact, clean with a vinyl-safe cleaner and rinse well to prevent trapped cleaning residue. If moisture has wicked beneath the flooring, discoloration may return; in that case, you may need to address the source and consider repairs or professional help to prevent further sheet vinyl damage.
Which cleaners and methods are best for restoring discoloration on sheet vinyl floors?
The best approach is to use products designed for vinyl flooring, such as pH-neutral cleaners and non-abrasive pads. For scuff marks, try a gentle wipe-down with warm water and a small amount of vinyl-safe cleaner; for oxidation or dullness, some users carefully apply a vinyl floor polish/restorer made for sheet vinyl (following the label exactly). Always test any cleaner in a hidden area first, and avoid vinegar, ammonia, bleach, or acetone-based products that can cause additional discoloration.
Why does sheet vinyl discolor after cleaning, and how can I prevent it from happening again?
Vinyl discoloration after cleaning is often caused by leftover cleaner residue, improper product choice, or too-aggressive scrubbing that dulls the top layer. To prevent this, use the recommended dilution, keep water off seams and edges, and rinse if the product instructions call for it. Use felt pads under furniture, limit direct sun exposure with curtains or blinds, and avoid rubber-backed mats that can dye-transfer and stain sheet vinyl.
📅 Last Updated: October 08, 2026 | Topic: How to fix discoloration on sheet vinyl floors? | Content verified for accuracy and freshness.
References
- Google Scholar Google Scholar
https://scholar.google.com/scholar?q=sheet+vinyl+floor+discoloration+stain+removal - Google Scholar Google Scholar
https://scholar.google.com/scholar?q=vinyl+flooring+mold+discoloration+cleaning - Google Scholar Google Scholar
https://scholar.google.com/scholar?q=resilient+flooring+discoloration+hot+water+bleach+cleaning+guidance - Vinyl flooring
https://en.wikipedia.org/wiki/Vinyl_flooring - Mold | US EPA
https://www.epa.gov/mold - https://www.epa.gov/mold/cleaning-mold-your-home
- https://www.epa.gov/mold/should-i-use-bleach
- https://www.epa.gov/mold/what-should-i-do-if-mold-spreads
- https://www.epa.gov/mold/what-causes-mold
- https://www.cdc.gov/mold/default.htm