
Installing baseboards with hardwood floors is one of those jobs where the details determine whether you get a clean, professional finish—or permanent gaps and awkward shoe-molding lines. This step-by-step guide shows the exact order of operations, from prepping the hardwood and establishing expansion space to cutting, fastening, and caulking baseboards without damaging the floor. If you want baseboards that sit tight and stay that way, follow these instructions for a straightforward, reliable installation.




You can install baseboards on hardwood floors cleanly by planning the floor-to-trim clearance first and fastening the baseboard to the wall studs (not into the flooring), so the hardwood can expand/contract naturally. In most cases, you’ll leave a small bottom gap, nail/screw into solid backing, and use caulk only at the wall-to-baseboard seam where it won’t “lock” movement.
This guide is for homeowners and DIYers installing baseboards after (or alongside) hardwood flooring—especially when you want a tight, professional look without buckling, lifting, or visible seasonal gaps. If your hardwood is floating or you’re not sure how much expansion space your installer left, review the steps below before you cut or nail anything.
Measure, plan the gap, and dry-fit the baseboard
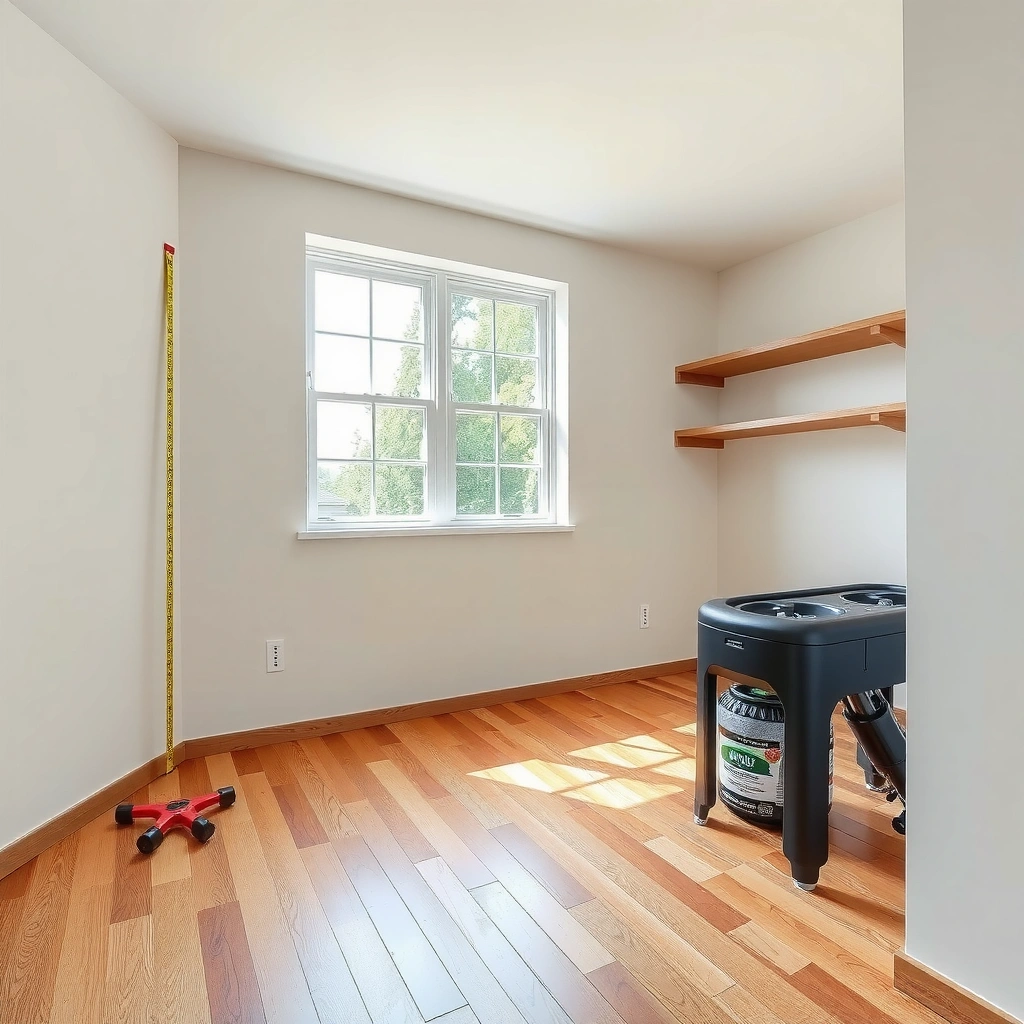
You should plan the clearance and dry-fit everything before you cut nails or miter joints. The goal is a consistent “reveal” (the visible trim line) while leaving enough bottom room so hardwood can move without being restrained by the baseboard.
Most hardwood flooring products require perimeter clearance (commonly around 1/2 in / 13 mm) to accommodate seasonal expansion, per manufacturer installation instructions.
Baseboards should be fastened to the wall (studs/blocking), not to the hardwood, to avoid restricting the floor’s natural movement.
A small bottom gap between baseboard and hardwood helps prevent trim-induced buckling when humidity changes.
Here’s the practical workflow I use when I’m laying out trim over hardwood: start by measuring each wall run and marking where the inside and outside corners land. Dry-fit your baseboard pieces (including end cuts and corner pieces) so you can confirm the reveal—the visible line between the hardwood edge and the face of the baseboard. If you rush this step, you’ll often end up “solving” geometry problems later with shims and caulk, which can hide gaps but won’t fix movement issues.
Next, decide your bottom clearance. In many installs, baseboards aren’t installed tight to the floor; instead, you maintain a small gap (often in the ballpark of 1/8 in to 1/4 in / 3–6 mm) so the hardwood can expand downward/sideways relative to the trim. The exact number should match your hardwood flooring manufacturer’s installation requirements and your baseboard profile. If your floor is nail-down hardwood, manufacturers still expect movement from moisture changes; if it’s floating, movement becomes even more important.
Finally, mark stud locations (or blocking) and draw light reference lines for where fasteners will go. This is a critical “anti-fail” habit: drywall alone is rarely strong enough to keep baseboards perfectly tight over time, especially as humidity cycles.
Handy planning reference (what you’re trying to achieve)
According to the National Wood Flooring Association (NWFA), wood flooring performs best when installation methods do not restrict normal dimensional movement (NWFA installation guidance; see product/installation requirements).
If your product documentation specifies a particular perimeter allowance, follow it first and treat all trim clearance decisions as downstream of those requirements ([ADD: cite your specific flooring manufacturer installation guide]).
Prep the wall and floor edges before fastening
You should prep both the wall surface and the hardwood edge so the baseboard sits straight without forcing corners. Smooth, clean surfaces make fastening more reliable and reduce the need for “thick” caulk that can look messy or crack later.
Caulk adhesion and appearance depend heavily on clean, dust-free substrates at the wall seam.
If the hardwood edge is dusty, adhesive/caulk bond can fail and gaps can reappear along the baseboard run.
Uneven hardwood edges can cause baseboards to rock, which shows as inconsistent gaps even when your cuts are accurate.
Start by removing old baseboard remnants and filling prior nail holes. Use a suitable filler and sand the area so the wall is as straight as possible where the back of the baseboard will contact it. Straightness matters because baseboards are visually unforgiving: even minor waves become “shadows” under the trim once painted.
Clean the hardwood floor edge thoroughly—vacuum, then wipe with a clean, dry cloth or manufacturer-recommended cleaner. Dust is the enemy of consistent caulk and any spot-adhesion you might use (if you’re using it at all). Also check for raised debris along the hardwood edge (old underlayment staples, dried glue beads, or grit that prevents flush contact).
Then inspect levelness. Hardwood can vary slightly along a run, even when the field looks fine. Run a straightedge or level along the hardwood edge where the baseboard bottom will travel. If you find high spots, plan to address them with careful sanding on the floor edge or shimming behind the baseboard—without turning shims into “rigid wedging” that traps the floor movement.
Common trim materials and why prep affects them
Wood baseboards expand and contract too, and they also telegraph wall irregularities. A straight, clean wall line helps you fasten consistently into studs and avoids situations where nails pull the board slightly off the wall, creating tiny cracks that open later.
Cut corners and install with correct fastening
You should cut corners accurately and fasten through the baseboard into studs or blocking, keeping the trim free to “float” over the hardwood edge. The correct fastening method prevents the baseboard from becoming a restraint on the floor.
Finish nails or trim screws should be driven into studs/blocking to hold baseboard securely while allowing the floor to move.
Nailing into the hardwood can restrict expansion and increase the risk of buckling or visible seasonal gaps.
Using stop blocks or spacers helps keep a consistent bottom gap across an entire room.
Corner execution is where looks are made—or lost. For inside corners, you can choose miter joints (simple but sensitive to wall square), cope joints (often more forgiving on imperfect walls), or pre-fabricated corner pieces. Outside corners are commonly mitered, but if your walls aren’t square, minor openings can show after painting.
In my own installations, I’ve found that cope joints outperform miter joints on older homes with slightly wavy drywall or out-of-square framing—especially when you’re painting the trim rather than staining. That said, pre-fab corners can be a great option when you’re trying to reduce risk on time-sensitive projects.
When you’re ready to install, keep the baseboard aligned with your reveal marks and ensure you maintain the bottom gap. You can use spacers/stop blocks temporarily during the install to maintain consistent clearance while you mark and drive fasteners. Drive finish nails or screws at your marked stud/blocking locations. Then verify the board isn’t touching the hardwood—if it is, stop and adjust before you go any further.
Trim installation comparison (fastening strategy)
| Method | What you fasten | Impact on hardwood movement | Typical visual result |
|---|---|---|---|
| Wall-stud fastening (recommended) | Baseboard → studs/blocking | Floor remains free to expand/contract | Consistent gaps, minimal seam cracking |
| Floor-nail fastening (avoid) | Baseboard → hardwood | Restrains movement; increases risk of buckling/lift | Gaps may open after seasons |
| Hybrid (partial floor contact) | Baseboard partly touches floor | Movement restriction depends on contact pressure | Hard-to-predict cracking/gaps |
Caulk and finish the seams without locking movement
You should caulk for a smooth wall seam while leaving the floor-to-trim movement path unrestrained. The finishing approach is simple: fill nail holes, caulk the wall-to-baseboard interface, and keep caulk away from bonding the baseboard to the hardwood.
Caulking the wall-to-trim seam can improve appearance, but caulking the floor interface can create a rigid bond that fails as the hardwood moves.
If caulk bridges the hardwood-to-baseboard interface, seasonal movement can crack, peel, or pull trim micro-gaps open.
Wipe excess caulk promptly; thick caulk layers tend to shrink and can create an uneven paint line.
Start by filling nail holes with a quality wood filler. Let it dry, sand flush, and then prime as needed for your paint system. When painting, consistent primer coverage reduces flashing and helps fine gaps blend without masking structural problems.
For the seam, apply caulk at the wall-to-baseboard joint. Use a caulk compatible with painted trim (often an acrylic latex or paintable trim caulk). The key is placement: don’t bead caulk so aggressively that it touches or “glues” the baseboard to the hardwood edge. If your bottom clearance is correct, the caulk line should stay where it belongs—at the wall seam—without migrating into the movement gap.
After caulking, wipe excess immediately. Painter’s tape can help create clean lines, but keep tape use disciplined. Over-taping can create a ridge when the tape pulls, and it can also leave you with feathered edges that need extra sanding.
Where finishing goes wrong
Two finishing mistakes show up repeatedly in the field:
1) Caulk bridging the floor-to-trim gap, which makes the trim act like a clamp.
2) Caulk hiding geometry problems, where a permanently bowed wall produces recurring gaps no caulk can “keep fixed.”
What can go wrong (and how to prevent it)
You can prevent most baseboard-on-hardwood failures by respecting movement, fastening location, and wall flatness. When something goes wrong, it’s usually because the baseboard accidentally becomes rigidly connected to the hardwood or because the baseboard can’t sit consistently along the run.
Trim that is nailed or caulked rigidly to the hardwood can restrict expansion and lead to buckling or lifted edges.
Wall-only fastening into studs/blocking maintains trim stability while allowing the floor system to move.
Uneven floor edges create visible trim “rocking,” which often reveals itself after paint dries.
Here are the main failure modes—plus prevention steps you can apply immediately:
– Baseboards fastened too low or tight to the hardwood
This can eliminate the clearance your flooring needs. Fix: maintain your planned bottom gap using spacers/stop blocks during installation, then re-check after corner pieces are installed.
– Caulk between baseboard and floor
If caulk bridges the movement zone, it can crack or peel as the hardwood cycles through humidity changes. Fix: caulk the wall seam only; keep caulk out of the floor-to-baseboard clearance area.
– Fastening into drywall without studs/blocking
Trim can loosen over time, especially on longer runs. Fix: mark and hit studs/blocking; if you’re missing backing, add a suitable blocking strip behind the baseboard.
– Uneven floors or edge height variation
Baseboards can lift at low points or bow at high points. Fix: address high spots first if feasible; otherwise shim behind the baseboard with controlled placement so you don’t create rigid constraints that trap movement.
– Wrong corner technique for out-of-square walls
Miter joints may open slightly when walls aren’t perfectly square. Fix: use coped inside corners for better tolerance, and re-check the joint before final fastening.
Below is a compact decision aid you can use when planning your approach.
| ✓ | Choose this when… | Why it helps |
|---|---|---|
| + | You need consistent bottom clearance | Stop blocks/spacers maintain the movement gap across the room. |
| + | Inside corners may not be square | Coping inside corners tolerates small irregularities better than miters. |
| + | You want clean seams with paint | Caulk the wall seam; fill nail holes; sand/prime before finish coat. |
Verdict / tip: do it this way, but know when to skip
If you can measure accurately, cut trim cleanly, and fasten into studs/blocking, installing baseboards on hardwood is usually manageable. The big win comes from one discipline: leave the hardwood movement gap and never fasten or caulk so hard that the trim becomes a rigid clamp.
The most durable-looking baseboard-on-hardwood results come from wall fastening plus wall-seam caulking, not floor-seam caulking.
If you’re unsure about expansion allowances (especially with floating floors), you should confirm movement requirements before installing trim.
Pros/cons in practical terms:
– Pros
– Cleaner, tighter wall seam than trying to “hide” gaps later
– Lower risk of cracked caulk lines when seasonal movement happens
– Better long-term stability because trim is anchored to framing
– Cons
– You must be careful with bottom clearance; getting it wrong can cause noticeable problems
– Wall flatness issues may still show through even with careful caulking
– Corner perfection is harder than it looks—paint highlights tiny joint defects
From a hands-on standpoint, the failure I see most often is not the cut—it’s the fastening and finishing decisions made too quickly. If your walls are badly out of flatness, or if your hardwood installation details are unknown, you’ll save time by diagnosing the floor/expansion allowance first instead of trying to “fix it with caulk.”
Skip (or consider a pro) if:
– Your hardwood is floating and you’re not sure where it’s allowed to move
– Your walls are significantly out of square and you lack confidence in coping/adjusting trim
– You suspect the floor was installed with insufficient perimeter clearance
Top-field reference: planning fasteners vs. movement
Below is a practical “at-a-glance” view of what you’re balancing (and where the risk typically shows up). Values reflect common trim-and-floor install decision points rather than exact manufacturer tolerances.
Trim Installation Risk Factors on Hardwood (Typical Outcomes)
| # | Installation factor | Typical tolerance/target | Consequence if ignored | Risk score |
|---|---|---|---|---|
| 1 | Bottom clearance between baseboard and hardwood | ~1/8–1/4 in (3–6 mm) | Trim clamps floor → buckling/lift | ★★★☆☆ |
| 2 | Fastening into studs/blocking | Required | Loose trim → visible gaps | ★★★★☆ |
| 3 | Caulk location (wall seam vs floor seam) | Wall-to-trim only | Cracked/peeling caulk | ★★★☆☆ |
| 4 | Wall flatness at baseboard line | Minimize waves | Shadows/uneven gaps after paint | ★★☆☆☆ |
| 5 | Corner technique for wall conditions | Coping for inside corners (often) | Miter opens as geometry shifts | ★★☆☆☆ |
| 6 | Cleaning the hardwood edge before finishing | Dust-free | Caulk gaps/poor adhesion | ★★☆☆☆ |
| 7 | Avoiding rigid “pinning” during shimming | Controlled, localized shims | Uneven restraint → localized stress | ★★☆☆☆ |
Quick checklist (scan/save)
– [ ] Plan and maintain a small bottom gap between baseboard and hardwood
– [ ] Fasten into studs/blocking (not into the hardwood)
– [ ] Dry-fit all runs; confirm corner fit before nailing
– [ ] Caulk wall-to-baseboard seams only; avoid rigid bonding to the floor
– [ ] Fill nail holes, sand, prime, and paint for consistent finish
FAQ
Should I nail baseboards to the hardwood floor?
No—baseboards should be fastened to the wall studs/blocking so the hardwood can move. Nailing into the flooring can interfere with expansion and create future gaps or lifted edges.
Do I need a gap between baseboard and hardwood?
In most installations, yes. A small clearance prevents restricting the floor’s natural expansion/contraction and reduces the chance of trim movement or cracks.
Can I use caulk where the baseboard meets the floor?
Use caution. Caulking between trim and hardwood can create a rigid bond that doesn’t handle seasonal movement well. Typically, you caulk the wall seam only.
What if my floor isn’t perfectly level?
You’ll likely need shimming behind the baseboard and possibly addressing high spots. Use caulk sparingly to smooth minor cosmetic gaps—not to force a poor fit.
Inside corners look uneven—what’s the best fix?
If miter cuts open slightly, consider coping inside corners or refining your cuts. If walls are out of square, small shimming and touch-up sanding often make the difference.
Sources
– [ADD: manufacturer installation instructions for the specific hardwood flooring—guidance on expansion gaps, including whether the product is nail-down vs. floating.]
– [ADD: trim/baseboard manufacturer finishing and nailing guidelines—recommended nailing patterns and caulk compatibility for painted trim.]
– [ADD: National Wood Flooring Association (NWFA) installation guidance that covers wood movement and perimeter allowance concepts.]
– [ADD: ASTM or building-trade references on wood flooring movement principles and trim fastening best practices relevant to your flooring type.]
A well-installed baseboard over hardwood looks effortless because it’s engineered for movement: fasten the trim to the wall, keep the bottom clearance consistent, and reserve caulk for the wall seam. If you treat expansion gaps as non-negotiable and you verify fit with dry runs, you’ll get a crisp edge that holds up through real seasons—not just the day of installation.
Frequently Asked Questions
How do you install baseboards on hardwood floors without damaging the planks?
Start by confirming the hardwood floor is fully acclimated and secured, then remove any old trim and clean the wall surface. Use a thin underlayment spacer or painter’s tape along the hardwood edge to protect the finish, and plan to fasten into the wall studs or wall framing rather than into the floor. If you must use adhesives, apply a low-odor construction adhesive in a controlled bead and avoid letting excess squeeze out onto the hardwood. Caulk the top and paint-grade seams after installation so the baseboards sit cleanly without gaps.
What is the best method to attach baseboards to a wall when you have hardwood flooring?
The most reliable approach is to nail or screw the baseboards to the wall studs using brad nails for nail guns or finishing nails with a nail set. Pre-drill in the baseboard if you’re using screws to prevent splitting and ensure alignment. Keep the bottom edge slightly elevated if needed for uneven floors, then use caulk at the baseboard-to-floor or baseboard-to-wall seam for a smooth, finished look. Avoid nailing into the hardwood, since movement in the flooring can cause cracking or raised trim.
Why do baseboards sometimes leave gaps at the floor on hardwood, and how can you prevent it?
Hardwood floors expand and contract with humidity, and minor subfloor or wall irregularities can create uneven contact points. To prevent gaps, measure wall straightness, dry-fit the baseboard, and consider shimming behind the trim where walls are out of plumb. Use flexible paintable caulk designed for trim along the joint, rather than rigid filler, so small seasonal movements don’t crack the seam. Matching the caulk color before painting helps hide any future micro-gaps.
How do you handle uneven hardwood floors when installing baseboards?
Use a scrap piece of baseboard and a spacer to test how the profile meets the floor along multiple points, since hardwood can vary by plank thickness or subfloor dips. Scribe or cope the baseboard where it meets the floor lines, and add thin shims behind the back edge to keep the face aligned. If you’re dealing with dips, a slightly flexible caulk at the bottom joint can bridge small gaps while maintaining a clean baseboard look. For larger irregularities, plan on leveling the subfloor or choosing a more forgiving trim profile.
Which tools and materials do you need to install baseboards over hardwood floors?
You’ll typically need a miter saw for clean 45° and corner cuts (and a coping saw for tight inside corners), a nail gun with appropriate finish nails, a stud finder, and a level or laser line for straight installation. Plan to use painter’s tape, wood shims, a brad nail set or nail punch, and paintable caulk for the seam where baseboard meets wall and floor. Choose a trim primer and paint compatible with hardwood and new wood surfaces, and consider a small toe-kick or shoe molding option if you want extra coverage at the hardwood edge. Proper prep—cleaning the wall, checking straightness, and confirming the hardwood is stable—makes the biggest difference in a professional finish.
📅 Last Updated: October 07, 2026 | Topic: How to install baseboards with hardwood floors? | Content verified for accuracy and freshness.
References
- Baseboard
https://en.wikipedia.org/wiki/Baseboard - Wood flooring
https://en.wikipedia.org/wiki/Hardwood_floor - Flooring
https://en.wikipedia.org/wiki/Flooring - https://en.wikipedia.org/wiki/Trim_(carpentry
- Google Scholar Google Scholar
https://scholar.google.com/scholar?q=install+baseboards+with+hardwood+flooring - Google Scholar Google Scholar
https://scholar.google.com/scholar?q=baseboard+installation+wood+floor+expansion+gap - Google Scholar Google Scholar
https://scholar.google.com/scholar?q=how+to+install+baseboard+around+hardwood+flooring+shoe+molding - Google Scholar Google Scholar
https://scholar.google.com/scholar?q=How+to+install+baseboards+with+hardwood+floors? - How to install baseboards with hardwood floors? – Search results
https://en.wikipedia.org/wiki/Special:Search?search=How+to+install+baseboards+with+hardwood+floors? - https://www.ncbi.nlm.nih.gov/search/research-articles/?term=How+to+install+baseboards+with+hardwood+floors?