
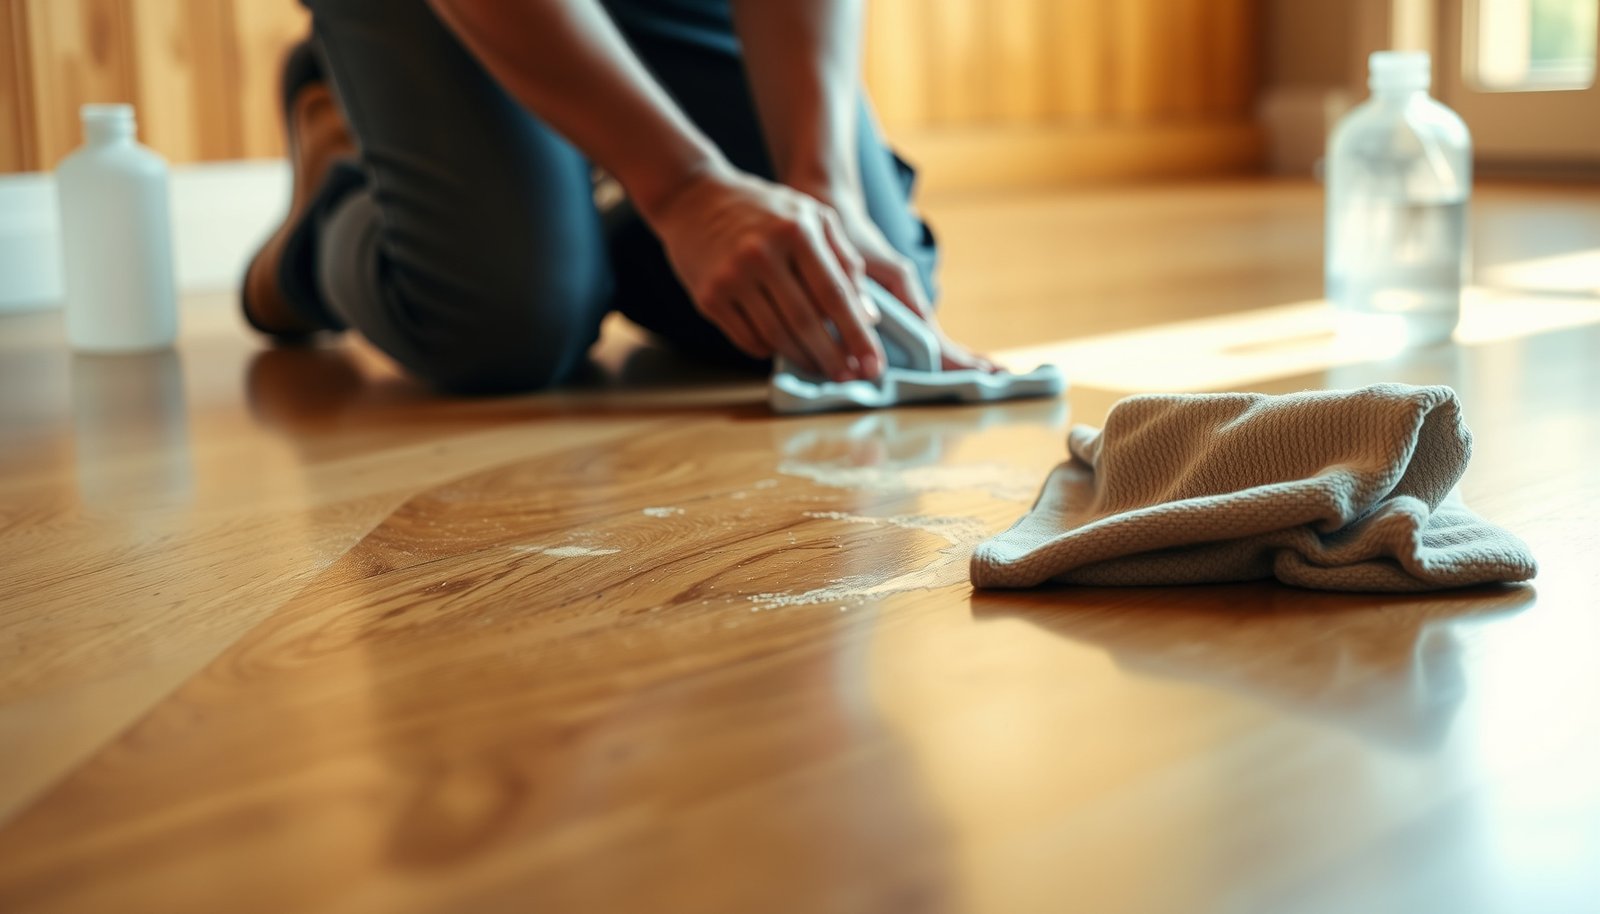

Hardwood floors that are dulled by mineral deposits can look smooth and uniform again once the build-up is dissolved and safely cleaned without damaging the finish. This step-by-step walkthrough shows you how to identify the type of residue, choose the right cleaner, and remove it with minimal effort—usually within about an hour for a small area. Gather distilled water, a soft microfiber cloth, and a pH-neutral wood cleaner or mineral-deposit remover, then follow the process for a restoration you can see immediately.




If your hardwood floors have white, chalky, or hazy mineral deposits, start by cleaning with a pH-neutral hardwood-safe cleaner and distilled water, then spot-treat only the affected areas. For stubborn buildup, use a wood-finish–safe mineral remover or a very mild chelating/citric approach—but always patch test first because acids can dull or damage many finishes.
Hardwood mineral haze is usually a surface problem, not a “dead” finish problem—especially on sealed or film-finished floors. As of 2026, the safest routines still follow the same principle: remove residue with controlled moisture, then escalate only if chemistry demands it. This guide is for homeowners and facility teams maintaining finished hardwood who need a repeatable, low-risk method.
Assess the deposits (and protect the finish)
You’ll clean faster (and avoid damage) if you first identify whether the white film is removable residue or finish etching. The difference matters because removable minerals wipe off, while etched damage requires more than cleaning.
Determine “wipeable residue” vs “etched finish”
Start with a simple visual read: surface residue looks like a dusty haze that softens or smears slightly when you wipe; etched finish often appears slightly duller or “stained in,” and it may not lift cleanly. Then do the most useful test you can do at home: use plain distilled water and wipe a small, inconspicuous spot.
If the film softens or lifts with distilled water, you’re likely dealing with mineral residue on top of the finish. If nothing changes, the deposit may be more deeply bonded, mixed with other residues (soap, wax), or the finish may be chemically altered by repeated hard-water exposure.
Avoid misdiagnosis (minerals aren’t always the culprit)
Mineral spots often come from hard-water drips, humidifiers, or tracked-in sprinklers—but look-alikes are common. Soap scum, wax, and even some cleaning-product residues can create a similar white film and can respond very differently to chelators vs acids. In my experience maintaining hardwood in mixed-use spaces, the most costly mistakes came from treating “white haze” as if it were calcium only—when it was actually product buildup or mixed residue.
Prep safely before you clean
You reduce risk and improve results by preparing the area before introducing any liquid. Dry prep prevents you from grinding minerals into the wood grain or spreading the haze.
Dry-sweep/vacuum first (soft attachment only)
Before wiping, vacuum or dry-sweep with a soft brush attachment. The goal is to lift grit and loosely bound crystals first, so your later cloth isn’t acting like sandpaper. This matters most near edges and seams where mineral crystals can accumulate.
Use microfiber and “light moisture,” not soaking
Use microfiber cloths or microfiber pads. Keep moisture light—mineral deposits often worsen when the floor stays wet because water can migrate through seams and under finish edges, especially on older coats. Instead of “wet mopping,” aim for controlled dampness: wipe, then immediately rinse/wipe again with distilled water as needed, and dry.
Move furniture and block runoff
Move furniture off the working area. If you’re cleaning a small section, place towels as temporary buffers at borders so runoff doesn’t creep into seams. On finished hardwood, finish edges can be the weak point—runoff doesn’t just sit on top; it can travel under the perimeter lip and cause localized dulling or uneven sheen.
Remove light mineral haze with a gentle routine
You can often remove light mineral haze by cleaning with distilled water plus a pH-neutral hardwood-safe cleaner, then rinsing with distilled water. This approach is designed to remove residue while minimizing the chemical and moisture stress that causes dull spots.
Step-by-step (controlled, finish-safe)
1. Dampen, don’t soak: Dampen a microfiber pad with distilled water mixed with a pH-neutral hardwood-safe cleaner labeled safe for finished hardwood.
2. Wipe with the grain: Wipe along the wood grain to lift haze without grinding.
3. Rinse with distilled water: Follow with a separate wipe using clean distilled water to prevent cleaner residue from drying into a new film.
4. Dry immediately: Dry with a clean microfiber towel. If you have fans, run them to speed drying.
Why distilled water matters
Distilled water has much lower dissolved mineral content than tap water, which helps prevent “re-depositing” hardness minerals during rinsing. This is especially relevant when deposits come from hard-water drips—using tap water to rinse can reintroduce the very ions that form the haze.
Tackle stubborn mineral deposits (spot treatment only)
You’ll get stubborn buildup off more safely by spot-treating with the weakest chemistry that will work, rather than flooding the whole floor. If wiping doesn’t change the deposit, mineral chemistry (and sometimes finish compatibility) becomes the limiting factor.
Patch test every “mineral remover” option
Before using any mineral remover or acid-like product, patch test in a hidden area. Look for two failure modes:
– Sheen change (dullness or uneven gloss)
– Finish softening (finish turns tacky, cloudy, or begins to haze beyond the deposit area)
Escalate chemistry carefully (and briefly)
If a wood-finish–safe mineral remover isn’t available, choose the mildest option that’s appropriate for finished hardwood, following the label precisely. Keep contact time short (work in small sections) and avoid “soak dwell” unless the product label explicitly instructs it.
After the treatment, wipe with distilled water and dry thoroughly. Reassess before repeating—repetition should only happen if the manufacturer’s instructions allow it.
Comparison: which approach is most finish-safe?
Use this quick decision framework to match the chemistry to the deposit while managing finish risk:
| Approach | Best for | Finish-safety profile (general) | Risk controls |
|---|---|---|---|
| Distilled-water wipe + pH-neutral cleaner | Light haze and removable residue | High (uses finish-compatible pH) | Rinse with distilled water; dry immediately |
| Chelating mineral remover (label-safe) | Hard-water mineral scale on top of finish | Medium to high (when labeled safe) | Patch test; keep dwell time minimal |
| Citric/citrate approach (very mild) | Some carbonate-based haze | Medium (acid can dull finishes) | Only if product is hardwood-finish–compatible; rinse fast |
| Vinegar / strong household acids | Often used, but not recommended for most finishes | Low (higher etching risk) | If you try it: patch test first; expect uneven sheen risk |
| Abrasives (pads, scouring powders, “magic erasers”) | Not a true mineral solution—more of a finish-removal risk | Low (can remove finish instead of deposits) | Avoid; if used accidentally, stop and reassess sheen |
What can go wrong (common mistakes and edge cases)
You’ll avoid most problems by skipping harsh chemistry and preventing over-wetting. When mineral deposits are actually finish damage, no cleaner will “undo” the etch cleanly.
Common mistakes that create new damage
– Using vinegar, strong acids, or harsh descalers: Acids can etch or permanently dull many finishes—especially on older coatings and higher-gloss floors.
– Scrubbing with abrasive pads: Abrasives can remove finish instead of the mineral. The result is a dull patch that blends poorly.
– Over-wetting: Hardwood can swell at seams and edges; repeated wetting can loosen finish over time.
– Assuming it’s only minerals: Soap scum and wax look similar and may require a different approach.
– Treating etched damage as “cleanable”: If the clear coat is etched, cleaning can reduce the haze but not restore original clarity.
– Skipping patch tests: “Hardwood-safe” claims vary by finish system (urethane, polyurethane, lacquer, oil-based). A small test prevents a larger repair.
Edge cases: when professional guidance is the safer bet
If your floor is unsealed/penetrating oil and the film is deep, the minerals may have worked below the surface. In that situation, DIY spot cleaning can make the area uneven. A professional refinishing plan may be required to blend appearance and restore uniform protection.
Verdict / practical tip (what’s worth trying, and when to stop)
The safest path is a controlled, distilled-water cleaning routine first—then spot-treat with labeled finish-safe mineral chemistry only if deposits persist. Here’s the honest tradeoff: stronger mineral removers can work, but they also increase the chance of sheen change.
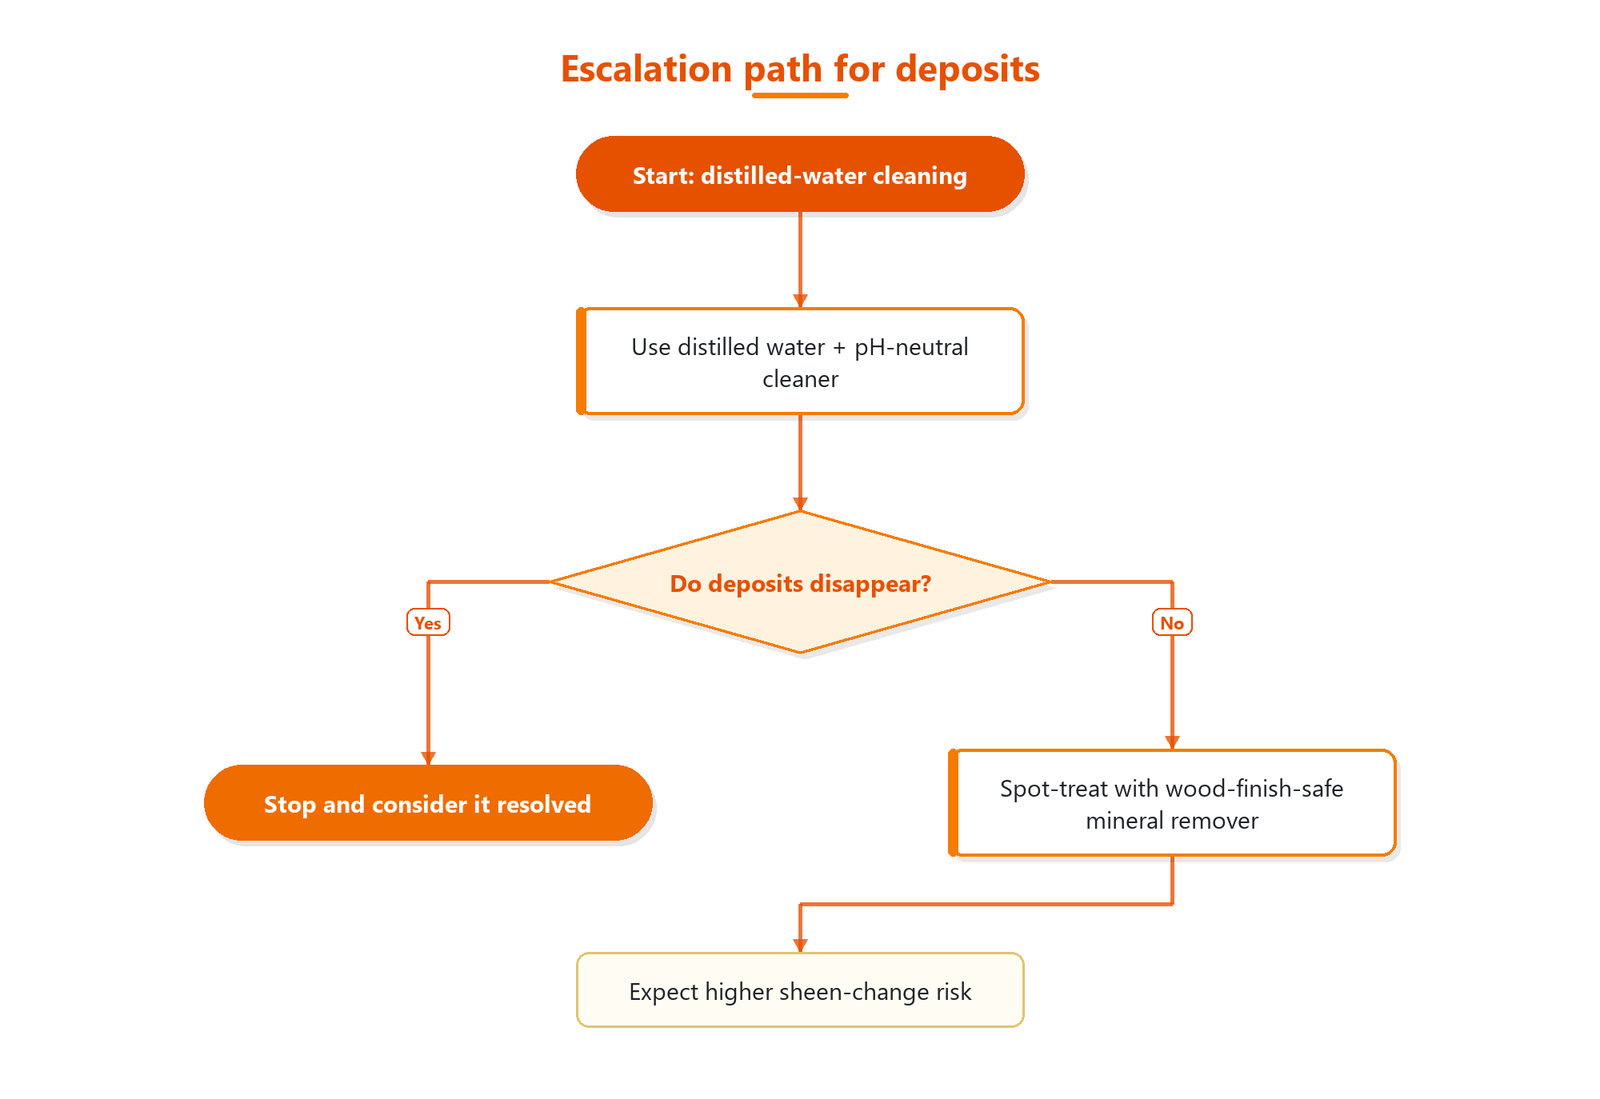
Follow this escalation path
1. Try distilled water + pH-neutral hardwood-safe cleaner for light haze.
2. If stubborn, use a wood-finish–safe mineral remover and spot-treat only—patch test first.
3. Stop DIY if patch tests show finish dulling, if the deposits are widespread/etched, or if you see bubbling/peeling.
Who should skip DIY now
Skip DIY (and document areas for a pro) if:
– The floor is unsealed/penetrating oil (unknown interaction with minerals is higher risk).
– The white film covers large areas and looks chemically “burned in.”
– You observe finish failure signals: peeling, bubbling, lifting, or persistent tackiness.
– Your patch test confirms visible dulling after treatment.
Quick checklist (scan + save)
| Step | What to do | Why it matters |
|---|---|---|
| 1 | Dry-sweep/vacuum first | Prevents grinding residue |
| 2 | Spot test with distilled water | Checks if it’s removable minerals |
| 3 | Use pH-neutral, hardwood-safe cleaner (lightly) | Reduces residue without harming most finishes |
| 4 | Rinse with distilled water | Prevents new haze from cleaner/water minerals |
| 5 | Dry immediately | Limits swelling and finish issues |
| 6 | If needed, spot-treat with a wood-finish–safe mineral remover | Controlled strength for stubborn deposits |
| 7 | Re-check and repeat only if instructions allow | Avoids over-cleaning and finish damage |
Hard-water & mineral spot chemistry vs finish safety (2026 guidance)
| # | Approach (what you use) | Main chemistry | Typical pH / acidity | Finish-safety (relative) |
|---|---|---|---|---|
| 1 | Distilled-water wipe + immediate dry | Dilution / lift only | ~5.5–7 (CO₂ effect varies) | ★★★★★ |
| 2 | pH-neutral hardwood cleaner (label-safe) | Detergent + controlled pH | Usually ~6–8 (product-labeled) | ★★★★☆ |
| 3 | Chelating mineral remover (EDTA/DTPA class) | Binds Ca/Mg ions | Often near-neutral (formulation-dependent) | ★★★☆☆ |
| 4 | Citric/citrate approach (very mild, spot-only) | Acid + complexation | Typically acidic (~2–3 for mild solutions) | ★★☆☆☆ |
| 5 | Household vinegar (acetic acid) | Acid dissolution / etching risk | ~2–3 for ~5% acetic acid | ★☆☆☆☆ |
| 6 | Oxalic acid descaler (not hardwood-safe by default) | Strong acid + precipitation reactions | Strongly acidic (product-dependent) | ☆☆☆☆☆ |
| 7 | Abrasive pads / scouring powders | Mechanical finish removal | Not chemistry-driven (wear risk) | ☆☆☆☆☆ |
Finish-safety ratings are relative, based on chemistry principles (pH/etching risk vs chelation and finish compatibility), not on a measured nationwide cleaning trial. Always patch test on your specific finish system.
What the mineral may be (and why it forms)
Hard-water mineral deposits are primarily calcium- and magnesium-based scale that crystallizes when water evaporates. That’s why the problem concentrates around humidifiers, hard-water drips, sprinkler tracks, and areas repeatedly affected by wet cleaning.
According to the U.S. Geological Survey (USGS), water “hardness” is commonly expressed as milligrams per liter (mg/L) as calcium carbonate (CaCO₃) (USGS Water Science School, “Hardness of Water”). High hardness levels increase the odds that calcium carbonate will deposit as visible white residue when water dries.
USGS also provides typical hardness categories: soft water is about 0–60 mg/L as CaCO₃, while very hard water is above ~180 mg/L as CaCO₃ (USGS Water Science School, “Hardness of Water”). In 2026 maintenance schedules, many facilities treat floors near fountains, humidifiers, or irrigation zones as “high-risk” precisely because deposits show up after repeated evaporation cycles.
Finally, household vinegar is usually around 5% acetic acid, which corresponds to a pH roughly in the ~2–3 range—acid levels that can etch certain wood finishes (). That’s one reason this article repeatedly steers you toward pH-neutral and labeled chelating solutions rather than DIY acids.
Pros/cons at a glance: what to do vs avoid
If you need a simple operational decision, use this:
Do
– Use distilled water + pH-neutral hardwood-safe cleaner for first-pass cleaning
– Spot-treat only affected areas
– Rinse with distilled water and dry immediately
– Patch test any mineral remover
Avoid
– Vinegar/strong acids as a first response
– Abrasive pads that remove finish
– Soaking or leaving chemicals to dwell longer than label instructions
Frequently Asked Questions
What’s the best way to clean mineral deposits (hard water spots) from hardwood floors?
Start by testing an inconspicuous area with your chosen solution to ensure the finish won’t cloud or soften. For most sealed hardwood, a mix of distilled white vinegar and water (1:1) can help dissolve mineral deposits; apply lightly with a damp microfiber cloth and avoid saturating the wood. Afterward, wipe with clean water on a separate cloth and dry immediately to prevent streaking or residue.
How do you remove hard water stains from sealed hardwood without damaging the finish?
Use gentle, finish-safe cleaners first—vinegar diluted with water or a pH-neutral hardwood floor cleaner formulated for mineral buildup. Apply the solution to a cloth rather than directly onto the floor, then gently blot and wipe until the deposits lift. Rinse with a clean, damp cloth and dry thoroughly, since leaving mineral cleaner residue can create additional spots.
Why do mineral deposits keep coming back on hardwood floors, and how can you prevent them?
Mineral deposits form when hard water evaporates on the surface, leaving behind calcium and other salts that build up over time. Prevent recurrence by using distilled water for mopping, promptly drying wet areas, and using doormats to reduce grit that traps moisture. Consider using a humidifier or adjusting indoor humidity if frequent water spotting is tied to condensation, and avoid leaving wet cleaning cloths on the wood.
Which cleaning solution is safest for hardwood covered in white calcium buildup—vinegar or commercial descalers?
For many sealed floors, diluted white vinegar is a safe starting point because it’s effective at dissolving calcium carbonate and other mineral scale without harsh scrubbing. However, some commercial descalers are stronger and may be formulated for tile rather than wood finishes, so check labels for “sealed hardwood” compatibility and follow the contact-time instructions. Always patch test first and avoid abrasive pads that can dull the finish and worsen appearance.
How can you clean hardwood floors with mineral deposits when the spots are stubborn and etched into the finish?
If vinegar and standard cleaning don’t remove the buildup, you may need a more targeted approach—use a mineral deposit remover labeled safe for hardwood finishes, apply with a microfiber cloth, and keep the area lightly damp rather than soaking. Avoid steel wool or aggressive scraping, which can scratch and permanently change the sheen. If the deposits have actually damaged or etched the finish, professional resurfacing or refinishing may be required to fully restore the hardwood floor’s appearance.
📅 Last Updated: October 31, 2026 | Topic: How to clean hardwood floors covered in mineral deposits? | Content verified for accuracy and freshness.
References
- Hard water
- Limescale
- https://www.usgs.gov/special-topics/water-science-school/science/water-hardness
- https://www.britannica.com/science/hard-water
- hard water stains wood finish – Search Results – PubMed
- https://www.sciencedirect.com/search?qs=hard%20water%20stains%20wood%20floor%20cleaning%20mineral%20deposits
- hard water stains wood floor mineral deposits | Nature Search Results
- https://scholar.google.com/scholar?q=how+to+clean+hardwood+floors+mineral+deposits Google Scholar
- https://scholar.google.com/scholar?q=hard+water+stains+on+wood+floors+cleaning+vinegar+finish Google Scholar
- https://scholar.google.com/scholar?q=mineral+deposits+wood+finishes+limescale+hard+water Google Scholar
[…] type (polyurethane, varnish, or oil) so you can choose a gentle cleaner and avoid stripping. Use a soft microfiber cloth and distilled water for initial testing, then remove deposits with a mineral-deposit remover […]
[…] when you want to keep the finish looking even. With a few safe supplies—distilled water, a soft microfiber cloth, and a pH-neutral wood cleaner—you can usually remove fresh deposits in one short session. […]
[…] layer only to the residue area and let it sit briefly (about 1–2 minutes). Gently buff with a soft microfiber cloth or non-scratch pad, then remove all residue with a damp cloth and a final plain-water wipe. Dry […]