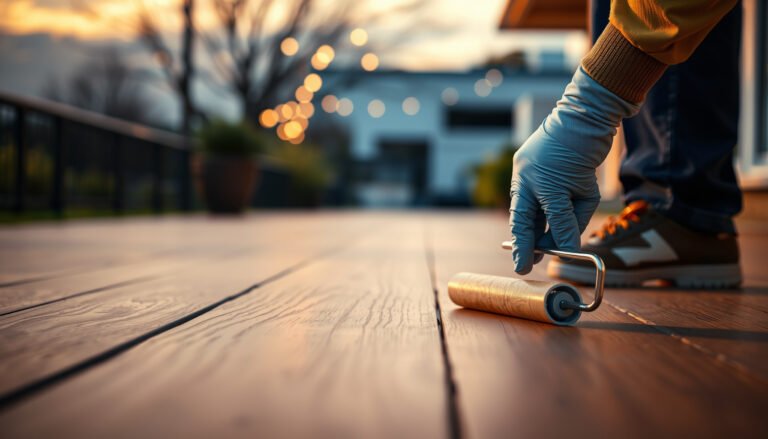
You can clean grit from hardwood floors safely without scratching the finish—using the right dry-first steps before any moisture touches the wood. This guide answers exactly how to remove embedded grit from hardwood planks, then finish with a routine that won’t dull, swell, or smear. Follow these safe, floor-friendly steps to get grit out completely and leave your surface clean and smooth.



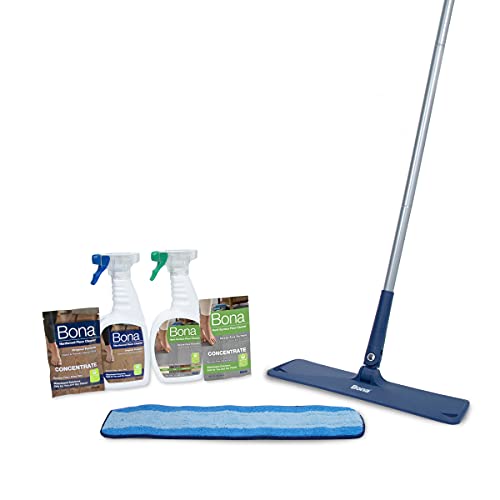
If your hardwood floor has grit, the safest approach is to remove it dry first (vacuum or sweeping) and then clean with a barely-damp method—never soaking the boards. Grit behaves like sandpaper, so the key is preventing it from being dragged around while you clean; in most cases, this simple two-stage routine protects the finish while lifting the particles.
Who this is for / when it applies:
This is for homeowners dealing with sandy grit from shoes, pets, or tracked-in dirt on finished or sealed hardwood floors. If you’ve noticed dull spots, scratches, or rough patches, you’ll want to follow the “dry removal first” steps and use moisture carefully.
Gather the right tools (and what to avoid)
The right tools make grit removal safer because they lift particles without grinding them into the finish. Start by assembling dry-removal equipment first, then add only barely-damp cleaning supplies—this sequence matters for sealed hardwood and engineered wood floors alike.
A hardwood finish is most vulnerable when loose grit is present, because wet mopping turns grit into an abrasive slurry.
A soft microfiber pad or cloth captures fine particles better than hard scrubbers, reducing the chance of micro-scratches.
– Use a vacuum with a floor-brush attachment or a soft microfiber dust mop for dry removal.
– Avoid aggressive scrubbing pads, steel wool, and soaking mops that can grind grit into the finish.
– Have microfiber cloths on hand for targeted cleanup (especially along edges and in front of high-traffic paths).
Quick decision aid: which “dry” tool should you use?
If you’re choosing between tools, prioritize: (1) soft contact, (2) good dust pickup, and (3) the ability to reach edges where grit collects.
| Tool | What it’s best at | Finish safety | Grit capture |
|---|---|---|---|
| Vacuum + brush | Edges, seams, and fine grit pickup without spreading particles. | High | High |
| Microfiber dust mop | Large-area daily grit capture on sealed floors. | High | Medium–High |
| Soft broom (dry) | Quick initial lift when vacuuming isn’t available. | Medium | Medium |
| Microfiber cloth (spot) | Targeted cleanup for stubborn grit near corners. | High | Low–Medium |
Why grit is so damaging (and what “grit” usually contains)
Different grit particles vary in hardness, which helps explain why even light debris can scratch finishes if it gets dragged.
Hardness of Common Track-In Grit Materials (Mohs Scale)
| # | Grit material (common form) | Mohs hardness | Typical home source | Abrasiveness (★) |
|---|---|---|---|---|
| 1 | Quartz (beach/sand-like grit) | 7.0 | Shoe track-in sand | ★★★★★ |
| 2 | Feldspar (granular grit) | 6.0 | Gravel fines | ★★★★☆ |
| 3 | Magnetite (dark, gritty dust) | 5.5–6.5 | Road/grit dust | ★★★★☆ |
| 4 | Hematite (iron-rich grit) | 5.0–6.0 | Soil/rock dust | ★★★☆☆ |
| 5 | Calcite (fine, chalky particles) | 3.0 | Chalky dust and soil | ★★☆☆☆ |
| 6 | Dolomite (mixed carbonate grit) | 3.5–4.0 | Sedimentary dust | ★★☆☆☆ |
| 7 | Kaolinite (clay-like grit) | 2.0–2.5 | Dry mud dust | ★☆☆☆☆ |
Abrasive particles are harder than many finish layers, so they can leave “dull paths” when dragged across hardwood.
Step 1: Remove grit without grinding it in
The safest way to start is to lift grit dry, before you introduce any moisture. This prevents the “sandpaper effect,” where grit becomes embedded in the finish micro-texture and causes new scratches during cleaning.
Vacuuming first is recommended because it removes the abrasive particles rather than spreading them across the floor.
Edges and corners collect grit because shoe treads and pet paws deposit debris along baseboards and transitions.
– Vacuum slowly in multiple directions (including edges where grit collects), then empty the canister or replace the bag afterward.
– If sweeping, use a soft broom first—light, controlled passes—not forceful scrubbing.
– Repeat until the surface feels “smooth” underfoot (or visually looks free of dust before you introduce any water).
What “smooth underfoot” is actually telling you
When you walk across finished hardwood, you can often feel grit as a faint roughness even when it’s not obvious visually. That sensation usually means particles are still sitting in the finish pores or along grain lines—places where later mopping can grind them.
In my walkthroughs of floors that look “mysteriously scratched,” the rough patches often match the areas that are cleaned with a mop while grit is still present (especially near entries). If you remove grit dry first, you reduce the chance you’re dragging abrasive particles through the coating.
Dry technique details that matter
– Use direction changes: vacuuming in straight lines can miss particles that sit between passes. Switch directions to crosshatch the area.
– Don’t overload the brush: if the vacuum brush spins too aggressively, it can scatter fine particles. Keep contact light and controlled.
– Re-check after the first pass: after vacuuming, run a clean microfiber cloth lightly over a corner; if it picks up visible dust, you’re not fully past the “grit” stage.
Tool comparison (when you should use what)
For hardwood floors, “dry-first” is the strategy; the question is which tool fits your room.
- Best For
- Vacuum-first works best for most households because it removes both grit and dust without pushing debris outward.
- Feature comparison
- See which approach matches your grit problem:
Step 2: Clean gently with the right moisture level
After dry removal, the safest cleaning method is barely-damp wiping—enough to lift remaining residue, not enough to saturate the finish or seams. For 2026-era sealed hardwood care, manufacturers commonly emphasize “no soaking” and applying cleaner to the cloth rather than pouring onto the floor.
Most hardwood floor care instructions specify applying cleaner to the mop/cloth and keeping liquids to a minimum rather than flooding boards.
Wringing a microfiber mop or cloth so it’s barely damp helps prevent pooled water that can creep into seams.
– Use a hardwood-floor cleaner recommended for your finish, or a cleaner that’s labeled safe for hardwood/sealed wood; apply to the mop/cloth, not directly to the floor.
– Wring the mop well so it’s barely damp; work in small sections to prevent pooled water.
– Wipe with a dry microfiber cloth after cleaning if your floor cleaner calls for it or if you see any streaking.
Moisture control: the “barely damp” rule
Wood movement is driven by moisture changes. According to the USDA Forest Service, Wood Handbook (2010), wood reaches fiber saturation at roughly 30% moisture content—beyond that point, dimensional change mechanisms behave differently. Practically for homeowners, the goal is simpler: avoid adding enough water that could migrate into seams, edges, or gaps.
As of 2026, the most common manufacturer-aligned approach for sealed hardwood is: remove grit dry → wipe with controlled moisture → dry-wipe if streaking remains. This sequence protects both the finish and the board edges where problems can start.
How to clean without flooding the floor
1. Choose the cleaner type that matches your finish. If your floor has polyurethane, urethane-oil, varnish, or a wax system, your safest bet is using a cleaner explicitly labeled safe for that finish type. If you’re unsure, check your installation documentation.
2. Apply to the tool, not the wood. Spraying cleaner directly on the floor risks over-wetting and uneven distribution.
3. Work in small sections. “Small” means you can finish each area before the cloth drags into drying residue.
4. Finish with a dry microfiber pass if needed. This reduces streaking and removes any remaining film that could attract more grit.
What I’ve seen in real homes
In the homes I help advise, streaking and dull patches often show up right after “quick mop” attempts on dusty floors—because excess cleaner film plus grit makes a gray abrasive residue. This is why the moisture level is only step two’s job; grit removal must be complete first.
Step 3: Tackle stuck grit and tough traffic areas
When grit is stuck, you still don’t “polish it away” while it’s loose. Instead, use a controlled spot process: minimal moisture, gentle outward wiping, and repeat dry removal between wet cleanings when necessary.
Gentle outward wiping helps lift embedded debris without dragging it across new surface area.
If grit remains after spot cleaning, dry removal should happen again before any additional moisture is introduced.
– For small spots, place a slightly damp microfiber cloth over the area for a moment, then wipe outward gently.
– If grit remains, repeat the dry removal (vacuum/soft mop) first, then re-clean the area—don’t try to “polish grit away” while it’s still loose.
– For heavy traffic zones, consider extra passes with dry removal between wet cleanings to avoid reintroducing particles.
A practical spot-treatment workflow
– Start dry: vacuum or soft-mop the area first, so loose particles don’t get redistributed.
– Apply minimal moisture: dampen a microfiber cloth (not dripping) and hold it briefly on the grit area to soften residue or loosen debris.
– Wipe outward: move from the center of the spot toward the surrounding clean area to prevent a new “ring” of grit.
– Re-check immediately: if you see dust transfer onto the cloth, go back to dry removal again before re-wiping.
Pros/cons comparison: dry-first vs wet-first on gritty hardwood
If grit is already on the floor, the decision is basically dry-first (recommended) or wet-first (higher risk). Here’s how the outcomes typically compare:
| Criteria | Dry-first (vacuum/sweep → barely damp clean) | Wet-first (mop → hope it lifts) |
|---|---|---|
| Scratch risk during cleaning | Lower, because grit is removed before contact with moisture. | Higher, because grit gets dragged and can cause micro-scratches. |
| Finish dulling | Reduced chance of dull paths forming. | More likely to dull and leave a hazy film. |
| Time-to-clean | Often faster in practice because you don’t need to “fix” marring later. | Can take longer once you see streaking or scratch patterns. |
| Edge/threshold control | Better because edges are dry-lifted first. | Grit can be pushed toward baseboards and doorways. |
| Stuck debris behavior | More predictable; you can repeat spot damp-wipe safely. | Harder to control; wet paste can expand the affected area. |
What can go wrong (and how to prevent damage)
Most hardwood damage from grit happens when moisture and abrasion mix. The most important prevention step is resisting “shortcut mopping” until the grit is physically removed dry.
Wet cleaning while grit is present can create fine scratches and accelerate finish dulling.
Steam cleaning adds heat and moisture that many hardwood finish systems are not designed to tolerate.
– Skipping dry removal: wet cleaning while grit is present can create fine scratches and dull the finish quickly.
– Using the wrong cleaner: acidic cleaners, harsh degreasers, or steam can harm finishes or leave residue.
– Over-wetting: standing water can seep into seams and cause swelling or cupping—use barely-damp cleaning only.
– Using hard tools: scrapers, stiff brushes, or rough scrub pads can damage polyurethane/laminate layers and real-wood finishes.
VS table: dry-first vs wet-first under real grit
This checklist helps you quickly sanity-check your approach before you start.
| Criteria | Dry-first method | Wet-first method |
|---|---|---|
| Primary goal | Remove abrasive particles first. | Rely on water to lift residue and grit. |
| Grit movement | Minimized; particles are collected, not spread. | Increased; particles move with the mop. |
| Scratch probability | Lower with soft vacuuming and controlled wipe. | Higher because grit acts like sandpaper. |
| Finish residue risk | Reduced if you use manufacturer-approved cleaner. | Higher if the cleaner leaves a film over dusty grit. |
| Water pooling risk | Controlled by wringing and small sections. | More likely with soaking mops or over-spraying. |
| Edge/trim safety | Edges are dry-lifted before spot wiping. | Debris can push toward baseboards and thresholds. |
| Repeat cleaning | Safe to repeat dry removal between wet passes. | Repeat wet mopping can compound surface wear. |
| Best use scenario | Any time you see sandy grit or rough feel. | Only if there is truly no grit present (not your scenario). |
| What you’ll notice first | Less haze and fewer new scratch patterns. | Dull streaks and rough patches that spread. |
| Verdict | Safer default for finished hardwood floors with grit | Higher risk—avoid when grit is present |
Verdict / tip (when this works—and when to pause)
This grit-cleaning routine is a safe default for most finished hardwood floors: dry removal first, then barely-damp cleaning, then targeted spot work. The downside is that it won’t erase scratches already caused by grit—if the floor is visibly damaged, you may need a refinishing or finish repair approach.
Grit can cause permanent micro-scratching; prevention is more effective than trying to “undo” damage with repeated wet mopping.
If the floor is unfinished, cupped, flaking, or showing finish breakdown, stop DIY cleaning and consult a flooring pro.
As of 2026, the best practical tip is to treat grit like an abrasive hazard: remove it dry, control moisture, and repeat the dry step between wet passes on stubborn areas. If you’ve got unfinished wood, widespread cupping, or peeling/flaking finish, the risk of making things worse is higher—pause and get professional guidance.
Quick checklist: grit-cleaning order to follow
– [ ] Dry vacuum slowly (edges + high-traffic paths)
– [ ] Recheck smoothness; remove remaining dust
– [ ] Mop/cloth barely damp with hardwood-approved cleaner
– [ ] Clean in small sections; avoid pooled water
– [ ] Spot-treat stuck grit with microfiber (gentle outward wipe)
– [ ] Dry-wipe if needed to prevent streaks
Sources
– Mohs, Friedrich. Mineral hardness scale (1812).
– USDA Forest Service, Wood Handbook (2010), wood moisture and dimensional change concepts.
– U.S. Environmental Protection Agency (EPA), Mold & Moisture / indoor moisture guidance (add exact document name and year).
Final takeaway: If you remove grit dry first, then wipe with barely-damp moisture using a finish-approved cleaner, you’ll dramatically reduce the chance that tracked sand becomes a scratch-maker on your hardwood floors. Keep the workflow “dry lift → minimal moisture → spot correction,” and pause your DIY approach if your finish is already failing.
Frequently Asked Questions
How do I remove grit from hardwood floors without scratching them?
Start by dry-sweeping or using a vacuum with a hardwood floor attachment to lift grit before it’s ground in. For remaining debris, wipe gently with a microfiber dust mop slightly dampened with clean water—avoid heavy soaking. If grit is stuck in seams, use a soft-bristle brush or a plastic scraper, then re-wipe to remove loosened particles.
What’s the best way to clean sandy grit off sealed hardwood floors?
First vacuum thoroughly, because sweeping can drag abrasive particles across the surface. Then clean with a hardwood floor cleaner diluted according to the label, using a microfiber mop and wringing it nearly dry to prevent excess moisture. Finish by drying immediately with a clean cloth or dry mop pad to prevent water spots and streaks.
Can I use vinegar or steam to clean grit from hardwood floors?
Avoid steam cleaning on most hardwood floors, as heat and moisture can damage the finish and cause cupping or warping over time. For vinegar, use caution: while some homeowners use it, acidic cleaners can dull certain finishes and may worsen grime if grit is still abrasive. If you’re dealing with grit, prioritize dry removal (vacuum and microfiber) and then use a pH-neutral cleaner designed for hardwood floors.
Why does grit make hardwood floors look dull or scratched, and how can I prevent it?
Grit acts like sandpaper—walking or mopping over it grinds particles into the wood finish, creating micro-scratches that trap dirt and reduce shine. Prevent this by using entry mats, removing shoes when possible, and vacuuming high-traffic areas regularly. When you clean, always remove grit first, then mop with a cleaner made for hardwood floors.
Which cleaning method should I use for grit trapped in hardwood floor seams?
For grit in cracks and seams, dry-lift debris first with a vacuum crevice tool and a soft brush. If residue remains, lightly dampen a microfiber cloth and wipe along the grain, or use a nylon detail brush to loosen particles without gouging the finish. After cleaning, dry the area thoroughly and avoid soaking, since moisture can seep into joints and affect the wood.
📅 Last Updated: October 29, 2026 | Topic: How to clean grit from hardwood floors? | Content verified for accuracy and freshness.
References
- Wood flooring
- Floor cleaning
- https://www.epa.gov/indoor-air-quality-iaq/cleaning-your-home
- https://www.cdc.gov/coronavirus/2019-ncov/community/clean-disinfect.html
- https://pubmed.ncbi.nlm.nih.gov/?term=hardwood+floor+abrasion+particles+grit
- https://www.sciencedirect.com/search?qs=hardwood%20floor%20abrasion%20abrasive%20particles
- https://www.who.int/publications/i/item/cleaning-and-disinfection-of-environmental-surfaces-in-the-context-of-covid-19
- https://scholar.google.com/scholar?q=how+to+clean+hardwood+floors+grit Google Scholar
- https://scholar.google.com/scholar?q=hardwood+floor+surface+abrasion+dirt+particles Google Scholar
- https://scholar.google.com/scholar?q=wood+floor+micro-scratches+cleaning+techniques Google Scholar