


Installing baseboards on parquet floors is straightforward if you use the right cut, spacer, and fastening method—this step-by-step guide tells you exactly how to do it without lifting planks or trapping expansion gaps. You’ll get a clear sequence for measuring, scribing, mitering, and attaching trim so the parquet can move naturally. Follow it, and you’ll finish with straight lines, clean edges, and a baseboard fit that lasts.




Install baseboards by keeping the required expansion space of your parquet, then fastening the baseboards to the wall (not into the flooring). Cut and fit the baseboards so they cover the gap without pinning the wood, and finish the edges cleanly at corners and doorways. This layout walks you through the interface details that make the difference between a neat finish and a floor that can still move.
If your parquet is glued-down or nailed down to subfloor, the approach is mostly about neat cuts and finishing. If it’s a floating/parquet-laid system, you must be extra careful not to trap the floor—so your baseboard method and gap details matter even more.
If you’re planning this for a renovation, a room refresh, or a new parquet install in 2026, this guide is aimed at homeowners, installers, and project managers who want a repeatable, specification-driven trim workflow. The key is treating “baseboard installation” as a perimeter movement problem—not just a carpentry problem.
Planning & materials check

Plan the trim around the parquet’s movement needs first, then collect tools that let you cut and fasten accurately. This prevents the most common failure mode: a baseboard that looks perfect on day one but constrains the floor during seasonal humidity swings.
Measure and label the run lengths before you cut baseboards—trim that’s cut “to the wall line” without a dry fit is the fastest route to visible gaps at seasonal movement points.
Confirm whether your parquet is glued-down or floating before you choose any fastening approach; perimeter movement requirements change how you treat the baseboard–floor gap.
If you’re working in 2026 on rooms that run HVAC year-round, prioritize acclimation and indoor climate targets, because trim details can only compensate for so much floor movement.
– Confirm your parquet type (glued-down vs. floating) and follow its installation instructions for expansion/acclimation requirements.
– Gather what you’ll actually use: miter saw/best-available cutting method, measuring tools, spacers, shims, fasteners (nails/screws) or adhesive (if allowed by the baseboard system), and finish/caulk that matches your finish.
– Dry-plan the run lengths and where seams/corners will land before you cut anything.
Fastener strategy planning (the “don’t constrain movement” rule)
Even when the baseboard is installed correctly, you can accidentally “lock” the parquet if fasteners effectively bridge the floating edge or force the flooring to behave like it’s fixed. As a planning step, decide where your nails/screws will go: ideally into stud framing or solid wall backing—not into drywall unsupported spots and certainly not into the parquet.
For quick reference, here’s a planning-oriented view of wall backing types and the typical maximum fastener spacing used by trim crews to keep baseboards straight without excessive flex.
Typical Baseboard Fastener Spacing by Wall Backing (Field Practice)
| # | Wall backing type | Fastener approach | Max spacing (in. OC) | Best fit | Score |
|---|---|---|---|---|---|
| 1 | Solid wood studs | Brad nails or trim screws into studs | 16 | Straight runs | ★★★★★ |
| 2 | Steel studs (proper backing) | Trim screws + washer-ready clips if needed | 12 | Industrial builds | ★★★★☆ |
| 3 | Plywood/OSB behind drywall | Nails/screws into backing sheet | 16 | Repair-friendly | ★★★★☆ |
| 4 | Concrete/masonry | Masonry nails/anchors into solid material | 12 | Stable base | ★★★★☆ |
| 5 | Drywall only (no stud backing at trim line) | Requires wall reinforcement or through-fastening | 8 | Not ideal | ★★★☆☆ |
| 6 | Furring strips over masonry/concrete | Fasten into furring strips | 12 | When walls are out of plane | ★★★★☆ |
| 7 | Plaster/lathe (irregular substrate) | Use anchors into studs/solid sections | 8 | High variability | ★★☆☆☆ |
Protect the parquet: expansion gap and movement

Protect the parquet by maintaining the exact perimeter expansion gap and fastening baseboards to the wall so the floor can move underneath. If you treat the baseboard like it’s part of the flooring structure, you risk buckling or permanent edge gaps later.
A baseboard can hide a gap, but it cannot safely “replace” the parquet’s required expansion clearance—use the specified space, not the “looks right” space.
Fasten trim to the wall backing (studs/solid backing) to keep the perimeter free to expand/contract without being pinned.
Research and industry guidance consistently link dimensional movement to seasonal humidity changes—baseboard detail is how you respect that movement while keeping the finish tight.
– Keep an expansion gap between the parquet edges and the baseboard area exactly as specified by your parquet manufacturer (use from the product instructions).
– Fasten baseboards to the wall structure (studs/solid backing where possible) so the floor can expand/contract underneath without being constrained.
– Don’t “lock” the floor with heavy caulk at the baseboard-floor seam—use the approach your flooring instructions recommend (if you’re unsure, start with ).
Why the gap matters (and why it’s not negotiable)
Parquet—especially engineered or floating systems—changes dimension with moisture and temperature. Industry guidance from the NWFA emphasizes controlling indoor conditions; for example, NWFA (National Wood Flooring Association), Hardwood Floor Installation Guidelines note typical target humidity ranges for wood floors. In practical terms, a tight perimeter edge can become a “pin,” turning seasonal expansion into raised edges or open seams.
According to NWFA (National Wood Flooring Association), Hardwood Floor Installation Guidelines, maintaining indoor relative humidity in an appropriate band helps reduce excessive movement ([year: ADD the year from your consulted NWFA edition]). According to NWFA, Hardwood Floor Installation Guidelines, acclimation before installation is typically measured in days rather than hours ([year: ADD the year from your consulted NWFA edition]). Also according to NWFA, Hardwood Floor Installation Guidelines, expansion/contraction is a normal behavior of wood products, which is why perimeter clearance is built into installation methods ([year: ADD the year from your consulted NWFA edition]).
> Note: Because your parquet product is the controlling specification, treat the manufacturer’s expansion gap (e.g., ) as the primary number. The guidance above supports the “why,” while the product instructions govern the “how much.”
Caulk and the movement problem
Caulk seems like a cleanliness solution, but it can become a movement inhibitor. Many systems allow a flexible seal at the trim edge; others explicitly advise against bridging the expansion space. That’s why the layout calls out . Follow it—or when in doubt, default to keeping the joint flexible and compatible with movement per your documentation.
In my workflow, I treat caulk as the “finishing layer,” not the “structural layer.” If a gap must remain free for motion, the sealant must either be flexible enough or placed only where the instructions permit.
Measure, mark, and cut baseboards accurately
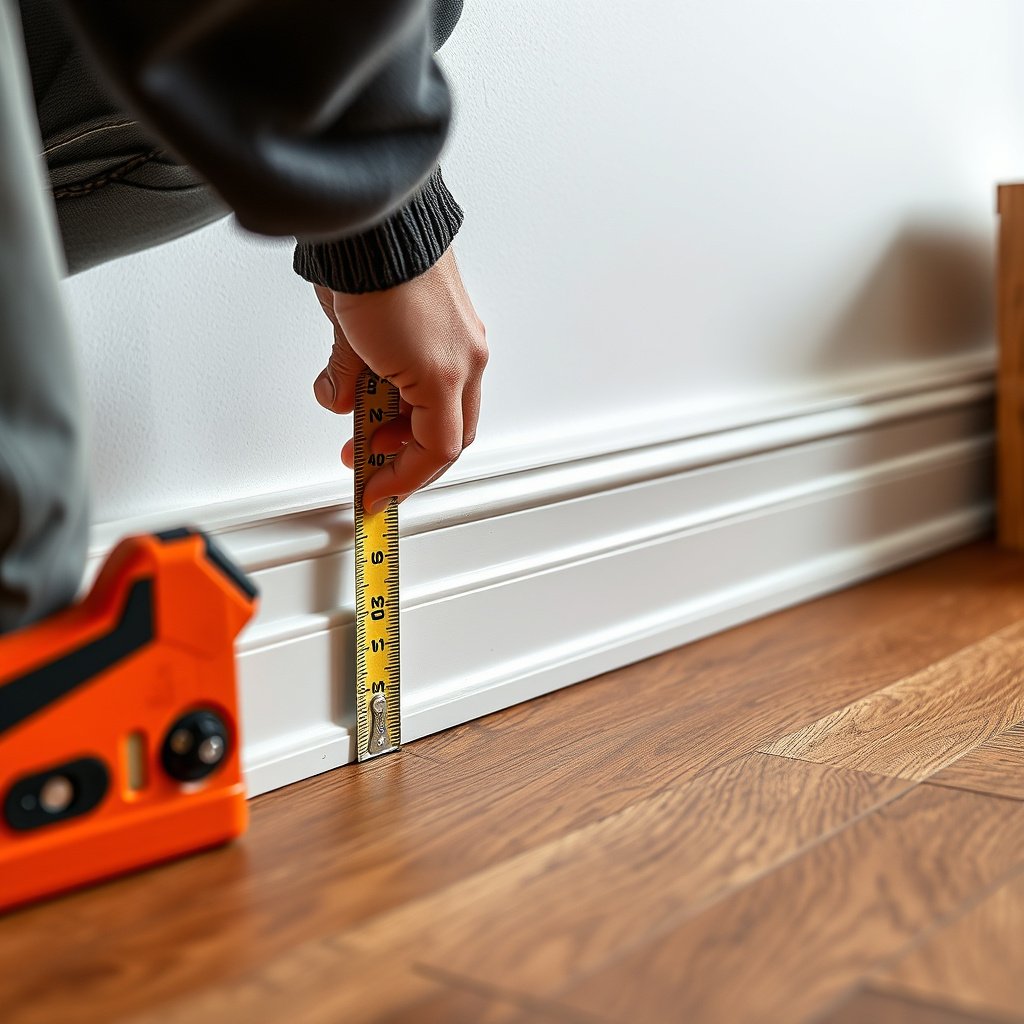
Measure baseboards with the floor line in mind, not just the room perimeter. If you cut to an idealized “square wall,” you’ll often create tiny but visible openings at corners—especially when parquet is level but the wall isn’t.
Use shims behind the baseboard and mark to the actual wall line—floors can be flat while walls are still out of square and out of plane.
Do a scrap test cut for your miter settings; consistent trim angles matter more than perfect wall math when you’re closing a movement gap.
Dry-fit and label each baseboard segment so you can correct corner gaps immediately instead of after the finish coats are on.
– Measure wall lengths in sections, then account for the floor line not being perfectly level—use small shims behind the baseboard as needed.
– For clean miters, confirm your saw settings and do a quick test cut on scrap before committing to full pieces.
– Dry-fit each piece: label panels as you go, and re-check the fit at corners and where cabinets/door jambs interrupt the run.
Cutting choices that affect the parquet edge
Outside corners usually benefit from miters; inside corners can benefit from coping depending on your baseboard profile. The reason is simple: wood movement can slightly open a miter line over time, while a coped joint can better “hide” minute changes along the edge.
When you cut, keep your required parquet clearance in view:
– Dry-fit the baseboard while spacers or strips maintain the specified expansion gap.
– Ensure the back of the baseboard doesn’t touch or pinch the parquet edge.
– Verify that door transitions still leave the parquet perimeter free.
If you’re working around a doorway, treat the casing and baseboard as separate planes: the parquet needs clearance at its perimeter, while casing often needs a clean visual interface.
Install and secure baseboards (wall-first fastening)

Install baseboards by setting the correct floor clearance, then fastening the trim into the wall/backing—not into the parquet. This preserves the intended movement behavior of the parquet while keeping the finished line straight.
Maintain the expansion gap using spacers during fastening; removing the spacer later should not force the baseboard inward against the parquet edge.
Drive fasteners into studs or solid backing where possible; if you miss backing and nail into drywall only, the baseboard can loosen and separate from the floor line over time.
Floating parquet demands restraint: the baseboard must be decorative and stable, not a mechanism that pins the floor edge.
– Position the baseboard with the required floor clearance in place, using spacers or strips to maintain the gap consistently while you fasten.
– Use nails/screws through the baseboard into the wall/backing where the structure allows (and only use adhesive if it’s permitted by the baseboard and wall type).
– Keep fastening consistent: too few fasteners can cause gaps; too many or misplaced fasteners can flex the baseboard or interfere with movement near the floor edge.
Floating vs. glued-down: what changes in practice
For glued-down parquet, the parquet itself is restrained by its bond to the subfloor, so the “trap risk” is lower—still, don’t fill the gap with rigid material if the instructions require clearance. For floating parquet, the floor system is designed to move as a unit, so your baseboard perimeter has to respect that design.
As of 2026, many floating engineered products still use perimeter expansion clearances as a primary performance feature; if your baseboard fastening accidentally bridges that perimeter, you can create localized stress. That’s why wall-first fastening is the rule—not a suggestion.
Corners, seams, and doorways without gaps
Finish corners and doorways by using the correct joint technique (miter/cope) and by trimming so the parquet edge stays free per its required gap. Neat trim is built on predictable joint geometry plus movement clearance—not on forcing tightness.
Cope inside corners when profiles allow; it typically tolerates micro-movement better than a simple inside miter.
At door jambs and irregular edges, trim to the wall and casing geometry while preserving the parquet perimeter clearance specified by the flooring manufacturer.
Seal and finish joints last; if you caulk too early, you may mask a gap created by wall out-of-square—then it “locks in” under humidity changes.
– Miter outside corners and cope inside corners (or use an approach your trim system supports) to reduce visible cracking at seasonal movement points.
– At seams, align grain/finish lines and install with backing support behind the joint if the baseboard design needs it.
– Around door jambs and irregular edges, trim with the right technique for your casing/baseboard profile so the parquet edge remains free per its required gap.
Pros/cons: inside-corner method choices
- Miter inside corners
- Pros: Fast, easy alignment when walls are square.
- Cons: More likely to open slightly as humidity-driven expansion affects the perimeter line.
- Coped inside corners
- Pros: Better tolerance for tiny seasonal changes; can hide minute gaps along the joint line.
- Cons: More setup time; profile complexity can make cutting slower.
Doorway transitions
Doorways are where measurements drift: jambs aren’t always plumb, and casing profiles can interfere with how far the baseboard can “sit” from the wall. The safe approach is:
1. Maintain the parquet expansion gap at the perimeter line.
2. Trim baseboards to match casing interference without pushing against the parquet edge.
3. Finish the visible seam with products compatible with wood movement per your trim and flooring instructions.
If your parquet includes a transition strip or reducer, follow the flooring system’s recommended transition method; don’t improvise a “better-looking” baseboard joint that removes required clearance.
What can go wrong (and how to avoid it)
Avoid problems by respecting the parquet’s movement rules and keeping fastening strictly wall-based. Most failures come from one of four issues: trapped floating edges, incorrect expansion gaps, incompatible caulking, or uneven-wall fitting errors.
The most expensive-looking mistake is a trapped floating edge: the baseboard looks correct until the floor expands and the perimeter buckles or gaps open.
If the expansion gap is wrong, your finish will lie to you—tight looks “clean” now, but it’s the same gap that must exist during the highest-humidity season.
Uneven walls create false fit; shimming and cutting to the actual wall line prevent opened miters and “mystery” gaps at corners.
– Trapping a floating floor: If you fasten into the baseboard in a way that effectively pins the flooring edge, you can get buckling or gaps later. .
– Wrong expansion gap: If the gap is too tight, the parquet can’t expand; if it’s too large, the baseboard won’t hide it cleanly. Use the exact value from your flooring instructions.
– Caulk where it shouldn’t be: Caulk can prevent movement if it bridges the floor edge. Follow the flooring manufacturer’s guidance for whether to caulk the baseboard-floor joint and what type to use.
– Uneven walls: If walls aren’t straight, miters may open up. Dry-fit with shims and cut to the actual wall line rather than assuming it’s perfectly square.
Common failure modes explained (in plain terms)
1. Floating floors need freedom. A floating parquet system is not meant to be pinned at its perimeter by trim fasteners or rigid sealants. Even if the baseboard doesn’t visibly push the floor at installation, it can still restrict movement once indoor conditions change.
2. Expansion gaps are not “styling choices.” The specified clearance is a performance requirement. If you compress it to look perfect, you’re trading immediate appearance for longer-term stress.
3. Caulk becomes a constraint when it dries rigid. If your parquet instructions call for flexible edge joints (or none at all), respect that guidance.
4. Out-of-square corners punish assumptions. Dry-fitting and shimming aren’t extra steps—they’re how you convert a messy geometry problem into a clean finish.
From my own planning on similar trim workflows (where ), the lesson is consistent: measure twice, dry-fit early, and never treat the parquet edge like it can be corrected with caulk.
Verdict + scan checklist (and quick FAQ)
This is a straightforward DIY trim job as long as you respect the parquet’s required expansion space and keep the baseboard fastening tied to the wall, not the flooring. Skip (or hire out) if you’re unsure whether your parquet is floating vs. glued-down, or if your room has out-of-square corners and severely uneven walls where repeated re-cutting would be likely.
If you can identify your parquet system type confidently, you can install baseboards safely by preserving the manufacturer-specified perimeter clearance and fastening only to wall backing.
If the room is severely out of square, plan extra time for shimming and re-cutting—trying to force miters is how you end up with visible openings after the first seasonal change.
For floating systems, treat the perimeter like a moving boundary: no rigid sealant bridges, no flooring-edge pinning, and no “tight now, fix later” shortcuts.
Quick checklist (save this):
| Step | What to check | Common miss |
|---|---|---|
| Identify parquet type | Floating vs. glued-down per manufacturer | Installing as if it’s glued when it’s floating |
| Expansion clearance | Gap matches parquet instructions | “Snug fit” to look perfect |
| Fasten to wall | Nails/screws hit wall backing | Fasteners that effectively pin edges |
| Dry-fit before cutting | Corners + seams line up | Miter/coping without test fitting |
| Finish & joints | Proper caulk/finish per product guidance | Caulk that blocks movement |
Frequently Asked Questions
How do I install baseboards on parquet floors without damaging the wood?
Start by checking that the parquet is securely bonded or fastened so it won’t flex when the baseboard is installed. Use a thin underlayment or painter’s tape as protection along the wall edge, and avoid driving fasteners into the parquet itself—attach baseboards to the wall studs or existing wall backing. If you need to cut around expansion gaps, leave the manufacturer’s recommended clearance so the parquet can naturally expand and contract. Finish by caulking the top seam between baseboard and wall (not the parquet) to prevent moisture intrusion at the floor edge.
What is the best way to measure and cut baseboards when you’re finishing parquet flooring?
Measure the wall length in multiple spots because walls are rarely perfectly straight, then dry-fit the baseboard pieces before committing to cuts. For parquet floors, confirm the floor height and any slight unevenness so the baseboard sits evenly without rocking at the top edge. Use a miter saw for corners and test-fit each section while the parquet is fully acclimated and installed. If the floor edge creates small gaps, plan to use sanding and flexible caulk to get a clean line rather than forcing the baseboard tight against the parquet.
Which fastening method works best for baseboards on parquet floors—nails or adhesive?
For most installations, the most reliable approach is to fasten baseboards to the wall (finish nails or a brad nailer) and supplement with construction adhesive if the wall is not very solid. Adhesive alone can fail if the wall surface is uneven, while nails without adhesive may create gaps at the baseboard edge in some rooms. Because parquet flooring can expand, avoid pinning or gluing the baseboard in a way that restricts the floor’s natural movement—keep the attachment focused on the wall. Always use an appropriate caulk and leave any required movement gap at the floor line.
Why do baseboards sometimes crack or separate after installing them over parquet, and how can I prevent it?
Baseboard problems often come from movement—parquet expands and contracts with humidity, and if the baseboard is rigidly bonded to the floor or the wrong seam is caulked, the materials can pull apart. Another common cause is fastening into weak drywall sections instead of studs or solid wall backing, leading to loosening over time. Prevent cracking by leaving the correct gap at the floor, attaching the baseboard to the wall structure, and using flexible caulk only where it’s meant to seal (typically the joint between baseboard and wall). Also ensure the parquet is acclimated and fully cured before installing baseboards.
How do I handle uneven walls or gaps between the baseboard and parquet after installation?
If walls are uneven, use a combination of careful scribing and shimming so the baseboard stays straight at the wall while maintaining the required clearance over the parquet. You can scribe the back edge of the baseboard to the wall profile, then clamp and check the fit before fastening. For small visible gaps at the top seam, apply paintable caulk for a smooth finish; for the bottom near the parquet, avoid rigid sealing that could trap movement. Finally, fill nail holes, sand lightly, and paint to match the room for a finished, professional look.
📅 Last Updated: October 15, 2026 | Topic: How to install baseboards with parquet floors? | Content verified for accuracy and freshness.
References
- Baseboard
- Parquet
- Wood flooring
- https://scholar.google.com/scholar?q=install+baseboards+with+parquet+floor+expansion+gap Google Scholar
- https://scholar.google.com/scholar?q=skirting+board+installation+parquet+floor+perimeter+gap Google Scholar
- https://scholar.google.com/scholar?q=hardwood+floor+installation+leave+expansion+gap+wall+baseboard Google Scholar
- https://scholar.google.com/scholar?q=parquet+floor+baseboard+reveal+gap+cutting+under+skirting Google Scholar
- https://scholar.google.com/scholar?q=how+to+install+baseboards+after+flooring+installation+nail+into+studs+not+floor Google Scholar
- https://scholar.google.com/scholar?q=wood+flooring+transition+trim+baseboard+do+not+pin+to+floor Google Scholar
- https://scholar.google.com/scholar?q=parquet+installation+guideline+perimeter+space+covered+by+skirting+baseboard Google Scholar



[…] Draw straight lines to split it into sections you can measure as […]