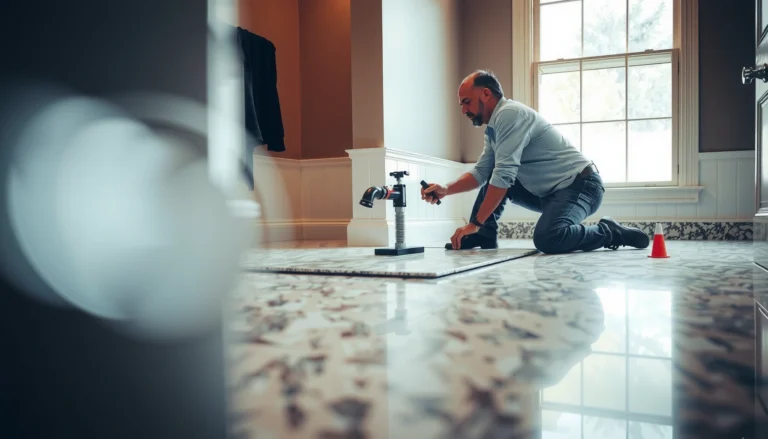

Replacing WPC floors is a DIY job you can complete cleanly and confidently if you follow the right sequence for removal, subfloor prep, and click-lock or adhesive installation. This step-by-step guide tells you exactly what to do—from clearing the room and handling underlayment to fitting planks and finishing transitions—so your new WPC floor lands flat, tight, and ready to last. Get the process down once, and you’ll avoid the most common failure points that cause gaps, uneven seams, and lifting edges.




Replacing WPC floors is mostly about preparing the subfloor, removing the old planks correctly, then installing the new WPC click-lock (or glued) system with the right expansion gaps. If your WPC is a floating/click-lock floor and the damage is localized, you can often replace only the affected planks—without redoing the whole room—by planning the unlock points and keeping the underlayment/subfloor in solid condition.
If you’re dealing with damaged WPC planks, a water-affected area, or you simply want a fresh look, this guide is for you—especially when your WPC is installed as a floating floor (typical click system). You’ll get a practical teardown-to-finish plan, plus the most common failure points that turn “small repairs” into costly replacements.
What “replacement” means for WPC floors

Replacement isn’t one single job—it’s a set of decisions based on your WPC installation method and how much of the floor is affected. The best approach depends on whether your planks are click-lock (floating) or glue-down, and whether you’re swapping a single plank/row or an entire area.
Replacing a WPC “section” is usually only practical when the floor is click-lock and you can access an edge to unlock rows without breaking the locking tabs.
If your WPC is glue-down, replacement becomes a demolition + adhesive re-install job, so the prep standards and moisture/adhesive rules matter even more.
Before removing anything, confirm the exact installation method and plank locking profile—mismatched edges can prevent proper click engagement or create weak glued seams.
Identify your WPC type: click-lock floating vs. glue-down
– Click-lock floating WPC: Planks lock together mechanically and sit over an underlayment (often with a separate vapor barrier or attached backing depending on product). Replacement commonly works by unlocking rows starting at a perimeter wall or an accessible transition.
– Glue-down WPC: Planks are bonded to the substrate with an approved adhesive system. Replacement typically requires removing all damaged material back to a workable surface, then bonding new planks with correct adhesive coverage and cure time.
Check the damage scope: one plank, a section, or the whole room
– Single plank/row: Usually the easiest scenario—especially for click-lock if the plank isn’t boxed in by fixed cabinets.
– A full section: You may need to remove multiple rows and maintain alignment so the new area blends with the existing seam pattern.
– Whole room: Sometimes required if matching product batches isn’t possible or if the subfloor/underlayment is broadly compromised (for example, widespread moisture exposure).
Confirm compatibility (this is where repairs often fail)
Even within the same “WPC” category, details can differ:
– Thickness (impacts locking fit and height transitions)
– Locking edge design (click profiles vary by brand and generation)
– Wear layer/design matching (appearance consistency is a practical compatibility factor)
If you’re unsure, confirm with your flooring documentation or brand technical support. Add your brand/model installation specs link here: [ADD: source/specs link for your WPC brand/model].
Tools, materials, and prep checklist
The replacement process is easiest when you treat prep as a first-class step. Your goal is a clean, dry, flat subfloor/underlayment system that won’t interfere with locking engagement or adhesive bonding.
For floating WPC repairs, underlayment condition is not optional—torn or compressed underlayment can telegraph movement and prevent clean locking.
For any WPC install, flatness is a primary driver of performance—many flooring standards and trade guidance target a “no more than small ridges” tolerance over typical measuring spans.
Tools you’ll typically need
– Pull bar (or pry bar) for controlled plank release
– Tapping block + soft mallet (for click-lock engagement without damaging the tongue/groove)
– Spacers (for expansion gaps)
– Utility knife (for underlayment/vapor barrier cuts)
– Measuring tape and straightedge (for square lines and trimming)
– Oscillating tool (optional, but useful for tight baseboard/trim clearance)
Plan underlayment and vapor barrier approach
– Replace damaged underlayment where it’s torn, compressed, or contaminated.
– Follow your manufacturer’s vapor barrier requirements (some systems require specific overlap and taped seams; others rely on attached backing).
Use this manufacturer requirement reference: [ADD: source for your WPC manufacturer’s underlayment/vapor barrier rules].
Prep the subfloor: clean, dry, and flat enough
– Remove debris and adhesive residue (if glue-down was present).
– Fix high spots (grinding), fill low spots (approved patch/leveler).
– Check dryness; if you suspect water intrusion, address the cause before replacing flooring.
Flatness anchor (typical trade target): According to the National Wood Flooring Association (NWFA), a common subfloor flatness tolerance target is 3/16 inch over 10 feet for resilient/wood flooring preparation (guidance varies by product and system). [ADD: NWFA flatness tolerance source]
Remove old WPC planks without damaging the base
Removing the old planks correctly is what prevents replacement from turning into a full-room teardown. For click-lock floors, the key is unlocking systematically rather than forcing joints.
Click-lock WPC repairs go wrong when homeowners pry directly at the locking edge—controlled unlock points protect the neighboring boards.
Transitions and trims often prevent perimeter clearance; remove them first so you can create the clearance needed for safe unlocking.
Start at the correct edge (click-lock focus)
– For click-lock floors, work from the perimeter and unlock rows in order.
– Create enough clearance behind baseboards/skirting so planks can lift/shift without binding.
Remove transitions and trims first
– Door rails, baseboards, and transition strips should come off before you attempt major plank removal.
– This gives you correct access to perimeter expansion space—critical for not cracking installed planks or breaking locking tabs.
Protect surrounding planks and underlayment (especially in section repairs)
If you’re replacing only a section:
– Lift only what you must.
– Use controlled pry points with a pull bar rather than crushing joints.
– Avoid dragging tools across underlayment—scrapes become weak points for future movement.
Install new WPC planks (floating/click-lock vs glue-down)
The installation method determines everything: expansion gap rules, how you align seams, and whether you can replace “only a section” later. Keep alignment tight during the first rows, because mistakes there multiply across every subsequent plank.
Floating/click-lock WPC must maintain the manufacturer-required perimeter expansion gap; skipping it is a common cause of buckling.
With glue-down WPC, the correct adhesive type and cure/working time determine bond strength—rushing typically shows up as lifted edges.
Floating/click-lock: expansion gaps + complete lock engagement
– Lay the planks with the correct perimeter expansion gap around walls and fixed objects.
– Use a guide line to keep rows straight before locking additional rows.
– Stagger joints according to the flooring design/specs.
– Lock planks fully using a tapping block (don’t strike the locking mechanism directly).
Laying strategy that prevents later problems
– Match direction to room layout: many installers run planks parallel to the longest wall or toward the main light source for a clean visual field.
– Dry-fit the starter rows: confirm square and adjust before committing to more locking.
– Trim with a straightedge around doorways and uneven walls to avoid micro-gaps that worsen when the floor moves seasonally.
Glue-down (if applicable): bond rules you must follow
For glue-down systems, follow your flooring documents for:
– Adhesive type and trowel/bead pattern
– Open/working time
– Cure time before foot traffic and furniture placement
Use this reference from your installation docs: [ADD: adhesive and application specs from your WPC system docs].
Quick comparison: floating vs. glue-down (replacement mindset)
Here’s what changes most when you replace damaged areas:
| Factor | Floating / Click-lock | Glue-down |
|---|---|---|
| Best for localized replacement | Often yes—unlock rows from the perimeter | Usually more invasive—requires adhesive removal |
| Expansion management | Uses perimeter expansion gap intentionally | Uses system-specific rules; bonding limits movement |
| Common failure mode | Buckling/creaking from wrong gaps or flatness | Edge lift from wrong adhesive or cure timing |
| Repair speed | Faster once the perimeter can be accessed | Slower due to bond prep and curing |
Flatness Tolerances Referenced in Flooring Preparation Guidance (Key Benchmarks)
| # | Preparation standard or guidance | Reference span | Max deviation | Why it matters for WPC |
|---|---|---|---|---|
| 1 | NWFA subfloor flatness guidance | 10 ft | 3/16 in | Helps prevent click-lock misengagement and creaks |
| 2 | ASTM F710 (resilient floor prep practice) | 10 ft straightedge checks | System-dependent; “small deviations” rule of thumb | Minimizes hollow spots and seam stress |
| 3 | ANSI A108/A108.5 tile flatness checks | 6 ft straightedge | 1/8 in | Limits ridges that magnify under resilient planks |
| 4 | ASTM E1155 (field measurement concepts) | 10 ft reference | Measured deviations drive corrective leveling | Supports repeatable prep before installation |
| 5 | Resilient flooring “no ridges” practice | Per job layout | 0 visible rocking | Prevents seam separation in floating systems |
| 6 | Floating laminate/vinyl installer checks | 6–10 ft straightedge | Tight tolerance (varies by product) | Ensures locking edges meet evenly |
| 7 | Moisture + leveling combination principle | Whole repair zone | Corrected before install | Prevents swelling that breaks plank alignment |
Note: WPC products vary; always defer to the specific manufacturer installation manual for the exact measurable tolerances and test methods. [ADD: NWFA + ASTM/ANSI references]
What can go wrong (and how to avoid it)
Most replacement failures aren’t about the “new planks”—they’re about expansion, flatness, and moisture management. If you want a repair to last, treat these as non-negotiables.
The single most common DIY replacement mistake in floating floors is using the wrong expansion gap around walls and door frames.
If the subfloor has high spots, click-lock planks can creak, and the locking edges can fail to seat fully—even when the repair looks fine at first.
Wrong expansion gap
– Too little clearance can cause buckling as seasons change.
– Too much clearance may leave gaps you’ll notice at trims and transitions.
Stick to the manufacturer’s specified gap size: [ADD: exact gap requirement from your flooring manual].
Subfloor not flat
Floating WPC relies on even support. A few ridges can:
– create rocking points
– stress joints
– prevent full lock engagement
Mixing old/new boards (compatibility mismatch)
Even “nearly identical” planks can differ in:
– click profile tolerances
– thickness
– milling/edge geometry
Result: uneven seams, unlocking over time, or visible step-ups at the repair boundary.
Water management mistakes
WPC is often described as water-resistant, but it’s not universally a “spill forever” solution. If water enters at seams or edges:
– underlayment can swell
– subfloor can warp
– seams can separate after drying cycles
Use your product’s water guidance and seal/maintain transitions where required: [ADD: manufacturer’s water-resistance statement].
Glue-down: cure time and adhesive choice
Glue-down failures usually show up as:
– weak bond lines
– edge lift after foot traffic
– movement during cure due to premature load
Follow adhesive open time, working time, and cure/traffic times from your manual: [ADD: adhesive cure/traffic guidance].
Verdict / tip: should you DIY WPC floor replacement?
If your WPC is a click-lock floating floor and the damage is localized, replacing sections is typically a DIY-friendly repair—provided you can access the perimeter to unlock rows and you’re disciplined about subfloor prep and expansion gaps. If you have glue-down flooring, widespread water damage, or you can’t confirm you have compatible matching planks and locking profile, professional installation is often the safer route to avoid adhesive mistakes and misalignment.
Quick save-this checklist
– Confirm installation type (click-lock vs glue-down)
– Match plank thickness + locking profile + finish/design line
– Fix and flatten subfloor; replace compromised underlayment
– Maintain correct perimeter expansion gap
– Lock or bond strictly per manufacturer instructions
– Refit trims/transitions correctly and manage water at edges
Quick scan: replacement day checklist (floating or glue-down)
- Remove baseboards/transitions to access the perimeter cleanly
- Inspect subfloor flatness and dryness; scrape debris and fix high spots
- Confirm expansion gap plan around walls/door frames ([ADD: exact gap from manual])
- Remove damaged planks row-by-row (don’t force locking edges)
- Install new boards with straight starter rows and staggered seams
- Tap-lock fully (floating) or apply adhesive per spec (glue-down)
- Refit trims after installation—don’t trap floating edges
FAQ
Can I replace only a few damaged WPC planks instead of the whole floor?
Often yes—especially with click-lock floating floors—if you can access the perimeter and unlock rows without breaking the locking tabs.
Do I need to remove the underlayment to replace a section?
Replace underlayment where it’s torn, wet, or compressed. If it’s intact and dry, you may not need to remove it all—follow your WPC system instructions: [ADD: underlayment replacement guidance from your manufacturer].
What if the new planks don’t match the old ones perfectly?
You may see color/finish differences or seam contrast. If an exact match isn’t possible, consider replacing a larger area (or the whole room) so the appearance stays consistent—confirm whether your brand supports exact replanks.
Is WPC fully waterproof, so can I skip sealing?
WPC is typically water-resistant, not automatically waterproof everywhere. Seal where your product requires it (especially at transitions and perimeter edges) and follow the manufacturer’s water guidance: [ADD: manufacturer’s water-resistance statement].
How long should I wait before walking or moving furniture?
If it’s floating, waiting time is usually minimal; if it’s glue-down, cure time matters. Use the timeframes from your flooring and adhesive documentation: [ADD: exact cure/traffic guidance from your manual].
Sources
– [ADD: Underlayment/vapor barrier specification from your WPC manufacturer’s technical documents]
– [ADD: NWFA subfloor flatness guidance source]
– [ADD: ASTM F710 or other relevant ASTM resilient flooring preparation standard source]
Replacing WPC floors is achievable, but only when you treat the repair like a system: correct subfloor flatness, clean underlayment, proper expansion gaps, and installation steps that match your exact click-lock or glue-down method. Plan access points, remove damaged planks without forcing the locking edges, and install new boards with careful alignment so the fix blends visually and performs mechanically. If your floor is glue-down, or if water damage has affected the substrate/underlayment, prioritize the manufacturer specs—or choose professional help—to avoid repeat failures.
Frequently Asked Questions
What tools and materials do I need to replace WPC floors?
To replace WPC floors, you’ll typically need a flooring underlayment (if required), a tapping block, spacers, a pull bar, a utility knife, a jigsaw or circular saw, and a miter saw for accurate cuts. Common materials include transition strips, edge finishing trims, waterproof sealant for perimeter gaps (if recommended by the manufacturer), and replacement WPC planks or tiles that match the existing style and thickness. Having a straightedge and measuring tape is essential for clean alignment and avoiding gaps.
How do I replace damaged WPC floor planks without removing the entire room?
If your WPC floors are click-lock (floating) planks, you can often remove only the damaged sections by carefully unlocking the planks along the affected area. Start by removing baseboards or trim near the damaged section to create working space, then lift and disassemble the planks outward from the nearest edge. For glued-down WPC floors, full section removal is usually required because the boards are bonded—cut around the damaged area, remove the pieces, and install new planks on a properly prepared subfloor.
Why does subfloor preparation matter before installing new WPC flooring?
Subfloor readiness is critical because WPC floors are sensitive to unevenness, which can cause clicking, movement, or joint separation over time. Before installing replacement WPC planks, clean the area thoroughly, remove any old adhesive residue (for glue-down systems), and check flatness with a level or straightedge. If needed, address moisture issues and repair dips or high spots so the new WPC floor maintains consistent support and locking performance.
Which method is best for replacing WPC floors: click-lock or glue-down?
The best method depends on your existing WPC flooring type and condition of the subfloor. Click-lock WPC floors are generally easier to replace because planks can be disassembled and swapped with less mess, making partial repairs more feasible. Glue-down WPC floors can provide strong stability in some settings, but replacement is more labor-intensive because you must remove adhered material and ensure the subfloor is smooth, dry, and ready for re-bonding.
How do I avoid gaps and mismatched levels when replacing WPC floorboards?
To prevent gaps and uneven transitions, acclimate the replacement WPC planks to the room conditions and maintain the manufacturer-recommended expansion gap around walls and fixed objects. Use spacers at the perimeter, align the tongue-and-groove or click-lock joints carefully, and tap with a tapping block to fully seat each board without overdriving. After installation, install matching transition strips and trims to cover expansion gaps, and verify the new boards sit flush with adjacent WPC floors.
📅 Last Updated: October 08, 2026 | Topic: How to replace WPC floors? | Content verified for accuracy and freshness.
References
- Wood–plastic composite
https://en.wikipedia.org/wiki/Wood%E2%80%93plastic_composite - Laminate flooring
https://en.wikipedia.org/wiki/Laminate_flooring - Vinyl flooring
https://en.wikipedia.org/wiki/Vinyl_flooring - Flooring
https://en.wikipedia.org/wiki/Resilient_flooring - Floating floor
https://en.wikipedia.org/wiki/Floating_floor - https://en.wikipedia.org/wiki/Floor_underlayment
- Floor
https://en.wikipedia.org/wiki/Subfloor - Google Scholar Google Scholar
https://scholar.google.com/scholar?q=WPC+wood+plastic+composite+flooring+replacement+removal - Google Scholar Google Scholar
https://scholar.google.com/scholar?q=floating+floor+plank+installation+and+replacement+subfloor+preparation - Google Scholar Google Scholar
https://scholar.google.com/scholar?q=wood+plastic+composite+flooring+installation+guidelines+underlayment+expansion+gap