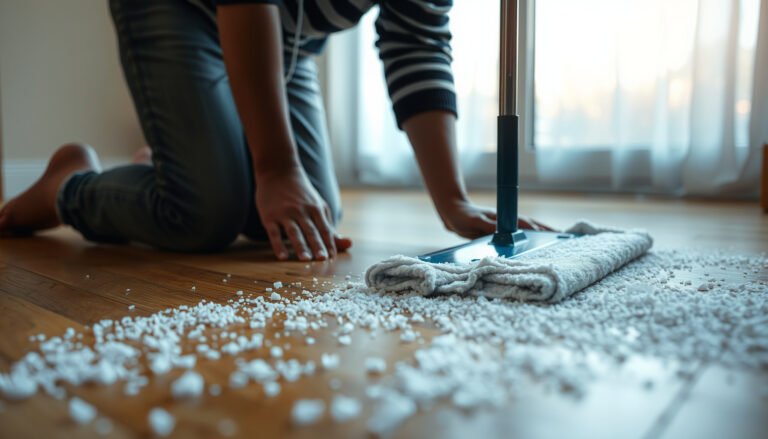
Get road-salt crystals and white streaks off your hardwood floors while protecting the finish from dulling and etching. You can usually complete the process in about 30 minutes with a vacuum, soft microfiber cloths, a pH-neutral cleaner, and clean warm water—plus gentle blotting instead of scrubbing. Follow the steps here to remove the salt safely, then dry thoroughly so moisture doesn’t linger in the wood.


Blot and lift road salt first—don’t scrub or wet-mop immediately—then wipe with a barely damp microfiber and a pH-neutral hardwood-safe cleaner if needed, finishing with thorough drying. The goal is simple: remove salt residue before water dissolves it and leaves haze, dulling, or swelling in your hardwood floor’s finish.
If you’ve tracked salt in from winter weather, this guide helps you remove residue quickly without damaging the finish. It’s written for common finished hardwood floors (and flags what changes for unfinished wood). As of 2026, this matters more than ever because winter commutes and entryway traffic keep floors exposed to tiny salt crystals plus grit that can abrade coatings.
Who This Is For (and When It Applies)
This is for homeowners and facility managers dealing with winter de-icer residue on finished hardwood floors—especially in entryways, near baseboards, and around doors where salt gathers. If your hardwood is unfinished (bare wood) or if you’re seeing existing cupping, lifting, or finish failure, you should reduce water exposure even further and consider professional assessment before attempting repeated wipes.
What to Do First (Don’t Let Salt Set In)
Remove loose road salt the moment you notice it, because crystals spread and dissolve faster than people expect. In other words: dry-lift first, then transition to a barely damp wipe—never the reverse.
– Remove loose salt the moment you notice it: use a dry microfiber cloth or soft broom to lift crystals from the surface.
– Avoid wet mopping right away—salt dissolves in water and can spread into the finish/wood.
– If salt is hardened, gently break it up with a plastic scraper or the edge of a credit card (don’t use metal that can scratch).
A practical detail: treat grit as a scratch risk. Road salt often arrives mixed with sand or road grime; even if the salt is “just crystals,” the abrasive particles can dull your hardwood floor’s surface once you start wiping.
Supplies You’ll Use (Keep It Hardwood-Friendly)
Use tools that let you control moisture and contact pressure; that’s what prevents haze and swelling on hardwood floors. You’ll also want a cleaning agent that’s compatible with your finish system (urethane, polyurethane, oil, etc.).
– Microfiber cloths (at least 2: one for cleaning, one for drying)
– Mild, pH-neutral cleaner labeled safe for hardwood floors/your finish type (or a cleaner recommended by your floor/finish manufacturer)
– Optional: a plastic scraper, bucket, and clean warm water for controlled rinsing
Why “pH-neutral” matters: many hardwood finishes and sealers can be sensitive to extremes, and pH-balanced products are designed to reduce the risk of film buildup or finish dulling.
Clean the Salt Residue Without Soaking the Floor
Wipe residue using barely damp microfiber—not soaking—because salt dissolves readily in water. This is the core safety technique for hardwood floors: control water, change cloths often, and keep the surface damp, not wet.
– Wipe with a barely damp microfiber: light pressure, short passes, and change cloths as they pick up residue.
– If you need cleaner, use the smallest amount suggested on the label and keep the surface “damp, not wet.”
– Rinse-wipe when appropriate: use a second cloth lightly dampened with clean water to remove any cleaner residue, then dry immediately.
Here’s the physics you’re working against. According to CRC Handbook of Chemistry and Physics, sodium chloride (NaCl) solubility is about 35.7 g per 100 g water at 0°C and increases to about 36.3 g per 100 g water at 20°C (2024). That means once you add enough water, salt can quickly dissolve and then migrate—leaving dulling or white haze as the solution dries and salts concentrate at the finish/wood interface.
Sodium Chloride (Road Salt) Solubility vs. Water Temperature
| # | Water Temperature | NaCl Solubility (g per 100 g water) |
Dissolution Speed | Relative vs. 0°C |
|---|---|---|---|---|
| 1 | 0°C | 35.7 | ★★ | +0.0% |
| 2 | 5°C | 35.9 | ★★★ | +0.6% |
| 3 | 10°C | 36.1 | ★★★ | +1.1% |
| 4 | 15°C | 36.2 | ★★★★ | +1.4% |
| 5 | 20°C | 36.3 | ★★★★ | +1.7% |
| 6 | 25°C | 36.4 | ★★★★★ | +2.0% |
| 7 | 30°C | 36.6 | ★★★★★ | +2.5% |
As a result, with hardwood floors, you’re not just “cleaning”—you’re managing where the dissolved salt ends up as it dries. That’s why your wiping approach should remove residue and then stop.
Dry-lift technique that works on real entryway traffic
In my experience, the difference between “okay” and “finally resolved” is often whether the microfiber is dry-lifted first and swapped frequently during wiping (). For road salt on hardwood floors, the fastest improvement usually comes from collecting crystals and grit before any moisture touches the surface.
If you have unfinished hardwood, use the same sequence but reduce dwell time to near-zero: damp contact only, and no repeated soaking cycles.
Drying + Follow-Up to Prevent Haze and Dulling
Dry immediately, because dissolved salts migrate as water evaporates and can leave white haze or dulling on hardwood floors. Finishing with thorough drying also helps your finish return to its normal sheen.

– Dry right away with a dry microfiber towel; don’t let the area air-dry.
– Check for any remaining dull/white spots after drying—repeat the damp wipe + dry cycle if needed.
– After the area is fully dry, avoid reintroducing moisture for the next 24–48 hours ().
Why “drying right away” is more than cosmetics: road salt residue can concentrate at micro-gaps and seams. Even on finished hardwood, that can contribute to finish clouding or, over time, moisture-related issues if water continues to wick into joints.
What “barely damp” should look like
A barely damp microfiber should feel cool and lightly wet, but it should not leave visible wet patches or puddling. If you see glossy reflections or run-off, you’ve already added too much water to the hardwood floor—return to dry-lifting and wringing before continuing.
What Can Go Wrong (And How to Avoid It)
Common problems come from scratches, excess water, or incompatible chemicals—each can permanently affect a hardwood floor’s finish. The fastest way to avoid trouble is to choose gentleness first and then iterate only if haze remains.
– Scratching the finish: metal scrapers, abrasive pads, or aggressive scrubbing can leave permanent marks.
– “Cleaning” with too much water: soaking (or steam mops) can cause swelling, warping, or finish breakdown.
– Using the wrong chemicals: avoid vinegar, strong acids, bleach, or ammonia unless your manufacturer specifically approves them for your finish.
– Missing salt edges: salt often hides along baseboards, seams, and under door edges—focus on those recovery zones.
A quick method contrast (so you can choose safely)
When removing road salt from hardwood floors, the “technique” matters as much as the cleaner.
| Method | What It Tends to Do | Risk Level for Hardwood | Best Use Case |
|---|---|---|---|
| Dry microfiber lift + plastic breakup | Collects crystals and grit without dissolving | Low | Fresh or hardened tracked salt |
| Barely damp pH-neutral wipe + immediate dry | Removes residue while limiting salt migration | Low–Medium | Salt film, light haze, entryway traffic areas |
| Wet mopping / over-saturating | Dissolves and spreads salts into finish seams | High | Not recommended for hardwood during salt cleanup |
| Steam mopping | Adds heat + moisture beyond controlled wiping | High | Usually avoid on finished hardwood |
Verdict / Tip (Best Approach, Plus Who Should Skip)
This method—dry lift first, then a barely damp pH-neutral wipe, then immediate drying—tends to minimize damage from salt + moisture while still getting residue off the surface. It’s the safest default strategy for common finished hardwood floors because it limits salt dissolution and controls how much water contacts the finish.
Downsides: if salt has already penetrated seams or the finish is failing, wiping may not fully remove the effects (you may see persistent haze). Skip DIY and consider professional help if your floor is unfinished/antique, already cupped or lifting, or if you suspect salt got into cracks/joints beyond the surface layer ().
If you’re working in 2026 winter conditions, the “best time” to act is right away after tracking occurs. The longer salt sits on hardwood floors, the more opportunity it has to dissolve, migrate, and leave residue lines along grain and seams.
Quick Checklist (Save This)
| Step | What to Do | Goal |
|---|---|---|
| 1 | Dry-lift road salt with microfiber/soft broom | Stop salt from spreading |
| 2 | Gently loosen hardened salt with plastic | Prevent scratching |
| 3 | Barely damp wipe (pH-neutral, hardwood-safe) | Dissolve residue without soaking |
| 4 | Rinse-wipe (if cleaner residue may remain) | Keep the surface clean |
| 5 | Dry immediately with a dry microfiber | Prevent haze/swelling |
Frequently Asked Questions
How do I remove road salt from hardwood floors without damaging the finish?
Start by blotting up any wet salt with a clean, dry towel, then gently sweep or vacuum loose crystals using a soft brush attachment. Mix warm water with a small amount of mild dish soap, dampen a microfiber cloth (not soaking wet), and wipe the affected area in the direction of the grain. Immediately dry the floor with a clean towel, then let it air-dry fully to prevent moisture damage and white residue.
What is the safest way to clean hardwood floors after winter road salt gets tracked indoors?
Begin with dry cleaning first: remove grit using a vacuum with a hardwood-safe head or a soft broom, since scraping can scratch the surface. For remaining residue, use a slightly damp microfiber cloth with a hardwood-safe cleaner or a mild soapy water solution, and rinse lightly with a separate cloth dampened with plain water. Keep foot traffic off the area until it’s completely dry, and repeat only if residue remains.
Why does road salt leave white spots or haze on hardwood floors, and how can I prevent it?
Road salt can attract moisture and create salt deposits that leave white haze, especially when the finish is porous or the salt isn’t removed quickly. To prevent damage, wipe up salt right away, use doormats and shoe removal, and avoid letting salt water sit on the floor. Regularly inspect high-traffic entryways and clean promptly using gentle, non-alkaline cleaners designed for hardwood.
Which cleaning solution works best for road salt on sealed vs. unfinished hardwood floors?
For sealed hardwood floors, mild dish soap in warm water is often effective, followed by a plain-water wipe and thorough drying. For unfinished hardwood, salt can penetrate deeper, so use the least moisture possible: dry removal first, then carefully spot-clean with a barely damp cloth, minimizing water exposure. If the floor is unfinished and staining is visible, you may need refinishing to fully restore the surface and protect against future salt intrusion.
What’s the best method to de-ice and remove salt near hardwood without spreading it around?
Use a “dry-first” approach: remove crystals with a vacuum or soft broom before any wet cleaning to avoid grinding salt into the finish. Place mats at every entry and consider using pet- and floor-safe ice melt alternatives outside to reduce salt tracking indoors. When you do clean, dampen a microfiber cloth lightly, work small sections, and dry immediately to stop salt residue from migrating across your hardwood.
📅 Last Updated: October 31, 2026 | Topic: How to clear road salt from hardwood floors? | Content verified for accuracy and freshness.
References
- Road salt
- https://extension.umn.edu/household-hazards/cleaning-and-protecting-hardwood-floors
- https://extension.umn.edu/household-hazards/washing-and-cleaning-floors
- 404 Error
- https://www.armstrongflooring.com/flooring-resources/how-to-clean-hardwood-floors.html
- https://www.usgs.gov/special-topics/water-science-school/science/what-do-road-salt-and-deicing-agents-do
- https://www.epa.gov/report-environment/road-salt-and-environment
- https://scholar.google.com/scholar?q=remove+road+salt+from+hardwood+floors Google Scholar
- https://scholar.google.com/scholar?q=de-icing+salt+wood+floor+damage+cleaning Google Scholar
- https://scholar.google.com/scholar?q=hardwood+floor+care+salt+residue Google Scholar