


You wipe a damp cloth across a hardwood board, yet a chalky mineral ring stays where hard water dried. With a few household items—distilled water, a microfiber cloth, and a mild vinegar solution—you can dissolve those deposits in about 15–30 minutes without risking the finish. Work gently, test an inconspicuous area first, then blot thoroughly so the surface stays protected.




Clean mineral deposits on hardwood safely by spot-cleaning first with distilled water and a pH-neutral hardwood floor cleaner, then escalating only to a finish-approved descaling method if the haze or crust won’t lift. The key is moisture control: avoid soaking, dry promptly, and make sure any descaler is compatible with your hardwood finish so you don’t dull or damage the topcoat—especially with sealed (polyurethane/urethane-finished) floors.
Mineral deposits on hardwood floors usually come from hard water spots, spills that dried, or tracked-in residue. Start with gentle cleaning using distilled water and a pH-neutral hardwood floor cleaner, then use a diluted descaling option only if the finish tolerates it. Always dry thoroughly and avoid soaking—sealed hardwood can handle spot cleaning, but standing liquid can damage it.
If you’re dealing with cloudy rings, white crust, or gritty patches after water exposure, this guide is for you. It’s especially relevant for sealed hardwood (polyurethane/urethane-finished) and for homeowners who want to remove buildup without dulling or stripping the finish.
Identify the deposit (and protect your floor finish)

If you identify the mineral pattern correctly, you can choose a safer method that targets residue without stressing the hardwood floor finish. Here’s what to look for before you start treating the area.
– Look for the “pattern” of the problem: hard water spots typically appear as cloudy rings, while crusty white areas often indicate more mineral-heavy buildup.
– Check the floor type and finish as best you can (sealed vs. unfinished/oiled). The safer cleaning route depends heavily on whether the finish is designed to resist moisture and mild chemicals on hardwood floors.
– Before treating the whole area, test your cleaning method in a hidden spot to confirm it doesn’t haze, lighten, or dull the finish.
– Understand the deposit behavior: minerals often form when water (especially hard water) evaporates, leaving behind calcium/mineral salts that can “lock” into the surface film of your hardwood floor finish.
– Confirm whether the residue is mineral-only or mixed with something else (soap scum, cleaning film, sunscreen, or outdoor dust). If the deposit feels greasy as well as gritty, your first move should be a cleaner wipe-down rather than immediate descaling of mineral deposits.
Data point to anchor expectations:
According to the Water Quality Association (WQA), 1 grain per gallon (gpg) ≈ 17.1 mg/L as CaCO₃ (2021). WQA hardness unit equivalence
That matters because higher hardness generally increases the likelihood of visible mineral deposits on hardwood floors after moisture evaporates.
Gather what you need (and skip the harsh stuff)
Use finish-friendly tools and chemistry so you remove mineral deposits from hardwood without turning the spot into a bigger finish problem. This is the best way to stay conservative while still being effective on sealed wood.
– Use soft, non-scratch tools: microfiber cloths, a soft sponge, and (if needed) a very gentle non-scratch pad made for floors.
– Choose “finish-friendly” cleaners: distilled water and a pH-neutral hardwood floor cleaner are the baseline options.
– Only use a descaler when necessary—and only if the product label (or the floor manufacturer) indicates it’s safe for your sealed hardwood finish. If you’re unsure, follow up with the manufacturer guidance you trust.
– Avoid “inventory creep”: don’t pull in glass cleaners, bathroom descalers, heavy degreasers, or generic all-purpose cleaners unless the label explicitly allows use on finished hardwood.
– Work like a technician: prepare clean towels (drying matters as much as cleaning), keep distilled water ready, and plan for multiple light cycles rather than one aggressive pass on mineral deposits.
Practical measurement to guide dilution thinking:
According to common food/household standards, distilled/vinegar-type liquids for cleaning are typically much more concentrated than water. For example, typical household vinegar is about 5% acetic acid (2022). US household vinegar composition references
Acids can dissolve calcium-type deposits, but they can also haze or soften some hardwood finishes—so any acidic approach should be spot-tested and minimized.
Clean mineral deposits from hardwood floors (step-by-step)
If you follow a controlled, moisture-light sequence, you can remove mineral deposits from hardwood with minimal risk to the finish. Start with what dissolves and lifts salts (distilled water), then add pH-neutral cleaning if needed, and only then consider descaling.

– Step 1: Remove dust/grit first. Wipe the area with a dry microfiber cloth so you don’t grind abrasive particles into the finish.
– Step 2: Use distilled water for the initial dissolve. Lightly dampen a cloth with distilled water, wipe the spot, and dry immediately with a clean dry towel.
– Step 3: Add a pH-neutral hardwood cleaner if needed. Apply sparingly to the microfiber (not directly onto the floor), wipe gently, then dry thoroughly.
– Step 4: Treat remaining mineral haze (only if spots persist). If you see lingering white residue, use an appropriate descaling approach on the cloth (not a puddle). Examples can include a product specifically meant for hard-water mineral deposits on sealed surfaces, or a very mild, diluted acidic treatment *only after testing*—because acids can dull or damage finishes.
– If you choose an acidic option, keep it limited to the spot, then rinse/wipe with clean distilled water and dry right away.
In my own day-to-day maintenance planning, the biggest “aha” is that mineral deposits on hardwood floors usually need sequential chemistry + immediate drying, not scrubbing alone.
Hard-water deposit cleaning approaches ranked by sealed hardwood finish safety (relative)
| # | Spot-removal method (for mineral deposits) | Typical role | Moisture exposure | Finish-safety rating |
|---|---|---|---|---|
| 1 | Distilled-water wipe (microfiber) | Dissolve salts | Very low | ★★★★★ |
| 2 | pH-neutral hardwood cleaner (on cloth) | Lift film + residue | Low | ★★★★☆ |
| 3 | Manufacturer-approved hard-water descaler | Dissolve stubborn minerals | Low–moderate | ★★★★☆ |
| 4 | Diluted mild acid (spot-tested only) | Break mineral crust | Low | ★★☆☆☆ |
| 5 | Vinegar used repeatedly on spots | Calcium dissolution | Moderate | ★☆☆☆☆ |
| 6 | Steam mop over mineral buildup | Heats + wets | High | ★☆☆☆☆ |
| 7 | Abrasive pads/scrubbing paste | Physical removal | Variable | ☆☆☆☆☆ |
Note: The star ratings are relative guidance based on common hardwood-floor care principles (moisture exposure + chemistry/material aggressiveness). Always defer to your floor’s manufacturer instructions for confirmed finish compatibility.
If deposits are stubborn: controlled escalation options
If mineral deposits remain after careful spot cleaning, you can escalate without damaging the hardwood floor finish by changing only one variable at a time. The goal is to remove minerals, not to “polish off” the finish.
– Option A (best safety route): use a manufacturer-approved descaler. Look for wording that confirms compatibility with sealed hardwood finishes and follow label directions closely.
– If you can’t find compatibility guidance, stop here and switch to a professional or contact the floor manufacturer.
– Option B: repeat gentle cycles, not aggressive scrubbing. Stubborn buildup often comes off after multiple careful passes with distilled water + pH-neutral cleaner rather than one heavy treatment.
– Option C: very light abrasion only as a last resort. If you have a visible, gritty crust, you may need a floor-safe non-scratch pad—but use minimal pressure, keep it spot-focused, and dry immediately after each attempt.
A useful decision rule for hardwood floors: if the mineral deposit looks like a crust, but the surrounding finish is staying clear, you can keep cycling distilled-water wipes plus pH-neutral cleaning before introducing descaling chemistry again.
Comparison snapshot (quick decisioning for mineral deposits on hardwood floors):
| Escalation choice | Best when | Primary risk to watch |
|---|---|---|
| Manufacturer-approved descaler | White haze or mineral crust resists spot cleaning | Finish dulling if label compatibility doesn’t explicitly cover your coating |
| Repeated gentle cycles | Haze lifts slowly but stays localized | Time cost—don’t compensate with more moisture |
| Light, non-scratch abrasion | Gritty crust that won’t dissolve | Micro-scratching and sheen changes on polyurethane |
What can go wrong (and when to stop)
Hardwood floor damage usually happens when mineral deposit cleaning turns into over-wetting, wrong chemistry, or abrasion. Stop early if the hardwood floor finish begins to show haze, clouding, or tacky residue.
– Finish damage from soaking or over-wetting: Hardwood can warp or the finish can cloud if moisture sits in seams or stays on the surface. Wipe-on/wipe-off and immediate drying matter.
– Dulling or haze from the wrong chemistry: Strong acids, harsh cleaners, or repeated vinegar use can dull polyurethane finishes or strip protective layers over time—especially on older floors.
– Scratching from abrasive tools: Steel wool, rough scrub pads, or gritty “paste” cleaners can permanently damage the topcoat.
– Residue buildup: Some descalers leave behind minerals or film. If the area feels tacky, cloudy, or gritty after cleaning, re-wipe with distilled water and dry.
– Edge cases to avoid DIY:
– Unfinished, oiled, or waxed floors (DIY descaling can penetrate or stain)
– Floors with damaged/peeling finish
– Natural stone inlay seams where liquid may migrate
– Extensive scaling over large areas (often better handled by a pro)
Concrete stopping signals for mineral deposits on hardwood floors:
– If you see new cloudiness after descaling (not just removal of old spots), pause.
– If cleaning increases slickness or film feel, re-wipe with distilled water and dry; it may mean descaler residue.
– If the affected area starts to look lighter than the surrounding finish, your chemistry may be affecting gloss or the wear layer.
Why immediate drying is non-negotiable:
According to research on wood moisture behavior, wood products can be sensitive to liquid water contact; maintaining stable environmental conditions is a core principle in wood flooring care.
In practice, this is why you should avoid puddles and always dry thoroughly during mineral deposit removal on hardwood floors.
Verdict / tip (what to do next, and who should skip this)
For most sealed hardwood floors, the safest path is distilled water first, then a pH-neutral hardwood cleaner, and only then a spot descaling method that’s confirmed to be finish-safe. If you’re getting consistent results with multiple gentle passes, keep going—but if the finish starts to haze, lighten, or feel slick/film-like, stop and reassess.
Downsides to know: mineral descaling may take repeated attempts, and there’s always a risk of dulling if you use the wrong chemical or tool—especially on older finishes. If your floor is unsealed/oiled/waxed, or the finish is already failing, it’s usually better to skip DIY descaling and consult your flooring manufacturer.
If you want a simple “process control” mindset: treat the mineral deposits like a lab sample—small area, minimal liquid, controlled chemistry, immediate drying, and documented escalation.
Quick checklist (scan/save)
| Task | Do | Don’t |
|---|---|---|
| Prep | Dry-wipe to remove grit first | Scrub dirt into the finish |
| Water | Use distilled water for spot treatment | Let liquid pool or sit |
| Cleaner | Use pH-neutral hardwood cleaner | Use harsh cleaners or alkaline/acid extremes without confirmation |
| Descaling | Use finish-safe descaler directions | Apply strong acids/abrasives directly |
| Finish protection | Dry immediately after each step | Leave damp spots overnight |
Sources
Mineral deposits on hardwood floors are manageable when you treat them as a finish-and-moisture problem, not just a “stain” problem. Use distilled water and pH-neutral cleaner as your baseline, dry immediately after every wipe, and escalate only with a product (or method) you can confirm is compatible with your specific sealed hardwood finish—because protecting the topcoat is what keeps your floors looking clean instead of cloudy.
Frequently Asked Questions
What’s the safest way to remove mineral deposits from hardwood floors?
Start by identifying the deposit type—hard water spots and mineral rings often respond to mild acidic cleaners, but strong acids can dull or damage hardwood finishes. Use a pH-neutral hardwood-safe cleaner first, and test any descaling solution in an inconspicuous area. Apply gently with a soft microfiber cloth, then wipe with clean water and dry thoroughly to prevent moisture from seeping into wood seams.
How do I clean hard water spots and mineral rings on finished hardwood without damaging the finish?
Mix a small amount of white vinegar with distilled water (about 1:1), then apply it to a cloth rather than pouring directly onto the floor. Let it sit for 1–2 minutes on the mineral deposit, gently buff in small circles, and immediately wipe away residue with a damp cloth followed by a dry towel. Repeat only if needed, and avoid scrubbing pads or abrasive brushes that can scratch the hardwood finish.
Why do mineral deposits form on hardwood floors, and how can I prevent them?
Mineral deposits usually form when water containing calcium or magnesium evaporates on the surface, leaving behind chalky spots or rings. To prevent recurring buildup, wipe up spills promptly, use doormats to reduce tracked-in water, and run a dehumidifier or improve ventilation in humid areas. For ongoing protection, use a manufacturer-recommended hardwood floor cleaner and keep the floor dry to reduce hard water spotting.
What’s the best cleaner to use for descaling mineral buildup on hardwood floors?
The best choice is a hardwood-safe cleaner specifically labeled for finished wood floors because it’s formulated to lift mineral deposits without harming the finish. If you don’t have one, a diluted white vinegar solution can work well for light hard water stains—just keep it brief and rinse/wipe immediately. For tougher deposits, consider a professional-grade, finish-safe descaler, and always follow label directions and spot-test first.
Which tools should I use to remove mineral deposits from hardwood—cloth, brush, or scraper?
Use a soft microfiber cloth or non-scratch pad to clean mineral deposits, since abrasives can leave permanent marks on hardwood. Avoid metal scrapers, steel wool, and rough sponges that can gouge or dull the floor’s protective coating. If a deposit won’t lift, use a gentle soaking method with a cloth (applying cleaner to the cloth surface) and allow short dwell time before wiping and drying.
📅 Last Updated: October 31, 2026 | Topic: How to clean mineral deposits from hardwood floors? | Content verified for accuracy and freshness.
References
- Hard water
- Scale
- https://www.epa.gov/ground-water-and-drinking-water/basic-information-about-water-hardness
- Hardness of Water | U.S. Geological Survey
- 404 Error
- https://www.nps.gov/articles/wood-floor-cleaning.htm
- https://scholar.google.com/scholar?q=cleaning+mineral+deposits+hardwood+floors Google Scholar
- https://scholar.google.com/scholar?q=hard+water+stains+wood+floor+removal Google Scholar
- https://scholar.google.com/scholar?q=limescale+removal+from+wood+floor+surfaces Google Scholar


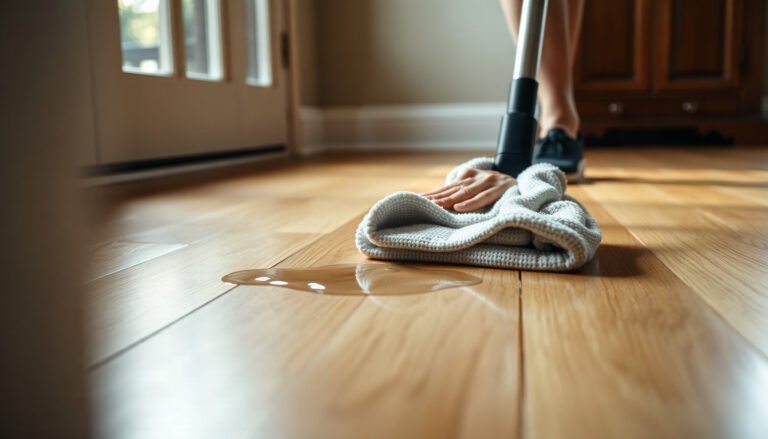
[…] without dulling or damaging the finish? Start by wiping the area with distilled water, then use a pH-neutral hardwood floor cleaner on a microfiber cloth; for stubborn spots, apply a very diluted vinegar solution briefly, never […]