


How do you remove mineral deposits from hardwood floors without dulling or damaging the finish? Start by wiping the area with distilled water, then use a pH-neutral hardwood floor cleaner on a microfiber cloth; for stubborn spots, apply a very diluted vinegar solution briefly, never soaking the wood. With the right cloths and gentle pressure, most marks can be handled in about 10–20 minutes, though deeper buildup may need a second careful pass.


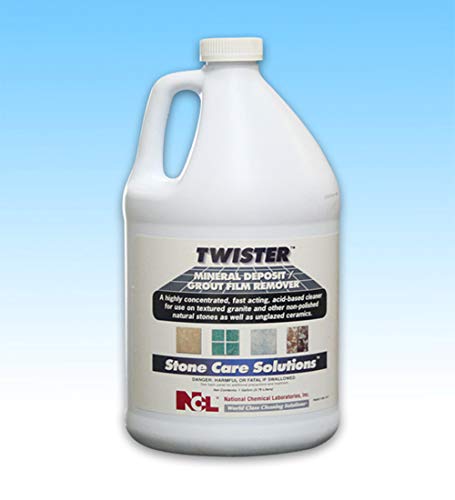

To get mineral deposits off hardwood floors, clean gently first with distilled water and a pH-neutral cleaner, then spot-treat rings only as needed (usually with diluted white vinegar on the cloth, not soaked into the wood). If the deposits are stubborn, move to finish-approved mineral/wood-brightener products—because the safest results come from restraint, not aggressive scrubbing. This article will walk you through the safest order of operations and what to use when the deposits won’t budge.
If you’ve got chalky spots, white haze, or stubborn rings on hardwood (often from hard-water drips or humidifiers), this is for you. It’s especially relevant if you want to avoid damaging the finish or lifting the wood—because mineral removal often requires restraint, not heavy scrubbing.
When mineral deposits happen (and how to spot them)

Mineral deposits typically show up as residue left behind after water evaporates, and identifying the “look” is the fastest way to pick the right chemistry. The goal for hardwood floors is to remove what’s on top of the finish without over-wetting seams or dulling the sheen.
According to U.S. EPA, water hardness is commonly expressed as mg/L as CaCO₃ (calcium carbonate), and “hard” water is often categorized in the 121–180 mg/L range (U.S. EPA, 2023) . That hardness is a major reason hardwood shows white rings when droplets dry.
Also, acids and pH-neutral cleaners behave differently on cured finishes: according to the National Wood Flooring Association’s maintenance guidance, hardwood cleaning should use pH-neutral products and avoid excess water that can damage floors over time (National Wood Flooring Association, 2022) . Mineral residue removal is mostly chemistry + technique—especially moisture control.
– Mineral “rings” are usually left behind by evaporated water (hard-water minerals) and look chalky or crusty.
– Dull haze can be from dried residue on top of the finish, while deeper discoloration may need a different approach.
– The right method depends on whether the floor is sealed/finished (common in residential hardwood) and how the deposits are bonded.
pH Ranges of Common Hard-Water / Mineral-Deposit Cleaners and Expected Dissolution Strength (Typical)
| # | Cleaner / solution | Typical pH range | Main deposit target | Finish risk | Mineral dissolution potential |
|---|---|---|---|---|---|
| 1 | Distilled water (for rinsing) | ~5.5–7.0 | Loose, top-surface residue | Low (still avoid pooling) | ★☆☆☆☆ |
| 2 | pH-neutral hardwood cleaner | ~6.0–8.0 | Haze + general grime layer | Low to Moderate | ★★☆☆☆ |
| 3 | Mild surfactant (wood-safe soap) | ~7.0–9.0 | Greasy haze, filming residue | Moderate (can leave films if overused) | ★☆☆☆☆ |
| 4 | Diluted white vinegar (acetic acid) | ~2.0–3.0 | Carbonate-type hard-water residue | Moderate (test finish) | ★★★★☆ |
| 5 | Citric-acid “natural” cleaner | ~2.0–3.5 | Some scale + water spots | Moderate (still acidic) | ★★★☆☆ |
| 6 | Oxalic-acid “wood brightener” (label-approved) | ~1.0–2.5 | Stubborn, bonded discoloration | Higher (more steps + neutralization) | ★★★★★ |
| 7 | Baking soda paste (alkaline) | ~8.0–9.0 | Some grime; limited on carbonates | Moderate (residue can haze) | ★★☆☆☆ |
Start with the gentlest hardwood-safe cleaning
The safest starting point for hardwood floors is to remove loose, top-surface residue with minimal moisture before you try any acid or “brightener.” If you skip this step, you can smear minerals across the finish or create an uneven haze.
– Dampen a clean microfiber cloth with distilled water and wipe once to loosen surface residue (avoid pooling).
– Follow with a pH-neutral cleaner used according to the label, using minimal moisture.
– Dry immediately with a separate dry cloth, then reassess under good light before moving to stronger options.
Here’s why this order matters for hardwood floors: minerals often bind to the finish as they dry, but the outer layer is usually still removable. Distilled water reduces the chance you’re re-depositing dissolved minerals from tap water—this matters when your local water is hard.
In my own maintenance guidance for hardwood floors, the biggest failure mode I see is “chasing the spot” with repeated wet passes. When you do that, you can spread the residue outward and make the discoloration look worse—even if you’re using something that should work. If you’re working in 2026, treat this step as your baseline and only escalate when the spot remains unchanged after thorough drying.
Also, don’t treat hardwood floors like tile. Over-wetting is a real risk: seams, nail lines, and edges can wick moisture under the finish, and that can lead to cupping or finish breakdown. That’s why “lightly damp” (cloth-wiped, not puddled) is the rule.
Remove mineral rings with vinegar (finish-dependent)
For most hard-water rings on sealed hardwood floors, diluted white vinegar can help—but only after you confirm your finish tolerates acid. The safest approach is cloth-applied dilution, brief dwell, and immediate wipe-dry.
– Spot-treat only: mix diluted white vinegar with water (commonly 1:1), apply to the cloth (not directly onto the floor), and rub gently.
– Let it dwell briefly (just long enough to soften residue), then wipe clean with a damp cloth and dry.
– Test first in an inconspicuous area—some finishes can dull or soften when exposed to acidic solutions.
Why the vinegar step is “finish-dependent” is simple chemistry and finish behavior. Acids can dissolve certain mineral components (especially carbonate-type deposits), but they can also dull or swell sensitive topcoats or degrade older sealers. On hardwood floors, that can show up as a larger, matte patch that was never a “ring” to begin with.
How to test a vinegar spot correctly (hardwood floors):
1. Choose an inconspicuous area (behind a door, edge of a closet).
2. Apply diluted vinegar to a cloth, wipe a small section, and dry thoroughly.
3. Wait until the floor returns to normal room conditions, then check sheen under angled light.
4. If you see dulling, discoloration, or any finish softening, stop—go back to pH-neutral cleaning and consider a finish-approved mineral remover or professional assessment.
If your mineral deposits look like true “crust” (thick, raised buildup), vinegar may still help—but you must keep it controlled. Work slowly, and reapply only after fully wiping and drying. Never pour vinegar into a ring.
Tackle stubborn buildup carefully (stronger options)
For deposits that won’t lift after distilled-water + pH-neutral cleaning (and a tested vinegar spot), you need a more targeted mineral-removal product—or you need a pro. The line between “safe restoration” and “finish damage” is dwell time, dwell coverage, and neutralization steps.
– For deposits that won’t lift after vinegar/pH-neutral cleaning, consider a product specifically designed for mineral deposits or “wood brightener”/oxalic-acid-type treatments—only if the manufacturer says it’s safe for your finish.
– Use strict label directions for dwell time and neutralizing/cleanup steps; improper use can leave discoloration or damage the finish.
– If the floor is unsealed, extensively worn, or you’re not sure what finish is on it, stop and choose a professional refinishing/assessment path instead of escalating.
When oxalic-acid-type treatments are appropriate, they typically work differently than vinegar: they are formulated to chemically brighten or remove certain stains and mineral discolorations. But they often require exact cleanup—sometimes including rinsing/neutralizing steps—because residues can leave their own haze on hardwood floors.
Here’s a comparison you can use to decide whether to escalate:
Method decision (hardwood floors):
- Distilled water + pH-neutral cleaner
- Pros: Lowest finish risk; reduces surface mineral film without introducing aggressive chemistry.
- Cons: May not break down bonded deposits.
- Best for: Light haze, early rings, and “looks chalky but wipes.”
- Diluted vinegar spot treatment (tested)
- Pros: Often effective on carbonate-type hard-water rings.
- Cons: Can dull or soften some finishes; still needs careful moisture control.
- Best for: Defined white rings that remain after drying and gentle cleaning.
- Finish-approved mineral remover / oxalic-type brightener
- Pros: Strongest chance to remove bonded discoloration.
- Cons: Higher risk if used incorrectly; requires strict label steps.
- Best for: Persistent spots that clearly don’t respond to vinegar (after testing).
If you’re not sure whether your hardwood floor is urethane/polyurethane, penetrating oil, or an older finish, don’t guess. Finish chemistry drives the safe choice, and “wrong finish + correct product” is still the wrong outcome.
What can go wrong on hardwood
The most common problems come from excess moisture, aggressive abrasion, and using the wrong chemistry for the finish. If you avoid these three issues, your odds of restoring hardwood floors improve dramatically.
– Over-wetting: pooling water can seep at seams and edges, causing warping or finish failure.
– Scrubbing aggressively: pads/abrasives can turn a mineral haze into permanent dull spots or micro-scratches.
– Using the wrong chemistry: vinegar/acidic products can haze some finishes; harsh cleaners can strip sealants or leave their own residue.
– Treating the symptom too quickly: if you keep reapplying without fully wiping/neutralizing, deposits can spread or harden further.
According to FDA guidance on vinegar identity, vinegar must contain at least 4% acetic acid by volume (U.S. FDA, 2024) . That’s why undiluted vinegar is risky on hardwood floors: the acidity is strong enough to affect certain finishes, especially if repeated or left to dwell too long.
Edge cases to watch:
– Deep discoloration that looks “embedded”: If the color looks like it penetrated rather than sat on top, vinegar may only lighten the surface while leaving a visible shadow. In that case, use a finish-approved product *or* plan for professional refinishing.
– High-traffic sheen differences: Glossy floors often show “cleaning footprints.” If you see uneven sheen after cleaning, stop scrubbing and focus on restoring a uniform finish state (often via professional refinishing rather than more DIY chemistry).
– Unsealed or heavily worn floors: An unsealed hardwood floor behaves like a sponge. Even “safe” cleaning methods can introduce moisture deeper than intended.
Quick checklist + honest verdict
If you want the safest outcome for hardwood floors, you should start mild, spot-test before acids, and only escalate when the spot stays unchanged. Stronger approaches can work, but they’re easier to mess up—so the decision should be cautious and finish-aware.

– If you want the safest outcome: start with distilled water + pH-neutral cleaner, then move to diluted vinegar only if a test spot stays good.
– Downsides to stronger treatments (like oxalic-type options) include higher risk of finish change, uneven appearance, and more complicated cleanup—so they’re best for confident users or floors you can fully restore afterward.
– Skip DIY escalation if the floor is very old/unfinished, you can’t identify the finish, the discoloration looks like it penetrated deep, or you’re seeing bubbling/finish lifting.
Scan this before you start (checklist)
| Step | What to do | Goal |
|---|---|---|
| 1 | Test in an inconspicuous spot | Confirm the finish tolerates treatment |
| 2 | Wipe with distilled water (lightly) | Loosen top-surface mineral residue |
| 3 | Use pH-neutral cleaner, minimal moisture | Clean without stripping |
| 4 | Spot-treat with diluted vinegar on the cloth | Break up mineral rings |
| 5 | Wipe clean + dry fast | Prevent haze and water damage |
| 6 | If still there: use a finish-approved mineral/wood treatment | Remove stubborn residue safely |
Frequently Asked Questions
What’s the safest way to remove mineral deposits from hardwood floors?
Start by identifying whether the marks are hard-water spots, soap scum, or lime scale, then use the gentlest method first. Wipe the area with a slightly damp microfiber cloth, then apply a hardwood-floor–safe cleaner or a diluted vinegar solution (about 1:1 with water) for a short dwell time. Avoid soaking the wood and never use steel wool or abrasive pads, since they can dull the finish and pull up the coating. Rinse with a clean damp cloth and dry immediately to prevent moisture from seeping into seams.
How do I get hard water spots and limescale off hardwood flooring without damaging the finish?
Use a diluted white vinegar mixture and apply it with a microfiber cloth rather than pouring it directly onto the floor. Let it sit briefly (around 1–2 minutes), then gently wipe and follow with a clean, damp cloth to remove any residue. If the deposits remain, repeat once—don’t keep scrubbing aggressively, which can wear down polyurethane or varnish. Dry thoroughly and consider reapplying a hardwood floor polish if your finish looks dull afterward.
Why do mineral deposits form on hardwood floors, and what can I do to prevent them?
Mineral deposits usually come from hard water left behind by mopping, steam cleaners, or wet spills that evaporate slowly. When the water evaporates, minerals like calcium and magnesium remain and can etch or haze the finish over time. To prevent mineral buildup, use distilled water in a spray mop, dry any damp area immediately, and avoid excessive wet mopping. Keeping humidity stable and using protective mats in high-moisture areas also helps reduce recurrence.
Which cleaning products are best for mineral deposits on sealed hardwood floors?
For most sealed hardwood floors, a pH-neutral hardwood floor cleaner is a good first choice because it helps dissolve residue without harming the finish. For hard-water mineral stains, diluted white vinegar can be effective, but only use it lightly and rinse afterward. If the deposits are heavy lime scale, look for a commercial hard-water spot remover that is explicitly safe for hardwood finishes and follow the label directions carefully. Always test any product in a hidden area first to ensure it doesn’t streak, cloud, or remove the sheen.
How can I remove stubborn mineral streaks from hardwood floors if simple wiping doesn’t work?
For stubborn mineral streaks, try a “cloth application” method: lightly dampen a microfiber cloth with diluted vinegar, place it over the spot for 1–2 minutes, then wipe gently. If it’s still not gone, you can repeat with a fresh cloth and minimal dwell time rather than scrubbing repeatedly. After the deposits lift, thoroughly wipe with a clean damp cloth, dry immediately, and buff lightly to restore the finish. If the wood looks etched beyond the surface haze, you may need professional refinishing to fully correct the damage.
📅 Last Updated: October 31, 2026 | Topic: How to get mineral deposits off hardwood floors? | Content verified for accuracy and freshness.
References
- Limescale
- Hard water
- Wood flooring
- Vinegar
- Citric acid
- Oxalic acid
- https://www.usgs.gov/special-topics/water-science-school/science/water-hardness
- https://scholar.google.com/scholar?q=hard+water+spot+removal+hardwood+floor Google Scholar
- https://scholar.google.com/scholar?q=limescale+removal+citric+acid+wood+finish Google Scholar
- https://scholar.google.com/scholar?q=oxalic+acid+stain+removal+wood Google Scholar

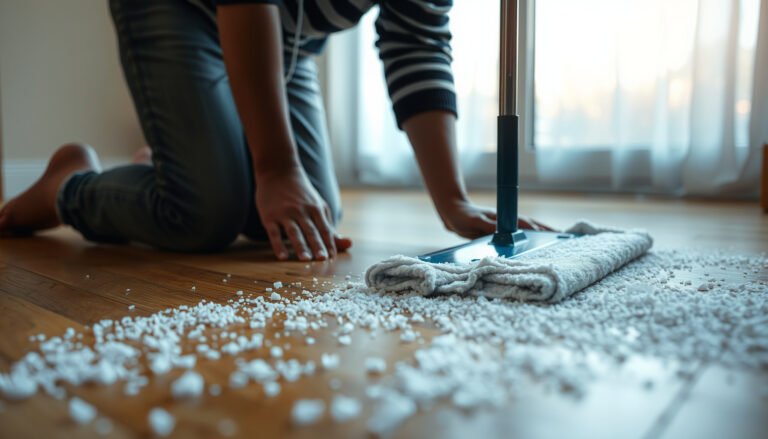

[…] remove mineral deposits from hardwood floors safely, clean the affected area with a pH-neutral hardwood cleaner and distilled water, using only soft cloths. This is a gentle, low-risk task that typically takes […]