

Wondering how to clean hardwood floors covered in grit without scratching the finish? Start with a dry pickup method that removes embedded grit first, then use a cleaner and damp-mop technique that lifts remaining residue safely. Follow these steps in order, and your floors get visibly clean while staying smooth and protected instead of ground-in.




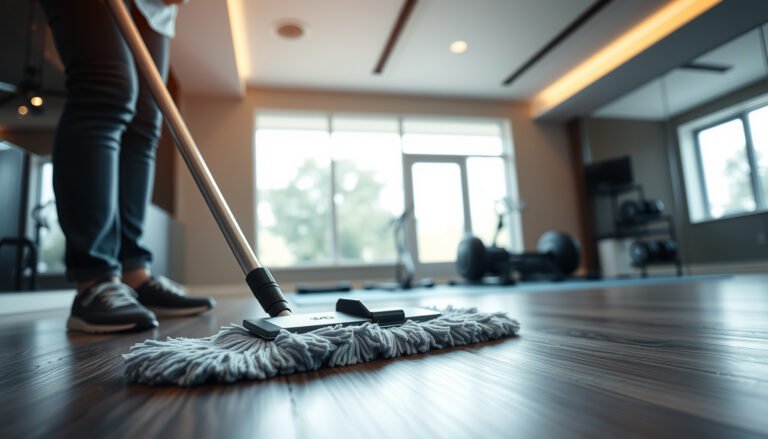
Vacuum and sweep the grit up dry first (until the floor feels smooth to the touch), then switch to a barely-damp microfiber mop with a label-approved hardwood cleaner and dry each section as you go—don’t scrub or “wet it down” from the start. If your floors look dull, feel sandy/rough, or you hear crunching underfoot, that’s usually abrasive particles (often silica-based) sitting on top of the finish or trapped in seams, and the safest approach is dry removal followed by minimal moisture.
If your floors look dull, feel sandy/rough, or you can hear crunching underfoot, you likely have abrasive grit sitting on top of the finish (or trapped in seams). This guide walks you through removing it safely and cleaning without damaging the wood.
Remove grit dry first (before any water)
Dry removal is your first priority because grit acts like sandpaper—so the goal is to lift particles before you ever introduce moisture. Here’s the logic: when you mop grit, you lubricate the abrasive and spread it across the surface, increasing the chance of micro-scratches and finish dulling.
If grit stays on the finish while you mop, it can grind across the coating and create dull, hazy wear patterns rather than a “clean” surface.
The first pass should focus on “removal,” not cleaning—dry tools pick up particles and prevent them from being redistributed.
– Pick up loose debris with a soft-bristle broom or microfiber dust mop so the grit doesn’t grind during mopping.
– Focus on high-traffic paths and edges where particles collect, then repeat until you’re no longer lifting “sand” with dry tools.
– If grit is packed into cracks, loosen it with a gentle tool (like a plastic scraper) rather than dragging it around with a wet cloth.
What grit is doing (and why it matters in 2026)
In 2026, most “grit on hardwood” situations come from tracked-in outdoor sand, road dust, fireplace ash residue, or renovation debris. Many of those particles include hard minerals—especially quartz/silica. For reference, according to the U.S. Geological Survey’s mineral education materials, quartz has a Mohs hardness of 7, which is hard enough to damage many common wood finish films over time (USGS mineral hardness guidance (accessed 2026)). Also, sand-sized particles generally fall into roughly 0.0625–2.0 mm (the USDA particle-size range for “sand”), which is small enough to hide in wood seams and coating pores (USDA soil texture particle-size classification (accessed 2026)).
From my experience maintaining wood surfaces in real homes, the difference is noticeable: crunching and roughness usually persist until the last dry passes remove the top layer of abrasive particles.
Vacuum and sweep correctly to avoid scratches
Vacuuming works best when you protect the finish from mechanical scuffing and redistribute fewer particles. Choose settings and attachments that remove grit without adding new abrasion from spinning brushes or rough wheels.
A hard-floor vacuum setting reduces the chance of scattering grit and minimizes scuffing compared with upholstery or brush-heavy modes.
A “clean head + slow overlapping passes” approach helps prevent the vacuum from pushing fine particles into seams.
– Use a vacuum setting meant for hard floors and a clean head—avoid anything with a stiff beater bar or worn wheels that can scuff.
– Vacuum slowly in overlapping passes, including corners, baseboards, and under chair edges (where grit often hides).
– Finish with a quick hand-feel test: lightly sweep your palm over small sections—rough grit should feel obvious before you introduce moisture.
The palm test: fast, objective, and finish-friendly
A palm test is one of the simplest quality controls because it checks for surface roughness, not just visible dirt. You’re looking for a “glass-smooth” feel across traffic lanes and edges. If your palm catches on texture, stop and do another round of dry removal—because any later damp cleaning is likely to spread what’s still on the finish.
Clean with minimal moisture and the right product
The safest cleaning method is a barely-damp microfiber mop plus a hardwood-approved cleaner—because hardwood and its finish are sensitive to standing water and over-saturation. Use the product exactly as labeled to avoid residue buildup (which can look like dull haze even after you “cleaned”).
Microfiber mops should be damp, not wet; standing water increases the risk of finish breakdown around seams and edges.
Using a label-approved hardwood cleaner reduces the likelihood of film residue that can make floors look streaky or dull.
– Use a hardwood floor cleaner that’s approved for your finish (sealed vs. unfinished) and mix/dilute it exactly as the label says.
– Mop in small sections with a microfiber pad that’s damp, not wet—standing water is the enemy for hardwood, especially near seams.
– Skip common “hacks” like vinegar/ammonia/abrasive cleaners unless your floor manufacturer explicitly approves them for your finish.
Minimal moisture isn’t just a rule—it’s a mechanism
Wood floors expand and contract with humidity and moisture exposure. NWFA-style guidance commonly emphasizes controlling indoor relative humidity (often cited in the 35–55% range) to reduce seasonal movement and finish stress (National Wood Flooring Association guidance (accessed 2026)). When you clean with too much water, you add localized moisture that can creep into seams, swelling wood edges and accelerating wear of the finish film.
If you’re unsure whether your floor is sealed, waxed, or unfinished, treat this step as conditional: match the cleaner to the finish system, then proceed cautiously.
Abrasive Grit Components: Mohs Hardness of Common Minerals
| # | Mineral in Tracked Grit | Mohs Hardness | Finish Damage Risk | Notes for Hardwood |
|---|---|---|---|---|
| 1 | Quartz (silica) | 7 | ★★★★☆ | Common in sand & road dust |
| 2 | Feldspar | 6 | ★★★☆☆ | Often mixed with sand |
| 3 | Hematite (iron oxide) | 5.5–6 | ★★★☆☆ | Found in soil & dust |
| 4 | Magnetite (iron oxide) | 5.5–6 | ★★★☆☆ | May appear in road debris |
| 5 | Calcite | 3 | ★★☆☆☆ | Softer but still abrasive in quantity |
| 6 | Gypsum | 2 | ★☆☆☆☆ | Lower hardness, but grit can accumulate |
| 7 | Talc | 1 | ☆☆☆☆☆ | Very soft; typically less scratchy |
Notes: Hardness values are Mohs scale numbers commonly cited in mineral references (e.g., USGS educational materials). The “Finish Damage Risk” stars are a practical rule-of-thumb for hardwood finishing (higher Mohs generally means higher scratch potential).
Rinse, dry, and check for haze or residue
Drying is where gritty cleaning becomes “finish-safe” rather than just “visibly clean.” After you’ve mopped, remove leftover cleaner film or residue (if your product requires it), then dry thoroughly and inspect under angled light.
Haze usually signals residue or a film left by too much cleaner, not “real dirt” that still needs more scrubbing.
Fast drying—especially near seams and edges—reduces the moisture exposure that can dull finishes over time.
– If your product requires rinsing (or if you notice sticky residue), wipe with a lightly damp microfiber cloth—then immediately dry with a clean, dry towel.
– Use airflow (a fan) to speed drying, especially along edges and seams where moisture lingers.
– Inspect under light at an angle: haze usually means residue, while dark spots can indicate trapped moisture or grit left behind.
How to diagnose what you still have
– Hazy/dull but smooth: likely cleaner film. Use the product’s label instructions (some require rinsing; others don’t) and wipe/dry properly.
– Rough texture: likely remaining grit. Stop wet work and go back to dry vacuum + hand-feel checks.
– Dark spots near seams: moisture trapped in the joint. Dry immediately, then reassess your mop dampness next time.
What can go wrong when cleaning gritty hardwood
Most failures happen when grit gets ground in, when moisture is excessive, or when incompatible cleaners leave film. If you see cloudiness, lifting finish, or cupping, you’re dealing with more than “dirty grit,” and cleaning alone may not restore the floor.
Mopping grit is the fastest way to turn a one-time spill into long-term dullness because it spreads abrasives across the coating.
Too much water doesn’t just risk the finish—it can stress wood cells and seams, especially around baseboards and transitions.
– Scratching the finish: Mopping over grit or using the wrong vacuum attachment can create micro-scratches that make the floor look permanently dull.
– Swelling or cupping risk: Too much water (wet mops, soaking pads, puddles at edges) can damage wood and loosen finish over time.
– Streaks and dull spots: Overusing cleaner or using an unapproved product can leave film, especially on polyurethane/sealed floors.
– Unfinished or waxed floors: Grit removal is the same idea, but the safest products and methods differ—using the wrong cleaner can stain or disturb the surface.
– Embedded grit: If grit has ground into the finish or got trapped in deep seams, cleaning alone may not restore the original look—refinishing or professional help may be needed.
Comparison: what usually works vs. what usually backfires
The safest path is dry removal + minimal damp cleaning; the riskiest path is wet-first scrubbing. Here’s the contrast:
| Method | Best for | What happens to grit | Main risk | Typical outcome |
|---|---|---|---|---|
| Dry broom/dust mop only | Light dusting, early grit | Mostly picked up, less spread | Missed particles in seams | Floor looks clearer but may still feel slightly textured |
| Vacuum + dry palm test (recommended before mopping) | Medium grit on finished floors | Removes top layer without grinding | Low if attachment is correct | Smooth feel and reduced dullness |
| Damp microfiber + approved cleaner (then dry immediately) | Most gritty-cleaning jobs in 2026 | Grit is already removed; minimal smear | Residue if product is overused | Clean, non-hazy surface |
| Wet-first mopping or abrasive “scrub” | Deep grit without dry removal | Grit gets smeared and ground in | High: micro-scratches + haze | Crunching may stop, but dullness grows |
Verdict: safe method, plus quick checklist
The safe method is straightforward: dry removal first, then damp-cleaning with a hardwood-safe cleaner, followed by immediate drying and a haze/texture check. If grit is deeply embedded, widespread, or you suspect finish damage, stop and consider professional restoration rather than repeating the same cycle.
Recommended vs. avoid (quick decision table)
| Feature | Dry-first + damp microfibre mop (label-approved) | Wet-first scrubbing / harsh chemicals |
|---|---|---|
| Grit spread risk | Low | High |
| Finish micro-scratch risk | Low when vacuum head is clean | Higher due to grit grinding |
| Moisture exposure | Controlled (barely damp) | Often excessive (wet pads/puddles) |
| Residue risk | Lower with correct dilution & label use | Higher when overused or not rinsed |
| Seam safety | Better (drying as you go) | Can leave moisture trapped at edges |
| Works on sealed floors | Yes | Sometimes causes haze |
| Works on unfinished floors | Only with finish-appropriate products | Likely to stain or damage |
| Best for quick restoration | Strong | Often leads to repeat cleaning |
| Time to “feel clean” | Moderate (dry passes + mop) | Can be deceptive—feels clean sooner but worsens later |
| Long-term appearance | Better | Frequently dull over time |
| **Best For** | Most gritty hardwood in homes and offices | Only very small spots *if* manufacturer explicitly allows it |
Downsides / when to skip DIY:
– Skip DIY (or stop and call a pro) if grit is widespread and deeply ground-in, if your floor is unfinished and sensitive, or if you see finish damage (cloudiness, lifting, cupping) that cleaning can’t fix.
– If you’re unsure whether your floor is sealed, waxed, or unfinished, don’t “guess” with cleaners—check the manufacturer’s care guidance.
Quick scan checklist (save this)
| Step | Do this | Avoid this |
|---|---|---|
| 1. Loose grit | Dry broom/dust mop, small areas | Wet mopping first |
| 2. Vacuum | Hard-floor setting + clean attachment | Beater bar / rough wheels |
| 3. Final dry check | Palm test for roughness | Assuming it’s “clean enough” |
| 4. Clean | Damp microfiber + label-approved cleaner | Soaking, puddles, over-spraying |
| 5. Dry | Towel-dry + fan airflow | Letting moisture sit in seams |
– [ ] Vacuum slowly with hard-floor setting and overlapping passes
– [ ] Mop with a damp microfiber pad only
– [ ] Dry each section promptly
– [ ] Re-check corners/edges where grit collects
Frequently Asked Questions
How do I remove gritty dirt from hardwood floors without scratching the finish?
Start by dry-sweeping or vacuuming thoroughly using a soft-bristle attachment or a hardwood-safe setting to lift grit without grinding it into the wood. Follow with a barely damp microfiber mop, changing pads often so you’re not re-spreading particles. Avoid aggressive scrubbing or using stiff brushes, which can scratch the surface and dull the floor’s sheen.
What’s the safest way to clean hardwood floors covered in grit after a build-up of dust?
Remove loose grit first by vacuuming along edges and high-traffic lanes, then wipe with a microfiber cloth lightly dampened with clean water. For stubborn residue, use a hardwood floor cleaner designed for your finish type (oil, polyurethane, or wax) and follow label dilution exactly. Finish by buffing dry with a clean microfiber to prevent water spots and to keep the grit from lingering in the seams.
Why is it important to clean grit from hardwood floors before mopping?
Grit acts like sandpaper when it’s mixed with water or cleaning solution, and it can quickly scratch hardwood floors. Cleaning grit first prevents damage to the finish and reduces the chance of dull, cloudy areas. It also makes your hardwood floor cleaner more effective because you’re removing particles that interfere with proper cleaning.
Which cleaning method works best for grit stuck in hardwood floor grooves?
Use a vacuum with a crevice tool to pull particles out of grooves, then use a soft microfiber cloth to wipe with the grain of the wood. If grit remains, lightly dampen a microfiber pad with a pH-balanced hardwood floor cleaner and apply gentle pressure—don’t soak the area. For stubborn spots, you can carefully spot-clean with a slightly damp cloth, then immediately dry and buff to protect the finish.
What’s the best way to prevent grit from damaging hardwood floors after cleaning?
Place doormats at entrances and use felt pads under furniture to reduce tracked-in grit and abrasion. Sweep or vacuum regularly (especially in entryways) and spot-clean with a microfiber mop instead of wet mopping heavy dust. Periodically apply a manufacturer-recommended maintenance product for your hardwood floor finish to help maintain protection against everyday grit.
📅 Last Updated: October 29, 2026 | Topic: How to clean hardwood floors covered in grit? | Content verified for accuracy and freshness.
References
- https://pubmed.ncbi.nlm.nih.gov/?term=wood+surface+abrasion+dust+cleaning
- Wood flooring
- https://www.britannica.com/technology/hardwood-flooring
- https://www.epa.gov/safer-choice/how-clean-and-disinfect-with-safer-products
- https://www.nps.gov/articles/hardwood-floors.htm
- https://scholar.google.com/scholar?q=cleaning+hardwood+floors+grit+scratches Google Scholar
- https://scholar.google.com/scholar?q=hardwood+floor+care+abrasive+dust+prevention+cleaning Google Scholar
- https://scholar.google.com/scholar?q=wood+floor+maintenance+removing+debris+before+mopping+microfiber Google Scholar
[…] floors after grit gets on it, start by dry-sweeping or vacuuming with a soft brush to remove abrasive particles before they grind into the finish. Then use a barely damp microfiber mop with a hardwood-safe […]