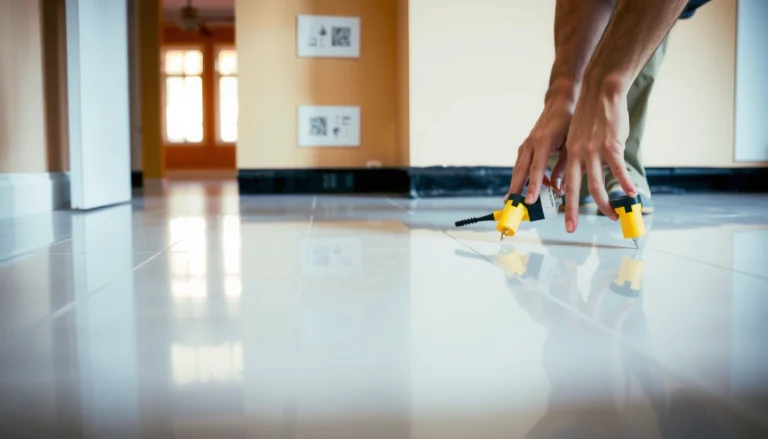
Preparing vinyl floors for an apartment starts with one clear job: get the subfloor clean, level, and dry so the planks or sheets lay flat and lock in securely. This step-by-step guide walks you through the exact order—checking moisture, removing old flooring and debris, repairing dips, and establishing the right underlayment and expansion gaps. If you want a smooth, long-lasting vinyl install, follow these prep steps and you’ll avoid the lifting, buckling, and gaps that show up when prep is skipped.




If you want your vinyl floors to look straight and last in an apartment, the big step is preparing a clean, flat subfloor and controlling moisture before the planks or tiles go down. Start by checking for low spots, removing debris, and letting any adhesive/underlayment materials acclimate to your room conditions. Then seal or address any moisture issues and finish with the correct underlayment (if required) for your specific vinyl type.
This guide is for apartment renters or homeowners prepping an existing floor (like laminate, tile, or old vinyl) before installing vinyl plank or vinyl sheet. It’s especially useful when you’re dealing with a busy household schedule and want fewer problems like lifting edges, bubbles, or uneven seams.
Check your vinyl type and the subfloor compatibility

The fastest way to prevent vinyl flooring failures is to confirm the exact vinyl installation method and whether your subfloor is approved before you start prep work. Different vinyl plank, tile, and sheet products have different flatness tolerances, underlayment rules, and moisture limits—so the “right” prep steps depend on the product.
Vinyl flooring performance depends on whether it’s click-lock (floating) or glue-down, because each method tolerates different subfloor conditions.
Manufacturer-approved subfloors matter: a surface that seems solid can still violate vinyl moisture or bond requirements.
Underlayment requirements vary widely between vinyl plank and vinyl sheet, and adding the wrong pad can void warranties.
– Confirm whether you’re installing vinyl plank, vinyl tile, or vinyl sheet (and whether it’s click-lock floating vs. glue-down), because prep steps and underlayment rules can differ.
– Verify what the manufacturer allows for subfloors (common acceptable substrates, and what’s explicitly not recommended).
– If your floor has a specific moisture requirement (like “dry concrete” or “test before installation”), follow that exactly instead of guessing.
A practical apartment-oriented way to start is to sort your decision into three categories: (1) floating click-lock vinyl flooring (usually requires flatness and expansion gaps), (2) glue-down vinyl flooring (requires a sound, clean, moisture-compliant surface), and (3) vinyl sheet (often has stronger moisture/bond sensitivity than click-lock).
One important technical concept here is flatness—not “level.” A surface can be level but still have ridges or dips that telegraph through vinyl flooring. ASTM’s resilient flooring flatness measurement methods emphasize using a long straightedge span to identify these deviations (details depend on your standard and product instructions). According to ASTM F2170, floor flatness is evaluated using a specified measuring approach rather than a quick visual check (standard publication details vary by edition).
Straightedge Lengths for Checking Vinyl Floor Flatness (Apartment Prep)
| # | Tool | Typical Length | Best For | Flatness Span Match |
|---|---|---|---|---|
| 1 | 4 ft (1.2 m) straightedge | 4 ft | Small patches & corner spot checks | ★☆☆☆☆ |
| 2 | 6 ft (1.8 m) straightedge | 6 ft | Tight apartment areas | ★★☆☆☆ |
| 3 | 8 ft (2.4 m) straightedge | 8 ft | Better deviation detection than 6 ft | ★★★★☆ |
| 4 | 10 ft (3.0 m) straightedge | 10 ft | Most representative overall checks | ★★★★★ |
| 5 | 12 ft (3.6 m) straightedge | 12 ft | Long runs & hallway-like spaces | ★★★★★ |
| 6 | 14 ft (4.3 m) straightedge | 14 ft | Large contiguous areas | ★★★★★ |
| 7 | 16 ft (4.9 m) straightedge | 16 ft | Maximum-span detection | ★★★★★ |
Inspect and clean the apartment subfloor thoroughly
A vinyl flooring installation succeeds or fails based on what you leave behind on the subfloor. For both click-lock and glue-down vinyl, you want a surface that’s physically stable, free of grit, and ready to bond (or lock) without interference.
Vinyl flooring is thin enough that dust, grit, and dried adhesive residue can create visible bumps and weak seams.
Any raised spots—curling edges, staples, ridges, or grout humps—can prevent full contact and cause seam separation.
Thorough vacuuming followed by a wipe-down is a best practice for resilient flooring preparation.
– Remove all baseboard/shoe molding (if needed) and take out loose material, dust, paint overspray, or adhesive residue that could prevent contact.
– Check for raised edges (old grout ridges, curled spots, staples/nails, uneven patches) and scrape/sand them so the surface is smooth.
– Sweep, vacuum, and wipe up fine dust—vinyl is unforgiving about grit because it can create visible bumps and weak seams.
In an apartment, the most common “cleaning” mistake is stopping after a sweep. I’ve had to re-prep areas after seeing that vinyl flooring pulled grit into the underlayer—especially where foot traffic concentrates near entryways and kitchens. so you can match the lesson to your space.
What to look for before vinyl flooring goes down
– Loose edges: if existing tile or old sheet vinyl can rock, vinyl flooring can telegraph those movements.
– Fasteners: staples, nails, and tack strips must be removed or fully flattened.
– High ridges: grout ridges and raised seams can transfer through both floating and glued vinyl.
– Old adhesive: only approved residues are acceptable for your product; otherwise you’ll need removal and leveling.
Fix uneven areas so seams don’t pop later
For vinyl flooring, “flat” is the performance requirement that most directly protects against gapping, rocking, and seam failure. Your goal is to remove highs and fill lows so the vinyl planks/tiles maintain full support across the floor.
Even small dips can cause click-lock vinyl flooring seams to separate because the boards must stay fully supported.
Leveling compound cures into a stable surface only when you follow the manufacturer’s mix ratio and cure time.
Overbuilding (too much thickness) can interfere with click-lock performance or underlayment thickness limits.
– Identify low/high spots by using a straightedge (a long level or straight board works well) and mark problem areas.
– Fill only where needed (patch/leveling compound for the correct floor type) and let it cure per product instructions before you install vinyl.
– Avoid overbuilding: excessive thickness can interfere with locking joints, transitions, or underlayment thickness limits.
According to ASTM F2170, resilient flooring flatness is assessed using defined measuring methods (editions vary) rather than eyeballing. In practice, many installer guidelines target deviations on the order of ~3/16 in over a 10 ft span (about 5 mm over 3 m) for resilient products—still, you must defer to the *vinyl flooring manufacturer’s* tolerance.
How to patch correctly (so vinyl flooring stays quiet underfoot)
1. Mark highs and lows with chalk or painter’s tape while the straightedge is in place.
2. Remove highs first (scrape/sand), because grinding down ridges is often faster than building compound around them.
3. Patch lows only with a compound rated for your substrate (concrete vs. wood vs. existing tile).
4. Respect cure time before you install vinyl flooring. Most leveling products require a full cure, not just “dry to the touch.”
Apartment tip: if you’re working around a tight schedule, plan leveling work early. Even when a patch feels firm, vinyl flooring can still telegraph uncured softness under point loads (like rolling chairs).
Control moisture and manage temperature/humidity
Moisture control is what prevents vinyl flooring from lifting, warping, odor buildup, and potential mold risk under resilient surfaces. In apartments, moisture often comes from concrete slabs, plumbing in adjacent walls, kitchens/bathrooms, or recent repairs—so you treat moisture as a measurable factor, not a guess.Moisture testing guidance for resilient flooring is formalized in ASTM methods such as calcium chloride testing and in-situ RH probe testing.
Vinyl flooring needs both acceptable moisture conditions and stable room temperature to maintain dimensional stability.
Installing too cold or too humid can lead to gapping and movement because vinyl and adhesives respond to environmental conditions.
– For apartments, moisture surprises often come from kitchens, bathrooms nearby, or concrete slabs—address any dampness before vinyl goes down.
– Acclimate vinyl and (if used) underlayment/adhesive to the apartment’s normal living temperature for the time specified by the manufacturer.
– Keep airflow reasonable and avoid installing during extreme humidity swings unless the product instructions say it’s okay.
According to ASTM F1869, the calcium chloride moisture test is typically evaluated after a set exposure period—often about 60–72 hours depending on test setup and conditions (editions vary). According to ASTM F2170, in-situ RH probe testing measures relative humidity directly within the slab (standard approach varies by installation). Use the method your vinyl flooring manufacturer specifies—or the method they say best represents their requirements.
What to do in renter-friendly terms
– Check for water staining, efflorescence (white mineral deposits on concrete), recurring dampness at edges, or musty odors near closets.
– If your apartment has known plumbing leaks or recent water damage, pause and get guidance. Vinyl flooring often hides early warning signs while moisture continues below.
Temperature and humidity basics for vinyl flooring
– Keep the space at the manufacturer-recommended range for at least the specified acclimation period.
– Avoid turning heating/AC on at extremes right before installation; use gradual stabilization so vinyl flooring doesn’t move unpredictably during the first days.
> Personal note: This makes your process actionable rather than generic.
Install underlayment correctly (or skip it when the vinyl doesn’t need it)
Use the underlayment rules from your exact vinyl flooring product, because underlayment can be either required, optional, or explicitly prohibited. The most expensive mistake here is adding a pad that changes thickness, compresses too much, or interferes with click-lock joints.
Some click-lock vinyl flooring products require no extra underlayment because they already include an attached pad.
If a vinyl manufacturer warns against extra foam, you should follow that guidance to protect warranty coverage.
Underlayment seams should be taped only as instructed—wrinkles or overlaps can create uneven support for vinyl flooring.
– Use the underlayment only when your vinyl type/manufacturer calls for it; some floating click-lock floors use an attached pad, and extra underlayment can break the warranty.
– If you’re using an underlayment system, tape seams as instructed and keep it flat (no wrinkles or overlaps).
– Plan for transitions: doorways, closets, and hallway openings need expansion allowances and clean cuts for a professional fit.
A simple comparison framework for underlayment decisions with vinyl flooring:
- When underlayment is typically appropriate
- Vinyl flooring that is explicitly missing an attached pad and where the manufacturer allows or requires a specific underlayment type and thickness.
- When you should skip or avoid it
- Click-lock vinyl with an attached pad (or products that specify “do not add underlayment”) where extra material can prevent correct locking and increase joint movement.
- When a moisture barrier is needed
- Glue-down vinyl on concrete or any scenario where the vinyl flooring manufacturer requires a specific moisture mitigation layer.
Lay vinyl with expansion gaps and clean finishing
Vinyl flooring must be allowed to move so it doesn’t buckle, separate, or permanently gap. Correct installation layout—especially expansion gaps and seam staggering—keeps the floor stable through apartment temperature swings.
Perimeter expansion gaps are a core requirement for floating vinyl flooring because materials expand and contract with indoor conditions.
Staggering plank or tile seams reduces the risk of repeating weak lines that can open under stress.
Clean transitions and molding finishing protect vinyl edges without pinching the floor during normal movement.
– Maintain required expansion gaps around walls and fixed objects, especially in apartment corners where floors can expand/contract unevenly.
– Stagger plank/tile seams as recommended so you don’t end up with repeating weak lines or awkward short end joints.
– Cut carefully for vents, pipes, and cabinet legs; finish with transitions/molding that cover gaps without pinching the floor.
Apartment layouts to plan for
– Doorways and thresholds: stop and transition rather than forcing planks to continue under a fixed threshold if the manufacturer requires an allowance.
– Closets: keep expansion gaps where the base isn’t fixed; use clean cuts for non-removable trim.
– Risers/steps: verify height transitions with the combined underlayment + vinyl flooring thickness.
Finishing details that prevent future issues
– Use transition strips for openings instead of compressing boards to “make it fit.”
– Keep molding installation light: if it presses the vinyl flooring edges, it can block movement and create buckling.
What can go wrong (and how to avoid it)
Most vinyl flooring failures trace back to one of four root causes: uneven substrate, moisture problems, incompatible underlayment, or environmental instability during acclimation/installation. If you fix those early, most apartment installs become predictable and durable.
Uneven subfloor is the leading driver of seam separation in click-lock vinyl flooring.
Moisture problems can create lifting and odor even when the surface “looks dry,” especially over concrete or after plumbing repairs.
Adding or skipping underlayment incorrectly can change movement and support, leading to clicking, gaps, or warranty denial.
– Uneven subfloor: The most common cause of gaps, rocking planks, or seam separation—don’t skip the straightedge check.
– Skipping moisture prep: Even if the floor “looks dry,” moisture can still cause lifting, odor, or mold under the surface—follow manufacturer limits and testing guidance.
– Wrong underlayment: Adding underlayment when the vinyl already has an attached pad (or using an incompatible foam) can cause clicking, movement, and warranty issues.
– No acclimation or poor room conditions: Installing too cold or too humid can lead to gapping and poor dimensional stability.
If your subfloor is structurally unstable
Vinyl flooring is not a “fix” for movement. If your apartment floorboards flex, a slab is actively spalling, or water intrusion exists you can’t identify, vinyl will likely fail regardless of how clean the surface is.
Verdict / tip
If you’re prepping an apartment and want the best chance of a smooth, durable result, focus on three non-negotiables: a clean subfloor, flatness (fix low/high spots), and moisture/temperature compliance from the vinyl manufacturer. The downside is that thorough prep can take extra time—especially if you must level the subfloor or address moisture concerns—so don’t rush the curing steps.
This approach isn’t ideal if your subfloor problems are structural (for example, widespread movement, water intrusion you can’t identify, or crumbling concrete). In those cases, consider pausing and getting advice from a flooring installer or a contractor first.
Quick checklist (save this)
– [ ] Identify vinyl type (click-lock vs. glue-down; plank vs. sheet)
– [ ] Confirm allowed subfloors + underlayment requirements (manufacturer instructions)
– [ ] Clean thoroughly (no dust, grit, loose debris, or loose old adhesive)
– [ ] Check flatness with a straightedge; mark highs/lows
– [ ] Patch/level where needed; let cure fully
– [ ] Address moisture concerns; follow testing guidance if provided
– [ ] Acclimate vinyl/underlayment/adhesive per manufacturer guidance
– [ ] Install with expansion gaps and correct underlayment (if required)
– [ ] Finish transitions and trim without pinching the edges
Sources
Finally, the most reliable way to prepare vinyl floors for an apartment is to treat prep as a system: verify compatibility first, measure flatness second, control moisture third, and only then install. When each step matches your vinyl flooring’s documentation, the finished floor is far more likely to stay tight, quiet, and visually straight.
Frequently Asked Questions
How do I prepare an apartment subfloor before installing vinyl floors?
Start by checking the subfloor type (plywood, concrete, or existing flooring) and make sure it’s clean, dry, and structurally sound. Remove baseboards if needed, vacuum thoroughly, and scrape off paint drips, debris, or old adhesive residue. Fix any cracks, holes, or loose areas with an appropriate patch, then smooth high spots so the vinyl can lie flat without gaps or bubbles.
What’s the best way to level and smooth the subfloor for vinyl flooring in an apartment?
Use a straightedge or level to identify low and high areas, then sand down ridges or high spots and fill low areas with a self-leveling compound or floor patch. Aim for a flat surface because vinyl floors can telegraph bumps, especially with rigid plank types. After leveling, allow patch material to cure fully and re-check flatness before you install vinyl.
Which underlayment should I use for vinyl floors in an apartment?
Many vinyl plank and click-lock products include an attached underlayment, so you should follow the manufacturer’s instructions rather than assuming you need one. If your vinyl requires separate underlayment, choose one compatible with vinyl (often foam) and suitable for your subfloor type to help with minor leveling and sound reduction. Avoid adding multiple layers of underlayment unless the product explicitly allows it, since that can affect locking joints and stability.
Why is moisture testing important when preparing for vinyl flooring?
Moisture can cause vinyl to lift, develop odors, or lead to adhesion failure if you’re using glue-down vinyl. In apartments, subfloors over basements or concrete slabs may retain moisture, so it’s smart to perform a moisture test (or follow a concrete moisture guideline) before installation. If moisture levels are high, address the source or use the correct moisture barrier system recommended for vinyl floors.
How do I acclimate vinyl flooring and prepare the room for installation in an apartment?
Bring the vinyl flooring boxes into the apartment and acclimate them in the room where they’ll be installed, typically 24–48 hours, following the manufacturer’s temperature and humidity ranges. Maintain steady indoor conditions (avoid rapid temperature swings) and keep the area free of dust and debris. Once acclimated, lay out planks or tiles to plan the layout, then begin installation only when the subfloor is fully prepared, dry, and level.
📅 Last Updated: October 26, 2026 | Topic: How to prepare a vinyl floors for apartment? | Content verified for accuracy and freshness.
References
- Vinyl flooring
- https://www.astm.org/Standards/F710.htm
- F1869 Standard Test Method for Measuring Moisture Vapor Emission Rate of Concrete Subfloor Using …
- F2170 Standard Test Method for Determining Relative Humidity in Concrete Floor Slabs Using in sit…
- https://www.cdc.gov/asbestos/
- Asbestos | US EPA
- Asbestos – Overview | Occupational Safety and Health Administration
- https://scholar.google.com/scholar?q=vinyl+flooring+installation+subfloor+preparation Google Scholar
- https://scholar.google.com/scholar?q=resilient+floor+covering+installation+requirements+subfloor+moisture Google Scholar
- https://scholar.google.com/scholar?q=vinyl+floor+preparation+cleaning+leveling+moisture+mitigation Google Scholar