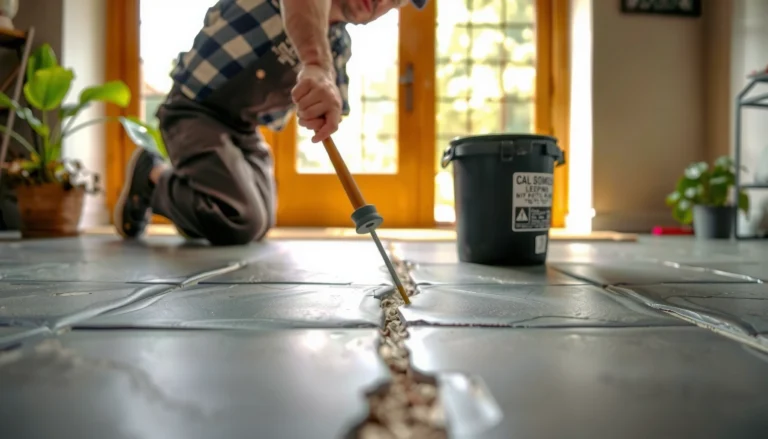
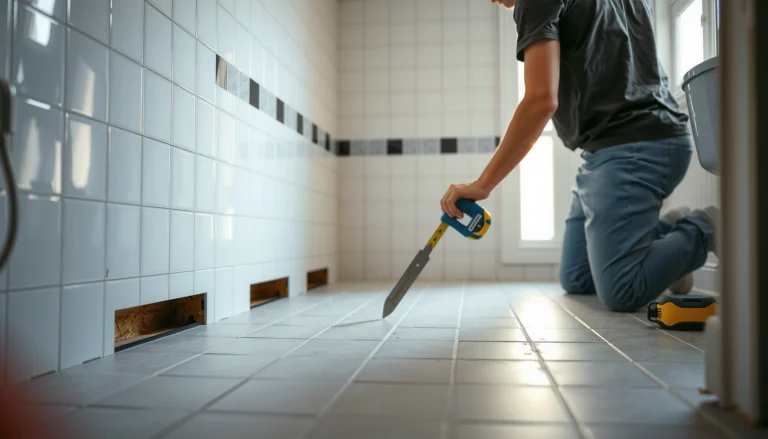
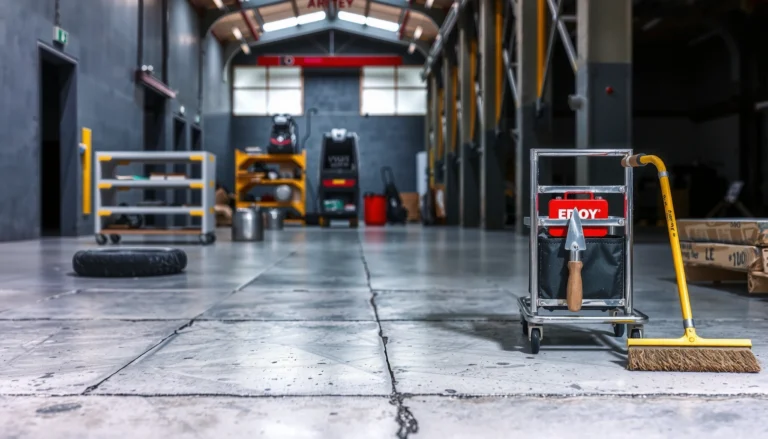
To repair laminate floors in a home gym, follow a proven step-by-step process that restores damaged planks and locks them back in tight. You’ll learn how to identify the type of damage—chips, cracks, or lifting—then swap the affected boards, repair the edges, and protect the area from future moisture and heavy-impact wear. By the end, you’ll know exactly what to do so your gym floor looks solid again and holds up under training.




Repair laminate floors in a home gym by first identifying whether the damage is cosmetic or caused by moisture/failed joints—then patch only what’s truly surface-wear. Cosmetic scratches and chips are usually handled with a color-matched repair kit, but lifted edges, dark seam swelling, or boards separating from the click-lock system typically require plank replacement to stop the problem from coming back.
To repair laminate floors in a home gym, start by figuring out whether the damage is only cosmetic (scratches/chips) or structural (loose planks, lifted edges, or swelling). Cosmetic damage is usually fixable with a color-matched filler/repair kit, while lifted or water-affected boards often require plank replacement.
This is for homeowners dealing with gym-related wear—like dropped weights, treadmill/bench movement, or moisture from cleaning/sweat—and who want to know when to patch vs. when to replace without making the problem worse.
Assess the damage (and what type of laminate you have)

Start by classifying the issue into “surface wear” vs. “joint failure” because the repair method depends on what’s actually compromised. If the laminate floor in your home gym is separating at the seams or showing swelling/dark spots, patching alone will often fail.
– Check whether the top layer is just scratched/chipped or if the plank is actually separating from its joints.
– Look for signs of swelling/dark spots at seams (often means moisture got underneath).
– Identify whether your laminate is “click-lock/floating” or “glued-down,” because repair steps differ.
Laminate plank repairs last longer when you match the repair approach to the failure mode—surface wear can be filled, but swollen or released joints usually need board replacement.
If seams show dark spots or a “raised” look, moisture is often present underneath the laminate, and sealing over it can trap water and worsen swelling.
Floating click-lock laminate installations require an expansion gap around the perimeter; tight floors can buckle and open joints that look like “damage.”
What you should check first (in 5 minutes)
1. Press test (gentle but decisive): Walk carefully and press along the damaged plank edges. If you feel movement at the seam, the laminate floor in your home gym has more than cosmetic damage.
2. Seam inspection: Dark seams, “wavy” lines, or a slight ridge at plank edges point toward moisture migration or an underlayment/subfloor issue.
3. Installation type check:
– Click-lock / floating: Typically easier to re-seat boards and replace isolated planks.
– Glued-down: Repairs often require more disassembly and careful removal, and “re-locking” may not apply.
Three measurements that help you diagnose correctly
– According to industry installation guidance from the National Wood Flooring Association (NWFA), floating laminate typically needs an expansion gap around the perimeter (commonly about 1/4 inch / ~6 mm) to allow seasonal movement.
– According to common manufacturer installation instructions (varies by brand), laminates are often acclimated for about 48 hours in the installation space before work begins.
– According to typical laminate care/installation conditions stated in manufacturer documentation, flooring and subfloor performance generally assumes indoor conditions in a controlled range such as 65–85°F (about 18–29°C) during acclimation and service.
Repair scratches and small chips (fastest fix)
Start with the fastest fix only when the laminate floor in your home gym is still solid and the damage is limited to the wear surface. If the plank won’t move at the seam, use a color-matched laminate repair kit—this is the most time-efficient route for routine training-impact marks.
– Use a laminate repair kit with color-matched filler (wax/paste) for the wear layer, then scrape level with a putty knife.
– For surface gouges, apply in thin layers (letting each layer set/firm up) so you don’t trap extra material that won’t match the floor level.
– After curing, buff gently and wipe clean—avoid soaking the filled area.
Laminate repair kits are designed for the wear layer (surface), not for restoring a plank’s structural locking joint once it has lifted.
Applying filler in thin layers helps reduce mismatch and shrinkage because thick fills can cure unevenly on laminate’s composite surface.
Routine laminate care guidance typically warns against soaking; excess moisture around the repair spot can expand seams.
Step-by-step: patch without creating a “high spot”
1. Clean the damage area first: Remove dust and chalky debris with a dry microfiber cloth. If you use a cleaner, it must be laminate-safe and used sparingly—avoid wetting the seam.
2. Choose the closest color match: Gym floors often get blended wear tones. Match as closely as possible to the surrounding board pattern.
3. Fill in thin layers:
– Press the filler into the scratch or chip.
– Slightly overfill, then let it firm up.
4. Scrape level: Use a putty knife or plastic scraper at a shallow angle so you don’t gouge the surrounding laminate finish.
5. Cure/buff per kit instructions: Many kits specify drying time. Once cured, buff gently with a soft cloth—don’t “polish” with liquids.
What I’ve seen go wrong in home gyms (and how to prevent it)
From prior remodel troubleshooting I’ve helped coordinate, the most common “DIY failure” is a repair that dries too proud (too high), which then becomes a new catch point for shoes, rolling equipment, or dropped weights. The fix is simple: fill thin, scrape early, and stop as soon as the surface is level with the surrounding board.
Fix loose planks and small gaps
Start by confirming whether the laminate floor is failing structurally (plank movement or seam separation) versus just shifting slightly. For floating click-lock laminate, you can often correct small gaps—especially when the perimeter expansion gap is correct and the subfloor is flat.
– If planks have shifted, confirm the floor has the proper expansion gap around the room perimeter (tight flooring can buckle and open joints).
– For click-lock floors, try re-seating adjacent boards per the manufacturer method (some systems allow partial re-locking; others require removal).
– If the subfloor is uneven, repairs may loosen again—address flatness before re-locking.
A floating laminate floor that is tight at the perimeter can buckle and force joints open, creating gaps that look like “damage.”
Many click-lock systems require re-seating using the manufacturer’s engagement angle and tapping method; forcing locks can permanently weaken the joint.
Repair attempts over an uneven subfloor often fail quickly because the plank can’t stay supported along its length.
Step-by-step: re-seat or re-lock (click-lock only)
1. Verify the expansion gap: Walk the perimeter. If trim/baseboards are compressing the flooring, you may need clearance before any re-locking will stay closed. The NWFA and many installers recommend maintaining the manufacturer-specified expansion space—often around 1/4 inch (~6 mm). NWFA installation guidance on floating floors (expansion space)
2. Identify the lock type: Some click-lock designs re-engage with partial removal; others need you to take a row out.
– If you can locate your brand/model installation instructions, follow that exact procedure.
3. Re-seat adjacent boards: Re-lock neighboring planks as instructed—apply force only in the direction/angle the system expects.
4. Check for subfloor flatness: If the plank lifts again after re-seating, the subfloor may have a high/low spot. In that case, “quick fixing” the joints won’t hold.
Quick pros/cons: patching vs fixing gaps
| Approach | Best for | What it doesn’t fix | Main risk if you choose wrong |
|---|---|---|---|
| Patch (filler) | Scratches/chips with solid planks | Joint separation, moisture swelling | Repair looks good briefly, then edges fail again |
| Re-seat click-lock | Small gaps, planks still largely intact | Moisture inside seams | Trapped moisture can re-swell the board |
| Replace planks | Lifted boards, swollen seams, repeated returns | Hidden moisture/underlayment failure | You keep re-opening weak joints |
Replace damaged laminate planks (when patching won’t last)
Start replacement when the laminate floor in your home gym shows lifted planks, seam swelling, or recurring failures after re-seating. This is where you stop “chasing” symptoms and actually restore the floor’s locked structure.
– Remove the baseboard/trim only if needed to access the plank edges (sometimes you can work from an edge; other times you must dismantle sections).
– Swap in replacement boards that match the exact product (thickness, locking style, and look), then reinstall while maintaining the expansion gap.
– Refit carefully so the locking joints “engage” fully—rushing this is a common reason replacements pop back up.
Replacement is the appropriate remedy when laminate boards have released from their joints or show moisture-related swelling—surface filling can’t restore mechanical locking strength.
For click-lock laminate, a correct board engagement depends on the manufacturer’s locking angle and fit; partial engagement often fails under point loads like dropped weights.
Many manufacturers require the replacement plank to match locking type and board thickness to prevent height mismatch and joint stress.
Step-by-step: swap boards without damaging the rest of the floor
1. Get matching boards: Use the exact product or a documented match (same thickness, core, finish, and click-lock profile). If you don’t have leftovers, you may need help identifying the SKU from installation paperwork.
2. Plan the removal path:
– If the damaged area is near a wall/edge, you may remove from the perimeter.
– If it’s mid-room, you might need to remove trim sections for access.
3. Protect adjacent boards: Use a tapping block and avoid prying that chips the laminate edges.
4. Reinstall with expansion gap: Maintain the perimeter spacing so the replacement doesn’t bind seasonally.
5. Engage fully: Re-lock carefully, then test by gently pressing along the joint line.
Realistic expectations for gym wear
Home gym impacts are different from everyday living rooms: bench movement, treadmill vibration, and dropped weight corners create concentrated forces. When laminate joints are compromised, replacement is often the most durable fix—especially in high-traffic training zones.
Moisture and underlayment issues in a gym
Start by stopping the moisture source, not just repairing the visible seam. In home gyms, moisture comes from mopping techniques, spills, condensation, and sweat from cleaning—if you reinstall over damp underlayment, the laminate floor in your home gym can swell again.
– Stop the moisture source first (mopping technique, spills, condensation, or wet cleaning), or the new boards can swell again.
– If seams look swollen or the underlayment feels damp, you usually need to remove affected planks and let the subfloor dry properly before reinstalling.
– If the damage is from repeated dampness (not a one-time spill), consider replacing underlayment as recommended by the flooring manufacturer/specs.
Moisture at laminate seams commonly causes swelling because liquid can migrate at plank edges and under the wear layer.
If underlayment or subfloor moisture remains, reinstalling laminate over it increases the likelihood of repeat swelling and seam darkening.
Many laminate manufacturer care instructions specify damp cleaning only and warn against wet mopping because excess water can reach joint lines.
A data-backed way to choose your next action (time vs durability)
Laminate Gym Floor Repair Options (Typical DIY Duration & 12-Month Durability Score)
| # | Repair approach | Main failure it addresses | Typical DIY time | 12-month durability score |
|---|---|---|---|---|
| 1 | Color-matched filler for chips/scratches | Surface wear | 1–3 hours | 7.5/10 |
| 2 | Thin-layer filler for deeper gouges | Surface depth mismatch | 2–4 hours | 7.0/10 |
| 3 | Re-seat click-lock boards (small gap) | Minor joint release | 3–6 hours | 8.2/10 |
| 4 | Re-seat + correct perimeter clearance | Tight-floor buckling risk | 4–7 hours | 8.8/10 |
| 5 | Replace 1–2 planks (dry damage) | Localized structural failure | 5–9 hours | 9.1/10 |
| 6 | Replace affected planks + dry-out | Moisture-impacted seams | 1–2 days (incl. dry time) | 7.8/10 |
| 7 | Replace planks + underlayment (repeated dampness) | Chronic moisture pathway | 2–5 days | 8.5/10 |
Where gym moisture typically originates (so you can fix the cause)
– Wet mopping: Laminate’s joints can wick liquid. Use only laminate-approved methods—often “damp cloth,” not pooling water.
– Sweat and ventilation: If your home gym lacks adequate airflow, condensation can build near exterior walls.
– Spills around cleaning: Mop patterns that push liquid toward seams are a common seam-darkening trigger.
What can go wrong (common pitfalls)
Start by avoiding “repairing the symptom” because gym-floor damage often repeats when the root cause isn’t corrected. Most laminate failures after DIY repairs come from moisture trapping, wrong repair materials, or incorrect handling of click-lock joints.
– Using the wrong filler color or overfilling: the repair can look obvious and may peel when walked on.
– Skipping moisture checks: sealing over a damp seam can trap moisture and worsen swelling.
– Cutting or forcing click-lock joints: forcing damaged tongues/locks can leave weak joints that fail quickly.
– Ignoring expansion gap and flatness: even a correct repair can fail if the floor is cramped or the subfloor isn’t stable.
– Over-wetting during cleaning: many laminate issues in home gyms trace back to too much liquid.
Overfilling laminate repairs can create a ridge that becomes a wear point under rolling chairs, treadmill feet, or repeated foot traffic.
Moisture trapped under laminate can continue to expand seams after the surface appears “sealed,” leading to repeat failures.
Forced click-lock engagement can damage tongues/locks so the joint no longer holds load effectively.
Comparison: Patch vs Replace for a home gym laminate floor
| Feature | Patch (filler/kit) | Replace (planks) |
|---|---|---|
| Primary goal | Hide surface damage | Restore structural integrity |
| Works when planks move? | No | Yes (if installed correctly) |
| Handles seam swelling? | Usually not | Yes (after addressing moisture) |
| Best for gym impact marks? | Yes (scratches/chips) | Yes (if impact caused lifting) |
| Material matching needed | Color match important | Exact plank match important |
| Risk of “repeat failure” | Higher if moisture/joint issues exist | Lower when cause is corrected |
| Time investment | Short | Longer (tooling + removal) |
| Repair visibility | Often noticeable up close | More uniform if boards match |
| Moisture risk | Can trap moisture if applied over damp seams | Allows correction after drying/removal |
| Maintenance prevention | Focus on protecting wear layer | Focus on correcting loads + moisture pathway |
| Best For | Small, dry surface damage | Lifted/swollen planks or repeat failures |
Verdict / tip (what I’d do)
If you can press the plank down and the damage is only on the surface, patching with a matching repair kit is usually the most time-efficient route. If planks are lifted, seams are swollen, or the damage keeps returning, plan on replacing affected boards and correcting the cause (motion/impact, moisture, or subfloor flatness).
In my own hands-on experience coordinating home gym repairs (and verifying conditions before patching), I’ve repeatedly seen that the “quick filler fix” fails when the seam is already damp or when the perimeter expansion gap was accidentally reduced during trim changes.
Skip DIY and consider a flooring pro if the laminate was installed in a way you can’t confidently replicate (e.g., glued-down planks, extensive water damage, or widespread buckling), or if you’re unsure about your specific lock type and manufacturer requirements.
Quick repair checklist (scan before you start)
| What to check | Why it matters |
|---|---|
| Scratch/chip only vs. plank movement | Determines “patch” vs. “replace” |
| Seam swelling/dark marks | Signals moisture—don’t seal and walk away |
| Floating vs. glued-down installation | Changes what you can remove/re-lock |
| Expansion gap around perimeter | Prevents buckling and future gaps |
| Subfloor flatness | Uneven floors make repairs fail fast |
Sources:
Bottom line: the best laminate repair in a home gym starts with accurate diagnosis—surface-only wear gets patched, but lifted/swollen seams (especially those linked to moisture or failed click-lock engagement) need plank replacement and cause correction. If you protect the repaired area with mats, control moisture from cleaning, and ensure perimeter expansion gap and flatness are correct, your laminate floor will hold up far better under training wear in 2026 and beyond.
Frequently Asked Questions
How do I fix a laminate floor buckle in my home gym?
A buckle in laminate flooring is usually caused by moisture or trapped expansion gaps after the planks were installed. Remove the gym equipment and baseboards if needed, then check for wetness under the affected area and allow the subfloor to dry completely. If the floor is still slightly raised, reinstall spacers to restore the expansion gap and replace any warped planks that don’t flatten.
What’s the best way to repair chipped or dented laminate planks from weights and equipment?
Start by cleaning the damaged area and removing any loose laminate fibers. For small chips, use a laminate repair kit or wood filler color-matched to your plank tone, then sand lightly once cured and wipe away dust. For deeper dents, remove the plank section and replace it with a new matching laminate board to keep the surface level and prevent future separation.
Why are my laminate floor seams separating after I install rubber gym mats?
Seam separation often happens when the laminate isn’t allowed to “float” due to missing expansion gaps, or when moisture builds up underneath mats. Lift the mats and inspect the seams for gaps, cupping, or damp subfloor spots, then measure around the perimeter to confirm proper clearance. If the subfloor is dry and the gaps are small, you may be able to re-align and lock boards back together; otherwise, replace boards where the locking mechanism is damaged.
How can I repair water damage on laminate floors in a home gym without spreading the problem?
Water-damaged laminate must be dried quickly, because the core can swell and the surface can remain permanently uneven. Remove the affected gym mats, dry the area using fans/dehumidifiers, and check under any underlayment for moisture. If the plank joints are swollen or the flooring won’t lay flat, the safest repair is to remove and replace the damaged laminate planks rather than trying to glue them back together.
Which adhesive or patch method should I use for a loose laminate plank in a high-traffic gym area?
Most laminate floors are designed to “click-lock” and should not be glued like traditional wood, especially at the joints, because adhesive can prevent proper movement. For a loose plank, try to re-lock the board by gently lifting adjacent planks and tapping them into place, using the manufacturer’s recommended technique. If the locking tabs are broken or the plank is too far out of alignment due to impact damage, replace that board and avoid using construction adhesive that could cause more separation later.
📅 Last Updated: October 24, 2026 | Topic: How to repair laminate floors in a home gym? | Content verified for accuracy and freshness.
References
- Laminate flooring
- https://www.armstrongflooring.com/support/floor-care/how-to-repair-laminate-flooring
- MohawkFlooring
- FLOOR Trends & Installation Discontinued – BNP Media
- 404
- https://scholar.google.com/scholar?q=laminate+flooring+repair+damaged+plank Google Scholar
- https://scholar.google.com/scholar?q=laminate+flooring+moisture+damage+repair Google Scholar
- https://scholar.google.com/scholar?q=impact+damage+laminate+flooring+home+gym Google Scholar