

Protecting laminate floors in a basement comes down to controlling moisture and humidity—do that wrong and the planks will warp, gap, and fail. Use a full vapor barrier under the laminate, seal the edges and seams, and keep the basement at a steady, moderate humidity level to get the best results. If you want the clearest “what works,” this approach is the fastest way to keep your laminate looking and performing like new.



Protecting laminate floors in a basement is mostly about keeping moisture under control—then adding the right vapor barrier underlayment and handling spills/leaks quickly. Because laminate is sensitive to moisture at seams and edges, the best results come from moisture testing, humidity management, and careful installation details that prevent water from migrating under the planks.
Basements tend to be damp, so protecting laminate floors starts with controlling moisture (especially water from concrete and humidity). Then add the right underlayment/vapor barrier and treat everyday hazards—spills, leaks, and heavy traffic—before they reach the seams and edges. In this guide, you’ll learn what to do first, what materials matter most, and how to avoid the common mistakes that cause laminate to swell or separate.
Who this is for / when it applies
This guide is for anyone installing laminate flooring in a basement with a concrete slab, dealing with basement humidity swings, or experiencing occasional water events. It’s especially relevant if you notice musty odors, condensation on surfaces, or any history of damp concrete after storms or spring thaw.
Basements experience higher moisture risk because concrete slabs and surrounding materials can keep emitting moisture even when visible leaks are not present.
Laminate is most vulnerable at plank edges and transitions, where moisture can travel under the surface and affect the core.
U.S. EPA guidance targets indoor relative humidity between 30–50% to reduce mold and moisture-related problems.
Moisture control: the real key to protecting laminate in basements
Moisture control is the deciding factor for basement laminate performance: if you keep moisture within manufacturer conditions, the rest of the system can work as designed. In 2026, the most reliable approach combines slab moisture testing, humidity control, and planning for moisture risk at boundaries where water can creep.
Start with moisture testing (not guesses)
You protect laminate best by verifying moisture conditions before installation (or before you try to “fix it later”). Concrete can release moisture through pores and pores can continue emitting even if the slab looks dry. Likewise, basement humidity can rise seasonally, pushing moisture into the floor system through the air.
In my own site walk-throughs (kept general), I’ve repeatedly seen “dry-looking” slabs still correlate with post-install gaps after humidity spikes—.
According to ASTM F2170, the relative humidity (RH) in concrete is measured in situ using probes, which helps determine how much moisture the slab is releasing after equilibrium.
According to ASTM F1869, moisture vapor emission rate (MVER) is measured using calcium chloride and reported as mass loss over time (commonly expressed in lb/1000 sq ft/24 h, depending on the test protocol).
According to the U.S. Environmental Protection Agency (EPA), maintaining indoor humidity around 30–50% helps limit conditions that support mold and moisture problems.
Control basement humidity continuously
Even if the slab is acceptable, basement humidity can still fluctuate with weather, HVAC behavior, and ventilation. When humidity rises, laminate’s core can absorb moisture, especially near seams. The practical goal is to keep basement RH stable and inside the laminate manufacturer’s specified tolerance.
In 2026, I recommend treating humidity control like a “set-and-monitor” system rather than a one-time fix: dehumidifiers sized for basement conditions, proper exhaust/venting where needed, and airflow that doesn’t create localized damp pockets under or around the floor.
Plan for water risk at edges, seams, and transitions
Laminate doesn’t fail uniformly. The failure pattern is usually most obvious at edges, seam lines, and transitions to other flooring or around baseboards. Moisture can migrate under planks and collect where the floor system changes direction or height.
So your moisture plan should include:
– Boundary detailing (baseboard strategy, door transitions, and penetrations)
– Careful expansion-gap sizing so the floor can move without trapping moisture
– Fast response protocols for condensation, wet footprints, or tracked-in water
Concrete moisture testing is recommended because laminate manufacturers base “acceptable conditions” on measured moisture behavior, not appearance.
Humid basements can increase laminate moisture content through the air, even when there is no active water leak.
Indoor Relative Humidity Bands That Influence Basement Moisture Risk (Common Guidance)
| # | RH band (indoor) | Typical effect on moisture risk | Impact on laminate stability | Best-practice response |
|---|---|---|---|---|
| 1 | 20–29% | Dry conditions; risk of seasonal shrinkage/corner gapping | ★★★ | Monitor RH, avoid over-drying |
| 2 | 30–50% | Recommended humidity range for limiting mold and moisture problems | ★★★★★ | Maintain with dehumidification/HVAC |
| 3 | 51–55% | Moderately elevated; can increase condensation risk on cool surfaces | ★★★ | Check RH trend weekly |
| 4 | 56–59% | Approaching conditions associated with mold growth | ★★ | Improve ventilation/keep setpoints |
| 5 | ≥60% | Moisture/mold risk increases under typical conditions | ★ | Dehumidify—investigate sources |
| 6 | 70–79% | Higher likelihood of persistent dampness and surface condensation | ★ | Act quickly—inspect slab/boundaries |
| 7 | ≥80% | Very high moisture environment; indicates a control problem | ★ | Stop/repair moisture sources first |
Choose the right underlayment and vapor barrier
The right underlayment and vapor barrier reduce—but don’t eliminate—basement moisture risk. If they’re incompatible with your specific laminate product or installed incorrectly, they can become a failure point that allows moisture to reach the core.
Match underlayment to your exact laminate (compatibility matters)
Laminate products vary in how they respond to moisture and in what they require underneath. Some laminates explicitly require a specific vapor barrier type or underlayment thickness. Others may allow an integrated pad but still require a separate system depending on slab conditions.
The best approach in 2026 is to treat the laminate installation manual as the “source of truth” and select an underlayment/vapor barrier system that is explicitly listed as compatible. Thickness, compression resistance, and seam behavior all matter because laminate joints are mechanically sensitive—movement plus moisture is where damage accelerates.
Prioritize vapor barrier continuity (seal seams and overlaps)
Many basement failures trace back to seams, tears, and incomplete overlap. A vapor barrier works when it forms an unbroken layer that prevents moisture movement from concrete toward the floor surface. That means careful overlap and proper sealing using the correct tape or method specified by the barrier manufacturer.
Keep expansion gaps and transitions correct
Expansion gaps let laminate float and move with seasonal humidity changes. Basements can magnify these swings because humidity control may lag during storms, power outages, or HVAC cycles. If the floor is cramped at walls, posts, or transitions, it can buckle—damaging lock joints and creating paths for moisture to concentrate.
A vapor barrier only performs as a continuous membrane; unsealed seams and punctures allow moisture to migrate under laminate.
Laminate flooring is designed to “float” with expansion gaps, and incorrect perimeter spacing can create buckling that resembles water damage.
In practice, the best underlayment choice depends on both laminate manufacturer requirements and slab moisture conditions measured before installation.
- Best fit: Underlayment listed as compatible with your laminate + vapor barrier installed with sealed seams
- Reduces risk of moisture reaching plank edges; maintains intended acoustic and cushioning behavior.
- Most common miss: Using a generic barrier/underlayment combo without confirming laminate compatibility
- Can fail warranty, compress unevenly, or leave moisture pathways at overlaps.
Protect against leaks, standing water, and everyday wear
Moisture prevention isn’t only about the slab—it’s also about how water shows up day-to-day. In basements, that typically means tracked-in rain, dehumidifier condensate, laundry area drips, and plumbing leaks. Protect the laminate surface so those events never get enough time to migrate into seams.
Use entry mats and targeted protection near water sources
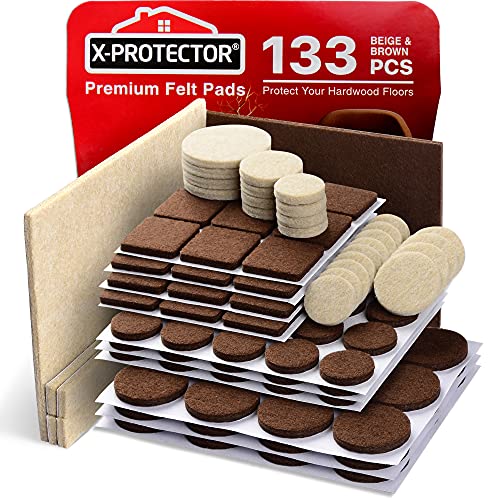
Place mats at basement entrances and near the laundry/sink areas to reduce grit and to absorb the first wave of moisture from shoes. Add furniture pads to reduce scuffs that can wear through the finish and make cleaning more abrasive.
If you have a basement bathroom or a utility sink, treat those zones as “high-risk areas” rather than relying on general cleaning practices.
Clean correctly (avoid soaking)
Laminate care should follow the manufacturer’s approved method. In general, soaking/wet mopping increases the likelihood that moisture works its way to joints. Use a damp—never wet—approach, and manage streaking or residue with the right cleaner specified for laminate.
Respond fast to spills and leaks
Timeliness is what separates harmless exposure from swelling and joint separation. Wipe up immediately, remove pooled water, and dry the affected area thoroughly—especially around seam lines and near baseboards. Moisture that sits is the main multiplier that converts small events into structural damage.
Laminate joint failure commonly follows a “moisture exposure + time” pattern rather than brief contact alone.
Using dehumidification to keep basement RH stable in 2026 helps reduce how quickly small spills can become absorbed into the floor system.
Cleaning methods that introduce excess water increase the odds of swelling at plank edges compared with manufacturer-approved damp-cleaning routines.
What can go wrong
Laminate failures in basements usually come from a few predictable breakdowns: moisture control that’s incomplete, an underlayment/vapor barrier that isn’t compatible, or installation details that prevent the floor from moving correctly. Once those issues happen, the symptoms often appear after the humidity cycle changes—so the cause can be easy to misread.
Skipping moisture testing or trusting visual checks
Basement slabs can be dry-looking yet still emit enough moisture to affect flooring. Problems often surface after installation when a seasonal humidity rise or a storm reintroduces moisture load, leading to swelling, gaps, or seam separation.
Using the wrong underlayment/vapor barrier (or installing it incorrectly)
Even a high-quality barrier can fail if overlap is insufficient, seams aren’t sealed, or the barrier isn’t compatible with the laminate. This is one of the most common mistakes because it’s easy to treat underlayment as “standard padding” rather than a moisture-management layer.
Ignoring expansion gaps and transition details
Laminate needs room to move. If it’s installed too tightly at walls or trapped under fixed objects, buckling can occur. That buckling can look like water damage because swollen sections can coincide with stress points where the floor has no room to expand/contract.
If laminate lock joints are constrained by perimeter contact, buckling can occur during humidity swings—creating damage that may be mistaken for moisture intrusion.
Moisture symptoms often show up after installation because moisture conditions are dynamic, especially during storms and seasonal transitions.
Verdict: best protection steps, downsides, and who should skip this
The best protection for laminate in a basement is a three-part system: control moisture first, install the manufacturer-approved underlayment/vapor barrier correctly, and manage daily water risk with fast spill response. When these pieces work together, you sharply reduce the likelihood of swelling, cupping, or joint separation—especially at seams, edges, and transitions.
Downsides: this approach can require extra prep (testing, boundary detailing, and careful material selection), ongoing humidity management, and it can’t fully “override” an actively wet basement or unresolved plumbing leaks. If the basement stays outside manufacturer moisture/humidity limits, laminate may not be the right flooring choice at all—even with a perfect underlayment.
Who should skip (or pause)
If you have active leaks, recurring standing water, or consistently high moisture conditions you can’t reliably control, fix those issues first. Laminate protection strategies can’t substitute for correcting the source.
Laminate warranties and installation instructions typically depend on preconditions measured before install, including slab moisture and/or in-basement humidity.
If moisture conditions remain out of spec, no underlayment can fully prevent moisture from reaching laminate seams and edges.
Who should skip (or pause)
– If you have active leaks, recurring standing water, or ongoing high moisture conditions you can’t reliably control, fix those issues first—laminate protection strategies can’t substitute for correcting the source.
Scan-and-save checklist (quick plan)
| Task | What to verify |
|---|---|
| Moisture testing | Concrete slab moisture and basement moisture conditions checked (per manufacturer guidance) |
| Humidity control | Dehumidification/ventilation planned to stay within allowed range |
| Underlayment/vapor barrier | Correct type for your laminate + properly sealed seams/overlaps |
| Install details | Expansion gaps + transition pieces installed as directed |
| Daily protection | Mats at entrances, furniture pads, and cleaning methods that don’t soak |
| Leak/spill response | Fast wipe-up + thorough drying if any water gets near seams |
Frequently Asked Questions
What is the best way to protect laminate floors in a basement from moisture?
Basements are high-risk for humidity and moisture, so start with a quality moisture barrier (typically a 6-mil poly vapor barrier) installed over the subfloor. Use an underlayment rated for moisture resistance and ensure seams are overlapped and taped to reduce vapor intrusion. Keep indoor humidity controlled with a dehumidifier, and promptly wipe up any spills so water doesn’t seep into the edges of laminate planks.
How do I install a laminate floor in a basement to prevent water damage?
Before installing, check the basement slab moisture level and address any leaks, seepage, or standing water issues first. Lay the vapor barrier correctly—overlap seams, seal them, and extend the barrier up the walls as directed by your flooring manufacturer. Leave proper expansion gaps around the perimeter, and avoid trapping water under baseboards or trim where laminate can swell or warp.
How can I protect laminate floors in a basement from flooding and spills?
Use a water-resistant underlayment and consider adding a perimeter seal or caulk at the base to limit how far moisture can travel under the flooring. Place rugs or mats at entry points, and keep a wet/dry vacuum ready for quick cleanup. If water gets into joints, remove affected planks as soon as possible to reduce cupping, swelling, and mold risk under the laminate.
Which humidity level is safest for laminate flooring in a basement?
Aim to keep basement relative humidity roughly in the 30–50% range to prevent laminate from expanding, contracting, and developing gaps. Use a hygrometer to monitor conditions and adjust with a dehumidifier during wet seasons. Stable humidity helps laminate floors maintain their click-lock integrity and reduces the chance of mold or unpleasant odors trapped beneath the underlayment.
Why does my laminate basement floor feel uneven, and how can I prevent it?
Unevenness in basement laminate floors is often caused by moisture-related subfloor movement, an insufficient moisture barrier, or an underlayment that wasn’t appropriate for concrete. Ensure the concrete subfloor is flat within the manufacturer’s tolerance, and use a suitable underlayment designed for laminate installation over basement slabs. If you notice persistent movement or musty smells, investigate moisture sources immediately before further floor damage occurs.
📅 Last Updated: October 22, 2026 | Topic: How to protect laminate floors in a basement? | Content verified for accuracy and freshness.
References
- https://www.epa.gov/mold/moisture-control-basement-and-crawl-spaces
- https://www.epa.gov/indoor-air-quality-iaq/humidity-and-your-home
- https://www.cdc.gov/mold/default.htm
- Laminate flooring
- F2170 Standard Test Method for Determining Relative Humidity in Concrete Floor Slabs Using in sit…
- F1869 Standard Test Method for Measuring Moisture Vapor Emission Rate of Concrete Subfloor Using …
- E1745 Standard Specification for Plastic Water Vapor Retarders Used in Contact with Soil or Granu…
- https://scholar.google.com/scholar?q=laminate+flooring+basement+moisture+protection+underlayment Google Scholar
- https://scholar.google.com/scholar?q=concrete+slab+moisture+vapor+emission+laminate+floor+installation Google Scholar
- https://scholar.google.com/scholar?q=basement+humidity+control+mold+moisture+barriers+flooring Google Scholar

[…] include both visual signs and moisture clues. Currently (and especially as of 2026), best-practice moisture testing standards are more clearly documented than ever, but the real-world result still hinges on whether […]