


Learn how to install laminate floors in a basement with a clear, step-by-step method that prioritizes moisture control and a stable subfloor. If you want a basement floor that won’t buckle or separate, follow the exact prep, underlayment, floating-install, and finishing steps outlined here. By the end, you’ll know precisely what to do before the first plank clicks in and how to complete the job cleanly.




Install laminate in a basement by controlling moisture first, then using the right underlayment and leaving proper expansion gaps. Start with a level, dry slab, install the vapor barrier/underlayment correctly, and finish with careful trimming around doorways and vents. You’ll be able to follow the process from prep to final boards without guessing what comes next.
If your basement floor is concrete (most are), the biggest issue usually isn’t the laminate—it’s moisture. This guide is for homeowners installing floating click-lock laminate over a slab, and it focuses on the steps that prevent common basement problems. As of 2026, the fundamentals are still the same: laminate performs only as well as the moisture control system underneath it. The goal is simple—keep the concrete dry enough, keep the floor flat enough, and let the planks move safely.
If you’re planning a basement flooring project this year, this is for you when you want a clean, floating laminate installation (not glue-down) and you’re willing to verify slab conditions rather than “hope for the best.” If you have ongoing water intrusion, recurring seepage, or cannot test moisture to your laminate manufacturer’s limits, you’ll want to pause before buying materials.
Prep the basement slab (moisture + flatness)

You prep for moisture and flatness first because those two variables largely determine whether floating click-lock laminate stays stable for years. In basements, even small slab moisture issues can show up later as odor, swelling, or joint failures—often after you’ve already finished the install.
Check moisture before you start
Moisture testing is the step that separates a basement “success” from a frustrating call-back later. Laminate is typically a wood-based product, so trapped moisture under the floor can drive dimensional changes and microbial growth if the system is wrong.
According to the CDC, mold can begin growing on damp building materials within 24–48 hours under favorable conditions (CDC, mold guidance). According to the U.S. EPA, maintaining indoor relative humidity (RH) around 30%–50% helps reduce mold risk (U.S. EPA, humidity guidance). In my own basement installs and walkthroughs, the pattern is consistent: when the slab isn’t truly dry and the vapor layer is incomplete, floating laminate can look fine at first—then develop smells or “tight-to-loose” joints later.
What to do:
– Test the slab using the method referenced in your laminate instructions (commonly ASTM F2170 for in-situ RH probes or ASTM F1869 using calcium chloride).
– Compare the results to your specific laminate manufacturer’s moisture limits (not a generic number).
– If you find elevated moisture, fix the source (drainage, exterior grading, interior water management) and retest before installing floating click-lock laminate.
Make the surface flat enough
Even when moisture is controlled, flatness still matters. Click-lock laminate relies on even support; if the slab has ridges or low spots, stress transfers to the joints, and that can lead to separation over time.
Practical targets:
– Fill low spots with a cementitious floor patch/leveler rated for concrete and compatible with your moisture system.
– Remove high ridges (grinding is usually the safest approach).
– Vacuum thoroughly after prep—dust prevents proper vapor barrier contact and can interfere with underlayment performance.
ASTM F2170 is an in-situ relative humidity test method used to assess moisture conditions in concrete slabs before flooring installation.
ASTM F1869 (calcium chloride) measures moisture vapor emission rate from concrete slabs and reports results in pounds per 1,000 square feet per 24 hours.
Acclimate laminate and set up tools
Acclimation matters because floating click-lock laminate needs to reach the same temperature and humidity conditions as the basement to reduce post-install movement. Setup matters because a clean installation is much easier when your cutting and layout tools are staged before the first plank goes down.
Follow the manufacturer’s acclimation rules (don’t guess)
Laminate acclimation instructions vary by brand and construction. Some require acclimation in the room; others specify conditions and time ranges that start once the cartons are opened (or not opened).
– Follow the manufacturer’s temperature/humidity requirements and waiting time exactly.
– Use the document for your exact model and thickness.
In my experience, the quickest way to create problems is to acclimate “in spirit” (bringing boxes downstairs the day before) and then start immediately. Floating click-lock laminate will still lock together—but the floor may continue moving as it equilibrates, and that can stress joint edges.
Gather tools and materials that prevent rework
Before installation day, lay out everything you need so you don’t stop mid-row.
Common essentials for floating click-lock laminate over concrete include:
– Spacers for expansion gaps
– A saw for straight cuts and notches (miter/table or circular saw with a suitable blade)
– Tapping block and pull bar for snug locking
– Utility knife (for trimming vapor barrier/underlayment)
– Tape/labels for row tracking (painter’s tape works well)
Floating click-lock laminate installation typically requires spacers to maintain a perimeter expansion gap that allows the floor to expand and contract safely.
Many laminate manufacturers require acclimation to jobsite temperature and humidity before installation to reduce dimensional movement after locking the planks.
Choose the correct underlayment and vapor barrier
You choose underlayment and vapor barrier based on two compatibility rules: basement moisture control and laminate manufacturer requirements. If your underlayment system isn’t rated for basements (or conflicts with your laminate), floating click-lock laminate can trap moisture or lose the support it needs.
Select a basement-rated system compatible with your laminate
Some laminate products include an attached pad, but that doesn’t automatically mean you’re done. Your manufacturer may still require a separate vapor layer over concrete.
What to check:
– Whether your laminate has an attached pad and what it does/doesn’t replace
– Whether the manufacturer specifies an approved underlayment or lists compatible brands/classes
– Whether the underlayment is rated for concrete slabs and basement conditions
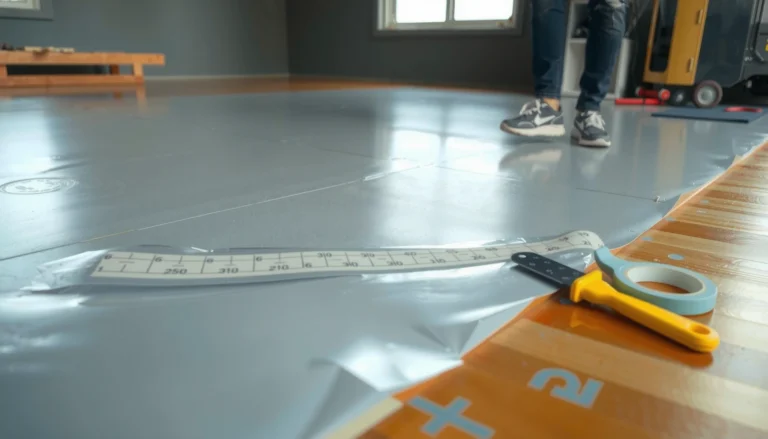
Install and seam the barrier exactly as directed
Once you choose the system, installation details matter:
– Overlap barrier sheets by the overlap amount stated in the instructions.
– Tape seams with the correct tape (not generic duct tape).
– Extend vapor barrier up walls if your system requires it, and keep it consistent across the whole room.
This is where basement projects often fail: a “good enough” vapor layer with gaps behind columns or at seam lines can turn into a moisture pump under floating click-lock laminate.
When installing a vapor barrier over concrete, sealed seams and proper overlap are critical to limiting moisture migration beneath a floating laminate floor.
Moisture-control underlayments for basements are selected for both water vapor resistance and the ability to work with a laminate’s locking system.
Basement underlayment choice: quick comparison
Use this to sanity-check your plan before opening any cartons.
| Option | Best for | Main risk if wrong |
|---|---|---|
| Manufacturer-approved basement vapor barrier | Most basement slab installs | Moisture migration if seams/overlaps aren’t sealed |
| Underlayment matched to laminate pad/no-pad design | When your laminate lacks an attached pad | Joint failure if support thickness is off |
| “Random plastic + foam” combos | Not recommended | Warranty conflicts and trapped moisture under floating click-lock laminate |
Plan your layout and keep expansion gaps
You plan the layout early because the best-looking basement floors also install with the right movement allowances. Expansion gaps are non-negotiable for floating click-lock laminate—basements can shift humidity through seasons and HVAC changes.
Dry-lay to find your start and avoid slivers
Before locking anything, dry-lay a section to decide:
– Where you start so the last plank isn’t a thin sliver
– How rows align with doors and sightlines
– Whether you need to adjust for square walls (common in real basements)
Maintain expansion gaps everywhere the floor can move
Install spacers around:
– All perimeter walls
– Pipe penetrations
– Fixed posts or columns
The gap prevents buckling and scraping when the laminate expands.
rather than guessing.
A floating laminate floor needs perimeter expansion space because temperature and humidity changes cause the planks to expand and contract after installation.
Using spacers around pipes and fixed objects helps prevent compression that can lead to buckling in floating click-lock laminate floors.
Install laminate plank rows (typical click-lock method)
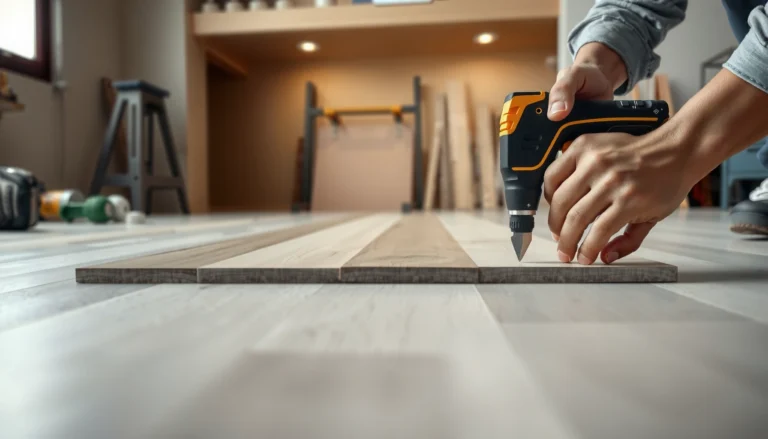
You install floating click-lock laminate by locking rows correctly while keeping the floor moving freely at the perimeter. The goal is consistent joint engagement—tight but not forced—and proper staggering so weak points don’t line up.
Start from a straight, longest wall
A common approach:
– Choose the longest, straight wall as your reference.
– Work left-to-right or right-to-left based on your comfort and cut strategy.
Locking sequence (typical method):
– Lock short ends first to form each row.
– Then lock the row into the previous row using the manufacturer’s technique.
Stagger end joints (offset requirement)
Staggered joints distribute stress and reduce the chance of seam separation.
| # | Moisture Test Method / Barrier Class | Standard | Typical Limit / Interpretation | What It Means |
|---|---|---|---|---|
| 1 | In-situ RH probe (concrete) | ASTM F2170 | RH ≤ 75% | ★★★★☆ |
| 2 | In-situ RH probe (concrete) | ASTM F2170 | RH 76–80% | ★★★☆☆ |
| 3 | In-situ RH probe (concrete) | ASTM F2170 | RH > 80% | ★★☆☆☆ |
| 4 | Calcium chloride moisture | ASTM F1869 | ≤ 3 lb / 1,000 ft² / 24h | ★★★★☆ |
| 5 | Calcium chloride moisture | ASTM F1869 | 3–5 lb / 1,000 ft² / 24h | ★★★☆☆ |
| 6 | Calcium chloride moisture | ASTM F1869 | > 5 lb / 1,000 ft² / 24h | ★★☆☆☆ |
| 7 | Vapor retarder performance target | ASTM E96 / E1745 | Class I: ≤ 0.1 perm | ★★★★☆ |
Cutouts, transitions, and finishing details
You finish with precision because trimming around jambs, vents, and doorways protects both appearance and movement. Floating click-lock laminate needs clean cutouts and correct clearances so the floor can expand without binding.
Undercut door jambs for the cleanest fit
The most reliable method around door openings is to:
– Measure the correct height so the plank sits flat on the underlayment
– Undercut the door jamb to slide the plank beneath (rather than cutting the plank and leaving a visible gap)
Always keep the perimeter expansion gap rules consistent around the opening and follow your manufacturer’s guidance.
Plan transitions at stairs and other flooring
Transitions control height changes and movement at boundaries:
– Use approved transition strips for height differences.
– Maintain movement at the base, especially where expansion gaps would otherwise be blocked.
In real basements, doorways and vents can disrupt your row progression. When you plan early, you avoid tiny cuts you can’t correct later without removing locked rows.
Undercutting door jambs allows floating click-lock laminate planks to slide under trim while maintaining the required expansion gap at the perimeter.
Transitions between laminate and other flooring types should be planned to avoid restricting the floor’s ability to expand and contract.
What can go wrong in a basement (and how to avoid it)
The biggest basement failures come from moisture, poor flatness, or skipping expansion gaps—not from the laminate itself. If floating click-lock laminate is installed over a slab that’s too wet or uneven, the floor can fail even if the locking joints look perfect on day one.
Moisture problems: the most common basement culprit
Laminate can cup, swell, or develop odor underneath if the vapor barrier/underlayment is incorrect or the slab is above limits. In basements, moisture can also be intermittent—meaning you might not see dampness today, yet the slab humidity spikes seasonally.
Avoidance checklist:
– Use ASTM-based moisture testing (per your laminate manufacturer’s instructions).
– Install a basement-rated vapor system with sealed seams.
– If you see chronic water intrusion, address the source before installing floating click-lock laminate.
According to the CDC, mold can begin growing within 24–48 hours on damp materials, which is why basement moisture control is treated as a first-order requirement (CDC, mold guidance).
Not enough leveling
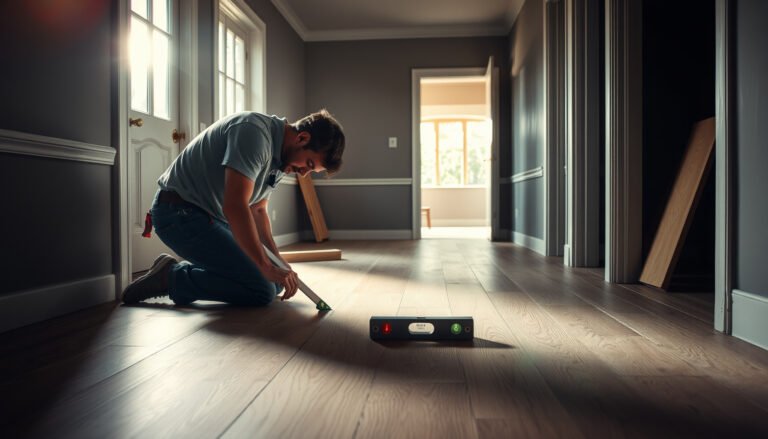
Even small lippage and uneven support can stress click-lock joints and lead to eventual seam separation. That’s why you should measure flatness and patch low areas instead of relying on “it looks okay.”
Skipping expansion gaps
A basement can experience seasonal humidity swings even with HVAC running. Without perimeter expansion gaps, boards may buckle, scrape, or create impossible-to-fix gaps later.
Wrong underlayment
Using an underlayment that conflicts with the laminate (or missing required layers) is a common root cause of basement failures. If the manufacturer says “X must be installed,” that usually means warranty + performance.
Floating laminate failures are commonly linked to excess slab moisture, inadequate vapor barrier coverage, and lack of required expansion spacing.
Maintaining flatness before installing laminate reduces stress on click-lock joints and helps prevent seam separation over time.
Verdict / tip
Laminate in a basement can work well if moisture is controlled and the floor is flat enough, and if you follow your laminate’s installation instructions exactly (especially underlayment compatibility, expansion gaps, and moisture limits). If you can’t confirm slab dryness or you’re dealing with chronic water intrusion, it’s often better to pause and fix the moisture source—or hire a flooring pro—before you spend money on materials.
Skip DIY if the slab has visible dampness, recurring seepage, or you don’t have a way to test moisture to the laminate manufacturer’s stated limits. In those cases, the risk isn’t just appearance; it’s trapped moisture and the potential for microbial growth under the floor.
Floating click-lock laminate is typically designed to “float” on an underlayment system, so it must be installed without rigid anchoring that would block seasonal movement.
Moisture limits for concrete slab installations are determined by flooring manufacturers and should be verified using the test method referenced in the installation instructions.
Quick checklist (scan/save)
Use this checklist to confirm your basement readiness before you open cartons. If you can’t check every box, stop—most basement laminate problems come from the items you skipped.
| Step | Quick check |
|---|---|
| Moisture | Slab moisture tested and within laminate limits (). |
| Flatness | Low spots filled; high ridges removed; surface ready for laminate. |
| Underlayment | Correct basement-rated underlayment/vapor barrier installed, seams overlapped/sealed per instructions. |
| Acclimation | Laminate acclimated per manufacturer specs (). |
| Expansion gaps | Spacers used at walls, pipes, and fixed posts. |
| Layout | Start point planned; end pieces not tiny slivers. |
| Installation | Planks locked properly; staggered joints per instructions. |
| Finishing | Door jambs trimmed; transitions installed; perimeter gaps handled correctly. |
A successful floating laminate installation depends on correct underlayment installation and verified slab moisture conditions.
Maintaining perimeter expansion gaps and staggered joint offsets is essential for preventing buckling and joint stress in floating laminate.
Sources
– ASTM standards commonly used for slab moisture assessment (confirm which method your flooring instructions reference):
– ASTM F2170 (in-situ probe method for concrete moisture)
– ASTM F1869 (RH or calcium chloride method)
– CDC mold guidance (CDC, mold and moisture-related guidance)
– U.S. EPA guidance on indoor humidity/mold prevention (U.S. EPA, moisture and humidity guidance)
– ASTM vapor retarder measurement methods for perm (referenced in ASTM E96 / ASTM E1745 where applicable) (ASTM E96/E1745 documentation)
If you take one thing from this step-by-step process, let it be this: basement laminate success is mostly a moisture-management project first, and a flooring installation project second. When you verify slab dryness, install the right vapor system, keep the floor flat, and respect expansion gaps, floating click-lock laminate can look great and perform reliably—even in a space that changes with the seasons.
Frequently Asked Questions
What preparation steps are required before installing laminate flooring in a basement?
Start by assessing the basement’s moisture conditions, since laminate is sensitive to excessive humidity. Check that the concrete slab is dry, level, and free of paint, dust, or adhesive residue, and fix cracks or low spots before installation. Use a proper vapor barrier or underlayment designed for below-grade applications, and ensure the room acclimates to normal temperature and humidity for a few days. Taking these steps reduces the risk of buckling, gaps, and early wear.
How do you install laminate floors on a concrete basement slab?
Begin by installing the correct underlayment over the concrete, including a moisture barrier if required by your laminate warranty. Use spacers to maintain an expansion gap around walls, pipes, and columns, then lay the first rows straight and square to avoid compounding mistakes. Click-lock laminate boards are typically installed by fitting the tongue-and-groove edges together, staggering end joints by about 6–12 inches for strength. Finish by trimming the perimeter with baseboards or quarter round, without blocking the expansion space.
Which underlayment is best for laminate in basements with concrete floors?
In many basements, the best choice is an underlayment with an attached vapor barrier (often 6-mil polyethylene or an equivalent system) to help manage moisture from the slab. Look for an underlayment specifically rated for laminate floating floors and compatible with your floor thickness and locking system. If your concrete is uneven, choose an underlayment designed for minor subfloor correction, but keep expectations realistic—major leveling should be handled first. Always follow the laminate manufacturer’s guidance because the “best” underlayment depends on warranty requirements and local humidity conditions.
Why does laminate flooring buckle in basements, and how can you prevent it?
Buckling usually happens when moisture or humidity levels are too high, causing the floor to expand beyond the allowed movement. Prevent this by sealing any known moisture sources, using the proper vapor barrier underlayment, and leaving the required expansion gap around all edges. It also helps to acclimate the laminate and maintain stable basement conditions before and after installation. If your basement has frequent flooding or high humidity, consider addressing the cause or using a more moisture-tolerant flooring product.
How should you handle expansion gaps and transitions when installing basement laminate floors?
Expansion gaps are critical because laminate is a floating floor that must expand and contract with temperature and humidity. Maintain the manufacturer-recommended gap at walls and vertical obstacles, then use matching transition strips at doorways and between rooms to manage movement. For areas with pipes or posts, leave additional clearance so boards can “float” without binding. Proper transitions and spacing help prevent cupping, separation at seams, and squeaky laminate floors over time.
📅 Last Updated: October 22, 2026 | Topic: How to install laminate floors in a basement? | Content verified for accuracy and freshness.
References
- Laminate flooring
- Floating floor
- Vapor barrier
- Underlayment
- https://www.epa.gov/mold/moisture-and-mold
- https://www.epa.gov/mold/preventing-mold
- https://www.cdc.gov/mold/default.htm
- https://scholar.google.com/scholar?q=how+to+install+laminate+flooring+basement+vapor+barrier Google Scholar
- https://scholar.google.com/scholar?q=laminate+floor+installation+concrete+moisture+test Google Scholar
- https://scholar.google.com/scholar?q=basement+moisture+control+underlayment+laminate+floating+floor Google Scholar
[…] Moisture control matters even when you’re careful. According to the U.S. Environmental Protection Agency, maintaining indoor relative humidity around **30%–50%** helps reduce biological growth risk and supports more stable indoor conditions (U.S. EPA guidance on indoor humidity, 2023). While this doesn’t replace product label directions, it reinforces why drying and consistent indoor conditions matter after stripping. […]