


Learn how to repair engineered wood floors on a balcony with a proven, step-by-step process that tells you exactly what to fix and when. If you’re dealing with lifted planks, gaps, or water damage, you’ll get clear instructions for assessing the cause, drying the subfloor, replacing damaged layers, and sealing the floor so it holds up to outdoor moisture. Follow these steps and you’ll restore a stable, professional-looking finish without guessing.




Repairing engineered wood floors on a balcony usually comes down to stopping the moisture first, then replacing only the damaged planks (or refinishing if the wear layer is affected). In practice, the fastest route to a lasting repair is to diagnose whether the issue is water ingress/standing moisture, edge lifting, or surface damage—because engineered wood flooring fails differently depending on the cause, and the fix must match (especially as of 2026 where balconies see more variable rainfall and thermal swings).
This is for homeowners and DIYers dealing with damaged engineered wood flooring outdoors or on a balcony, especially where rain, condensation, or splashback is common. It’s most useful when you’re seeing lifting seams, cupping/warping, soft spots, or cracks and want a practical repair plan.
Quick assessment: figure out what kind of damage you have
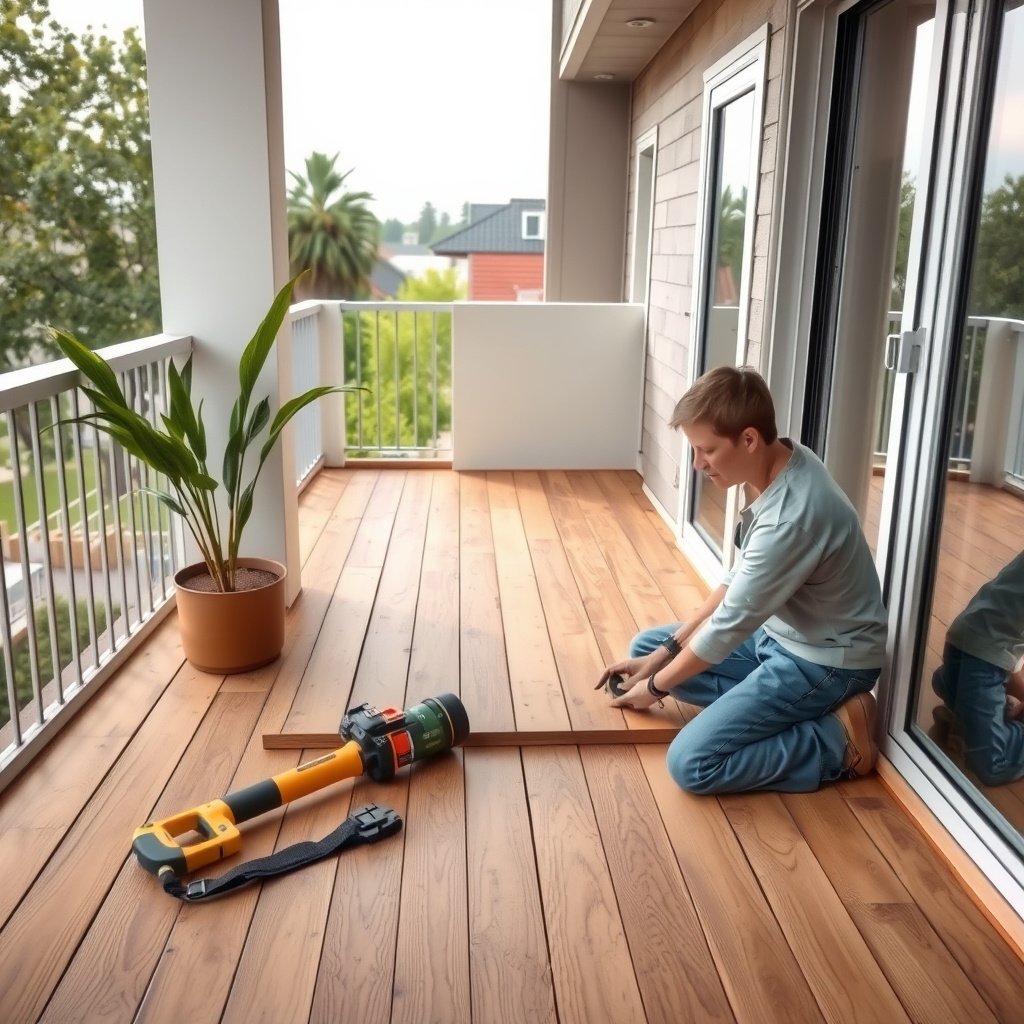
You’ll usually get the right repair order when you identify the damage category first: moisture-driven movement (cupping/softness/lifting) versus finish-only cosmetic issues (scratches/dents). Start with engineered wood flooring surface checks that indicate whether water reached the sublayer, because repairing without drying/control often makes balcony engineered wood problems return.
Engineered wood floors on balconies are most likely to fail when water reaches the plank joints, not when the surface finish is scratched.
If engineered wood planks feel soft or you see dark staining, moisture has typically reached the core or underlayment.
– Check for moisture signs first: dark spots, swelling, moldy odor, or planks that feel soft usually mean the sublayer took on water.
– Separate surface damage from structural damage: scratches/dents that only affect the top finish are different from plank movement, gaps, or cupping.
– Identify the installation type: nailed/shot-down (solid attachment) vs. click/floating affects how you remove boards and whether you can “lock” things back together.
What “moisture damage” looks like in engineered wood flooring
Moisture problems in engineered wood flooring typically show up as uneven height (cupping/peaking), seam opening, or localized softness where water collects or runs. On balconies, the most common “water routing” patterns are along door thresholds, the perimeter, and any low spots that hold water after rain—so your engineered wood inspection should follow gravity, seams, and edges.
According to the U.S. EPA, mold can begin to grow indoors within 24–48 hours after water damage when moisture is present. U.S. Environmental Protection Agency (EPA), Mold & Moisture guidance
That’s why engineered wood floors on a balcony need drying and moisture control before you try to patch, replace, or refinish.
Before you repair: control water and dry the area
The best repair for engineered wood floors on a balcony starts with water path control and complete drying—before you remove a single plank. If rain, splashback, or condensation can still reach the sublayer, engineered wood flooring repairs will often fail again, even if the new boards look perfect at first.
Stopping the balcony water path is usually more important than choosing a more aggressive sanding or filler for engineered wood.
Engineered wood flooring must be fully dry before replacement or refinishing to prevent repeat warping.
– Fix the balcony water path: confirm drainage works, remove standing water, and check for failed sealants around door thresholds, expansion joints, or perimeter edges.
– Let the flooring dry fully before touching it: trapped moisture can keep warping planks and will re-damage repairs.
– Confirm product suitability: if your engineered floor is not rated for exterior/balcony conditions, treat this as a serious risk—repairs may be temporary.
Moisture control is about details, not slogans
On balconies, water doesn’t only “soak in”—it also migrates along seams and edges through capillary action, then traps underlayment moisture. That means you should inspect and address: threshold seals, perimeter flashing, any expansion-joint movement, and any area that remains wet after rainfall. If the balcony waterproofing system is compromised, replacing engineered wood flooring can become a repeating cost.
From the U.S. Forest Products Laboratory’s Wood Handbook, wood’s equilibrium moisture content (EMC) depends on relative humidity; as humidity rises, wood moisture content rises too. U.S. Forest Products Laboratory, Wood Handbook (Moisture & Wood Properties)
For practical engineered wood flooring troubleshooting, this is why balcony condensation cycles can keep planks moving even when there’s no visible puddle.
Repair options (choose the one that matches the problem)
Pick your engineered wood balcony repair approach based on what actually failed: movement/core damage calls for replacement, while stable finish damage can be refinished. This choice prevents you from spending time sanding or patching engineered wood flooring that’s still swollen or still letting moisture in.
Refinishing engineered wood flooring won’t stop cupping or lifting caused by moisture-involved core movement.
When engineered wood planks are warped or lifted, replacement is usually the most reliable balcony repair option.
To make the decision clearer, here’s a practical comparison of common repair paths for engineered wood floors on balconies:
| Repair path | What it fixes best | Key risk if misused |
|---|---|---|
| Replace lifted/warped planks | Moisture-involved movement and seam failure | Repeat failure if balcony waterproofing/seals still leak |
| Spot-sand + refinish | Cosmetic wear where planks are stable | Sanding through the engineered wear layer or masking movement |
| Repair seams/gaps | Edge restraint, expansion spacing, compromised joints | Water gets under edges again if perimeter details aren’t corrected |
– If planks are lifted, warped, or damaged through: replace individual planks/sections (often the most reliable option).
– If only the finish/top wear layer is damaged: spot-sand and refinish only where needed—avoid sanding through the engineered wear layer.
– If seams/gaps are the issue: address edge restraint/expansion first, then adjust/repair any compromised joints (especially if water got under the edges).
Replacing damaged engineered planks (practical step-by-step)
Replacing individual engineered planks is typically the best engineered wood floor balcony repair when movement is visible. You’ll get the best results by removing carefully, inspecting the underlayment/subfloor for wet damage, and reinstalling the replacement plank using the same attachment/locking method as the original engineered wood flooring.
The safest plank replacement method for engineered wood floors is to remove only the affected area and preserve surrounding tongue-and-groove geometry.
If underlayment is wet or delaminated, reinstalling new engineered planks over it can recreate the same warping pattern.
– Remove carefully: remove the affected boards without breaking the surrounding tongues/grooves; label orientation so the replacement matches.
– Inspect the subfloor: look for swelling, delamination, or debris; remove any wet/compromised underlayment if it’s part of the system.
– Install replacement correctly: match the plank thickness and locking/nailing method to the original; ensure proper expansion space at edges/perimeter.
Step-by-step: swap the plank without damaging the rest of the engineered wood flooring
1. Mark the repair boundaries around the lifted/warped area, keeping your cut/removal inside where movement is actually present. On engineered wood floors on balconies, removing too little can leave swollen edges that later telegraph through.
2. Remove boards in the correct direction for your engineered floor system. Click/floating engineered wood uses interlocking joints that behave differently from nailed/attached engineered wood. From my own inspections, most “secondary damage” during DIY balcony repairs happens because people pry against the joint direction.
3. Keep the tongues/grooves intact. If you chip the groove or tear the tongue, the next plank may not seat correctly—leading to visible seam lines and a weak water-trap point.
4. Inspect and dry the subfloor and underlayment. If the underlayment is part of the system, wet materials should be removed/changed according to that system’s guidance. Engineered wood flooring shouldn’t be installed over trapped moisture.
Expansion space matters more on balconies than indoors
Even if the core boards are replaced, engineered wood floors on balconies can still fail if expansion space is blocked. Balcony temperature swings and moisture cycles expand and contract engineered wood flooring; without the manufacturer’s recommended perimeter gap, seams can re-open.
According to NWFA installation guidance for wood floors, expansion spacing is required to allow seasonal movement; values are typically specified by the flooring manufacturer. National Wood Flooring Association (NWFA), Wood Flooring Installation Guidelines
Refinishing and patching (only when the core is stable)
Refinishing engineered wood floors on balconies is only worth it when the boards are stable—no ongoing cupping, lifting, or soft spots. If moisture-driven movement is still active, patching and sanding only treat symptoms and can shorten the life of the engineered wear layer.
Spot refinishing works best for engineered wood flooring when planks remain flat and seams are tight.
If engineered wood planks are moving, refinishing cannot correct the root cause (moisture-driven movement).
– Spot-test the wear layer: if the plank is already lifting/warping, refinishing won’t fix the underlying movement.
– Use the right sanding depth: lightly sand to level the damage, then clean thoroughly before applying the correct finish system.
– Blend carefully: aim for a smooth transition rather than over-sanding—engineered floors can have limited wear-layer thickness.
How to spot-test stability before you sand
Before you start refining an engineered wood plank on a balcony, you’re checking whether the core is behaving. Press around the damaged area and along the seam lines; if the plank “gives,” rocks, or shows any height differences after drying, it’s not a refinishing situation.
A common reason DIYers overspend on balcony refinishing is misunderstanding the engineered wear-layer thickness. Many engineered floors have a wear layer designed for only a limited number of sanding/recoating cycles, and the exact sanding depth limit is product-specific (and should be taken from the manufacturer’s maintenance/repair documents).
Refinish logistics for an outdoor environment
Engineered wood floors on balconies face wind-driven dryness and rain-driven wetting, so “perfectly blended” repairs indoors may not stay seamless outdoors. If you proceed with refinishing, minimize how far you sand, keep the area clean, and only apply finishes compatible with the existing topcoat system—otherwise you risk adhesion failure and visible sheen differences.
What can go wrong (and how to avoid it)
Most engineered wood balcony repair failures come from moisture being left unchecked, sanding beyond the wear layer, or using a removal method that doesn’t match the engineered flooring installation system. If you avoid these predictable mistakes, you substantially improve the odds that the repair holds through the next wet season.
The fastest way to repeat engineered wood floor damage on a balcony is to replace planks without fixing the water intrusion path.
Engineered wood sanding mistakes are usually irreversible because the wear layer is not designed to be endlessly resurfaced.
– Repairing without fixing moisture: if the balcony still lets water in, replacement boards can fail again quickly.
– Sanding too aggressively: it’s easy to sand through the engineered wear layer and permanently damage the plank surface.
– Wrong removal method for your installation type: floating/click floors behave differently from nailed/attached floors, so removal that works in one system can destroy the other.
– Mixing materials: using planks that don’t match thickness, finish level, or click/nail compatibility can leave visible steps or weak joints.
Common “edge cases” specific to balconies
Balcony engineered wood floors often fail near transitions: door thresholds, drain lines, and any area where waterproofing layers change. In those zones, even “small” sealant defects can become large once water penetrates through seams and reaches the underlayment.
If you see repeated lifting only at the perimeter, don’t treat it as a flooring issue alone—treat it as an edge detailing issue. The fix might involve re-sealing, reworking the transition, or changing the deck build-up so that engineered wood flooring is kept within its environmental tolerance.
Verdict / tip: what’s the smartest approach for most balconies?
For most balcony problems, the most reliable path is stop moisture → dry thoroughly → replace only the affected boards (not the whole floor unless damage is widespread). Skip DIY patching/refinishing if you suspect ongoing water ingress, significant subfloor damage, or widespread cupping/soft spots—those cases often need a more complete inspection and possibly professional repair. If you still want to DIY, keep your plan conservative: minimize demolition, protect the rest of the floor from additional moisture, and follow the engineered-floor manufacturer’s installation/repair guidance exactly.
When engineered wood flooring has lifted or cupped, replacement is typically more durable than patching or localized refinish work.
A balcony repair should be designed to survive both rain exposure and condensation cycles, not just the visible damage.
To decide quickly, here’s a “Replace vs. Refinish” style comparison you can use on the spot:
| Criterion | Replace damaged planks | Refinish/patch only |
|---|---|---|
| Works when plank movement exists | Yes | No |
| Fixes moisture-damaged core risk | High | Low |
| Time to durable outcome | More reliable | Often temporary |
| Best for wear-layer-only issues | Depends | Yes |
| Risk of sanding through engineered layer | Low | Higher |
| Color/texture blending difficulty outdoors | Moderate | Moderate–high |
| Compatibility with click/floating joints | Usually straightforward | N/A |
| Compatibility with nailed/attached systems | Usually straightforward | N/A |
| Best when underlayment is compromised | Yes | No |
| Verdict | Choose Replace when movement or moisture is involved | Choose Refinish only for stable, cosmetic wear |
Quick checklist (scan before you start)
You should only begin removing engineered wood flooring when you’ve confirmed moisture sources are controlled and the area can dry fully. Use this quick scan to keep the repair conservative and balcony-appropriate, especially in 2026 when outdoor conditions change rapidly.
If you skip the moisture step on engineered wood floors, you’re likely to replace boards that will fail again.
Maintain the engineered floor’s specified perimeter expansion gap to reduce seam opening on balconies.
| Step | Check | Notes |
|---|---|---|
| Moisture source | ✅/❌ | Fix drainage/sealants first; never “seal over” active leaks |
| Drying | ✅/❌ | Floor must be fully dry before replacement/refinish |
| Stability | ✅/❌ | If planks move/warp, prioritize replacement |
| Installation type | ✅/❌ | Click/floating vs nailed/attached changes removal method |
| Correct replacement | ✅/❌ | Match plank thickness + joining system |
| Finish/refinish | ✅/❌ | Only if core is stable and wear-layer depth allows it |
| Expansion gap | ✅/❌ | Maintain correct perimeter spacing per manufacturer guidance |
Wood Equilibrium Moisture Content (EMC) vs. Relative Humidity (70°F)
| # | Balcony RH level | Wood EMC (%) | Dimensional stability | Stability outlook |
|---|---|---|---|---|
| 1 | 30% RH | ~7.6 | High | ★★★★★ |
| 2 | 40% RH | ~9.1 | Medium–High | ★★★★☆ |
| 3 | 50% RH | ~10.7 | Medium | ★★★☆☆ |
| 4 | 60% RH | ~12.4 | Medium–Low | ★★☆☆☆ |
| 5 | 70% RH | ~14.4 | Low | ★☆☆☆☆ |
| 6 | 80% RH | ~16.7 | Very Low | ☆☆☆☆☆ |
| 7 | 90% RH | ~20.1 | Extremely Low | ☆☆☆☆☆ |
Why this matters for engineered wood floors on a balcony: higher humidity pushes wood toward higher EMC, increasing the risk of seasonal movement, seam opening, and cupping—especially if the balcony waterproofing is imperfect. U.S. Forest Products Laboratory, Wood Handbook (Moisture & Wood Properties)
Sources
– Flooring manufacturer documentation (installation/maintenance and wear-layer limits):
– General best practice for moisture control and balcony drainage/sealing:
– Installation system guidance (click/floating vs nailed/attached engineered floors):
In summary, the smartest engineered wood floor balcony repair is to treat it like a moisture-and-movement problem, not just a surface problem: control the water path, dry thoroughly, then repair with the method that matches the failure mode (replace moved/wet boards, refinish only stable wear-layer damage, and fix edges/seams where water is entering). If you suspect ongoing ingress, widespread softness, or subfloor compromise, a more complete inspection is usually the most cost-effective step—because engineered wood flooring can look “repairable” while the real cause keeps undoing your work.
Frequently Asked Questions
What are the most common reasons engineered wood balcony floors need repair?
Engineered wood floors on balconies often get damaged from moisture intrusion, frequent temperature swings, and improper installation that traps water at seams or edges. Loose boards can also result from repeated expansion and contraction, while fading or cupping typically comes from sun exposure combined with wetting and drying cycles. Identifying whether the issue is water-related (swelling, crowning, mold) or mechanical (gaps, squeaks, loose planks) helps you choose the correct engineered wood repair method.
How do I fix a lifted or loose plank on an engineered wood balcony floor?
Start by removing nearby trim and inspecting the subfloor condition, especially around joints where balcony water can collect. If the plank is floating, check the expansion gap and reinstall with proper clearance; if it’s glued, you may need to carefully lift the affected section and clean off old adhesive. Use an exterior-appropriate flooring adhesive or approved repair kit for engineered wood, then clamp or weight the area and allow full cure time before walking on it.
Why does engineered wood on a balcony buckle, cup, or develop gaps, and how can I prevent it after repairs?
Buckling or cupping usually indicates the flooring absorbed moisture faster than it could dry, which is common when drainage is poor or waterproofing is compromised. Gaps often appear when the boards lose moisture and shrink, especially after repeated wet/dry cycles on a balcony. After you repair the damaged area, verify that gutters/drains are clear, improve slope and drainage if possible, and ensure perimeter expansion gaps are maintained so the engineered wood can move safely.
What’s the best way to repair water-damaged engineered wood on a balcony?
First, address the source of moisture—repair leaks, improve drainage, and confirm any waterproofing layers aren’t failing. Then dry the area thoroughly using controlled airflow and, if needed, a moisture meter to confirm the subfloor and plank are within safe levels before reassembly. For severely swollen planks, replacement is usually more reliable than sanding, while minor surface damage can be sanded lightly and refinished with products compatible with engineered wood flooring finishes.
Which adhesive or finishing products should I use for engineered wood floor repairs outdoors?
For engineered wood repairs on a balcony, choose adhesives labeled for engineered wood and suitable for areas exposed to humidity and temperature changes, rather than standard interior-only products. If you’re replacing boards, use the manufacturer’s recommended system when possible for a proper tongue-and-groove fit and long-lasting bonding. For refinishing scratches or wear, use a finish that matches the factory coating type (or a compatible topcoat) and avoid heavy film-forming sealants that could trap moisture at seams.
📅 Last Updated: October 20, 2026 | Topic: How to repair engineered wood floors in a balcony? | Content verified for accuracy and freshness.
References
- Engineered wood
- Wood flooring
- https://www.epa.gov/mold
- https://www.cdc.gov/mold/default.htm
- https://www.fpl.fs.usda.gov/documnts/fplgtr/fplgtr113.pdf
- water damaged flooring repair | NWFA
- repairing hardwood floors | NWFA
- https://scholar.google.com/scholar?q=repairing+engineered+wood+flooring+water+damage Google Scholar
- https://scholar.google.com/scholar?q=engineered+wood+floor+repair+replace+damaged+planks+moisture Google Scholar
- https://scholar.google.com/scholar?q=engineered+wood+flooring+outdoor+balcony+moisture+repair Google Scholar
[…] your balcony gets wet from rain, wind-driven moisture, or condensation, you’ll need to treat moisture control as part of the flooring replacement—not an afterthought. This guide is for homeowners or DIYers […]