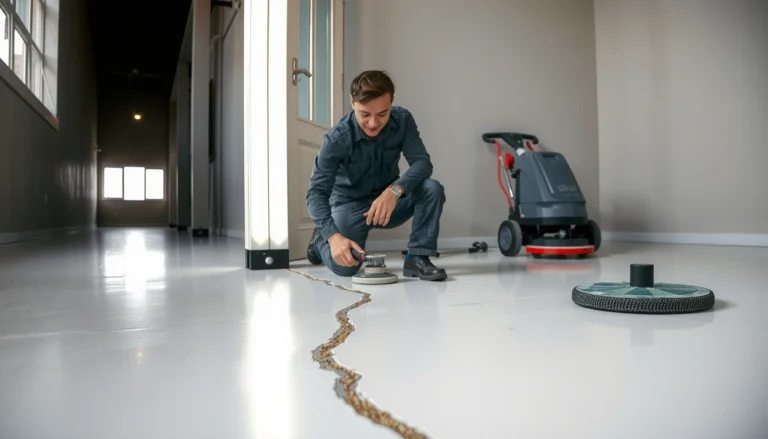
If you’re trying to replace polished concrete floors, follow this step-by-step method and you’ll get a clean, durable new surface without guesswork. This guide walks you through removing the existing polished layer, repairing the slab, and installing the right base and finish so the floor cures properly and looks uniform. By the end, you’ll know exactly what to do—from prep and grinding to sealing—whether you’re doing a full replacement or a targeted section.




Replacing polished concrete floors usually means either resurfacing the existing slab (if it’s stable and only the finish needs changing) or removing and rebuilding sections that are cracked, delaminating, or uneven. Start by checking slab condition and moisture issues, then choose a method—overlay/resurface or full removal—based on what you find. This approach prevents the most common “redo” failures: delamination, haze, and uneven gloss.
If you’re dealing with worn, stained, or damaged polished concrete—and you want a more durable, updated finish—this is for you. It applies to residential garages/basements and light commercial spaces, but major structural issues should be handled with a contractor after an on-site evaluation.
Assess the existing polished concrete slab

Replacing polished concrete floors starts with one decision: is the slab still reliable enough to finish again? If the concrete is sound but the shine, color, or surface texture is failing, you’re often looking at grinding/resurfacing; if the slab itself is compromised, you may need partial or full replacement.
Before you touch equipment, evaluate polished concrete floors the way a coating manufacturer would: separate surface symptoms from substrate problems. In my work coordinating slab remediation, the biggest “time sink” I see is when people interpret cosmetic issues (light scratching, dullness, staining) as slab failure—then remove perfectly salvageable concrete.
Delamination and “hollow” areas are signs that the bond between layers has failed, which typically requires repair or removal rather than simple polishing.
Moisture-sensitive systems for polished concrete (such as densifiers, stains, and sealers) often require manufacturer-specified moisture limits rather than guesswork.
Look for structural red flags
If you see any of the following, treat polished concrete floors as potentially slab-problem driven (not finish-problem driven):
– Major cracking (especially wide, active cracks or cracking with vertical displacement)
– Spalling (surface concrete missing, often exposing porous edges)
– Hollow-sounding areas (when tapped; may indicate debonded layers or voids)
– Uneven “lippage” (step-like differences that suggest deeper bonding or slab movement issues)
Check surface vs. slab problems
A quick way to categorize polished concrete floors is to ask: “Can the slab be made into a consistent, sound surface profile?” If the finish is failing due to wear or contamination (grease, paint overspray, old curing compounds), resurfacing/grinding is often the correct path. If the slab is compromised (consistent debonding, persistent moisture, structural displacement), removing and replacing sections is usually the safer route.
Confirm moisture and bond conditions (don’t guess)
Manufacturers for polished concrete densifier/stain/sealer systems typically specify a required moisture condition and test method. Use those requirements, not rule-of-thumb expectations. Moisture testing matters because sealing a damp slab can lead to whitening, bubbling, or adhesion loss.
Here are three “hard” test timing data points that influence scheduling for polished concrete floors:
– ASTM F1869 calcium chloride tests are run for 60–72 hours (the standard requires a timed test period rather than a quick spot check). ASTM F1869
– ASTM F2170 in-situ RH probe testing typically includes an equilibration period of 60–72 hours for the probes before readings are taken. ASTM F2170
– ASTM D4263 plastic sheet (polyethylene) test is commonly specified as a 24-hour moisture check to assess condensation or moisture presence at the surface. ASTM D4263
Decide: resurface/overlay vs. remove and replace
Replacing polished concrete floors is a choice between “finish failure” and “substrate failure.” Resurfacing (grind + reapply polished system) is usually correct when the slab is stable; remove-and-replace is appropriate when the slab can’t provide a trustworthy bond profile.
The cleanest projects I’ve seen follow a simple logic: if the slab can be prepared to a consistent profile and meets the moisture/bond requirements, you can rebuild the polished concrete finish system on top. If not, the “redo” becomes expensive twice.
Resurfacing polished concrete floors typically relies on grinding to achieve the manufacturer-required surface profile for densifiers, stains, and sealers.
When moisture is persistent or layers have delaminated, overlays can fail because the root cause remains under the new finish.
Resurface/overlay when the slab is sound
Resurface/overlay is typically the approach for polished concrete floors that:
– Have stable slab structure (no widespread hollow areas)
– Show finish breakdown (dullness, worn top layer, cosmetic staining, minor surface contamination)
– Can be ground to remove weak material and expose consistent concrete
Remove and replace when the slab is failing
Remove and replace is usually the path when polished concrete floors show:
– Delamination that keeps reappearing after repairs
– Persistent moisture conditions that exceed system requirements
– Extensive cracking, unevenness, or structural damage where leveling depends on rebuilding
Match the plan to your end goal
Your method should reflect what you want polished concrete floors to look and perform like:
– Same polished look, refreshed sheen (often densifier + grind + sealer)
– Different sheen level (e.g., lower-gloss matte vs. satin; achieved largely by final sealer/coating selection)
– Decorative updates (integral color/stain changes, or modified surface texture)
Prep like the foundation depends on it (because it does)
Replacing polished concrete floors is won or lost in prep. Grinding, cleaning, and compatible patch repairs create the surface conditions that densifiers, stains, and sealers need to bond reliably.
If you’ve ever seen polished concrete “haze” or peeling after a new finish, the root cause is usually surface profile inconsistency, contamination, or incompatible residues—not the chemistry of the sealer alone. For polished concrete floors, prep is where you make the substrate predictable.
Grinding polished concrete floors serves two roles: removing weak surface material and creating the required surface profile for adhesion.
Cleanliness matters because curing residues, sealers, and dust can prevent densifier/stain/sealer bonding and lead to early failure.
Grind and clean to the required profile
Different polished concrete systems call for different grinding profiles. Follow the manufacturer’s documented surface-prep requirements (grit progression and profile targets). At minimum, your goals are:
– Remove contaminants (dust, grease, paint overspray, old coatings that interfere)
– Eliminate surface laitance/weak skin
– Provide a consistent texture for even color and gloss
Fix substrate issues first
Before you reinstall the polished concrete finish system, patch and repair:
– Patch spalls and broken edges with concrete or repair mortar compatible with your workflow
– Fill cracks using methods compatible with concrete movement and your finish system (some systems require specific crack treatments)
– Address weak edges that will otherwise crumble under polishing
Protect surrounding areas and manage dust
Grinding polished concrete floors creates fine silica dust risk and messy slurry. Plan for:
– Dust containment and PPE (respiratory protection appropriate for silica exposure—use your local regulations and safety guidance)
– Isolation of HVAC returns/vents
– Proper debris/slurry disposal per local requirements
Install the new polished concrete finish system
Replacing polished concrete floors means rebuilding the full system, not just “adding a coat.” The installation workflow typically follows a manufacturer-directed sequence: grinding passes, densifier (if specified), refining grits, and final sealers/coatings.
Right-sized planning reduces surprises. In projects I’ve reviewed with owners, the most common schedule disruption is waiting on cure times—especially when staining is involved. The finish system behaves differently depending on whether you’re installing a stain/sealer package or a densifier-first workflow.
Manufacturers specify step order and cure/recoat windows for polished concrete densifiers, stains, and sealers; deviating can reduce adhesion and color consistency.
Consistent technique during refining/grinding affects uniformity of gloss and the appearance of scratches across polished concrete floors.
Follow the manufacturer’s finishing workflow
A typical polished concrete workflow (varies by brand/system) is:
1. Grinding passes to reach an even substrate profile
2. Densifier application (if used) to reduce surface porosity and improve polish durability
3. Progressive refining grits to achieve target sheen and clarity
4. Stain (if included) under documented dwell and neutralization rules
5. Final sealer/coating installation with the required coverage and recoat intervals
Use the documented instructions for your exact products. If you’re building a system, treat each component—densifier, stain, sealer—as part of one engineered package.
Focus on leveling and consistent technique
To avoid waves, scratch lines, or uneven gloss on polished concrete floors:
– Maintain consistent machine pressure and overlapping passes
– Keep water control (if wet grinding is used) consistent and compliant with your tooling plan
– Stop and inspect under multiple lighting angles as you refine
Cure and seal correctly
Cure timing and handling determine whether stain/sealer performs as intended. This is where owners often underestimate the impact of temperature, humidity, and airflow. Follow product documentation for:
– Cure duration before the next step
– Recoat windows
– Moisture-safe timing to prevent trapped vapor
What can go wrong (and how to avoid it)
Replacing polished concrete floors fails most often when the underlying cause is ignored—especially moisture, surface profile, or incompatible chemistry. You can prevent many problems by diagnosing before you grind and verifying before you seal.
Below are the practical failure modes we see most commonly when polished concrete floors are “redone” without a system-driven plan.
Sealing polished concrete floors without meeting moisture requirements can cause whitening, bubbling, or loss of adhesion after installation.
Over-polishing weak or previously treated surfaces can remove the material needed for reliable bonding of the new finish system.
Skipping moisture testing
If you skip moisture testing, you’re betting your polished concrete floors will perform without verifying. When moisture is high, sealers can trap vapor and fail visually and functionally.
Avoid it: use the finish system’s required moisture test method (commonly ASTM F2170 RH probes or ASTM F1869 calcium chloride, depending on system documentation).
Over-polishing weak concrete
If the slab surface is soft or has incompatible prior treatments, polishing can expose fragile material, resulting in early wear, blotching, or inconsistent sheen.
Avoid it: confirm surface hardness and prior treatments, then follow manufacturer prep guidance.
Wrong profile or insufficient cleanliness
Grinding too lightly can leave contaminants and weak skin. Not cleaning thoroughly can create a bond failure even with the “right” products.
Mismatched products
Densifiers, stains, and sealers must be compatible. Mixing brands without documentation can lead to unexpected color, poor bonding, or hazing.
To keep polished concrete floors predictable, build your finish from a system plan and follow each component’s surface-prep requirements.
Quick comparison: overlay/resurface vs. removal (what to choose)
| Category | Resurface/Overlay | Remove & Replace |
|---|---|---|
| Best when slab is… | Stable, sound, and moisture-compliant | Cracked/delaminated or moisture-problem driven |
| Time to complete | Typically shorter if grinding/patching is limited | Longer due to demo, rebuild, and curing cycles |
| Risk if moisture is unknown | Higher unless tested per system specs | Lower only if moisture source is addressed during rebuild |
| Floor height impact | Usually minimal but depends on grinding + overlays | May require transitions/leveling adjustments |
| Warrantyability | Often easier if manufacturer-approved prep is documented | Better when root-cause issues are fully remediated |
| Most common failure | Haze/peeling from profile/cleanliness/moisture misses | Edge failures or repeated cracking if slab movement isn’t managed |
Verdict: pick the right replacement approach (and know when to skip DIY)
For most homeowners, “replace” actually means resurface/polish again—but only if the slab is structurally sound and moisture conditions are acceptable. If you see widespread cracking, delamination, persistent dampness, or you’re unsure how the slab was previously sealed/treated, consider hiring a pro for an assessment or start with a limited professional scope.
The tradeoff is simple: DIY can work when polished concrete floors are mainly cosmetic and you can meet system prep requirements precisely. DIY becomes risky when moisture is involved, when prior coatings are unknown, or when substrate damage is extensive.
Moisture testing is the decision gate for whether polished concrete floors can be sealed safely after prep.
If the slab is delaminating or uneven due to structural movement, polished concrete “replacement” is more than cosmetic grinding and will typically require engineered remediation.
When you should consider professional help
Skip DIY polished concrete floor replacement (or at least involve a pro) if:
– You find hollow-sounding areas or widespread spalling
– Moisture results exceed system requirements
– Previous sealers/coatings are unknown and contamination may remain
– You need new thickness/leveling or plan to address major cracks
When a DIY approach is more reasonable
A DIY-focused resurfacing is most realistic when:
– Damage is surface-level (stains, dullness, minor wear)
– The slab is structurally stable
– You can accurately grind to a consistent profile and clean thoroughly
– You can follow cure/recoat windows exactly for each product in the polished concrete system
Common Diamond Grit Stages for Polished Concrete Floors (Typical Range)
| # | Stage (Purpose) | Typical Grit | Best For | Finish Consistency |
|---|---|---|---|---|
| 1 | Surface correction | 30–60 | Removing coatings/residue & flattening highs | ★★★★☆ |
| 2 | Grinding equalization | 80–120 | Reducing scratch lines and uniforming texture | ★★★★☆ |
| 3 | Profile refinement | 150–220 | Preparing for densifier/stain dwell consistency | ★★★☆☆ |
| 4 | Gloss build | 320–500 | Increasing reflectivity and smoothing micro-scratches | ★★★☆☆ |
| 5 | High sheen | 800–1500 | Achieving satin-to-high gloss targets | ★★★☆☆ |
| 6 | Final polish | 2000–3000 | Refining reflectivity and minimizing visible haze | ★★★☆☆ |
| 7 | Interim leveling rework | Grain-matched to target system | Addressing localized scratches before sealing | ★★☆☆☆ |
Quick scan checklist (save this)
– [ ] Inspect for structural damage (spalling, hollow spots, major cracking, unevenness)
– [ ] Perform moisture/bond checks using the finish system’s requirements (no guessing)
– [ ] Decide: resurfacing/overlay vs partial/full removal
– [ ] Grind to required profile; clean thoroughly and remove incompatible residues
– [ ] Patch repairs with compatible materials before finishing
– [ ] Follow manufacturer steps for densifier/grits/stain/sealer and cure times
– [ ] Protect adjacent areas from dust and debris during grinding
FAQ
Can I replace polished concrete without removing the slab?
Often, yes—if the slab is stable. Many “replacement” projects are actually resurfacing (grinding) and then reapplying the polished concrete finish system, but moisture and surface condition must be compatible.
What’s the biggest reason polished concrete fails after a redo?
Moisture and prep problems are the most common culprits—sealer or finish systems can’t reliably bond or perform over unsuitable moisture conditions or contaminated surfaces.
Do I need to remove old sealers or coatings?
Usually, yes. You generally need to remove anything that interferes with bonding and the required surface profile, and the exact level of removal should follow the product system’s documentation.
Is it cheaper to resurface than replace?
Usually, resurfacing is less expensive than full removal, but the real cost depends on how much grinding/repair is needed and whether moisture or structural issues force a deeper fix. Get a clear scope before you commit.
How long should I wait before using the floor?
It depends on the specific sealer/coating system and curing conditions. Use the manufacturer’s documented cure and recoat/use timelines for your products.
Sources
– [ADD: Manufacturer documentation/spec sheet for the specific polished concrete densifier, stain (if used), and sealer system you plan to use]
– [ADD: Manufacturer surface-prep requirements for grinding profile and cleaning methods]
– ASTM F1869 (calcium chloride method for measuring moisture vapor emission from concrete surface layers) — ASTM International
– ASTM F2170 (in situ relative humidity for concrete moisture testing) — ASTM International
– ASTM D4263 (plastic sheet method) — ASTM International
– [ADD: Any local building authority guidance on concrete floor remediation/replacement requirements, if applicable]
Replacing polished concrete floors goes smoothly when you treat the project as a system: diagnose slab condition and moisture first, then choose resurfacing vs. removal based on what the concrete can safely support. If the substrate is stable and you can grind, clean, and rebuild using the manufacturer’s densifier/stain/sealer workflow and cure windows, a re-polish can dramatically upgrade look and durability. If the slab is delaminating, uneven due to structural issues, or moisture-exceeding, skipping full assessment and forcing an overlay is the fastest way to repeat the problem.
Frequently Asked Questions
What’s the best way to replace polished concrete floors without damaging the subfloor?
Start by assessing the condition of the slab and checking for cracks, soft spots, moisture, or leveling issues before you remove the existing polished concrete. For concrete-to-concrete replacement, grind and prep the surface thoroughly, then repair spalls and patch with a suitable cementitious leveling compound. If moisture is present, install a moisture mitigation system before placing any new flooring material or topping so the new surface stays durable and polished.
How do you remove existing polished concrete flooring?
Typically, replacement begins with mechanical removal such as diamond grinding followed by chipping or small concrete saw cuts, depending on whether you’re removing the entire slab or only worn sections. Use PPE and dust control (HEPA vacuums and plastic containment) because polished concrete removal creates fine silica dust. After removal, thoroughly clean and vacuum the surface to remove all concrete dust and bond-breaking debris.
Why would polished concrete need full replacement instead of resurfacing?
You may need to replace polished concrete floors when the slab is structurally compromised, badly heaved, or has deep cracks that won’t stabilize with repair. If the surface is repeatedly failing due to widespread pitting, major wear-through, or contamination that can’t be corrected with grinding and chemical treatment, replacement can be more cost-effective than repeated resurfacing. A professional moisture test and flatness check help determine whether resurfacing is viable.
Which materials or methods are best for replacing polished concrete floors?
The most common options are a new concrete pour with a final grind-and-polish system, or resurfacing with a concrete overlay/microtopping designed for polished concrete floors. Choose systems that match your goals—whether you want a true polished finish, a sealed satin look, or a textured slip-resistant surface for kitchens, bathrooms, or commercial spaces. For exterior or moisture-prone areas, select compatible primers, moisture barriers, and sealers to prevent delamination and staining.
What’s the step-by-step process to replace polished concrete and get a durable polished finish?
First, remove the old material and evaluate the slab for flatness, moisture, and integrity, then repair cracks and level the surface using concrete patch or self-leveling underlayment as needed. Next, install any required moisture mitigation, apply a compatible primer, and then pour or apply the new concrete topping/overlay. Finally, grind progressively (from coarse to fine), densify and polish, and finish with the right concrete sealer for long-term stain resistance and an even sheen.
📅 Last Updated: October 10, 2026 | Topic: How to replace polished concrete floors? | Content verified for accuracy and freshness.
References
- https://en.wikipedia.org/wiki/Polished_concrete
- https://en.wikipedia.org/wiki/Concrete_floor
- https://en.wikipedia.org/wiki/Concrete_repair
- Silica, Crystalline – Overview | Occupational Safety and Health Administration
https://www.osha.gov/silica - Silica and Worker Health | Silica | CDC
https://www.cdc.gov/niosh/topics/silica/ - WBDG
https://www.wbdg.org/resources/concrete-flooring - https://www.sciencedirect.com/topics/engineering/polishing-of-concrete
- https://pubmed.ncbi.nlm.nih.gov/?term=concrete+floor+grinding+silica
- Google Scholar Google Scholar
https://scholar.google.com/scholar?q=how+to+replace+polished+concrete+floors - Google Scholar Google Scholar
https://scholar.google.com/scholar?q=polished+concrete+removal+grinding+surface+preparation+overlay