
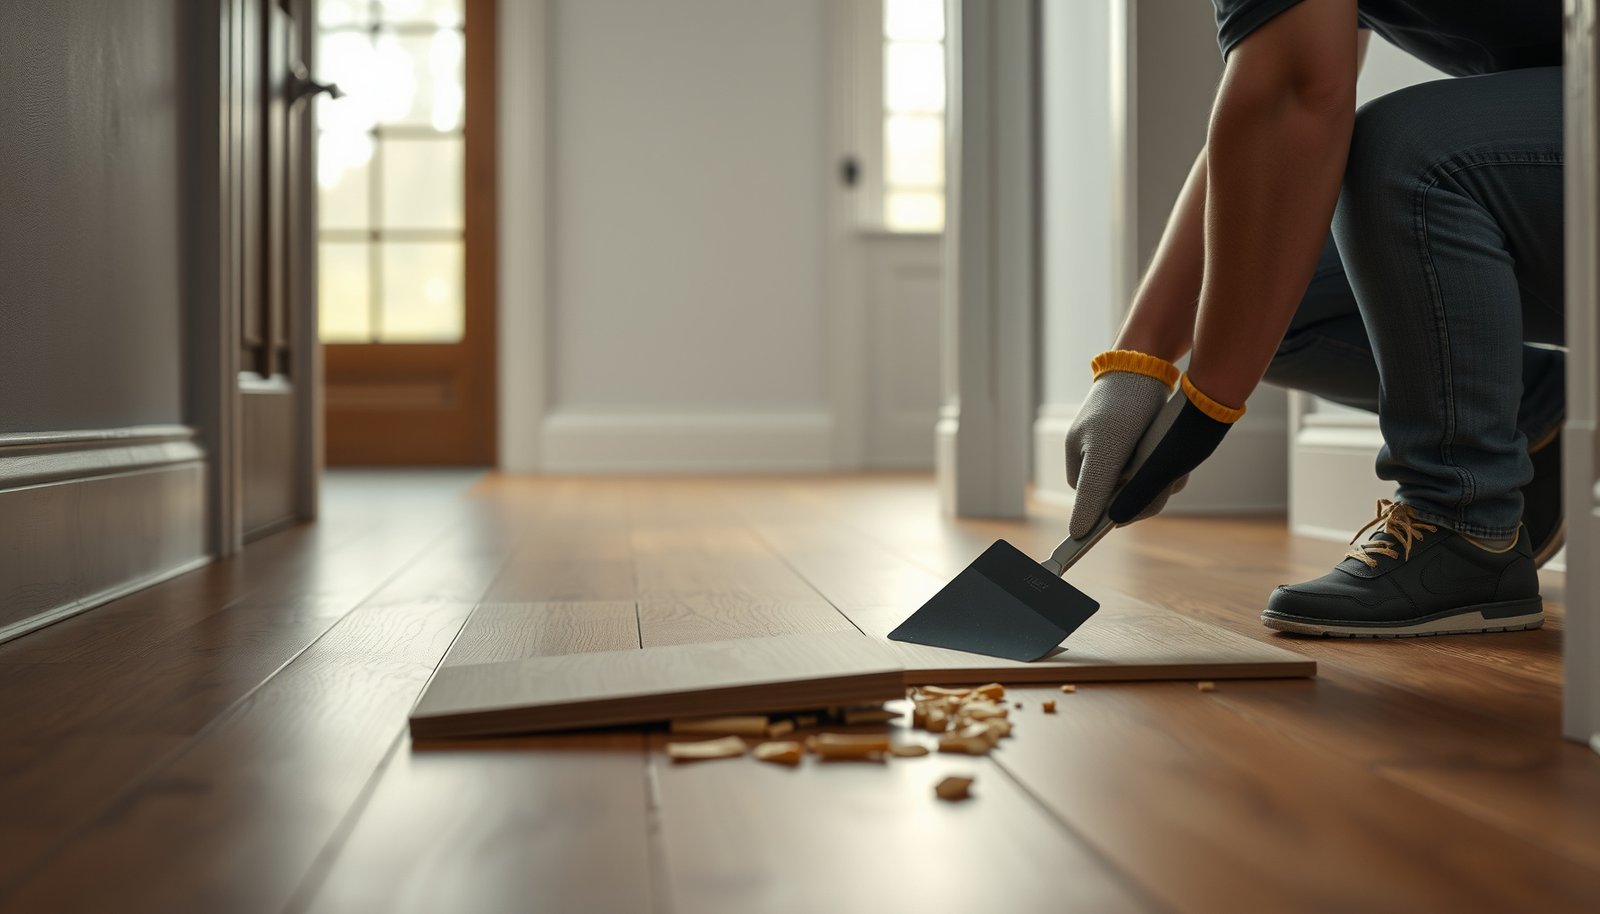

Want to remove engineered wood floors from an entryway safely? The right method depends on how the planks are installed, and the safest path is to identify whether they’re nailed, glued-down, or floating before you start prying or pulling. Follow the steps below to protect the subfloor and doorway thresholds while minimizing splintering and dust. If you choose the correct removal approach first, you can finish the job cleanly without costly repairs.




Start by confirming whether your engineered wood flooring is floating/click-lock versus nailed/stapled or glued down—this determines whether planks lift cleanly or must be cut and scraped. Then remove the trim/shoe molding first and work from the nearest accessible edge with controlled leverage to protect the subfloor and transitions.
This guide is for homeowners tackling a smaller entryway section and aiming to reuse the subfloor (or at least minimize damage). It explains the order of operations, what changes by installation type, and which missteps commonly turn a straightforward engineered wood removal into an all-day subfloor cleanup job. As of 2025 and into 2026, the practical safety focus remains the same: contain dust, avoid uncontrolled demolition, and verify any hazardous materials before disturbing old adhesives.
Prep and protect your entryway
Answer-first: Before you pry up any engineered wood flooring, you need to control dust and protect the door openings, drywall edges, and thresholds. This prep step is what keeps engineered wood removal from turning into a mess (and it can reduce exposure to respirable dust in the air).
A HEPA-filtered shop vacuum is designed to capture 99.97% of particles at 0.3 microns, which helps control fine dust during engineered wood flooring removal.
Using plastic sheeting and painter’s tape to isolate door jambs and drywall edges reduces dust spread while you remove engineered wood planks.
If you suspect asbestos-containing materials in older adhesive systems, you should not disturb them until you follow EPA/OSHA guidance for the relevant hazard.
– Clear the entryway, then cover nearby surfaces (doors, drywall edges, and thresholds) with tape and plastic to limit dust.
– Remove shoe molding/trim first so you can access the floor edge without splitting boards or breaking the trim.
– Gather basics for control: pry bar(s), pull bar or tapping block, utility knife, scraper, and a shop vacuum with a dust bag/filter ().
Dust-control reality check (why it matters): Engineered wood removal creates fine particulate dust from cutting, prying, and scraping. According to U.S. OSHA, 29 CFR 1910.134, respirable hazards are handled through a hazard assessment and appropriate engineering controls—so your vacuum and containment setup isn’t “extra,” it’s part of doing the job safely. Also, engineered wood flooring often has a thin veneer layer and backing/film layers; those materials can shed dust when disturbed.
NIOSH Particulate Filter Classes Used for Floor-Dust Control (Min Efficiency)
| # | Respirator Filter Class | Min Capture Efficiency | Oil Resistance | Best Use for Engineered Wood Dust | Protection Match |
|---|---|---|---|---|---|
| 1 | N95 | ≥95% | No | Routine non-oily dust | ★★★☆☆ |
| 2 | N97 | ≥97% | No | Heavier nuisance dust | ★★★★☆ |
| 3 | N99 | ≥99% | No | Fine dust containment work | ★★★★☆ |
| 4 | P95 | ≥95% | Yes | Dust with incidental oils | ★★★☆☆ |
| 5 | P99 | ≥99% | Yes | Higher-filtration nuisance dust | ★★★★☆ |
| 6 | P100 | ≥99.97% | Yes | Most protective for fine dust | ★★★★★ |
| 7 | R95 | ≥95% | Limited | Non-oily dust with some oils | ★★★☆☆ |
Identify how the engineered wood is installed
Answer-first: Engineered wood flooring typically falls into three removal paths: floating/click-lock, nailed/stapled, or glued down. Identify the install type first so you don’t crack the tongue-and-groove (click-lock) or gouge the subfloor (nailed/glued).
Floating/click-lock engineered wood floors usually require an expansion gap at the perimeter, so the boards may release more easily starting from the wall edge.
Nailed or stapled engineered wood floors show fastener points, and removal is safer when you locate and pull fasteners rather than prying aggressively.
Glued-down engineered wood flooring often resists lifting because the adhesive bonds the plank to the subfloor, so plan on scraping and cleanup after partial sectioning.
– Check the planks near the perimeter:
– Floating/click-lock often has no visible fasteners and may show a small expansion gap at the wall.
– Nailed/stapled often shows small nail holes/fastener points (especially after lifting an edge).
– Glued down usually means planks don’t separate cleanly and will tear or resist lifting.
– Look for clues under the lip (transitions/threshold area) or at any popped/loose section—this helps you choose the right removal approach.
What I recommend you verify in 2 minutes (before you start prying): Engineered wood flooring is often installed over a slab, OSB, or plywood subfloor, and the “look” of the edges can change based on transitions. As of 2025, common entryway builds include a threshold at the doorway, a direction change near the hall, and sometimes a small section of different substrate (like concrete or a patch). If you’re unsure, remove only enough trim to access a plank seam and inspect.
Subfloor material matters for how you scrape engineered wood flooring residue: Adhesive cleanup is very different on plywood/OSB versus concrete. For your project, confirm whether your subfloor is ().
Remove engineered wood planks step-by-step
Answer-first: Start at the nearest edge with the best access and work methodically row-by-row. Engineered wood flooring comes apart cleanly when you separate at seams and remove fasteners (if present), while glued installations require smaller sectioning to avoid tearing up the subfloor.
Click-lock removal is usually easiest when you pry at the plank seam, then lift while supporting the board so the tongue/groove doesn’t snap.
For nailed or stapled engineered wood flooring, controlled fastener removal prevents “board lift resistance” that otherwise transfers force into the subfloor.
For glued-down engineered wood flooring, plan on cutting the bond into smaller areas so you can scrape adhesive without deep gouging.
– Start at the easiest edge (usually the area with the best access) and work row-by-row toward the center; keep pressure controlled to avoid splintering tongues/grooves.
– For floating/click-lock floors: separate planks by prying gently at the seam, then lift the row while supporting the board so it doesn’t crack.
– For nailed/stapled floors: pull or remove fasteners as you go (don’t just yank—this can gouge the subfloor).
– For glued down floors: plan on smaller sections; use a scraper for remaining adhesive and avoid deep gouging into the subfloor ().
Order of operations that reduces damage: With engineered wood flooring, the perimeter is your “lever.” By removing engineered wood planks from the nearest edge, you reduce stress on the locking joints and avoid the common mistake of pulling upward on a trapped tongue-and-groove. For most entryways, the best start point is adjacent to the trim line you already removed—because that area typically has the cleanest gap or the least obstruction from transitions.
Quick comparison: which technique fits which engineered wood flooring install?
- Floating/click-lock engineered wood flooring
- Best move: pry at seams and lift supported rows. Main risk: snapping the tongue/groove if you pry too far from the joint.
- Nailed/stapled engineered wood flooring
- Best move: locate, pull, and clear fasteners before fully lifting each plank. Main risk: gouging the subfloor when boards meet resistance.
- Glued-down engineered wood flooring
- Best move: section the area and scrape residue shallowly. Main risk: adhesive and backing tear-out that makes future leveling difficult.
Handle underlayment, glue, and the subfloor finish
Answer-first: Treat underlayment, adhesive residue, and subfloor prep as a separate phase—because engineered wood flooring removal isn’t “done” until the subfloor is clean and workable for what comes next. If you skip this, your new floor can develop unevenness, squeaks, or poor adhesion.
Underlayment that comes up with engineered wood flooring should be removed carefully to avoid leaving bonded film or bumps that telegraph into the next installation.
Adhesive-removal methods depend on adhesive chemistry, so using the wrong technique can damage engineered wood flooring backing or the subfloor surface.
If you expose asbestos-containing dust sources while disturbing old flooring materials, you must follow EPA/OSHA containment and respirable hazard requirements instead of “DIY scraping.”
– If there’s underlayment or a vapor barrier, remove it carefully; don’t grind it into the subfloor if you’ll be installing new flooring.
– For adhesive residue, use manufacturer-approved methods (some products require adhesive remover; others respond better to heat + scraping).
– Do not assume one method fits all—adhesive type varies by brand and installation.
– Inspect the subfloor after removal: fill low spots, address damaged areas, and make sure the surface is clean and flat before the next floor goes in.
Adhesive and dust safety (important in older entries): If your entryway is in an older home, engineered wood flooring removal can disturb legacy adhesives or coatings. The hazard point is that the OSHA asbestos standard regulates airborne exposure; for asbestos, OSHA lists 0.1 f/cc as the 8-hour TWA permissible exposure limit (PEL) under 29 CFR standards for asbestos work (see OSHA asbestos regulation 29 CFR 1910.1001 or construction variant as applicable). As of 2025, the key safety principle is containment and appropriate respiratory protection if hazardous materials are suspected.
Subfloor cleanup targets (so engineered wood flooring performs later): Even a “small” entryway can include patched areas or old nail holes. After engineered wood flooring removal, confirm:
– Surface is free of ridges, loose debris, and high adhesive chunks.
– Voids/low areas are filled per the requirements of your next flooring system (follow those specs rather than guessing).
– Any vapor barrier or underlayment is replaced only if your next install calls for it.
What can go wrong (and what to do instead)
Answer-first: The main failure modes are splintering engineered wood tongues/grooves, gouging the subfloor, and leaving uneven adhesive residue. If you feel sudden resistance, stop and change technique—most damage happens when force is applied to the wrong layer.
A snapped click-lock seam is usually caused by prying at the wrong point or lifting without separating the joint first.
Subfloor gouging is commonly triggered when nailed or glued engineered wood flooring is pulled up without removing fasteners or cutting the adhesive bond.
When older flooring adhesives are unknown, you should treat the risk as uncertain and follow hazard guidance rather than using aggressive scraping methods.
– Splintered boards: usually caused by prying in the wrong place or lifting without breaking the click-lock seam. Use a tapping block/support and lift gradually from the seams.
– Subfloor damage: common when people skip fastener removal and yank glued/nailed planks; stop and adjust technique when you feel strong resistance.
– Adhesive/contaminants: older homes may have special hazards depending on materials used.
– If you suspect hazardous materials in old adhesives or coatings, pause and follow local safety guidance ().
– Waste and transitions: entryways often include thresholds and transitions; removing these incorrectly can damage adjacent floors or door clearances.
About adhesive dust and respirators (quick, measurable facts): If you’re dealing with fine dust from engineered wood flooring removal, particulate filter performance matters. According to NIOSH and U.S. respirator filter efficiency requirements (42 CFR Part 84), an N95 filter is rated to capture at least 95% of test particles, while a P100 filter is rated to capture at least 99.97%. In practice, that difference can be meaningful when you’re stirring dust repeatedly during scraping and vacuuming.
Transitions and thresholds: Entryways frequently have a threshold strip, a reducer, or a door track assembly. If you remove engineered wood flooring too aggressively at these points, you can damage adjacent flooring edges (carpet tackless strips, laminate edges, or tile) and cause clearance problems for the door. Remove transitions and fasteners in a controlled order and label pieces so you can reinstall them correctly.
Verdict / tip: choose the right removal method first
Answer-first: If you can confirm your engineered wood flooring is floating/click-lock, you’ll typically remove it more cleanly and with the best chance of saving the boards. If it’s nailed/stapled or glued down, expect more scraping, more subfloor prep, and a higher risk of unevenness—so proceed slowly and follow the manufacturer guidance for your next flooring system.
Floating/click-lock engineered wood flooring generally offers the cleanest separation because the boards are not bonded to the subfloor.
Nailed/stapled or glued-down engineered wood flooring removal is more likely to require subfloor repairs due to fastener holes, scrape residue, or bond breakage.
When the installation method is unclear, removing only trim and inspecting a small edge section is safer than committing to a full-force pry.
From a practical standpoint, I suggest you commit to the “inspect first” approach before you start lifting engineered wood planks. That small discipline helps prevent the common “I thought it was floating” mistake that leads to gouged subfloors.
Scan-ready checklist (save this)
| Step | Do this | Why it matters |
|---|---|---|
| 1 | Identify install type (floating vs nailed vs glued) | Determines whether boards lift cleanly |
| 2 | Remove trim/shoe molding first | Prevents broken edges and wall damage |
| 3 | Start at the nearest accessible edge | Builds control and reduces cracking |
| 4 | Remove fasteners as you go (if nailed) | Avoids gouging the subfloor |
| 5 | Scrape adhesive residue carefully (if glued) | Helps new flooring sit flat |
| 6 | Inspect/clean subfloor | New install performance depends on prep |
Frequently Asked Questions
What tools do I need to remove engineered wood floors from an entryway?
For engineered wood floor removal, plan on using a pry bar, floor scraper, hammer, utility knife, oscillating multitool (helpful for tight edges), and a putty knife for cleanup. If the boards are nailed down, a nail puller and pry bar work best; if they’re glued, you may also need a heat gun or adhesive remover. Have a shop vacuum with a HEPA filter, drop cloths, and painter’s tape ready to control dust in the entryway.
How do I remove engineered wood floor planks without damaging the subfloor?
Start by removing baseboards and any trim so you can lift boards from the perimeter. Use a pry bar to separate planks at the seam or tongue-and-groove connection, working slowly to avoid gouging plywood or subfloor panels. If boards are glued, carefully cut along seams with a utility knife or oscillating tool, then scrape adhesive residue after each section to protect the subfloor.
How do I remove engineered wood flooring that’s glued down in a small entryway?
Begin by scoring the top surface and cutting the engineered wood into manageable strips so you can lift section-by-section instead of trying to pull up intact planks. Use a heat gun to soften adhesive (keep it moving to avoid scorching), then lift with a floor scraper or pry bar. After removal, remove remaining glue using a scraper first, then an adhesive remover approved for your subfloor type, and finish by sanding or smoothing the area for new flooring.
Why does engineered wood removal differ between click-lock and nail-down installations?
Click-lock engineered wood floors usually release at seams when you apply upward pressure in the right direction, which makes removal faster and often cleaner. Nail-down installations require prying without breaking the boards because nails must be pulled or cut through with an oscillating tool at each plank end. Glue-down engineered wood is the most labor-intensive, since adhesive can hold planks firmly and leave residue that must be removed before installing new flooring.
Which is the best way to remove engineered wood floors at the doorway transition and edges?
The cleanest approach is to remove casing or transition moldings first, then work from the outer edge toward the center so cuts stay straight in the entryway. Use a utility knife to cut caulk or paint lines at the baseboard and door jamb, and an oscillating tool to slice under tight trim where a pry bar can’t fit. After the planks are removed, scrape and flatten the remaining subfloor so transitions near the threshold are level for the next floor installation.
📅 Last Updated: October 19, 2026 | Topic: How to remove engineered wood floors from a entryway? | Content verified for accuracy and freshness.
References
- Engineered wood
- Wood flooring
- https://www.epa.gov/lead/renovation-repair-and-painting-program
- https://www.epa.gov/lead/renovate-right-lead-safe-renovation-repair-and-painting
- https://www.epa.gov/asbestos
- https://www.cdc.gov/niosh/topics/wooddust/
- Lead – Overview | Occupational Safety and Health Administration
- https://scholar.google.com/scholar?q=engineered+wood+floor+removal Google Scholar
- https://scholar.google.com/scholar?q=remove+engineered+hardwood+floor+adhesive+nails+steps Google Scholar
- https://scholar.google.com/scholar?q=wood+floor+demolition+lead+asbestos+safety Google Scholar
[…] You’ll also need appropriate leveling compound/patch, primer if recommended by the product, and plastic sheeting or moisture test materials if humidity is a concern. Use an underlayment that matches your […]