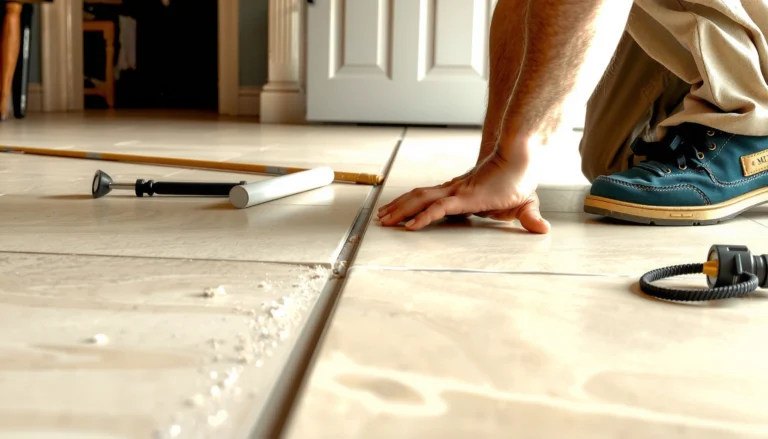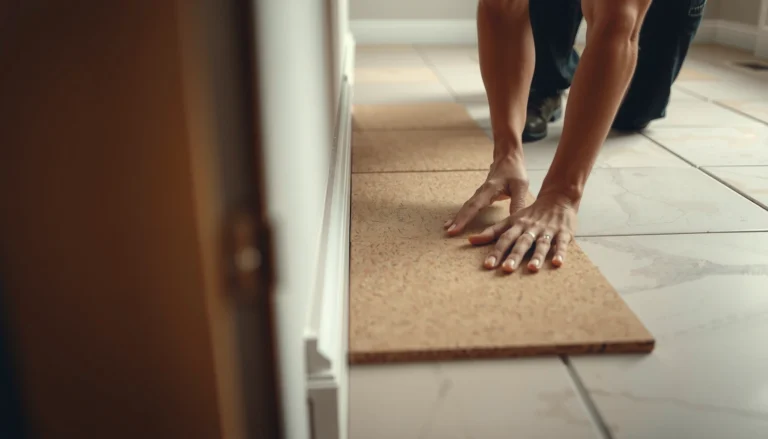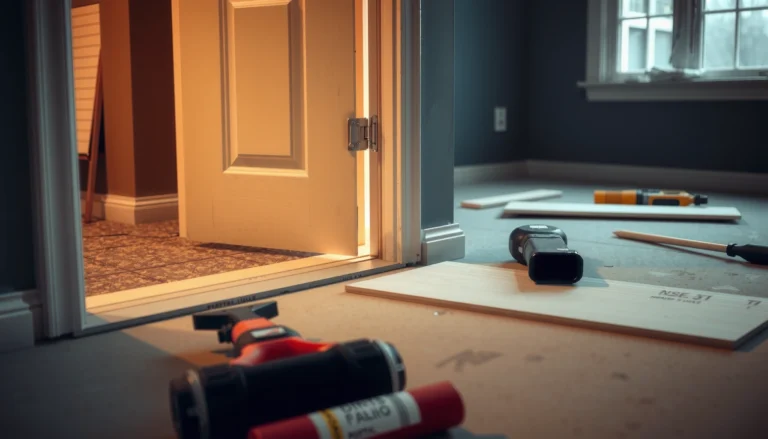

You can install WPC floors without professional help—if you follow the right order of prep, clicking/locking, and finishing steps. This guide walks you through the process from subfloor checks to locking planks down and installing trims, so you know exactly what to do at every stage. If you have a stable, level surface and basic tools, you’ll get a clean, tight fit without paying for installation.



Yes—you can install WPC (waterproof core) floors without professional help as long as you prep the subfloor carefully and follow the click-lock (or glue-down) instructions exactly. If you get the layout and expansion gap right and don’t skip moisture/flatness checks, most typical residential WPC plank installs go smoothly.
This guide is for homeowners, DIYers, and renters who want a straightforward install using common WPC plank systems (especially click-lock). It works best when your subfloor is solid, fairly flat, and you can give the flooring time to acclimate before installation.
WPC is designed to resist household moisture, but it does not correct a failing subfloor—most warranty issues trace back to flatness, moisture, or wrong underlayment.
For floating floors (including many click-lock WPC systems), expansion gap and fully seated joints are critical to avoid gapping or edge buckling after temperature swings.
For subfloor flatness, the common industry target for resilient flooring is around 1/8 in over 6 ft, and for wood flooring guidance it’s commonly about 3/16 in over 10 ft—always defer to your WPC manufacturer if stricter.
Check your WPC type and what it needs

Start by confirming whether your WPC planks are click-lock (floating) or glue-down—this single decision determines underlayment, tools, and the correct order of operations. Then match every step (including expansion gap and acclimation) to your specific manufacturer’s installation manual.
Here’s why this matters: click-lock WPC floors rely on mechanical seating of the tongue-and-groove profile, while glue-down WPC floors depend on correct adhesive choice and coverage. If you use the wrong method—even with the right planks—your flooring can feel “solid” at first and then fail at seams later due to incomplete locking or poor bond.
Snippets you can verify before you start
Before installing, identify whether your WPC planks are click-lock (floating) or glue-down because the underlayment and moisture barrier requirements commonly differ by system type.
Follow the installation manual for expansion gap size and acclimation time; those parameters are calculated around the product’s dimensional stability and locking/adhesive design.
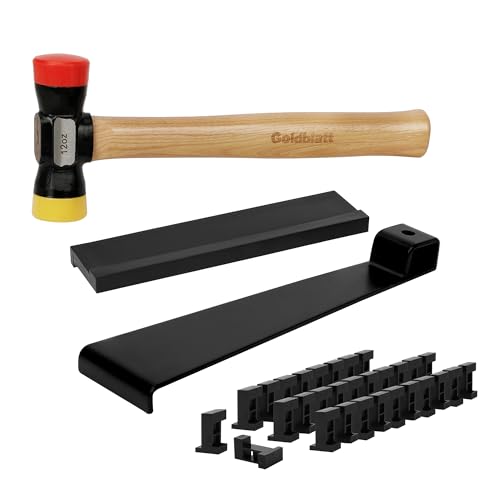
Use the exact tools recommended in your WPC instructions (for example, tapping block and pull bar for click-lock) to protect edges and fully seat joints.
What to gather (typical tool categories)
You’ll usually need some version of the following, but use your manual’s exact recommendations when provided:
– Measuring tape, square, utility knife (for initial scoring), and a straight edge
– Saw for planks (often a fine-tooth circular saw blade or jigsaw blade; again, match your manual)
– Spacers for expansion gap (or the manual’s specified equivalent)
– Tapping block (to protect locking edges) and pull bar (for tight rows near walls) for click-lock systems
– For glue-down: approved adhesive, proper trowel/notch size (this is often specified), and a clean roller or roller pad if your manufacturer calls for one
– Safety gear (eye protection, gloves, dust mask/respirator if cutting generates fine dust)
Key facts to anchor expectations
According to the Resilient Floor Covering Institute (RFCI), resilient floor installation standards commonly target a subfloor that does not exceed about 1/8 in variation over 6 ft (final limits vary by product).
According to the National Wood Flooring Association (NWFA), wood flooring guidance commonly references flatness targets around 3/16 in over 10 ft (again, defer to flooring manufacturer specifics).
According to ASTM E303 (standard for measuring surface flatness), measuring flatness correctly is part of installation quality—not a “nice to have.”
Prep the subfloor for a smooth, quiet floor
Your best outcome starts with subfloor prep: clean, dry, and flat. WPC may be water resistant, but it still needs a stable base; otherwise joints can stress, edges can lift, and the floor can feel hollow.
Moisture is the first “silent” problem. Even if the WPC core resists water, water can still travel through the subfloor/underlayment layer and damage structural materials, create odor, or cause adhesives (for glue-down) to fail. Flatness is the second silent problem: click-lock joints can open if planks flex over high spots or voids.
What “good prep” looks like in practice
– Remove all paint, drywall mud, adhesive residue, and dust—especially along the plank path.
– Check for high spots (grinding) and low spots (patching/leveling compound).
– Verify the surface is dry enough for your underlayment and system type.
– For any system, plan your underlayment/moisture barrier exactly as specified—some WPC products include an attached pad, while others require a specific underlayment layer.
WPC’s “waterproof core” does not automatically mean the entire installation is moisture-safe—subfloor moisture and vapor drive still need to be addressed per the manufacturer’s moisture guidance.
Flatness issues commonly show up as squeaks, joint gaps, and weak-feeling lock lines—especially when there are humps that force planks to flex.
A quick comparison table: subfloor readiness vs. risk
| Subfloor condition | What you’ll feel | Main failure mode | DIY viability |
|---|---|---|---|
| Clean + dry + flat within spec | Quiet, solid underfoot | Few issues if you follow steps | High |
| Dust/peaks/grit left behind | Joints don’t fully seat | Click-lock gaps or adhesive bond issues | Medium (fixable) |
| Moisture/vapor barrier not per spec | Odor, coolness, or adhesion failures | Substrate damage, bond failure | Low |
Measure, plan the layout, and manage expansion gaps
Start with a dry layout: measure the room, determine plank direction, and plan where your seams fall so you avoid awkward slivers and wonky board lines. Then enforce the required expansion gap everywhere the floor can contact something rigid (walls, posts, cabinets, and transitions).
A good layout isn’t just aesthetics—it directly influences how joints behave. If the first row is off, every subsequent row can drift, leaving uneven gaps and misaligned seams. For floating click-lock WPC, expansion gap also prevents buckling when indoor humidity and temperature shift.
Snippets for setup correctness
Do a dry layout first so you can balance plank cuts and avoid tiny edge pieces that are harder to install and often look worse.
Floating WPC floors need expansion space at walls and fixed objects; the correct gap size is specified in the installation instructions and should not be guessed.
Plan plank direction and transitions so the floor doesn’t “pinch” at doorways or height changes—pinched floors can buckle even with perfect joints.
The missing piece most DIYers underestimate: “where the floor can move”
Expansion gap isn’t only along walls. It can also be needed around:
– Door jambs (depending on trimming method)
– Columns or protrusions
– Built-in cabinetry where the flooring cannot expand under the fixed unit
– Floor transitions (tile-to-WPC, WPC-to-carpet, height differences)
Also, consider transitions in long runs. If your installation crosses multiple rooms or hallways, plan for movement paths and use the transition type your manual calls for.
Mandatory data table: common DIY setup targets that protect WPC installs
Subfloor Flatness Targets Commonly Referenced in Flooring Standards
| # | Standard / guidance | Flatness target | Typical context | Fit for DIY prep |
|---|---|---|---|---|
| 1 | RFCI resilient flooring guidance | ≤ 1/8 in over 6 ft | Resilient and similar floating surfaces | ★★★★★ |
| 2 | NWFA wood flooring guidance | ≤ 3/16 in over 10 ft | Wood installations over prepared subfloors | ★★★★☆ |
| 3 | ASTM E303 (flatness measurement method) | Measurement standard (method) | How to measure, not a single universal limit | ★★★★☆ |
| 4 | ASTM F710 (concrete floor prep practice) | Surface prep requirements | Leveling/repair before covering | ★★★☆☆ |
| 5 | Typical manufacturer WPC limits | Varies by brand (check manual) | Final authority for your product | ★★★★★ |
| 6 | Self-leveler manufacturer specs | Depends on compound | Depth and feather-finish ranges | ★★★★☆ |
| 7 | Laser level “trendline” checks | Detects humps/low bays | Practical DIY verification | ★★★☆☆ |
Note: This table summarizes commonly referenced prep targets and measurement methods. Your WPC manufacturer’s flatness tolerances override everything above, because those numbers are tied to that plank’s locking/structure.
Install WPC floors (click-lock vs glue-down)
Install by matching your planks’ system type. Click-lock WPC floors are about sequencing and joint seating; glue-down WPC floors are about adhesive selection, coverage, and dwell time until set.
If you’re unsure, look for terms like “floating” or “click-lock” in your manual. For glue-down systems, the packaging or manual will explicitly specify adhesive type and trowel notch size. Missing or incorrect adhesive details are one of the fastest routes to future seam problems.
Snippets for each method
For click-lock WPC, keep the first row straight, then interlock subsequent planks while using a tapping block/pull bar to seat joints fully without damaging edges.
For glue-down WPC, adhesive coverage and the correct trowel notch size are essential—insufficient coverage can leave joints unsupported and fail under expansion.
Keep joints free of dust and grit before locking or bonding; debris is a common reason click joints feel “almost seated” but later open.
Click-lock (floating) approach: step sequence that reduces drift
1. Start with the first row: snap a line, use spacers along walls, and keep planks aligned to that guide.
2. Click joints together gradually, then adjust—don’t force a “final position” misalignment after the lock is partially seated.
3. Use the tapping block and (when needed) pull bar to fully seat the joints. The goal is full engagement without chipping the locking edge.
4. Check alignment after every few rows (especially if the room isn’t perfectly square).
5. Around doorways and tight spaces, pre-fit pieces with the required expansion gap so the floor can move freely.
Glue-down approach: adhesive discipline wins
1. Confirm underlayment/moisture barrier is per the manual. Some glue-down systems require specific vapor layers even though they’re “glue-down.”
2. Mix and apply adhesive exactly as instructed (adhesive open time and spread rates matter).
3. Use the correct trowel/notch size to create the bond profile the manufacturer designed.
4. Lay planks carefully to avoid excessive squeeze-out. If adhesive transfers into the joint area, it can interfere with edge seating.
5. Maintain consistent spacing with spacers until the adhesive sets and the plank is stable.
Pros/cons comparison: which DIY path fits your situation?
| Method | Pros | Cons / watch-outs |
|---|---|---|
| Click-lock (floating) | Faster no-adhesive install; easier to replace planks | Requires very flat subfloor + perfect expansion gaps for joint stability |
| Glue-down | More rigid feel; can reduce movement in some setups | Adhesive selection/coverage is strict; mistakes can be difficult to correct |
Finish the edges, transitions, and clean-up correctly
Finish work is where DIY installs often look “professional” or “DIY.” Install baseboards/trim when the manual allows (often after flooring), use the right transition strips at doorways or other floor types, and keep the joint lines clean during the entire build.
For click-lock, cleaning matters because grit blocks full engagement. For glue-down, cleaning matters because adhesives and residue can interfere with how the surface tolerates movement during curing.
Snippets that prevent visible mistakes
Install baseboards/trim in a way that doesn’t restrain the floating WPC floor—using the correct finishing method protects expansion space and reduces edge buckling risk.
Use transition strips at height changes and between different flooring types to manage movement safely instead of relying on the planks to “absorb” stress.
Clean the joint edges before locking/bonding so dust doesn’t prevent full seating or reduce bond integrity.
Practical finishing steps
– Baseboards: if removal is possible, removing trim often gives a cleaner result and prevents accidental pinning of the floor.
– Transitions: at doorways, consider thresholds or transition profiles designed for floating floors.
– Cutouts: leave expansion space around vents, pipes, and structural penetrations as the manual requires.
– Final cleaning: vacuum thoroughly, especially in joint lines—many products specify “no debris” before installing the final row or applying adhesives.
What can go wrong (and how to avoid it)
Most problems aren’t “mystery defects”—they’re preventable install variables. The big categories are acclimation, subfloor flatness, expansion gaps, underlayment/moisture barrier mismatches, and early-row alignment errors.
Common failure modes and fixes
1. Skipping acclimation
Floors can expand/contract after installation. If you install immediately after moving planks into a very different temperature/humidity environment, seams can gap or joints can stress.
2. Not leveling the subfloor
Even waterproof core flooring can fail if humps or voids make planks flex repeatedly.
3. Incorrect expansion gaps
Too little gap can cause buckling; too much can look messy and allow excessive movement.
4. Wrong underlayment/moisture barrier
Click-lock and glue-down systems often require different layers. The “wrong pad” problem is real because pad thickness and vapor properties change the floor’s behavior.
5. Misaligned rows
A small error in the first 1–2 rows can compound, leaving uneven wall gaps and drifted seams.
If expansion gaps are ignored, floating WPC floors can buckle—this risk increases in long runs or rooms with strong temperature swings near exterior walls.
If underlayment/vapor barrier requirements are incorrect, the floor can perform “fine” initially but develop odor, edge lifting, or seam stress as moisture conditions change over time.
Verdict: DIY is doable—just don’t skip the prep
If your WPC system is click-lock and your subfloor is clean, dry, and reasonably flat, DIY installation is usually realistic—especially if you take your time with layout, expansion gaps, and joint seating. That said, skip DIY (or get help) if you have major subfloor issues, persistent moisture concerns, significant flatness problems, or if your glue-down method requires strict adhesive coverage you’re not confident following.
[ADD: author’s recommendation based on your situation—e.g., “If your room has lots of cutouts/closets, consider extra hands for faster alignment and to keep edges clean before locking.”]
DIY success for WPC is less about speed and more about process control: correct method (click-lock vs glue-down), correct subfloor prep, and strict compliance with the product’s expansion gap and moisture guidance.
Quick checklist (save this)
– [ ] Confirm click-lock vs glue-down requirements (per manufacturer)
– [ ] Check subfloor flatness and moisture condition ([ADD: tolerance/source]—use your WPC manual’s numbers)
– [ ] Choose correct underlayment/moisture barrier ([ADD: your product requirement] per manual)
– [ ] Acclimate planks for the time stated in your instructions
– [ ] Plan layout to avoid tiny edge pieces
– [ ] Use spacers for required expansion gaps ([ADD: exact gap from your instructions])
– [ ] Seat joints fully (tap/pull tools for click-lock; correct adhesive for glue-down)
– [ ] Finish edges and transitions; clean joints before they lock/bond
FAQ
Can I install WPC floors over an existing floor?
Often yes, but only if the existing surface meets the manufacturer’s approved substrate, flatness, and moisture rules. [ADD: your product’s approved substrates or maximum thickness/leveling requirements.]
Do I need underlayment with WPC?
It depends on the specific WPC product. Some include an attached pad; others require a specific underlayment and/or moisture barrier. Check your manufacturer’s installation guide and follow it exactly.
How much expansion gap should I leave?
Use the exact amount stated in your WPC installation guide (it varies by brand, locking system design, and installation conditions). [ADD: your manufacturer’s specified gap.]
What’s the most common DIY mistake?
Insufficient subfloor prep and incorrect expansion gaps—these are the two issues most likely to lead to gapping, movement, or buckling after installation.
Sources
– [ADD: manufacturer installation instructions for your specific WPC plank model—especially acclimation time, expansion gap, underlayment/moisture barrier requirements, and subfloor flatness tolerances]
– [ADD: manufacturer technical datasheet/spec sheet for the same WPC flooring system, covering approved subfloors and installation method (click-lock vs glue-down)]
– Resilient Floor Covering Institute (RFCI) installation guidance (flatness guidance commonly referenced as ~1/8 in over 6 ft for resilient-type installations)
– National Wood Flooring Association (NWFA) installation guidance (flatness guidance commonly referenced as ~3/16 in over 10 ft for wood flooring)
– ASTM E303 (standard method for measuring surface irregularities/flatness)
– ASTM F710 (standard practice for preparing concrete floors to receive resilient flooring)
WPC floors can be a successful DIY project when you treat installation as a “prep-first” job: confirm your click-lock vs glue-down method, follow acclimation and expansion-gap rules, and make sure the subfloor is clean and sufficiently flat. Use the checklist above, read your specific product instructions line by line, and if your room has moisture or leveling problems, consider getting help before you start. If you want, tell me your WPC brand/model and whether it’s click-lock or glue-down, and I’ll tailor the layout and step order to match.
Frequently Asked Questions
What tools do I need to install WPC flooring without professional help?
To install WPC floors DIY, you’ll typically need a tape measure, pencil, utility knife, straightedge, spacers, a rubber mallet, tapping block, and a pull bar for click-lock joints. If your subfloor is uneven, a floor leveling compound, and for cutting planks, a handsaw or jigsaw is helpful. Always keep safety gear like gloves and eye protection, and have a foam underlayment or attached pad (if your WPC product requires it) ready before you start.
How do I prepare the subfloor before installing WPC floors?
Proper subfloor preparation is the difference between smooth floating floors and future issues like gaps or squeaks. Make sure the surface is clean, dry, and level—scrape off debris, repair cracks, and remove high spots so the WPC flooring lays flat. For best results, use a moisture barrier or underlayment if your WPC flooring installation guide calls for it, especially for basements or ground-level rooms.
How do you install click-lock WPC flooring step-by-step for DIY success?
Start by laying out the planks and plan your first row so you get a balanced layout; leave the required expansion gaps around walls using spacers. Click the planks together by aligning the tongue and groove, then tap gently with a rubber mallet and tapping block to ensure tight WPC floor joints. Continue plank-by-plank, staggering end joints for stability, then finish with trim and reinstall baseboards to cover the expansion space.
Which installation method is best for WPC floors in different rooms—floating, glue-down, or loose lay?
Most homeowners choose floating installation for WPC floors because it’s fast, beginner-friendly, and usually doesn’t require heavy adhesive work. Glue-down options may be suitable when the manufacturer specifically allows it, but it demands careful surface prep and curing time. For bathrooms and other moisture-prone areas, choose a WPC product rated for those spaces and follow the installation instructions closely, particularly around transitions and expansion gaps.
Why do WPC floors sometimes lift or show gaps after DIY installation, and how can I prevent it?
Lifting and gaps usually happen when expansion gaps are too small, the subfloor is uneven, or planks weren’t fully locked during installation. To prevent problems, verify your room is within the recommended temperature and humidity range, use spacers for consistent expansion, and ensure the click joints are fully engaged with light tapping. Also avoid installing over thick carpet padding or unstable surfaces, and maintain the manufacturer’s recommended underlayment setup for your WPC flooring system.
📅 Last Updated: October 08, 2026 | Topic: How to install without professional help WPC floors? | Content verified for accuracy and freshness.
References
- Vinyl flooring
https://en.wikipedia.org/wiki/Vinyl_flooring - https://en.wikipedia.org/wiki/Resilient_flooring
- https://en.wikipedia.org/wiki/Floating_floor
- https://en.wikipedia.org/wiki/Floor_underlayment
- Google Scholar Google Scholar
https://scholar.google.com/scholar?q=WPC+flooring+installation+guidelines - Google Scholar Google Scholar
https://scholar.google.com/scholar?q=rigid+core+vinyl+plank+click+lock+installation+instructions - Google Scholar Google Scholar
https://scholar.google.com/scholar?q=waterproof+WPC+flooring+subfloor+preparation+moisture+installation - Google Scholar Google Scholar
https://scholar.google.com/scholar?q=installation+of+LVT+LVP+floating+floor+manufacturer+installation+practice+study - Google Scholar Google Scholar
https://scholar.google.com/scholar?q=vinyl+plank+flooring+acclimation+recommended+procedures - Google Scholar Google Scholar
https://scholar.google.com/scholar?q=floating+resilient+flooring+installation+best+practices+underlayment+gap+expansion