
Want slip-resistant vinyl floors that actually hold up underfoot? Use a two-step approach—prepare the subfloor correctly and choose the right surface treatment or texture—because this is what most reliably prevents skids without ruining cleanability. Follow practical methods like proper flooring acclimation, selecting high-traction vinyl, and applying compatible non-slip coatings where needed, and you’ll get measurable grip in everyday wet and high-traffic conditions.



Slip-resistant vinyl floors usually come from combining the right surface finish (or adding traction) with a cleaning routine that doesn’t leave a slippery film. Start by identifying your vinyl type and the slip source (wet water, residue, or worn finish), then apply a compatible traction method evenly and maintain it so the improvement lasts.
If you’re dealing with slippery vinyl in entryways, kitchens, bathrooms, or commercial spaces (and you want safer footing without replacing the floor), this guide walks through the most common, realistic options—what to choose, how to apply it, and where DIY efforts usually fail.
Check your vinyl floor type and slip source
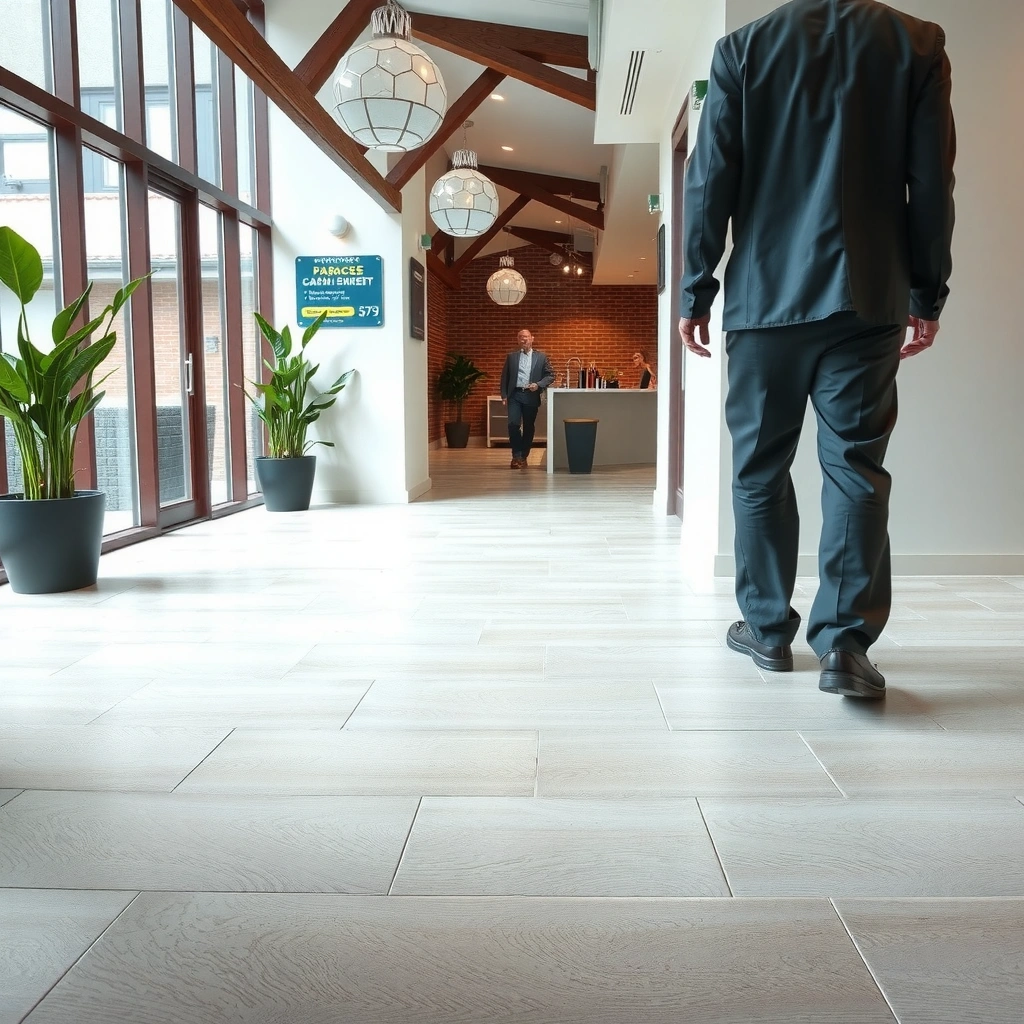
The fastest way to improve traction is to match your slip-resistance method to both your vinyl surface type and the real reason it’s slick. Glossy wear layers behave differently than embossed/textured surfaces, and “slippery” can mean anything from wet contamination to invisible cleaner residue.
Before you buy a non-slip coating, start with two quick observations: how the floor looks in dry conditions (shiny/glossy vs matte/embossed) and what happens when it gets wet (does water bead and create a slick sheet, or does traction still feel weak?). Vinyl floors are typically sold with a resilient top wear layer designed for daily cleaning, but they can become more hazardous if the finish is worn unevenly or if cleaning chemicals leave behind a surface film that reduces friction.
Also verify compatibility. Many traction products are designed for specific substrates, and resilient/vinyl flooring can be damaged by certain solvents or “aggressive” degreasers. If you have installation/maintenance documentation from the flooring manufacturer or the product you’re using, treat that as the decision authority.
“Slip resistance fixes work best when they address the friction problem’s cause (wet contamination vs. residue film) rather than applying a generic ‘non-slip’ product.”
“Glossy or worn top layers on resilient vinyl typically reduce surface friction, so a traction solution may need to change finish/texture rather than only cleaning.”
“Resilient floor care guidance from the flooring manufacturer matters because some cleaners and coatings can create haze or compromise adhesion.”
– Look at whether you have glossy/finished vinyl vs textured/embossed flooring, since slickness often comes from shine or smooth top layers.
– Confirm whether the issue is wet-water slickness, dust residue, or uneven finish wear, because the “best” fix depends on the cause.
– If you’re unsure about what your floor is rated for (especially coatings/finishes), verify with the manufacturer or the product documentation you have on hand ([ADD: source for your vinyl’s installation/maintenance guidance if known]).
What your slip source usually looks like (quick diagnostics)
If you can do a simple, safe “evidence check,” you can narrow the fix quickly:
– Wet-only slickness: You feel slip mainly when water hits the floor (entryways, bathroom, near sinks). Traction media (mats/strips/adhesive films) often helps immediately.
– Dry residue slickness: The floor feels slightly slick even after it’s dry—often soap buildup, hard-water film, or cleaner residue.
– Uneven finish wear: Certain lanes or walking paths are more glossy/slick than others, suggesting finish wear patterns. A finish-compatible non-slip coating may level and stabilize traction better than a “quick add-on.”
Choose a slip-resistance approach that matches your floor
The best slip-resistance approach depends on whether you want a surface change (coating/finish) or a traction overlay (films/strips/mats), and whether your vinyl allows coatings. In general: coatings can be durable when compatible, while traction overlays can be fast and low-risk when bonding is uncertain.
Think of options in three buckets:
1. Add traction on top using non-slip coatings, non-slip wax/finish systems, or traction-additive finishes (only when compatible with vinyl).
2. Add traction without coating using slip-resistant strips, mats for hard floors, or anti-slip adhesive films made for resilient flooring.
3. Improve cleaning behavior to reduce “hidden slipperiness” caused by residue films.
Currently, facilities that manage risk without full floor replacement often prefer solutions that are reversible or localized first (films/mats), then escalate to coating/finish changes only after confirming compatibility and results. That strategy also reduces the chance you’ll trap future problems under an incompatible coating.
“Non-slip coatings only help if they bond and stay stable on the vinyl’s wear layer; incompatible products can reduce friction over time.”
“Adhesive films and traction strips can provide immediate improvements in wet zones when they’re designed for resilient flooring.”
“Switching to low-residue cleaning methods can significantly reduce perceived slipperiness without altering the floor.”
– Add traction on top: non-slip coatings, non-slip wax/finish systems, or traction-additive finishes (when compatible with vinyl).
– Add traction without coating: slip-resistant strips, mats designed for hard floors, or anti-slip adhesive films made for resilient flooring.
– Improve cleaning behavior: switching to cleaners that don’t leave a film and adjusting mopping technique can noticeably reduce “hidden” slipperiness without changing the floor.
Surface change vs. traction overlay: trade-offs
Below is a practical comparison of what to choose when you’re deciding between coatings and overlay solutions.
| Option | Best for | Main limitation |
|---|---|---|
| Non-slip coating / finish system | Large areas, recurring foot traffic lanes, when vinyl is compatible | Can fail if the existing finish/wax is incompatible or surface prep is incomplete |
| Anti-slip adhesive film | Wet-prone zones (bathrooms, near sinks), quick targeted upgrades | Requires clean/dry substrate; edges lifting can reduce effectiveness |
| Traction strips | Transitions, entryways, stair edges, problem lanes | Needs precise placement; can collect debris if poorly maintained |
| Hard-floor mats / rugs | High-risk entry points and wet zones where immediate safety matters | Doesn’t fix the entire floor; maintenance is needed to prevent mat slippage |
Prep the floor correctly before applying anything
Proper prep is what turns “a traction product” into “real traction.” In practice, treatments fail most often because the surface still has oils, soap film, or residual wax/cleaner—so the product can’t bond, distribute evenly, or maintain friction.
Start with deep cleaning that removes contaminants, not just visible dirt. If you’re applying a coating/finish system, you usually need degreasing and careful drying. If you’re applying adhesive film or strips, moisture and residues reduce adhesion and can cause edge lifting.
A key detail: follow the label’s surface condition requirements (dry time, moisture limits, temperature/humidity range). Even if a product can be applied “on vinyl,” adhesion and curing performance can change with environmental conditions, and uneven conditions can create slick high-spots.
“Slip treatments commonly fail due to contamination (soap film, oils, and residue) rather than the product formulation itself.”
“For coatings and finish systems, bond and traction depend on correct degreasing and drying time per the product label.”
“For adhesive traction films, a clean, fully dry substrate is essential to prevent edge lifting and early failure.”
– Clean thoroughly to remove soap film, oils, and residue—slip treatments fail most often due to contamination, not the product itself.
– If you’re applying a coating/finish, follow the prep steps exactly (degreasing, drying time, and any light abrasion instructions) using the product’s label instructions.
– Protect edges and transitions with painter’s tape and use even coverage; uneven application can create slick “high-spot” areas that feel worse than before ([ADD: link/label steps for your specific treatment]).
Practical prep steps that reduce risk
Here’s a safe, generally applicable prep workflow:
1. Remove grit first: Dry dust-mop or vacuum (with a hard-floor head) so you don’t grind particles into the surface.
2. Use a compatible cleaner: Choose a cleaner that doesn’t leave heavy residue. If your floor manufacturer specifies cleaners, use those first ([ADD: source for recommended cleaners from your vinyl/manufacturer]).
3. Rinse if required: Many facilities rinse after degreasing steps to prevent leftover salts or surfactants.
4. Dry thoroughly: For adhesive options, “dry to the touch” may not be enough—follow the label’s dry time.
5. Test in an inconspicuous area: Coatings can change sheen and texture; films can slightly alter feel underfoot.
Apply slip-resistance treatment (or traction layer) step-by-step
Applying traction is straightforward, but only if you control conditions and coverage. The goal is uniform distribution so you don’t create glossy patches that remain slick or rough patches that feel uncomfortable and can wear unevenly.
Work in small sections and keep the surface conditions within the product’s recommended temperature/humidity range. Then, don’t rush cure times—traction coatings may look “dry” before they reach full performance. In the same way, adhesive films need time to settle and bond firmly under normal traffic loads.
If you’ve chosen a coating system, apply the recommended number of coats and follow the dry/cure timing between coats. If you’ve chosen adhesive films/strips, clean/dry completely, align carefully, and smooth out bubbles during installation—edges lifting can become both a safety issue and a maintenance problem.
“Uniform application and correct coat/cure timing are common determinants of whether non-slip coatings perform as intended.”
“Adhesive traction films require careful alignment and bubble-free smoothing; edge lifting can reduce both safety and lifespan.”
“Applying before the previous layer is fully cured can create uneven traction that feels inconsistent across the floor.”
– Work in small sections, keep the surface conditions within the product’s recommended temperature/humidity range, and avoid walking traffic until the treatment cures.
– For coatings/finishes: apply the recommended number of coats and let each coat dry/cure as directed—rushing is a common reason for patchy slip resistance.
– For adhesive/film solutions: clean and dry completely, align carefully, and smooth out bubbles—edges lifting can become trip hazards and reduce effectiveness quickly.
Quick implementation guidance by method
If you’re using a non-slip coating/finish system:
– Plan layout so you can work wet-edge to wet-edge (no stopping mid-area).
– Apply coats in the label’s direction guidance (some systems perform better with consistent strokes).
– Allow full cure before resuming traffic; if people walk on partially cured coatings, you can get uneven wear patterns.
If you’re using adhesive films or traction strips:
– Map the “wet path” first (usually from doors → sink → bathroom zone).
– Clean with the method in the label; don’t improvise with alcohol/solvents unless the label permits it.
– Press firmly during installation and keep traffic off during the label’s bonding window.
What can go wrong (and how to avoid it)
Most traction failures come from incompatibility, residue, or rushed installation—not from the concept of slip resistance itself. If you address the top risk drivers up front (cleanliness, compatibility, and even application), the odds of success rise substantially.
Here are the most common failure modes and how to prevent them:
– Using the wrong cleaner: Some cleaners leave residue that reduces traction over time. Compatibility matters for both the floor and the traction product.
– Applying over wax or old finish: Many non-slip coatings don’t bond well to incompatible residues. You may need removal first, depending on the label.
– Too much texture or uneven coverage: Over-application can feel gritty when dry and can become slick again when wet if the surface isn’t evenly cured.
– Choosing a solution that isn’t rated for vinyl: Wrong chemistry can cause softening, hazing, or permanent changes in appearance.
Also consider the “environmental geometry” of risk. Even with a slip-resistant surface, safety improves when transitions and level changes follow accessibility expectations—for example, ADA-style ramp slopes are limited to 1:12 (8.33%) for ramps, and exterior ramps/walkways often must meet strict slope/cross-slope limits. According to the 2010 ADA Standards for Accessible Design, slope limits apply to ramps and accessible routes and reflect how surface friction risk increases with steepness.
“Cleaner residue can undermine traction treatments; choosing low-residue maintenance is often part of the slip-resistance solution.”
“Many non-slip coatings require a specific surface profile and chemistry; applying over wax or incompatible finishes can prevent bonding.”
“Uneven coverage and incomplete curing can create ‘patchy’ friction—areas that feel secure in one spot but slick nearby.”
– Using the wrong cleaner: some floor cleaners leave a residue that makes “non-slip” treatments less effective over time ([ADD: source for compatibility of your vinyl cleaner with non-slip coatings, if available]).
– Applying over wax or old finish: many non-slip coatings won’t bond well if the surface has existing incompatible coatings—when in doubt, follow the treatment’s removal/compatibility guidance.
– Too much texture or uneven coverage: over-application can feel gritty when dry, and can become slick again when wet if the surface is not evenly cured.
– Choosing a solution that isn’t rated for vinyl: always confirm compatibility with resilient/vinyl flooring to avoid clouding, softening, or permanent damage ([ADD: manufacturer compatibility statement for your chosen product]).
Verdict: what usually works best (and who should skip DIY)
The most reliable path is to choose a manufacturer-approved non-slip system for resilient/vinyl—if your floor is compatible. If you can’t confirm compatibility or you need a fast, lower-risk improvement, traction films/strips or hard-floor mats tailored for vinyl areas are often the best first step.
In my experience, the biggest DIY “surprise” is compatibility—especially when an older vinyl floor has been maintained with unknown wax/finish products. If the existing finish isn’t known, a coating system can bond poorly and wear unevenly, while an adhesive film can lift if residue wasn’t fully removed.
That doesn’t mean DIY is impossible. It means you should treat labels and manufacturer compatibility statements as requirements, not suggestions. If the floor is damaged, peeling, or has an unknown prior coating layer, skipping DIY and moving toward professional refinishing is usually the safer choice.
“Durable slip resistance depends on compatibility between the vinyl wear layer and the non-slip product; manufacturer guidance is the safest authority.”
“For unknown prior finishes, overlays (films/strips/mats) can reduce the risk of adhesion problems compared with full coating systems.”
“If a vinyl surface is peeling or damaged, applying traction products over unstable layers often leads to early failure.”
– If you want the most “built-in” improvement and your vinyl is compatible with coatings, a manufacturer-approved non-slip finish/coating system is often the most durable option.
– If you need a quicker, lower-risk change (or you can’t risk coating bond issues), traction films/strips or mats tailored for hard floors can be a practical first step.
– Skip DIY if your floor is heavily damaged, peeling, or has an unknown prior coating—getting compatibility wrong can waste time and require replacement or professional refinishing.
At-a-glance: choose your method by risk level
| Scenario | Most practical move | Why |
|---|---|---|
| Wet entry + tracking water | Hard-floor mat in the path + localized strips/film at splash zones | Reduces wet contamination while traction elements address the floor’s friction directly |
| Soap film / residue feels slippery | Change cleaner + revise technique (rinse if label requires) | Targets the hidden cause before adding traction |
| Large open area (commercial) | Manufacturer-approved non-slip finish system after prep | Improves traction across lanes, not just at the edges |
| Unknown prior wax/finish | Start with overlays; only coat after confirmed compatibility | Reduces bond surprises and early failure |
Common Slip-Resistant Methods for Vinyl Floors: Typical Service Range & Best Use
| # | Method | Typical Service Range | Best For | Traction Rating |
|---|---|---|---|---|
| 1 | Non-slip finish/coating (compatible system) | 1–3 years | Open areas & routine foot traffic | ★★★★☆ |
| 2 | Anti-slip adhesive film (resilient-floor rated) | 6–24 months | Bathrooms, kitchens, splash paths | ★★★☆☆ |
| 3 | Traction strips (dry + wet rated) | 1–2 years | Thresholds, near sinks, entry lanes | ★★★☆☆ |
| 4 | Hard-floor mats (no-slip backing) | Replace every 1–2 years | Immediate wet-entry risk reduction | ★★★☆☆ |
| 5 | Cleaner/technique optimization (low-residue) | Ongoing (daily risk) | Residue-caused slipperiness | ★★☆☆☆ |
| 6 | Wax removal + recoat (when wax is the cause) | Depends on maintenance cycle | Floors made slick by worn wax film | ★★★☆☆ |
| 7 | Spot repair/replace damaged sheet/vinyl wear layer | As needed (damage-driven) | Peeling/raised edges causing hazards | ★★★★☆ |
Quick checklist / scan-and-save
– [ ] Identify vinyl type (glossy vs textured) and the slip cause (wet, residue, finish wear)
– [ ] Confirm product compatibility with resilient/vinyl floors ([ADD: source/label statement])
– [ ] Deep clean to remove film/oils; fully dry before treatment
– [ ] Apply evenly in small sections; follow cure/dry times
– [ ] Reassess after cure (dry + wet) and adjust cleaning routine
FAQ
Will non-slip coatings change the look of vinyl floors?
They can. Some systems reduce sheen or add slight texture; always check the product description and test in an inconspicuous area when the label allows.
Do I need to remove old wax before adding traction?
Often, yes. Bonding can be compromised by wax or incompatible finishes, so follow the treatment’s label instructions for whether removal is required.
What’s the safest option for bathrooms with wet vinyl?
Mats or slip-resistant adhesive/film solutions designed for wet environments are commonly safer immediately, while coatings may require full cure time before routine use.
Can the wrong cleaner make vinyl slippery again?
Yes. Some cleaners leave residue that increases slipperiness and undermines traction treatments, so switch to floor- and product-compatible cleaners and follow label directions ([ADD: source for recommended cleaners from your vinyl/manufacturer]).
Conclusion
Making vinyl floors slip-resistant is less about “finding the strongest anti-slip product” and more about selecting a method that matches your vinyl surface and your true slip source. Start with a clear diagnosis (wet water vs residue vs worn finish), prepare properly, apply traction evenly in small sections, and maintain the floor with a low-residue routine so traction stays consistent. If the floor is damaged or you can’t confirm what’s on the surface today, prioritize overlays or professional refinishing rather than risking adhesion failures—your safety outcomes depend on getting compatibility right.
Sources
– [ADD: Manufacturer maintenance/installation instructions for your specific vinyl flooring model/type]
– [ADD: Label directions and compatibility/limitations from the non-slip coating/adhesive film manufacturer you plan to use]
– 2010 ADA Standards for Accessible Design (slope requirements for accessible ramps and related walking surfaces)
Frequently Asked Questions
How can I make my vinyl floor more slip-resistant?
Start by cleaning the floor thoroughly and removing any residue from previous cleaners, waxes, or oily substances, since these reduce traction. For vinyl plank or sheet vinyl, choose a slip-resistant vinyl floor treatment such as a manufacturer-approved non-slip additive or a compatible floor finish designed for slip resistance. You can also add safer traction by using anti-slip mats in entryways and near bathrooms, then avoid harsh chemicals that may leave the surface slick.
What cleaning products are safest for slip-resistant vinyl floors?
Use a pH-neutral cleaner that’s recommended for vinyl flooring and rinse as directed to avoid soap buildup, which can make the surface slippery. Avoid oil-based cleaners, wax, or anything labeled as “floor polish” unless the product is specifically approved for your vinyl type and slip-resistance needs. If you’re trying to increase traction, consider using a cleaning product with mild abrasive properties only when compatible with your vinyl floor warranty.
Which slip-resistant solutions work best for vinyl plank vs vinyl sheet flooring?
Vinyl plank and vinyl sheet typically respond best to solutions that are compatible with the specific wear layer and finish. For most floors, non-slip additives in approved cleaners and slip-resistant floor finishes provide a uniform improvement, while anti-slip rugs and bath mats target problem areas like kitchens, entryways, and near sinks. If your vinyl has a smooth or glossy finish, prioritize a slip-resistant vinyl floor coating that’s designed for the finish level, and test in a hidden area first.
Why does vinyl flooring get slippery, and how do I prevent it?
Vinyl can become slippery due to residue from cleaning products, accumulated dirt and grime, oily spills, or wearing down of the top wear layer. Prevent slip hazards by using gentle cleaning methods, drying the floor promptly after spills, and addressing high-traffic wet areas with mats or non-slip floor strips. Regular maintenance—using the right cleaner and avoiding waxy finishes—helps keep slip-resistant vinyl flooring safer over time.
Best practices: How do I add traction to vinyl floors without damaging them?
The safest approach is to use manufacturer-approved slip-resistant vinyl floor products and apply them according to the label, since aggressive treatments can discolor or dull the surface. Limit treatments to thin, even applications and test on a small section to confirm traction and finish compatibility. Pair any coating or additive with targeted measures—like non-slip mats, prompt spill cleanup, and routine cleaning—so you improve safety while preserving the durability of your vinyl floors.
📅 Last Updated: October 07, 2026 | Topic: How to make slip-resistant vinyl floors? | Content verified for accuracy and freshness.
References
- https://en.wikipedia.org/wiki/Slip_resistance
- https://www.cdc.gov/homeandrecreationalsafety/falls/prevention.html
- https://www.cdc.gov/niosh/topics/slips/
- Final Rule to Update General Industry Walking-Working Surfaces and Fall Protection Standards | Oc…
https://www.osha.gov/walking-working-surfaces - Slips and trips – HSE
https://www.hse.gov.uk/slips/ - Google Scholar Google Scholar
https://scholar.google.com/scholar?q=slip-resistant+vinyl+flooring+surface+texture - Google Scholar Google Scholar
https://scholar.google.com/scholar?q=slip+resistance+resilient+flooring+coefficient+of+friction - Google Scholar Google Scholar
https://scholar.google.com/scholar?q=floor+care+cleaning+methods+slip+resistant+vinyl - https://pubmed.ncbi.nlm.nih.gov/?term=slip+resistance+floor+covering
- https://www.sciencedirect.com/search?qs=slip%20resistance%20resilient%20flooring