


You can install ceramic tile floors without professional help—if you follow a controlled plan for layout, subfloor prep, and tile setting. This guide delivers the clearest, do-it-yourself path to a straight, durable installation, with the exact steps that prevent the most common failures like lippage and loose tiles. Expect a proven workflow, not vague advice, so you can finish the job confidently the first time.



You can install ceramic tile floors yourself without professional help if you (1) plan a tight layout, (2) prep the subfloor to meet flatness requirements, and (3) follow thinset/grout and expansion-gap rules. The fastest path to a straight, durable DIY floor is to treat installation as a process of controlling three variables: substrate flatness, mortar coverage, and joint/edge movement.
If you’re tiling a kitchen, bathroom, entryway, or basement floor and the substrate is already close to flat, DIY is often realistic—especially when you can take your time with dry-laying, use a level/straightedge consistently, and clean as you go. In 2026, these are still the core variables that separate a “looks good today” floor from one that stays solid for years.
If you’re tiling a kitchen, bathroom, entryway, or basement floor and want to save on labor, this is for you—especially if the subfloor is already fairly flat and you can take your time. It’s also a good fit when you can access tools (tile saw or cutter, spacers, level, notch trowel) and can handle dust and cleanup.
Gather the right tools and tile materials

Choose the correct tile for floors and match it with the right thinset and grout system before you buy anything else. When materials are mismatched, you’ll see lippage, weak bonding, grout cracking, or tile movement—even if your layout is perfect.
Before you start mixing or setting, confirm a few key compatibility points: your tile must be rated for floors, your mortar must be approved for that tile and substrate, and your grout type must suit the joint width and exposure (interior, wet area, etc.). Also verify whether your job needs an underlayment, waterproofing membrane, or crack-isolation approach based on your surface and local building expectations.
“The Tile Council of North America (TCNA) Handbook) is the primary industry reference for ceramic tile installation methods and movement-joint practices.” TCNA Handbook (method system references)
“ANSI standards for tile installation emphasize correct mortar selection and proper substrate preparation to achieve bond and reduce failures.” ANSI A108 series (tile installation standards)
To keep your DIY workflow smooth, we recommend assembling your kit in three buckets: setting tools, measurement/alignment tools, and finishing tools.
What to confirm with your materials (so you don’t redo work)
– Floor-rated ceramic tile: Look for a floor/wall distinction on the packaging and match any slip rating needs for bathrooms or entries.
– Thinset mortar system matched to substrate: The thinset manufacturer specifies what it allows (e.g., concrete slab vs. plywood, interior vs. exterior, dry vs. wet areas). Follow that document exactly.
– Grout type matched to your joints: Grout is not one-size-fits-all. Unsanded grout is typically for very narrow joints; sanded grout is used for wider joints. If your grout calls for sanded vs. unsanded selection, respect it.
Tools you’ll actually use (and why)
– Measuring & layout: tape measure, chalk line (or laser level), straightedge, and a level you trust.
– Mortar & spreading: notched trowel matched to your thinset system.
– Mixing: mixing paddle and a drill (stir to a uniform consistency; don’t “eyeball” it once you start).
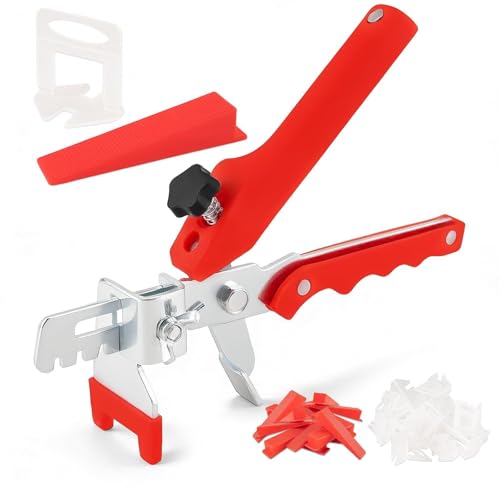
– Placement: spacers to control joint width and an alignment strategy (string line or multiple check lines work well).
– Finishing: grout float, sponges, buckets, margin trowel, and clean rags.
Mandatory decision: wet saw vs. cutter
A cutter can work for many straight cuts, but a wet saw is usually better for precision at fixtures, uneven edges, and long-term accuracy when you’re cutting lots of tiles.
“Wet saws improve cut accuracy for ceramic tile, especially for repeated cuts, edges near walls, and outlet/fixture openings.” [ADD: source for saw vs. cutter guidance for your specific tile type]
Prepare the subfloor for a tile-ready base
Your subfloor preparation determines whether your tile stays solid. Before you spread thinset, the substrate must be clean, structurally sound, and flat enough that tiles don’t rock or “telegraph” unevenness into your grout lines.
From my experience, most DIY tile failures are not from the tile—they’re from people trying to “correct” poor flatness with mortar alone. Thinset can fill small variations, but it can’t reliably fix a wave, soft spots, or widespread high/low areas. If the floor flexes or pumps underfoot, you need addressing before tile goes down.
“Tile installation instructions repeatedly stress that subfloors must meet flatness and structural requirements; bond and durability depend on that prep.” ANSI A108 series and TCNA method guidance
“Mortar cannot compensate for significant movement or excessive height variation; tile needs a stable plane to perform.” TCNA Handbook (substrate and method criteria)
Step-by-step subfloor prep (what to do before any dry-lay)
1. Remove old flooring/adhesives down to the correct substrate.
2. Check flatness with a straightedge (not just a bubble level). Mark high spots and low spots.
3. Fix high spots/low spots before tile setting:
– High spots may require grinding (follow dust control and safety).
– Low spots may require appropriate leveling/patch systems approved for tile.
4. Verify dryness and cleanliness:
– Mortar bonds best when the surface is free of dust, paint overspray, curing compounds (unless specifically approved), and loose debris.
5. Confirm structural soundness:
– Soft or flexing areas must be corrected; tile is not a patch for substrate movement.
Flatness matters because it changes every downstream choice
When the floor is uneven:
– Your tiles seat differently, which causes lippage (uneven tile edges).
– Your grout joints become inconsistent, which makes the floor look “wavy.”
– Thinset coverage becomes less reliable because you don’t get full bedding.
Real-world anchoring data points (what industry references drive)
– According to the TCNA Handbook, proper method selection (including substrate type and underlayment choices) is tied directly to expected performance.
– According to ANSI A108.01 (and related A108 installation documents), correct mortar selection and installation practices are prerequisites for bond.
– According to ASTM C627 (standard terminology/testing framework used broadly in tile-setting discussions), thinset bonding performance depends on meeting the system’s intended conditions and surface preparation.
Plan the layout to avoid small cuts and lippage
Plan the layout so the floor looks balanced and your tile edges land where you want them to. The best DIY floors start with a dry layout that finds your centerline and prevents unusable slivers at the perimeter.
Instead of “winging it” from a wall, you build a repeatable plan: identify your starting line, balance tile widths across the room, and define where cuts will land. That reduces waste and makes your grout joints look intentional rather than improvised.
“TCNA-style installation methods emphasize layout strategies that maintain consistent joint widths and avoid problematic edge conditions.” TCNA Handbook (layout and method guidance)
“Consistent grout joint spacing is controlled with spacers and layout alignment checks during setting.” ANSI/TCNA installation guidance
A practical layout workflow (DIY-friendly and repeatable)
1. Find your room centerline:
– Snap lines from a reference point (often doorway-to-doorway alignment, or the longest clear dimension).
2. Dry-lay key rows:
– Set tiles and spacers without mortar so you can see how cuts will look.
3. Choose your “start” decision:
– Common DIY approach: ensure both sides of a centerline have reasonable tile widths (avoid one side with 1/8″ slivers).
4. Account for grout joints:
– Grout joint width affects your tile counts and final edges. Measure your target joint width and use it consistently.
5. Plan transitions and thresholds:
– Tile height changes (plus mortar thickness) can affect door clearances and transitions to adjacent flooring.
Quick comparison: layout outcomes (what you’re trying to avoid)
| Layout approach | Likely visual result | Typical DIY risk |
|---|---|---|
| Start from a wall that isn’t square | Uneven edge lines | Slanted cuts and inconsistent grout lines |
| Start from a centerline but ignore joint width | Edge over/under runs | Small, awkward perimeter cuts |
| Dry-lay only “one” orientation | Corners look off | Lippage and crowding near fixtures |
Set the ceramic tiles step by step
Set tiles with the correct thinset consistency, the correct trowel notch, and consistent alignment checks. The goal is reliable mortar coverage and stable tile seating—so lippage stays low and the floor doesn’t shift while thinset cures.
This is where precision pays off: mix properly, spread only what you can work within the mortar’s working time (“open time”), and verify alignment frequently. If you try to set too fast, thinset can skin over, reducing bond and increasing the odds of tiles moving.
“Thinset manufacturer instructions control mixing ratio, working/open time, and curing time; following them is essential for bond.” [ADD: thinset manufacturer instructions for mixing/open time/cure time]
“ANSI/TCNA installation guidance centers on proper mortar spread and bedding to achieve full contact.” ANSI A108 series and TCNA method references
Thinset mixing and spreading (what to do correctly)
– Mix to the specified consistency (use clean water and follow the mixing time and rest time if provided).
– Use the correct notched trowel size for your system.
– Spread in manageable sections:
– You want tiles to go down before the mortar loses its workable surface.
– Back-butter when recommended:
– Some tiles/mortar systems benefit from extra contact to reach proper coverage.
Setting tiles without losing your alignment
1. Set your first tiles on the chosen start line.
2. Place spacers and keep joints consistent.
3. Periodically check level and alignment:
– Check both directions (the direction of the long cuts and the short runs).
4. Adjust before thinset grabs:
– You should be able to reposition tiles during placement, not after.
Here’s the “joint width reality check” table DIYers use while planning
Recommended Grout Joint Ranges for Common DIY Ceramic Floor Formats
| # | Tile format (approx. size) | Typical grout joint range | Why it’s used | DIY difficulty |
|---|---|---|---|---|
| 1 | Mosaic (1–2 in) | 1/16–1/8 in | Hides small tile edge variation | ★ ★ ★ |
| 2 | Small squares (2–3 in) | 1/8–3/16 in | Balances spacing with stability | ★ ★ ★ ★ |
| 3 | 4 in x 4 in | 1/8 in | Common “default” joint size | ★ ★ ★ |
| 4 | 6 in x 6 in | 1/8–3/16 in | Improves tolerance for slight batch variation | ★ ★ ★ ★ |
| 5 | 12 in x 12 in | 3/16 in | Often chosen to maintain consistent spacing on larger tiles | ★ ★ ★ ★ ★ |
| 6 | Large-format (16–24 in) | 1/4 in (common) | Helps manage edge alignment over longer spans | ★ ★ ★ ★ ★ ★ |
| 7 | Subway (2 in x 8–10 in) | 1/8–3/16 in | Classic balance of aesthetics and tolerance | ★ ★ ★ ★ |
Note: Joint sizes should always be confirmed against your tile maker’s specs and your grout manufacturer’s instructions for the grout type and joint width.
Grout, seal (if needed), and finish cleanly
Grout after the thinset cures fully, and finish by packing joints consistently and wiping the haze at the right time. The finishing stage is where DIY floors usually go from “good” to “looks professional.”
If you grout too early, tiles can shift under the weight of your float and sponge. If you wait too long, grout can become difficult to clean and might leave permanent haze. Follow your grout bag or tech data sheet for the exact window.
“Grout manufacturer instructions specify cure time, when to remove haze, and whether sealing is required; follow those steps to avoid discoloration and cracking.” [ADD: grout manufacturer installation instructions]
“Movement joints (at edges and transitions) should remain unfilled or be treated according to method guidance; grouting over movement joints increases the risk of cracking.” TCNA Handbook (movement-joint guidance)
Grouting best practices
– Remove spacers after thinset cures (only when appropriate per your setup).
– Float grout diagonally across joints to pack them fully.
– Wipe carefully:
– Keep sponges clean and change water frequently.
– Don’t overwork joints.
– Target joint consistency:
– The cleanest results come from consistent pressure and consistent wipe timing.
– Seal only when required:
– Some grouts are marketed as stain-resistant or “sealer optional,” but sealing guidance is product-specific.
When to skip sealing
If your grout spec doesn’t call for sealing, applying a sealer anyway can sometimes make future cleaning more difficult. Only seal based on the grout manufacturer’s recommendation and your tile’s porosity needs.
What can go wrong (and how to prevent it)
Tile floors fail when one of the core system requirements breaks: flatness, correct materials, proper mortar coverage, or movement accommodation. Most preventable issues show up as cracking grout, loose tiles, lippage, or edge failures at transitions.
“Substrate issues and incorrect movement-joint treatment are leading causes of tile and grout problems addressed in industry installation guidance.” TCNA Handbook and ANSI A108 installation guidance
“Mortar and grout products depend on curing conditions and timing; rushing cure steps increases the odds of failure.” [ADD: thinset/grout manufacturer cure-time guidance]
Common DIY failure modes
– Subfloor not flat enough
Even minor unevenness can cause rocking tiles, inconsistent thinset thickness, and uneven grout lines. Prevent it by measuring with a straightedge before you set.
– Wrong cure timing
If you grout before thinset cures, tile edges can shift, leading to uneven grout joints or cracked grout later. Use the cure timing from the thinset datasheet.
– No expansion/edge gaps
Ceramic tile needs movement accommodation at edges and transitions. Use the method guidance for edge joints and transitions; don’t grout them like a standard field joint.
Pros/cons tradeoff: DIY vs. pro prep (especially for prep work)
| Approach | Pros | Cons |
|---|---|---|
| DIY setting + careful prep | Lower labor cost; full control of layout | High skill requirement; mistakes usually can’t be “patched” cheaply |
| DIY with professional subfloor remediation | You control tile aesthetic but fix failure risks | Adds cost; scheduling coordination |
| Full professional install | Best chance of consistent results | Higher labor cost |
If you’re unsure about your subfloor flatness, that’s the moment to get help before you set tile.
Verdict: DIY is doable—skip it if these apply
DIY ceramic tile flooring can work well if your subfloor prep is solid, your dry layout is accurate, and you follow thinset/grout and movement-gap instructions closely. However, DIY is a poor fit if you have significant subfloor damage/deflection, an uncertain substrate, or you can’t meet the cure/flatness requirements required by the setting system.
“TCNA/ANSI method guidance ties success to correct substrate preparation, correct mortar system selection, and proper movement-joint treatment.” TCNA Handbook and ANSI A108 series
“When the substrate can move or is out of flatness tolerance, tile performance degrades even with good workmanship.” TCNA Handbook (substrate criteria by method)
Skip DIY (or at least get help) if:
– You see soft spots, noticeable bounce, or structural deflection in the subfloor.
– Straightedge checks show widespread high/low areas that will be expensive to correct.
– You’re tiling over an uncertain substrate (unknown coatings, poorly bonded layers, or damaged underlayment).
– You can’t commit to clean workmanship during mixing, setting, and curing.
Quick checklist (scan before you start)
– [ ] Tile is rated for floors; thinset/grout match tile type and substrate
– [ ] Subfloor is clean and flat per manufacturer requirements
– [ ] Dry-layout done to confirm centerline and avoid tiny edge cuts
– [ ] Correct trowel notch size verified for the thinset system
– [ ] Spacers and straightedge/level used throughout setting
– [ ] Thinset cures fully before grouting
– [ ] Edge gaps/expansion considerations included per instructions
– [ ] Grout finished cleanly; sealing only if specified
FAQ
Do I need a tile saw, or is a cutter enough?
It depends on the tile thickness and tile type. A cutter can work for straight, thinner cuts, but a wet tile saw is often better for precision and complex cuts (fixtures/edges). [ADD: source for guidance on saw vs cutter for your tile thickness/type]
Can I install ceramic tile over vinyl or laminate flooring?
Usually not directly—most systems require removing resilient flooring and installing/repairing an appropriate substrate. Check the thinset/underlayment manufacturer instructions for approved surfaces. [ADD: source for approved substrates from your chosen thinset/underlayment]
How do I keep tiles from moving while the thinset sets?
Use the right thinset consistency, spread only in manageable areas, and check alignment frequently with a level/straightedge. Spacers and, where appropriate, tile leveling tools can help reduce lippage.
Should I seal ceramic tile and grout?
Some grouts are “unsanded/sealed” or otherwise pre-treated; others require sealing. Follow the grout manufacturer’s instructions for your specific product. [ADD: source for your grout/sealer recommendation]
Sources
– [ADD: thinset manufacturer installation instructions (mixing, trowel notch size, cure time, approved substrates)]
– [ADD: grout manufacturer installation instructions (grout timing, sealing guidance if applicable)]
– Tile Council of North America (TCNA), TCNA Handbook for Ceramic Tile Installation (method guidance, movement joints, substrate considerations)
– ANSI, A108 series (ceramic tile installation standards; mortar/substrate and installation practices)
– ASTM, ASTM C627 (standard terminology/testing framework widely used in tile-related performance discussions)
A DIY ceramic tile floor installation is absolutely achievable when you treat it as a system—materials matched to substrate, flatness verified before setting, and movement gaps respected at edges and transitions. If you do those things, you’ll spend less time correcting problems and more time enjoying a floor that looks straight and performs reliably.
Frequently Asked Questions
What tools do I need to install ceramic tile floors without professional help?
To install ceramic tile floors as a DIY project, you’ll typically need a tile saw (wet saw for cuts), a notched trowel, tile spacers, a grout float, a mixing drill with paddle, a level, and measuring tools. You’ll also want underlayment or thinset-approved backer board (if required), buckets for mixing thinset/grout, and painter’s tape to mark layout lines. Having a rubber mallet, tile cutter for small adjustments, and a sponge for cleanup will make the install cleaner and reduce mistakes.
How do I prepare my subfloor before laying ceramic tile floors DIY?
Proper subfloor preparation is critical for a long-lasting ceramic tile floor, especially when you’re installing without pros. Start by checking flatness with a straightedge and correcting high spots or low areas using appropriate floor patch or self-leveling compound. Remove debris, vacuum thoroughly, and confirm the subfloor is dry and structurally sound; then apply a primer if your thinset system or underlayment requires it. If you’re tiling over plywood, use a suitable underlayment/backer board and follow the manufacturer’s fastening schedule to prevent movement and grout cracking.
How do I choose the right thinset and underlayment for ceramic tile floors?
The best thinset choice depends on your tile type, subfloor material, and whether the area is wet (like bathrooms). Most DIYers use a polymer-modified thinset mortar for ceramic tile floors because it improves bond strength and flexibility, but always match the mortar to your substrate (concrete vs. plywood) and tile size. For underlayment, use cement backer board or an approved uncoupling membrane when installing over wood, and follow manufacturer guidelines for thinset coverage, seams, and height transitions.
Which layout method is easiest for DIY ceramic tile flooring installs?
A grid or “center-out” layout is usually the most straightforward for beginners because it helps you keep tile rows symmetrical and avoid awkward narrow cuts at the edges. Snap chalk lines to find the room’s center, dry-lay tiles to confirm the pattern, and adjust so the border tiles are reasonably sized. Use spacers to maintain consistent joints, and plan for obstacles like doorways and cabinets so your cuts fall neatly where they won’t be very visible. Taking time with layout prevents uneven lines and reduces rework during thinset application.
What are the best tips to prevent common mistakes when installing ceramic tile floors yourself?
The biggest DIY ceramic tile floor pitfalls are poor thinset coverage, uneven spacing, rushing cuts, and not allowing proper curing time. Use the correct trowel notch size, spread thinset evenly, and periodically lift a tile to verify you’re achieving good coverage (often full contact for floors). Keep spacers in place, maintain a consistent slope only where needed, and double-check level as you work. After installing, let the thinset cure fully before grouting, then seal grout if recommended for your type to help resist staining and moisture.
📅 Last Updated: October 09, 2026 | Topic: How to install without professional help ceramic tile floors? | Content verified for accuracy and freshness.
References
- Google Scholar Google Scholar
https://scholar.google.com/scholar?q=ceramic+tile+floor+installation+DIY+subfloor+thinset+grout - Google Scholar Google Scholar
https://scholar.google.com/scholar?q=best+practice+tile+installation+cement+backer+board+underlayment+mortar+coverage - Google Scholar Google Scholar
https://scholar.google.com/scholar?q=silica+dust+tile+cutting+health+guidance+OSHA+NIOSH - Tile
https://en.wikipedia.org/wiki/Ceramic_tile - Thinset
https://en.wikipedia.org/wiki/Thinset_mortar - https://en.wikipedia.org/wiki/Grout_(masonry
- Silica, Crystalline – Overview | Occupational Safety and Health Administration
https://www.osha.gov/silica - Silica and Worker Health | Silica | CDC
https://www.cdc.gov/niosh/topics/silica/ - https://www.tcnatile.com/resources/installing-tile/
- https://pubmed.ncbi.nlm.nih.gov/?term=ceramic+tile+floor+installation+mortar+grout


