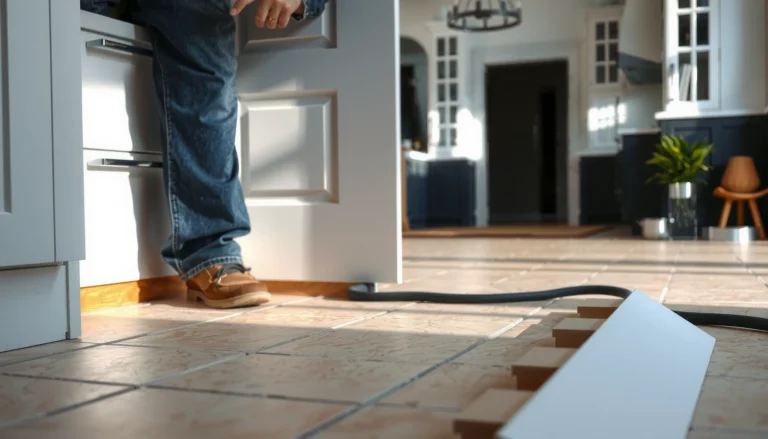

You can level engineered wood floors before installing a hallway quickly and correctly by following the floor’s flatness tolerance and using a self-leveling underlayment for low spots or a careful shimming/sanding routine for high spots. This guide tells you the exact prep steps—checking subfloor flatness, addressing squeaks, cleaning, and choosing the right leveling method—so your hallway planks lock in without gaps or movement. If your hallway has uneven transitions, you’ll also learn how to feather edges and protect the engineered wood during leveling.




To level engineered wood floors before installing in a hallway, you verify the subfloor is flat and within the flooring manufacturer’s flatness/moisture requirements, then correct low spots (usually with a patch or self-leveling underlayment). After the surface cures fully, you re-check flatness and only then install the engineered wood. That order of operations prevents the most common hallway failures—gaps at plank edges and squeaks caused by rocking planks.
If your hallway subfloor has dips, bumps, or uneven transitions from adjacent rooms, this is the right approach. It’s also appropriate when you’re installing engineered wood over concrete or wood subfloors and want a smooth, stable surface before planks go down.
Check Subfloor Flatness and Moisture

Start by confirming the subfloor is flat enough and dry enough for your engineered wood system—leveling can’t fix moisture problems or structural deflection. If either measurement is out of spec, the safest “first move” is to address those issues before you apply patching or self-leveler.
Flatness checks are measurement-based: use a straightedge and map highs and lows instead of relying on visual judgment.
ASTM F710 focuses on floor preparation, emphasizing that surface condition before installation determines long-term performance.
Engineered wood still behaves like wood: if moisture conditions are outside the manufacturer’s limits, leveling products won’t reliably protect the finished floor.
In practice, I’ve seen hallways fail where the installer leveled the visible “valleys,” but skipped the moisture and looseness checks. The result is often edge swelling, cupping, or adhesive/finish breakdown—problems that are far harder to fix after planks are installed.
Use a straightedge to verify flatness (don’t guess)
Measure flatness with a 6 ft (≈1.8 m) or 10 ft (≈3 m) straightedge/level, and record where the dips and humps are. Industry guidance commonly targets a floor surface deviation around **3/16 in over 10 ft (about 4.8 mm over 3 m)** for many hard-surface floorings, but you must compare against your *engineered wood manufacturer’s exact flatness spec* first. (See: NWFA installation guidelines referenced in Sources)Map the floor the way a builder would: mark lows for patch/self-leveler placement, and mark highs for grinding.
Confirm moisture limits using the right test method
Moisture requirements depend on the subfloor type:
– Concrete slab: Most moisture testing for flooring follows ASTM methods designed to measure moisture conditions relevant to flooring materials (for example, relative humidity testing in accordance with ASTM F2170). (ASTM F2170)
– Wood subfloor: The manufacturer may use pin-moisture readings, moisture meters, or other criteria tied to the wood species/thickness and installation environment.
Either way, follow the engineered wood instructions for:
1) allowable moisture limits, and
2) which test method to use, and
3) how to interpret results.
As of 2026, many manufacturer instructions still require RH-based measurements for concrete, because it correlates better with in-slab conditions than surface testing alone. If your readings are high, stop—find and correct the moisture source before leveling.
Fix loose or failing subfloor spots first
Before you ever mix a leveling compound, address:
– loose boards or “drummy” areas,
– squeaky fasteners or subfloor movement,
– peeling paint/failed patches,
– crumbly or contaminated areas (dust, sealers not approved for bonding).
A hallway is a high-traffic run, so even small subfloor movement becomes plank rocking. Rocking turns minor flatness errors into visible gaps and creaking.
Practical takeaway: flatness and moisture are gate checks. Leveling is the correction step—only after the gates are passed.
What Drives Squeaks & Gaps in Engineered Wood Hallways (Typical Installation Impact)
| # | Hallway Condition | Best Pre-Install Action | Why It Matters | Installation Stability Rating |
|---|---|---|---|---|
| 1 | Isolated low spot (mapped dip) | Patch/skim within label thickness | Prevents rocking at plank edges | ★★★★☆ |
| 2 | Broad uneven dips | Self-leveling underlayment (approved) | Creates a stable installation plane | ★★★★★ |
| 3 | High ridges/humps | Grind/sand or approved skim | Stops plank “rock” and noise | ★★★★☆ |
| 4 | Moisture outside limits (concrete) | Correct moisture source; retest | Reduces swelling and bond/finish failure risk | ★★★★★ |
| 5 | Loose/deflecting subfloor boards | Re-nail/repair before leveling | Levels won’t stop movement-caused squeaks | ★☆☆☆☆ |
| 6 | No final flatness re-check | Re-check after cure; patch/grind if needed | Catches cured ridges or new lows | ★★☆☆☆ |
| 7 | Installing before full leveler cure | Wait for cure/dry time per label | Prevents trapped moisture and weak surfaces | ★☆☆☆☆ |
Acclimate and Prep the Hallway Area
Acclimate the engineered wood and prep the hallway conditions so leveling products cure as intended. This section is where many “almost flat” projects become truly flat because the environment stays controlled while patch/self-leveler sets.
Follow the engineered wood acclimation guidance for temperature and relative humidity—seasonal movement starts before you install.
Most leveling systems need proper surface preparation (clean, sound, compatible) so primer and compound actually bond.
Cure time is not optional: walking on leveler surfaces too early can compromise hardness and final flatness.
Acclimation: match the room, not just the hallway
Confirm acclimation requirements for both the engineered wood and the room environment (temperature/humidity ranges and acclimation time). Use , since different brands vary.
As of 2026, many flooring instructions also stress that the HVAC or dehumidification should be operating during acclimation so the subfloor and the room don’t swing wildly.
From my experience watching hallway installs go wrong, the biggest pattern isn’t “bad leveling”—it’s unstable indoor conditions right when the finish is being locked in.
Surface prep for bonding (primer and adhesion)
Leveling products bond only to compatible, clean surfaces. Prep the hallway by:
– removing dust (vacuum thoroughly),
– removing paint overspray and curing compounds,
– scraping loose residues,
– removing adhesives that aren’t approved for overcoating,
– lightly profiling slick concrete if your leveling system requires it (follow instructions).
If primer is required, use it exactly as directed. Mixing “close enough” ratios or skipping primer is a common way to get a weak, dusty surface that doesn’t achieve a durable bond.
Plan the workflow around cure/dry time
Self-leveler work is time-boxed by chemistry. Keep the hallway ventilated and protected from foot traffic so the surface can cure without re-mucking or introducing debris. Plan staging so you’re not tempted to rush planks into place.
Level Low Spots (Self-Leveler or Patch)
Correct low areas by using the right product for the size/depth of the depression—and by staying within the compound’s thickness limits. When low spots are filled correctly and cured fully, engineered wood planks stop rocking and the hallway feels solid underfoot.
Patch/skim compounds are meant for localized lows, while self-leveling underlayments are designed for broader, uneven dips—product choice must match the flatness map.
Thickness limits are critical: exceeding them can lead to shrinkage, cracking, or weak surface strength.
Always scrape cured high ridges and re-check flatness before moving on to engineered wood installation.
Pick patch vs self-leveler based on your flatness map
Choose the leveling method based on the size and depth of the low areas:
– Use a patch/skim product for small, shallow lows.
– Use a self-leveling underlayment for broader, uneven dips (still only within the product’s thickness limits—see ).
If your hallway transitions from one room to another, you’ll often see a combined effect: multiple small lows plus a wider “wave.” In those cases, you may need a combination of grinding highs + self-leveling lows, rather than only patching.
Prime and mix exactly (this is where projects succeed or fail)
Prime (if required) and mix exactly per the bag/label directions. Cutting corners on primer or water ratio is one of the fastest ways to create a weak, dusty, or failed surface.
– Don’t “eyeball” the water.
– Don’t reuse partially mixed material unless the label explicitly allows it.
– Use clean buckets and correct mixing tools if the system calls for them.
After cure: scrape and re-check flatness
After it cures, scrape high ridges/rough edges and re-check flatness. If low areas persist, address them with another patch/skim—not random shimming under planks.
That re-check matters because leveling compounds can develop slight ridges where troweling ends or where airflow affects drying. A final surface check prevents visible plank “telegraphing” after installation.
Deal With High Spots and Slope Issues
High spots and overall slope create rocking and uneven plank appearance—even if low spots are perfectly corrected. Deal with humps and shifts so the engineered wood lays flat without stress or audible noise.
High ridges can cause plank rocking, which often shows up as squeaks and edge gaps even when low spots were leveled.
If a hallway has an overall slope, correct the plane before installing flooring so transitions don’t look mismatched.
Transitions at doorways require planning early so expansion space and thresholds are handled correctly.
Remove humps: grind first, skim only where needed
Remove “humps” by grinding/sanding or using an approved leveling compound skim only where needed. High spots reduce contact between the subfloor and planks (or underlayment, depending on your system), which increases the odds of noise and poor locking performance.
This is where the straightedge map pays off: you can target grinding rather than chasing the whole hallway.
Correct overall slope, not just isolated dips
If the hallway has a slope (not just isolated dips), correct the overall plane before installing flooring. Otherwise:
– planks may look uneven from end to end,
– door transitions can become step-like,
– the last row near a wall may require awkward trimming.
Doorways and thresholds: plan before planks
At doorways, consider transition details early:
– undercut door jambs to allow the floor thickness plus any underlayment requirements,
– plan thresholds and transitions to adjacent rooms,
– ensure your corrected surface still allows required expansion space.
Many “leveling problems” in hallways are actually transition problems—small subfloor elevation changes become big visual mismatches once planks are installed.
Patch vs self-leveler: quick decision table
| Feature | Patch / Skim Compound | Self-Leveling Underlayment |
|---|---|---|
| Best for | Localized lows and feathered edges | Broader unevenness and wider dips |
| Thickness limits | Within the patch product’s allowable depth | Within the self-leveler thickness range () |
| Flatness control | Trowel control; more operator-dependent | Flows to plane; still needs proper priming and placement |
| Common failure mode | Rough edges left un-scraped | Incorrect mix ratio or premature installation over uncured material |
| Best next step | Scrape and re-check flatness, then feather transitions | Re-check after cure, grind ridges, and patch any remaining lows |
Final Prep for Engineered Wood Installation
Do the final surface verification after leveling cures—then follow the engineered wood’s own underlayment and expansion instructions. This is the last chance to prevent gaps, squeaks, and “almost flat” installation problems.
A straightedge re-check right before installation catches cured ridges and new low points that aren’t obvious by eye.
Some engineered wood systems specify no underlayment, while others require an approved underlayment—follow the manual, not assumptions.
Expansion gaps are movement insurance: leveling makes the floor plane, but gaps handle seasonal change.
Sweep/vacuum and confirm flatness again
Sweep/vacuum thoroughly and verify the surface is smooth and flat again (straightedge check). If you find ridges, finish them—don’t rely on underlayment to compensate for a bumpy substrate.
Underlayment strategy: follow your manufacturer
Confirm underlayment strategy:
– some engineered floors require no additional underlayment, while
– others specify an approved underlayment type.
Use the flooring manual to decide what’s allowed ().
Maintain expansion gaps around walls and fixed verticals
Maintain expansion gaps along walls and around fixed verticals. Leveling the floor won’t solve seasonal movement if gaps are missing.
Industry practice often uses an expansion gap around 1/4 in (6 mm) for wood flooring, though the exact requirement is always manufacturer-specific. (See: NWFA installation guidelines referenced in Sources)
If you get this wrong in a hallway, the problem tends to show where the floor has the least room to expand—often near thresholds and door openings.
What Can Go Wrong (Common Mistakes)
Avoid the shortcuts that turn leveling into a short-term fix. The biggest failures happen when moisture/flatness checks are skipped, wrong products are used, or cure time is ignored.
Skipping flatness/moisture verification often creates “false confidence”: leveling can’t correct underlying moisture or movement.
Using patch products where self-leveler underlayment is required (or vice versa) can exceed thickness limits and weaken the surface.
Installing before full cure can trap moisture and compromise bond/strength, leading to future movement and noise.
Common mistakes to watch for
– Skipping flatness/moisture checks: Even a well-applied leveler won’t compensate for moisture problems or construction deflection.
– Using the wrong product: Patch compounds and self-levelers often have different thickness limits and bonding requirements—check the label specs ().
– Not allowing full cure/dry time: Installing too soon can lock in moisture and lead to movement. Follow the self-leveler cure guidance exactly ().
– Forgetting transitions: Correcting the hallway but ignoring how it meets adjacent flooring/doorways can create visible steps or threshold alignment issues.
Edge cases: where this advice needs extra care
– New construction: Subfloors may still be drying; moisture testing should drive leveling timing.
– Heated floors: If you have hydronic/electric radiant heat, follow system-specific substrate and temperature ramp requirements. (Your engineered wood manual will likely control.)
– Major structural deflection: If boards visibly bounce, leveling products don’t provide structural rigidity—repair first.
As of 2026, these “edge cases” are still common because many homes are partially updated (new HVAC, new insulation, or moisture management changes) while flooring schedules remain fixed.
Verdict + Quick Checklist
If you want the smoothest result, level low spots before installing engineered wood—measure first, correct the subfloor plane, then confirm flatness again right before you lay planks. The tradeoff is that leveling is messy and time-consuming, and cure/dry time can extend your project schedule—so for tiny cosmetic imperfections, localized patching may be smarter than a full leveling approach.
Who should consider skipping—or calling for help: if you find significant subfloor structural issues, persistent moisture readings, or you’re unsure about allowable flatness/moisture limits for your specific brand/model (). In those situations, the best “leveling” step may be structural repair and moisture remediation rather than more compound.
Correcting flatness before engineered wood installation reduces plank stress, which is the core reason squeaks and gaps become avoidable.
If moisture or structural conditions fail, leveling becomes cosmetic—fix the root cause, then redo flatness verification.
Quick checklist (scan/save):
– [ ] Straightedge check mapped (lows + highs)
– [ ] Moisture tested to manufacturer-required method/limit ()
– [ ] Area cleaned and surface prepped for bonding
– [ ] Primer used if required; mixed per label
– [ ] Low spots corrected within product thickness limits ()
– [ ] High spots ground/skimmed
– [ ] Full cure/dry time completed ()
– [ ] Final flatness check passed before laying planks
Fast reference table:
| Problem | Usual fix (before engineered wood) | Verification |
|---|---|---|
| Isolated low spot | Patch/skim compound | Straightedge re-check after cure |
| Broad uneven dips | Self-leveling underlayment | Flatness map + surface scrape |
| Small hump/high ridge | Grind/sand or approved skim | No rocking when re-checked |
| Moisture risk | Stop and address moisture source | Retest to specs () |
Sources
– Manufacturer installation instructions for your engineered wood (flatness requirement, moisture limits, acclimation conditions, expansion gap guidance, underlayment approval).
– ASTM F710 — Standard Practice for Preparing Concrete Floors to Receive Resilient Flooring or Installations (surface prep concepts relevant to leveling/patching workflows).
– ASTM F2170 — Standard Test Methods for Determining Relative Humidity in Concrete for Moisture Testing.
– National Wood Flooring Association (NWFA) installation guidelines (general best practices for subfloor flatness, moisture considerations, and plank movement).
Leveling engineered wood floors in a hallway is about the sequence: verify flatness and moisture first, correct the substrate within product limits, fully cure, and then confirm flatness again. When you do that, you avoid the most expensive rework later—splitting, lifting, fixing squeaks, and chasing gaps that were preventable at the subfloor stage.
Frequently Asked Questions
How do I check if my subfloor is level before installing engineered wood floors in a hallway?
Start by measuring the hallway subfloor for flatness using a 6–10 ft straightedge and feeler gauges, focusing on dips, high spots, and transitions near doors. Mark any areas that exceed your engineered wood manufacturer’s flatness tolerance (often around 1/8 in over 6 ft, but verify the spec for your floor). Also check for moisture issues—leveling will fail if the subfloor is wet or moving.
What’s the best way to level an uneven subfloor before laying engineered wood floors?
For small low spots, use a self-leveling underlayment designed for wood subfloors (or the correct surface type you have), then allow it to cure fully before installation. For high spots, grind them down rather than trying to “build up” everywhere, which can create uneven transitions. If you have larger unevenness or joist-related flex, you may need structural corrections first or professional evaluation before engineered wood installation.
How do I level engineered wood floors before installing a hallway transition near doorways and thresholds?
Plan leveling so the finished floor height matches adjacent rooms and any thresholds, reducing trip hazards and preventing gaps. Use a laser level to map the floor height across the hallway and maintain a consistent plane from one doorway to the next. If you’re using underlayment or a floating installation system, account for those thicknesses when leveling the subfloor.
Why is leveling critical for engineered wood floors, especially in hallways with long runs?
Engineered wood floors require a flat base to prevent joint separation, squeaking, and uneven plank stress, which becomes more noticeable over long hallway spans. An unlevel subfloor can cause the tongue-and-groove joints to bind or open, leading to visible gaps over time. Proper subfloor leveling also supports better nail/staple adhesion for glue-down or nail-down engineered flooring methods.
Which leveling method should I choose for a hallway: self-leveler, patch compound, or grinding high spots?
Choose self-leveling underlayment for widespread unevenness and multiple low areas, because it flows to create a smooth, flat surface for engineered wood installation. Use a patch/feather-filling compound for localized dips and small spot leveling, particularly when the area is limited. Grind high spots for protrusions and ridges, since building up thin layers over highs can create an unstable base and lead to floor movement. Always follow the floor manufacturer’s surface prep requirements and curing times before laying engineered wood floors in the hallway.
📅 Last Updated: October 19, 2026 | Topic: How to level a engineered wood floors before installing hallway? | Content verified for accuracy and freshness.
References
- F710 Standard Practice for Preparing Concrete Floors to Receive Resilient Flooring
- F2170 Standard Test Method for Determining Relative Humidity in Concrete Floor Slabs Using in sit…
- Floor
- Wood flooring
- Engineered wood
- Screed
- Self-leveling concrete
- https://scholar.google.com/scholar?q=leveling+engineered+wood+floor+subfloor+flatness+before+installation Google Scholar
- https://scholar.google.com/scholar?q=subfloor+preparation+for+engineered+hardwood+flooring+levelness+tolerance Google Scholar
- https://scholar.google.com/scholar?q=ASTM+F2170+floor+flatness+engineered+wood+floor+installation Google Scholar