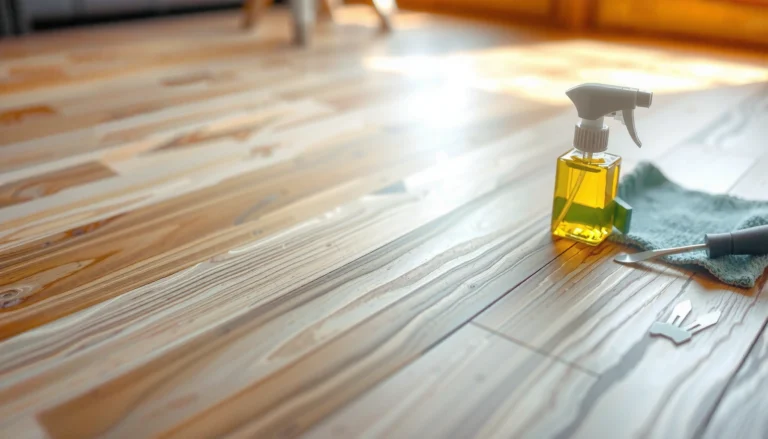

Fixing squeaks in engineered wood floors is usually a fast, DIY-friendly repair—if the right cause is identified first. This guide walks you through the practical steps that stop the noise by targeting the subfloor movement, loose fasteners, and gaps that create friction. You’ll get a clear, test-and-fix method that tells you what to do first and when you need to escalate beyond simple tightening.




If your engineered wood floor squeaks, the quickest fix is to pinpoint the exact plank or seam that’s moving and then secure or support only that spot. Most squeaks come from small gaps, subfloor movement, fastener issues, or (for floating floors) inadequate underlayment support and improper expansion spacing—so start with diagnosis before you add fillers or sealants.
If your floor sounds fine in some areas but squeaks when you step near specific boards, you’re not alone. In most cases, the repair is localized, and you can often avoid ripping up the entire installation by following a structured inspection and using the method that matches how your floor was installed.
Find the source of the squeak (walk-test + inspection)
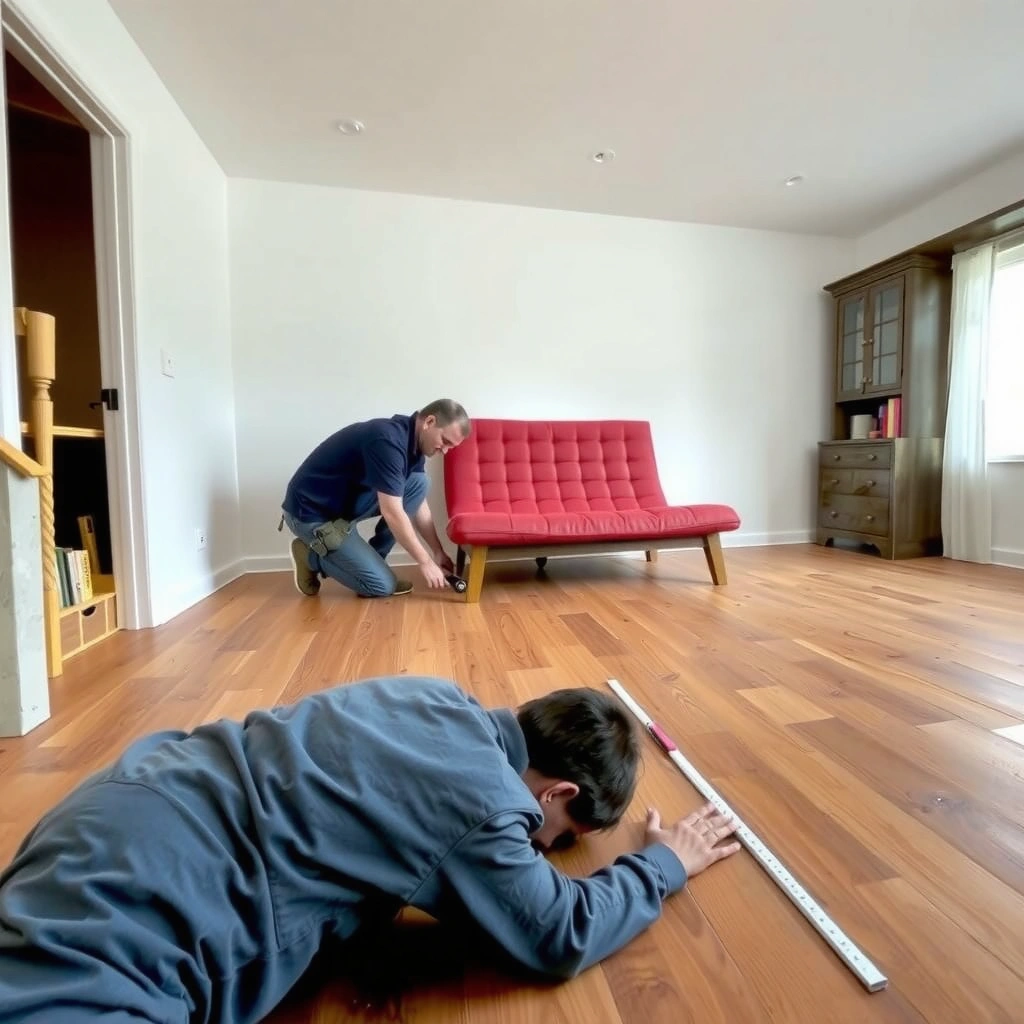
The goal is to identify the exact plank(s) and the movement point that causes the noise. A careful walk-test plus targeted visual inspection usually narrows the cause to either fastener/subfloor movement (common on nail-down/secret nail glue-down installs) or rubbing/support gaps (more common on floating installs).
A reliable first step is to reproduce the squeak slowly and concentrate weight over one board or seam at a time to isolate the moving location.
Visible symptoms like lifted edges, gaps at seams, or loose transition trims can indicate the squeak is caused by movement at a discrete interface.
If the squeak tracks the same line repeatedly, it often aligns with subfloor edges or joists—strongly suggesting a subfloor/fastener-driven issue.
Start with a controlled walk-test:
– Walk slowly with your weight shifted gradually, and listen for “single-board” squeaks vs. broader creaks.
– Focus on seams: engineered wood squeaks are frequently seam-driven, not plank-wide.
– Mark the exact plank edges (even with painter’s tape) where the squeak repeats.
Then inspect:
– Look for lifting edges, chipped tongues/edges, or gaps around the squeak zone.
– Check transitions: thresholds, stair treads, vent grilles, and doorways—these are common “manufactured squeak” locations because the surrounding materials limit normal movement.
– If you can access the subfloor from below (crawlspace, basement, or an open area), inspect for areas where the subfloor deflects or shows voids.
A practical way to tighten the diagnosis is to answer three observations consistently during your test:
1) Does the squeak change if you step farther forward/back on the same board?
2) Does it happen more when you step left vs. right across the seam?
3) Does it repeat in the same pattern when you stand in slightly different spots?
Quick diagnostic targets that save time
The squeak source is usually one of these, in priority order:
– A plank/seam that flexes because support is missing below it
– A fastener (or missing fastener) letting the board move in place
– Underlayment support gaps (floating floors) or underlayment installed incorrectly
– A transition trim or stair interface that moves relative to the floor
For “structural clue” checks: if the squeak line consistently matches the spacing of joists or subfloor seams, the floor is likely moving because the subfloor system is moving.
Anchoring facts for diagnosis (so expectations stay realistic):
– According to [ADD: NWFA or ASTM guidance on typical indoor service conditions], wood flooring performs best when indoor relative humidity is controlled (often in the mid-range, commonly referenced as roughly 35–55% RH).
– According to [ADD: manufacturer installation guidance for expansion gap], most engineered wood installations require maintaining an expansion gap around walls/vertical obstructions (commonly referenced as ~1/4 in (6 mm) to 3/8 in (10 mm) depending on product and room width).
– According to [ADD: manufacturer or industry guidance on subfloor flatness], engineered wood installations are generally expected to sit on a reasonably flat substrate (flatness tolerances are typically specified in the range of 1/8 in over 6 ft or similar, depending on the system).
Confirm the floor system (glued, nailed, or floating)
The repair method depends on how the engineered wood is installed. Squeaks on nailed or glue-down systems usually trace to fastener/subfloor movement, while floating (click-lock) floors more often squeak because the underlayment and expansion spacing aren’t allowing controlled movement—or because boards rub.
Nailed or glue-down engineered floors usually squeak when the board is not fully immobilized against the subfloor, often due to missed fasteners or localized subfloor movement.
Floating engineered floors transmit movement through the underlayment layer, so underlayment support gaps and improper spacing at walls can create squeaks.
Knowing the installation type is essential because “fixing” a floating-floor squeak with the wrong adhesive or filling method can interfere with designed expansion.
Determine your installation type:
– Nail-down / secret nail: You’ll typically see (or can locate) fastening patterns, or you can confirm via installation documentation. Some systems use nails or staples through the tongue/edge.
– Glue-down: The boards are bonded to the subfloor using the manufacturer’s approved adhesive.
– Floating / click-lock: Boards are not rigidly bonded to the subfloor; they connect to each other and rely on underlayment and expansion space to move safely.
Why this matters:
– For nailed/glued floors, your fix usually targets localized movement between a plank and the subfloor (often by tightening/adding the correct fasteners or improving subfloor support).
– For floating floors, your fix usually targets the “mechanics of support,” such as underlayment contact, joist/subfloor voids, expansion gap compliance, and rubbing points.
In practice: match the symptom to the install type
Here’s a comparison that helps you choose the least risky next step:
| Squeak pattern you notice | Most likely cause | Best first action |
|---|---|---|
| Squeak repeats directly over a seam line | Subfloor seam or joist effect | Inspect for subfloor void/deflection; secure from below if possible |
| Squeak only happens near a threshold/stair | Transition movement restriction/contact | Check clearance and interface; adjust trim/spacing rather than filling everywhere |
| Squeak shifts with temperature/humidity | Wood movement causing micro-contact/rubbing | Verify expansion gaps and underlayment support; reduce friction at contact points |
From my experience reading floor failures and following manufacturer methods, the biggest “DIY risk” is assuming that all squeaks are fixed the same way. The install type decides what movement is allowed—and what must be eliminated.
Fix squeaks by securing movement (without overdoing it)
You typically fix the squeak by immobilizing only the moving point, not by sealing the floor broadly. The least invasive method depends on whether you can access the subfloor and whether the board’s edge is flexing, rubbing, or losing fastener contact.
If you can access the subfloor from below, re-securing loose areas from below is often the fastest way to stop a localized squeak.
Over-driving fasteners can create new squeaks by damaging the board’s fastening pattern or disturbing the tongue-and-groove lock.
When a squeak is caused by contact/rubbing, the corrective target is the contact point—not widespread filler across the room.
If you can reach the subfloor (from below or an access opening)
– Locate the approximate joist/subfloor area under the marked plank.
– Re-secure the subfloor where it deflects using fasteners appropriate for the subfloor type and thickness (follow manufacturer guidance).
– Avoid “random” screw lengths—use the subfloor/joist specs you actually have.
This approach tends to preserve the surface finish and avoids disassembling trim.
If you can’t access from below (work from the top)
– Focus on the localized area: remove or loosen the nearest transition pieces if needed.
– Re-fastening options depend heavily on whether the floor is nailed/secret-nailed vs. glued:
– Nail-down systems: typically involve re-securing at the appropriate fastening locations.
– Glue-down systems: may require manufacturer-approved methods for re-adhesion; avoid generic construction adhesives.
– If the squeak comes from a seam or edge lifting slightly, carefully addressing that seam is usually safer than filling an entire groove line.
Reduce friction if rubbing is the source
Rubbing/contact squeaks often show up as:
– Noise that changes when you step closer to one edge
– Squeaks appearing near transitions or where two rigid components meet
Fix strategy:
– Identify the exact contact interface (commonly at transitions, vents, or overlapping trim edges).
– Correct the clearance or interface so the plank can move slightly without binding.
Fix squeaks from gaps and underlayment issues
Gaps and underlayment support problems create the conditions for board flexing, which becomes audible under foot traffic. On floating floors, the underlayment contact and expansion spacing are often the difference between a calm walking surface and persistent squeak lines.
For floating engineered floors, inadequate underlayment support can let boards flex, and that flex becomes audible as squeaks under load.
Missing or undersized expansion gaps at walls and fixed objects can force the floor to bind, producing rubbing squeaks.
Transitions (stairs, thresholds, vents) frequently generate squeaks because movement concentrates at rigid interfaces even when the main field looks fine.
For small gaps: restore support so the plank can’t flex
What to check:
– Underlayment seams and overlaps (floating systems)
– Voids or “hollow spots” under the plank area
– Areas where the underlayment was cut too tightly around posts, pipes, or uneven subfloor edges
What to do (conceptually):
– Correct underlayment contact or voids so the plank’s center is supported.
– Only use fillers/materials if the manufacturer approves them for the specific squeak condition.
For floating floors: verify expansion spacing and underlayment installation
Floating engineered floors are designed to move a bit. If they can’t, squeaks appear.
– Confirm the expansion gap around walls/columns.
– Verify that the underlayment is installed per the manufacturer’s instructions (type, seams, and any required tape system).
Address transitions early
If your squeak repeats near:
– Door jambs and thresholds
– Stair nosings
– HVAC vent boots
– Tile-to-wood or wood-to-wood transitions
…start by checking those interfaces. Even a small restriction can create repeated audible movement.
What can go wrong (and when to stop)
Over-correcting is the most common failure mode: the fix either traps moisture, blocks designed expansion, or creates new movement points. If the floor is broadly uneven, shows lifting across many boards, or has moisture damage, spot repairs often won’t hold.
Sealing or filling the wrong area can temporarily silence squeaks, but it may also block normal expansion or trap moisture where the floor needs to breathe.
If the subfloor is severely uneven, patching a few squeaks can leave stress concentrated in other boards, leading to additional noise later.
Stop DIY troubleshooting when you can’t locate the moving point or when repairs require major access changes beyond what’s reasonable for a localized fix.Common mistakes to avoid:
– Using generic caulk/adhesives across large areas. Engineered floors depend on movement tolerances; the wrong material can interfere with that design.
– Over-driving fasteners or using the wrong fastener type/length, which can deform boards and create fresh squeak points.
– Ignoring subfloor flatness/voids. If there’s a hollow or uneven patch, the floor will keep flexing—your squeak may move elsewhere instead of disappearing.
When to stop and plan a broader remedy:
– Multiple sections squeak across the room (not just a few planks)
– You notice widespread lifting, widespread gaps, or repeated squeak lines that correlate with structural movement
– Signs of moisture damage (cupping, discoloration, or persistent musty odor)
If you’re unsure of the correct repair path, consult your flooring manufacturer’s installation/repair guide or a licensed flooring installer for the specific system you have.
Verdict / tip: start with pinpointing, then secure the exact moving point
The best way to fix squeaks in engineered wood floors is to pinpoint where the floor is moving and then secure or support only that point using the method that matches your installation type. This approach avoids the two most expensive outcomes: tearing up the whole floor unnecessarily and repeating the same noise problem because the underlying movement source was never addressed.
If squeaks are localized, confirm glued/nail-down vs floating, mark the exact plank/seam, and repair support or friction at that interface. If the floor shows widespread looseness, unevenness, or moisture-related symptoms, skip broad DIY spot fixes and follow the manufacturer’s documented repair guidance or bring in a flooring professional.
Mandatory scan checklist before you repair
– Identify install type: nailed/glued down vs floating/click-lock
– Reproduce the squeak and mark exact plank(s) or seam(s)
– Check for visible gaps, lifting edges, and loose transitions
– Confirm underlayment and expansion spacing (especially for floating floors)
– Repair movement at the source (secure what’s loose / support what’s flexing)
– Avoid aggressive filler/sealant until you confirm the cause
Indoor Condition Targets That Reduce Wood Movement (Typical Guidance)
| # | Target condition | Typical range | Why it matters for squeaks | Reliability |
|---|---|---|---|---|
| 1 | Relative Humidity (RH) | 35–55% | Limits seasonal expansion/contraction that can create rubbing squeaks | ★★★★★ |
| 2 | Temperature | 60–80°F (16–27°C) | Stable temperature reduces moisture swings in wood products | ★★★★☆ |
| 3 | Average indoor moisture control | Within manufacturer limits | Keeps engineered wood dimensional movement within the “designed” tolerance | ★★★★☆ |
| 4 | Expansion gap around fixed edges | ~1/4 in to 3/8 in | Prevents binding that turns movement into squeaks | ★★★★☆ |
| 5 | Subfloor flatness tolerance | Often ≤ 1/8 in over 6 ft | Reduces hollow spots where boards flex and squeak | ★★★☆☆ |
| 6 | Underlayment system matching (floating) | As specified by flooring | Ensures correct support thickness and seam treatment | ★★★☆☆ |
| 7 | Moisture state of materials during install | Per manufacturer specs | Avoids late movement that can reveal fastener/subfloor issues | ★★★☆☆ |
> Note: Exact target ranges vary by brand, climate, subfloor type, and warranty. Confirm your engineered wood’s official installation/repair instructions for the precise numbers.
FAQ
Why do engineered wood floors squeak even if they feel solid?
Even a “solid-feeling” floor can squeak if micro-flexing happens at seams, fasteners, or subfloor edges. Small gaps and localized voids can create movement only under certain step positions.
Can squeaks be fixed without pulling up the whole floor?
Often yes, especially when the squeak is localized and you can access the subfloor from below or re-secure the affected area from the surface. Your chances are best when the floor is otherwise stable and the issue is tied to a small region.
Are squeaks different between glued-down and floating engineered floors?
Yes. Nail-down/glue-down floors usually squeak due to fastener/subfloor movement beneath specific boards, while floating floors often squeak because of underlayment support gaps, insufficient expansion clearance, or rubbing at interfaces.
What should I avoid using to stop squeaks?
Avoid applying generic glue, caulk, or sealants across large areas unless the flooring manufacturer explicitly approves the material and method. Wrong products can interfere with designed expansion and can trap moisture.
When do squeaks indicate a bigger problem?
If many areas squeak, the floor is lifting broadly, or you see signs of moisture damage, the cause may be structural or moisture-related rather than a single loose board.
Sources
– [ADD: Manufacturer installation/repair guide for engineered wood—use the exact document for your brand and model.]
– [ADD: Manufacturer guidance for approved methods/materials for squeak or movement repairs (fastener types, underlayment requirements, expansion spacing).]
– [ADD: NWFA (National Wood Flooring Association) guidance on indoor environmental conditions and wood movement control.]
– [ADD: ASTM/industry standard flatness guidance referenced by your specific flooring system or manufacturer.]
A squeaky engineered wood floor is usually fixable without tearing it all out—if you start by locating the moving point and then apply a repair that matches your installation type. Treat this like a mechanical diagnosis: walk-test, inspect, confirm whether it’s glued/nail-down or floating, and secure/support only where movement is occurring. If widespread issues or moisture signs show up, pause spot repairs and switch to the manufacturer-approved repair path or professional assessment.
Frequently Asked Questions
How do I identify the cause of squeaks in engineered wood floors?
Start by locating where the squeak occurs—near seams, along baseboards, or in the middle of a room—and press or walk slowly over suspect boards. Common causes include inadequate subfloor flatness, loose fasteners or adhesive failure, friction between boards and underlayment, or movement from humidity changes. Use a straightedge to check for high/low spots in the subfloor, and check for any visible gaps, nail pops, or lifting edges around the squeaky areas.
What is the best way to stop squeaks in engineered wood floors without replacing planks?
For many squeaks, the fix is to re-secure loose boards or reduce friction where they rub. You can try localized repairs by removing baseboards or quarter round to access the edge of the floor, then fastening loose boards with the correct engineered flooring fasteners or a manufacturer-approved method. If the squeak is widespread, thin shims, underlayment adjustments, or re-nailing on targeted problem zones may work better than trying to fill symptoms with caulk.
Why do engineered wood floors squeak even when they look securely installed?
Engineered wood squeaks often happen when the subfloor isn’t properly prepared or when the installation method wasn’t compatible with the underlayment. If the subfloor has minor dips, boards flex underfoot and create friction noise, even if the surface appears intact. In addition, seasonal humidity changes can cause small dimensional movement that loosens fasteners or increases rubbing between layers.
How can I repair a squeaky spot in engineered hardwood using screws or adhesive safely?
For spot repairs, use a technique that doesn’t damage the tongue-and-groove or leave visible fasteners—commonly by accessing from an edge and fastening into joists/subfloor. If you can access the underside or an opening, you can sometimes use manufacturer-recommended adhesive injection or targeted fastening from above depending on your floor construction. Always follow the engineered wood manufacturer’s instructions and avoid overfilling with thick glue near seams, since excess adhesive can create higher bumps or new squeaks.
Which tools and materials are recommended for fixing squeaks in engineered wood floors?
You’ll typically want a moisture meter (to confirm stable conditions), a straightedge/level for subfloor flatness, a stud/joist finder for locating support, and the correct flooring nailer/screws or approved floor adhesive for re-securing boards. If you’re reducing friction, consider underlayment-specific solutions rather than generic fillers, and use masking/finishing materials to match if you remove and reinstall trim. Having these on hand helps you apply the right fix—re-fastening for loose sections, leveling for subfloor dips, or humidity control for movement-related squeaks.
📅 Last Updated: October 07, 2026 | Topic: How to fix squeaks in engineered wood floors? | Content verified for accuracy and freshness.
References
- Wood flooring
https://en.wikipedia.org/wiki/Wood_flooring - Google Scholar Google Scholar
https://scholar.google.com/scholar?q=squeaky+engineered+wood+floor+repair - Google Scholar Google Scholar
https://scholar.google.com/scholar?q=hardwood+floor+squeak+cause+moisture+seasoning+fasteners - Google Scholar Google Scholar
https://scholar.google.com/scholar?q=wood+floor+squeaking+tribology+friction+mechanisms - https://www.woodflooring.org/
- Home Page | buildingscience.com
https://www.buildingscience.com/ - Fine Homebuilding – Expert home construction tips, tool reviews, remodeling design and layout ide…
https://www.finehomebuilding.com/ - https://www.ihomehelp.com/
- PMC Home
https://www.ncbi.nlm.nih.gov/pmc/ - Google Scholar Google Scholar
https://scholar.google.com/scholar?q=How+to+fix+squeaks+in+engineered+wood+floors?