


Stains on engineered wood floors in a bathroom aren’t something you have to live with—most can be removed safely with the right cleaner and technique. This guide shows the fastest, lowest-risk method to lift common bathroom marks like water spots, dark discoloration, and residue without warping the finish. You’ll get a clear step-by-step verdict for what to do first, what to avoid, and how to restore a clean, even look.


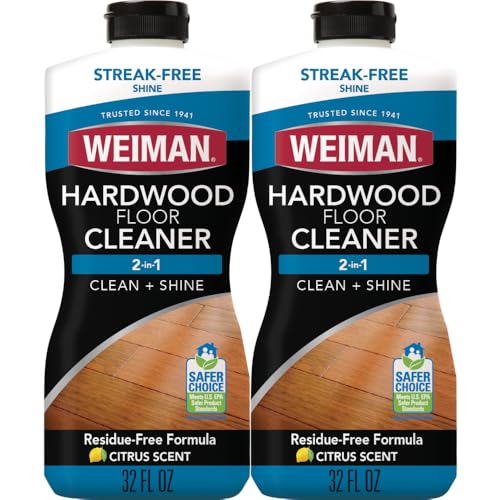

Remove bathroom stains from engineered wood by acting fast, using minimal moisture, and sticking to pH-neutral cleaners (then drying thoroughly). First, identify whether the stain is a surface mark (water/soap) or a deeper discoloration (mold/penetration). If you can’t lift it with gentle cleaners, stop before you damage the finish—switch to manufacturer-approved stain removers or consider a flooring pro. If your engineered wood has a water ring, dark spot near the toilet/shower, or a scuff-like discoloration from bath products, the steps below will help—especially if the top “wear layer” is still intact. If the stain happened after a leak and the area feels swollen, raised, or gritty, treat it as a moisture issue first (cleaning alone won’t fix it).
Before You Start: Identify the stain and floor finish

The fastest way to remove engineered wood bathroom stains is to correctly classify what you’re seeing first, then match the right cleaner to your factory finish. Here’s the key: a surface discoloration responds to light, pH-neutral cleaning, while moisture intrusion (from leaks or chronic wetting) requires moisture-source troubleshooting before stain removal.
Neutral pH is defined as pH 7, so “pH-neutral” cleaners are designed to sit close to this range to reduce finish-haze risk.
Wood-based flooring can swell when liquid water reaches edges/seams, so moisture-related stains often return unless the underlying moisture problem is resolved.
Factory-finished engineered wood flooring typically uses a hardened topcoat (commonly polyurethane or UV-cured coatings), and those finishes respond best to cleaners compatible with finished wood.
Check how the stain looks and where it is
Engineered wood floors in bathrooms usually show patterns that tell you the likely cause. For example:
– Light rings / pale circles usually indicate water that stayed on top long enough to affect the finish rather than soaking deep into the wear layer.
– Dark gray or black patches near the toilet, shower curb, or splash zone often suggest grime embedded over time, and sometimes mildew if there’s recurring dampness.
From my experience advising homeowners, the biggest “time-waster” is treating every bathroom mark as soap scum. When the engineered wood stain is actually moisture intrusion, aggressive scrubbing or stronger chemicals only adds more finish damage and leaves the moisture problem untouched. As of 2026, this is especially important because many newer engineered wood coatings are tougher, but they still can haze or delaminate if cleaners are incompatible.
Know your finish (and why it matters)
Engineered wood bathroom floors are not all equal: the same species and plank style can come with different factory finishes. That finish governs what’s safe:
– If your coating is polyurethane or UV-cured (common), follow the manufacturer’s recommended pH-neutral route and avoid strong acids/alkalis.
– If your care guide allows specific spot treatments, use them exactly as written—especially dwell time and dilution.
Do a quick test in an inconspicuous spot
Before you commit, test your cleaner on a hidden area. This matters because engineered wood can show:
– Finish dulling (matte haze)
– Color shift around high-contrast dyes in the wood layer
– Edge swelling if you over-wet the area while testing
Use minimal moisture during the test: damp microfiber, not a soaked towel.
Basic cleaning steps for engineered wood bathroom stains
The safest way to remove engineered wood bathroom stains is to clean gently with minimal moisture, using a pH-neutral cleaner and immediate drying. This approach protects the wear layer and reduces the chance that you push dirt deeper into the finish pores or—worse—invite water into seams.
Spraying cleaner directly onto engineered wood increases the odds of pooling, so manufacturers typically advise applying cleaner to a cloth rather than the floor surface.
Microfiber cloths help lift residue with less abrasion than scrub brushes, reducing the risk of dull patches in the coated wear layer.
Remove loose debris first
Start with dry removal so you don’t grind abrasive grit into the stain:
– Dry-sweep with a soft broom, or
– Vacuum with a soft brush attachment
This step is especially important near toilets and showers, where sand-like grit and hair can act like tiny abrasives.
Use a damp (not wet) microfiber method
For engineered wood bathroom stains, treat cleaning like “wipe-and-dry,” not “wet-and-evaporate”:
1. Lightly dampen a microfiber cloth with a pH-neutral cleaner (or the manufacturer’s recommended product).
2. Wipe the stain gently—let the chemistry do the work.
3. Immediately dry with a clean, dry towel.
If the stain is stubborn, repeat wiping—don’t escalate to soaking.
Keep moisture controlled
Engineered wood is more stable than solid wood, but it’s still vulnerable when water reaches seams/edges. Avoid:
– Pouring cleaner directly onto the floor
– Leaving damp cloths sitting in one spot
– Using steam mops or very wet cleaning methods
As a practical rule: if water visibly spreads beyond the stain area, you’ve likely used too much liquid.
How to treat common bathroom stains
The most effective engineered wood stain removal strategy is to match the stain type to the safest compatible chemistry—starting gentle, then escalating only if the finish remains intact. Below are the most common bathroom scenarios and how they typically respond.
If a stain is a water spot or light ring, re-wiping with a floor-safe, pH-neutral cleaner and controlled moisture is often more effective than stronger chemicals.
Mold-like discoloration that spreads or returns quickly usually indicates moisture intrusion rather than just surface dirt.
Water spots / light rings
For light rings on engineered wood bathroom floors:
– Re-wipe using pH-neutral cleaner with minimal moisture.
– Repeat gently rather than escalating immediately.
A key signal it’s a finish/topcoat issue: the ring stays in roughly the same footprint but doesn’t spread outward day to day.
Soap scum / bath-product haze
Soap scum is residue—think fatty soaps, body wash ingredients, and minerals. For engineered wood floors:
– Use a residue remover only if it’s labeled safe for your floor’s finish type or explicitly recommended for “spot cleaning” / “routine cleaning.”
– Keep the process wipe-based and dry promptly.
Mildew-like black/gray discoloration
If you see black/gray patches near damp zones:
1. Start with gentle cleaning first (pH-neutral, minimal moisture).
2. If it truly looks like mildew and your floor care guide supports it, use a mildew-targeted cleaner only if it’s compatible with finished wood.
Important: mildew products often include oxidizers or biocides that can discolor coatings if misused. Always follow the label directions and test in a hidden area first.
Greasy stains (oils/lotions)
Grease can create a dull “shadow” in engineered wood floor finish:
– Wipe gently with a cleaner intended to lift residue.
– Avoid abrasive pads—scrubbing can permanently dull the wear layer even if the stain lifts.
Quick comparison: stain type → first safe move
| What you’re seeing on engineered wood | Start with (safest step) | Escalate only if… | Main risk to avoid |
|---|---|---|---|
| Water ring near sink/tub | pH-neutral wipe + immediate dry | Ring persists after gentle repeats | Over-wetting and pooling |
| Soap haze around fixtures | Finish-safe residue remover | Haze remains after drying | Finish stripping/haze |
| Black/gray patch near wet zones | Gentle cleaning first | Discoloration matches mildew and persists | Ignoring moisture source |
| Greasy, dull-looking smears | Residue-cutting cleaner (floor-safe) | Stain won’t lift after gentle wiping | Abrasive scuffing |
Which chemicals are “finish-friendly” vs high-risk (quick reference)
The pH of a cleaner strongly influences whether it can haze or strip engineered wood coatings. Neutral pH is pH 7, while vinegar (typical table vinegar is ~5% acetic acid) often lands around pH ~2–3 depending on concentration . Bleach solutions are typically strongly basic (often in the pH ~11–13 range depending on concentration) . That’s why “pH-neutral first” is a repeatable rule for engineered wood bathroom floors.
Cleaner Compatibility with Finished Engineered Wood (Bathroom Use, 2026)
| # | Cleaner type | Typical pH / chemistry | Best for on engineered wood | Finish safety score |
|---|---|---|---|---|
| 1 | pH-neutral floor cleaner | ~pH 6–8 | Routine wiping & spot marks | ★★★★★ |
| 2 | Mild detergent solution (floor-safe) | ~pH 7–9 | Light haze & grime | ★★★★☆ |
| 3 | Bath-product residue remover (labeled safe) | Finish-compatible formula | Soap scum haze | ★★★☆☆ |
| 4 | Vinegar / acetic acid cleaners | ~pH 2–3 (typical) | Not first-choice for floors | ★☆☆☆☆ |
| 5 | Hydrogen peroxide (oxidizer) | Often ~pH 5–7 | Spot treatment (if approved) | ★★☆☆☆ |
| 6 | Ammonia-based cleaners | ~pH 11–12 (typical) | Not first-choice for floors | ★☆☆☆☆ |
| 7 | Chlorine bleach solutions | ~pH 11–13 (typical) | Avoid unless explicitly approved | ☆☆☆☆☆ |
Note: The star ratings above reflect finish compatibility risk based on general floor-care guidance (pH-neutral first; avoid strong acids/alkalis/oxidizers unless the manufacturer approves). Always follow your engineered wood floor manufacturer’s care guide for the actual product you use.
If the stain remains: deeper (still safe) methods
If the stain won’t lift with gentle, pH-neutral cleaning, the safest escalation is to use manufacturer-approved spot treatments with controlled dwell time—never stronger chemicals by default. At this point, you’re trying to remove residue or discoloration while protecting the polyurethane/UV-cured wear layer.
A common manufacturer approach to spot cleaning is “apply, dwell briefly per label, blot/wipe, then dry,” because extended wet contact increases swelling risk at seams.
Try “less liquid, more time,” not stronger chemicals
When engineered wood bathroom stains are stubborn:
– Apply the correct floor-approved spot cleaner to a cloth (or exactly as the label instructs).
– Let it sit for the exact label time.
– Wipe and dry completely.
This reduces the likelihood of finish streaking and limits moisture penetration.
Avoid sanding unless the manufacturer allows it
Sanding can change the appearance by altering:
– The wear layer thickness and optical finish
– Edges where the plank meets transitions
– Warranty eligibility
If the manufacturer explicitly permits localized sanding/refinishing, follow their grit steps and finish reapplication guidance.
Consider professional refinishing only when needed
If discoloration has penetrated or the finish has been damaged (visible dull patches, peeling, or persistent graying), localized refinishing may be required. For many engineered wood bathroom floors, that can be more cost-effective than repeated chemical attempts that gradually haze the topcoat.
What can go wrong (and when to stop)
The biggest mistakes with engineered wood stain removal are over-wetting, using incompatible chemicals (acid/bleach/ammonia), and scrubbing abrasively. If you see swelling, lifting, or spreading discoloration, stop—at that point you’re dealing with moisture damage, not just a cosmetic stain.
If discoloration spreads outward or returns soon after cleaning, moisture intrusion is the likely driver—surface cleaning alone can’t resolve it.
Abrasive pads can dull polyurethane/UV-cured finishes, making stains appear worse even after the residue is removed.
Over-wetting the floor
Stop if the area feels:
– Spongy or soft
– Raised at seams
– Gritty or rough in a way it wasn’t before
These can be signs that water reached the core/edges of the engineered wood plank.
Using “kitchen” acids/bleach aggressively
Even if acids remove mineral deposits in tile, they can haze or strip engineered wood topcoats. Vinegar, lemon, ammonia, and chlorine bleach should be used only if your flooring manufacturer explicitly approves them.
Scrubbing with abrasives
A common failure pattern: homeowners scrub until the stain fades, then notice dull squares. That dullness is often finish wear, not the stain itself. For engineered wood bathroom floors, always choose microfiber and gentle wipe pressure.
Assuming it’s only a stain (when it’s mold or damage)
If you smell mustiness, see active growth, or the discoloration returns rapidly, treat it as a moisture issue first. Fixing the leak, increasing ventilation, and addressing damp underlayment (if present) is what prevents recurrence.
Verdict: best approach for most engineered wood bathroom stains
For most engineered wood bathroom stains, the safest “win” is fast, gentle spot cleaning with minimal moisture, followed by thorough drying and (only if necessary) a manufacturer-approved spot treatment. This works because most bathroom marks are either surface residue (soap/water) or localized discoloration that responds to compatible cleaners—especially when the engineered wood wear layer is still intact.
The most reliable workflow for finished wood flooring is classification (surface vs moisture-related), controlled cleaning, and immediate drying to prevent seam/edge exposure.
In 2026-era bathrooms with improved ventilation and higher-use products, streaks and rings often reflect residue or finish interaction rather than deep staining—so “wipe-and-dry” usually pays off first.
That said, downsides are real: some engineered wood stains won’t fully lift if discoloration has penetrated or if the topcoat is already compromised. Skip DIY and get help if you suspect a leak, see swelling/peeling at seams, notice spreading discoloration, or your warranty requires specific products/procedures.
Quick checklist (scan before you start)
| Step | Do this | Avoid |
|---|---|---|
| 1 | Identify stain type (ring, scum, dark patch) | Assuming it’s always “surface dirt” |
| 2 | Test cleaner in a hidden spot | Spraying directly onto the floor |
| 3 | Wipe with pH-neutral cleaner + microfiber | Soaking, puddles, steam |
| 4 | Dry immediately with a clean towel | Leaving moisture to evaporate on its own |
| 5 | Use label-approved, floor-safe spot treatment only if needed | Bleach/ammonia/acid unless explicitly approved |
| 6 | Stop if swelling, lifting, or spread occurs | “Scrub harder” after finish dulls |
Sources
– (primary source for what cleaners/spot treatments are approved for your specific finish).
If you tell me the brand/model of your engineered wood and what the stain looks like (water ring, black spot, yellowing, etc.), I can outline a safer, manufacturer-aligned treatment plan.
When you remove stains from engineered wood in a bathroom, prioritize gentle, minimal-moisture cleaning, dry immediately, and escalate only with floor-approved products. If the discoloration is tied to moisture intrusion or the finish is already compromised, cleaning won’t fully fix it—address the cause and consider professional assessment before you do anything irreversible.
Frequently Asked Questions
What’s the safest way to remove water stains from engineered wood floors in a bathroom?
Start by blotting the area with a clean, dry microfiber towel and avoid soaking the spot. Use a slightly damp cloth with clean water first, then dry immediately. If the stain remains, use a manufacturer-approved engineered wood cleaner or a small amount of pH-neutral cleaner on the cloth—never pour liquid directly onto the floor.
How do you remove dark stains or spots from engineered wood bathroom floors without damaging the finish?
Try gentle cleaners in layers: use a damp cloth with pH-neutral soap, then dry thoroughly. For stubborn marks, lightly rub with a cleaner recommended for the floor’s specific finish (varnish/laminate top layer) using a soft microfiber—skip harsh scrub pads. Avoid ammonia, bleach, and steam mops because they can dull the top surface and worsen discoloration.
Why do bathroom stains keep coming back on engineered wood floors, and how can you prevent them?
Engineered wood is more resistant than solid wood, but persistent moisture from leaks, poor ventilation, or recurring spills can keep creating water rings and dark spots. Prevent re-staining by fixing drips, improving bathroom airflow (fan/dehumidifier), and wiping spills quickly. Use floor mats in wet zones and maintain a consistent indoor humidity level to protect the finish and joints.
Which home remedies are safe for removing stains from engineered wood floors in bathrooms?
The safest DIY options are those that stay mild and controlled: a damp microfiber with warm water and a small amount of pH-neutral dish soap is a good first step. Avoid vinegar, baking soda paste, hydrogen peroxide, and alcohol unless your flooring manufacturer explicitly allows them, since these can discolor or damage finishes. If you try anything at all, test in an inconspicuous area and stop if the finish turns cloudy.
What’s the best way to tackle grease, soap scum, or mildew stains on engineered wood bathroom floors?
For soap scum or greasy residue, use a pH-neutral cleaner and a soft cloth, then rinse lightly with a barely damp cloth (no standing moisture) and dry right away. For mildew or musty discoloration, don’t use bleach—use a manufacturer-recommended wood-safe mold or mildew cleaner and follow label directions carefully. If mildew is deep or the stain won’t lift, the finish may need professional refinishing to fully restore the engineered wood floor’s appearance.
📅 Last Updated: October 19, 2026 | Topic: How to remove stains from engineered wood floors in a bathroom? | Content verified for accuracy and freshness.
References
- https://www.cdc.gov/mold/default.htm
- https://www.epa.gov/mold
- https://www.epa.gov/mold/mold-cleanup-your-home
- Engineered wood
- Wood flooring
- Wood stain
- Water damage
- https://scholar.google.com/scholar?q=how+to+remove+stains+from+engineered+wood+floors+bathroom Google Scholar
- https://scholar.google.com/scholar?q=engineered+wood+floor+water+stains+cleaning+polyurethane+finish Google Scholar
- https://scholar.google.com/scholar?q=wood+floor+stain+removal+methods+hardwood+engineered+flooring+moisture+mold Google Scholar


