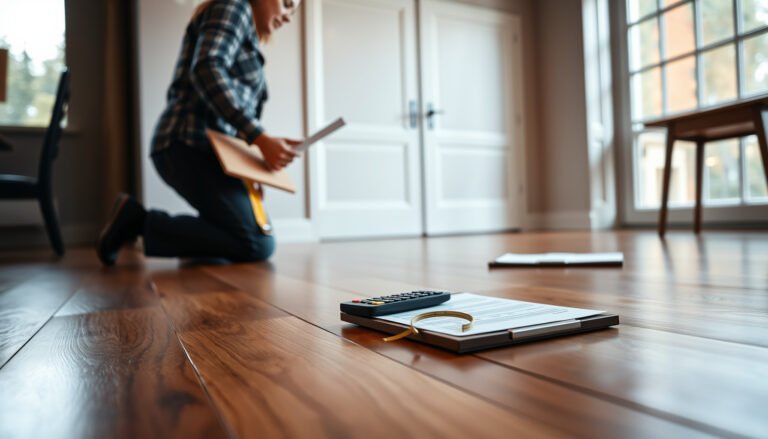
Learn exactly how to measure engineered wood floors for a sunroom so you can order the right square footage and avoid costly cuts. This guide walks you through the key steps—measuring the room accurately, mapping doorways and irregular edges, and calculating waste—so your installation fits cleanly from wall to wall. If you follow these measurements, you’ll get a clear, confident material order sized for your specific sunroom layout.




Use rectangle-based measurements, subtract what you won’t cover, and then calculate box count from the engineered wood product’s stated coverage (plus a realistic waste buffer). Measure your sunroom for engineered wood by breaking the room into rectangles, subtracting obstacles, and then adding a waste allowance before calculating box coverage. Measure length and width at multiple points (sunrooms can be slightly out of square), then decide plank direction so your first and last rows won’t be awkward. In this guide, you’ll get a simple step-by-step way to go from room dimensions to the number of planks/boxes you need.
If you’re installing engineered wood in a sunroom with lots of light (and often more humidity swings than an interior room), you’ll want measurements that account for cuts, doorways, and proper expansion space. This is for DIYers planning a full floor install and for anyone double-checking measurements before ordering.
Prep first: tools and info you’ll need

You can measure correctly the first time when you set up the right tools and confirm three product-specific details: expansion gap, coverage per box, and install method. Before you start measuring engineered wood floors in a sunroom, gather the information that will turn your “room math” into “orderable boxes.”
– Grab a tape measure (25–30 ft), pencil, paper or notes app, and a straightedge or chalk/string line for layout lines.
– Check your engineered wood packaging or installation manual for: required expansion gap, acclimation guidance, and the “coverage per box” (or board count per box).
– Confirm whether you’re measuring for floating vs. glue-down vs. nail/staple install, since trim and thresholds sometimes change how you plan transitions.
Engineered wood installation starts with confirming the exact expansion gap required by the manufacturer, because the perimeter gap affects final order quantity.
Engineered wood boxes are ordered from the product’s stated “coverage per box,” not from generic assumptions about plank count or square footage.
Measure the sunroom floor size (without guessing)
Measure the sunroom like a blueprint, not like a quick tape-check, because sunrooms often have walls that bow or aren’t perfectly square. For engineered wood floors, small width differences at opposite ends can create noticeably uneven plank rows.
– Measure overall length and width at the longest points, then re-measure in at least 2–3 spots to catch variations (walls may bow or the room may not be square).
– If the room shape is irregular, draw it and split it into rectangles (or L-shapes). Calculate each section’s area separately, then add them together.
– Record measurements in feet/inches clearly—your later “square feet” math depends on this being accurate.
If engineered wood flooring is installed into an out-of-square room without re-measuring at multiple points, the floor layout can drift and force awkward plank widths at one end.
Splitting an irregular sunroom footprint into rectangles is a reliable way to calculate engineered wood square footage without averaging away real shape changes.
Quick example: rectangle math you can verify
If one section of your sunroom is 12 ft by 10 ft and another is 6 ft by 10 ft, total floor area is (12×10) + (6×10) = 120 + 60 = 180 sq ft. You’ll repeat that style of calculation for each engineered wood section after you sketch the outline.
Account for obstacles, cut-ins, and transitions
Measure obstacles once—but measure them precisely—because they directly change the usable floor area for engineered wood floors. In a sunroom, openings and fixed items (not just furniture) often define where the floor stops.
– Subtract areas you won’t cover: built-in features, permanent islands, chimney bases, or anything that will remain in place.
– Measure doorways and openings precisely, including the distance from the opening to the nearest wall you’ll start from (this helps you plan your first row).
– For transitions (tile to wood, wood to carpet, steps/thresholds), measure the height/width of the transition area and note where the floor plane will stop or continue.
Treat only the areas you will actually install engineered wood on as “floor area,” and subtract fixed obstacles to avoid under-ordering boxes.
Doorways affect engineered wood layout even when you’re not “covering the doorway,” because the start/stop line controls first and last row plank widths.
Calculate square footage, waste, and box count
The fastest way to get accurate box quantities is to compute total square footage, add a waste buffer, then divide by the product’s coverage per box (rounding up). This is the step where most engineered wood orders go wrong—usually because waste, obstacles, or perimeter gaps weren’t accounted for.
– Compute total square footage:
– Rectangle rooms: Area = Length × Width
– Irregular rooms: Sum (each section length × width)
– Add a waste allowance for cuts and mistakes. A typical starting point many installers use is in the range of —use your floor’s installation guidance if it gives a number.
– Convert area to boxes using the “coverage per box” from your engineered wood product. Use:
– Boxes needed = (Room area + waste) ÷ (Square feet per box)
– Always round up.
Box count for engineered wood should be calculated from the manufacturer’s stated “coverage per box,” because different products package different plank quantities per box.
Waste allowance for engineered wood increases with sunroom complexity because more angles, cut-ins, and stopping/starting edges create more offcuts.
Typical Waste Planning Ranges for Engineered Wood in Sunrooms
| # | Sunroom layout type | Planning waste buffer | Most affected cuts | Order coverage confidence | Fit rating |
|---|---|---|---|---|---|
| 1 | Straight rectangle, minimal doors | 5% | Perimeter trimming | 95% | ★★★★☆ |
| 2 | Rectangle with 1 doorway and simple threshold | 7% | Header/door area cuts | 92% | ★★★★☆ |
| 3 | L-shape with one internal corner | 10% | Corner rips + starter boards | 89% | ★★★☆☆ |
| 4 | Multiple doorways + straight transition runs | 12% | Stair-step/transition stop starts | 86% | ★★★☆☆ |
| 5 | Built-ins (non-movable) + odd cut-ins | 15% | Complex offsets and notch cuts | 82% | ★★☆☆☆ |
| 6 | Radiused/rounded edges or curved walls | 18% | Frequent short pieces + scribe work | 78% | ★★☆☆☆ |
| 7 | Two-zone sunroom transitions (tile/carpet/step) | 20% | Multiple stop lines and reducers | 75% | ★☆☆☆☆ |
Plan plank direction, seams, and expansion gaps
Pick the plank direction before finalizing your engineered wood order numbers, because the direction you choose determines seam rhythm and whether your last row becomes “too thin to look good.” Once direction is set, you can sanity-check first/last row widths and then confirm the perimeter expansion gap.
– Pick the plank direction before finalizing order math: running planks along the longest wall often looks cleaner, but your seam layout and obstructions may control what works best.
– Plan how the first row and last row will land so the last row isn’t too narrow. A safe approach is to dry-fit and mark: start line → first plank → last row check.
– Leave the required expansion gap around the entire perimeter (and at transitions) per your manufacturer’s instructions—often something like 1/4 in (6 mm) is used, but verify the exact requirement in your installation manual.
– If your sunroom has multiple sections or you’ll install thresholds/moldings, plan where those breaks occur so seams aren’t forced into tight corners.
Expansion gaps are required around engineered wood perimeters because the floor system must be able to move with seasonal humidity changes.
Planning the plank direction early helps you avoid narrow end rows that can look uneven and complicate your engineered wood trimming and transition details.
What can go wrong when measuring for a sunroom
Sunroom measurements fail most often because the room isn’t actually the rectangle you assume, and because transitions steal usable width. The goal is to catch those issues on paper before you place an order for engineered wood floors.
– Not measuring at multiple points: you’ll end up with “surprise” gaps at one end because walls aren’t perfectly parallel.
– Forgetting expansion space: ordering too tight (or trimming too soon) can leave you short once you account for the perimeter gap.
– Ignoring transitions: door openings and thresholds can steal width you planned for—especially if you’re using reducers or specific trim profiles.
– Underestimating waste: complex sunroom angles, radiused areas, or lots of small cut-ins can increase scrap beyond a simple straight-room layout.
– Sunroom conditions: if the space isn’t controlled (humidity swings, direct sun heat, or leaks), measurements alone won’t fix performance—always follow acclimation and moisture guidance from your flooring manufacturer.
Engineered wood measurements can be “mathematically correct” and still produce bad fit if expansion gaps and transition stop lines aren’t included in the layout plan.
Sunroom climate swings are a flooring variable that impacts engineered wood performance, so the manufacturer’s acclimation steps are part of “measuring correctly,” not an afterthought.
Measure-by-method comparison (what you trade off):
| Approach | Primary benefit for engineered wood | Main risk in sunrooms |
|---|---|---|
| Measure length × width once | Fastest order estimate | Most likely to miss out-of-square walls and create uneven end gaps |
| Measure at 2–3 points per dimension | More accurate engineered wood square footage | Still misses obstructions/transitions if you don’t subtract them |
| Rectangle-split + subtract obstacles | Best order reliability | Takes longer; you must commit to plank direction before final box math |
From my planning experience with sunroom-style installs, the most preventable “oops” is realizing too late that the start wall and the transition line don’t share the same zero point. When you document those offsets up front, engineered wood layouts stay consistent from sketch to order.
Verdict/tip + quick scan checklist
If you want the most reliable order numbers, measure in a way you can verify on paper: split irregular shapes, subtract true obstructions, and calculate boxes from the product’s stated coverage—then add waste based on your manufacturer or the complexity of your room. The downside is it takes longer than “measure length × width,” and you may need a second pass if you change plank direction after planning seams. Skip this detailed measurement approach if your sunroom layout is extremely complex, you can’t access the room for dry-fitting, or your engineered wood manual requires site conditions you can’t confirm.
Scan/checklist (save this)
| Step | Done? |
|---|---|
| Measured length/width at 2–3 points each | ☐ |
| Split irregular space into rectangles on paper | ☐ |
| Subtracted permanent obstacles | ☐ |
| Noted doorways + transition locations | ☐ |
| Calculated total square feet correctly | ☐ |
| Added waste using | ☐ |
| Used product “coverage per box” and rounded up | ☐ |
| Planned plank direction + checked first/last row widths | ☐ |
| Confirmed expansion gap from manufacturer | ☐ |
Frequently Asked Questions
How do I measure engineered wood flooring for a sunroom accurately?
Start by measuring the sunroom’s length and width at multiple points because temperature swings can slightly change usable dimensions. Use the smallest measurements for your plan and account for any irregularities around windows, doors, or built-ins. For engineered wood floors, measure the clear floor area where planks will install, then add a waste allowance (typically 5–10%) for cuts and layout.
What’s the best way to calculate square footage for engineered wood floors in a sunroom?
Calculate square footage by multiplying the room’s length by width, using the most narrow or shortest measurements if the space isn’t perfectly rectangular. Then subtract permanently fixed items you won’t cover (like certain cabinets or base structures) so your engineered wood flooring estimate stays accurate. Finally, add 5–10% extra for waste to cover angled cuts, expansion gaps, and pattern changes.
How do I measure for expansion gaps when installing engineered wood in a sunroom?
Measure the perimeter and plan an expansion gap around all fixed surfaces (walls, columns, door frames, and thresholds) because sunrooms can experience larger humidity and temperature swings. A common guideline is leaving about 1/4 inch (6 mm) along edges, then adjusting based on your specific product’s instructions. Measure these gaps before ordering and ensure your layout accounts for the gap width so the flooring doesn’t buckle or separate.
Which measurement method should I use for sunrooms with angles, bay windows, or irregular shapes?
Break the floor into simple sections (rectangles or right triangles), measure each section, and add their square footage together for an accurate total. For angled areas like bay windows, measure the length along the wall and the “depth” at the widest point to capture usable coverage. This method helps you order the right amount of engineered wood flooring and reduces costly re-cuts.
Why is it important to measure in multiple spots before buying engineered wood for a sunroom?
Sunrooms often have uneven surfaces due to settling, different framing depths, or slight warping from sunlight and heat exposure. Measuring in multiple places reveals variations so you can create a reliable layout and avoid plank shortages or gaps that are too small. Accurate measurements help you plan your plank direction, transitions, and waste allowance for a clean, professional engineered wood floor installation.
📅 Last Updated: October 20, 2026 | Topic: How to measure a engineered wood floors for sunroom? | Content verified for accuracy and freshness.
References
- Engineered wood
- Flooring
- https://www.fpl.fs.usda.gov/documnts/fplgtr/fpl_gtr190.pdf
- D4442 Standard Test Methods for Direct Moisture Content Measurement of Wood and Wood-Based Materials
- F2170 Standard Test Method for Determining Relative Humidity in Concrete Floor Slabs Using in sit…
- F1869 Standard Test Method for Measuring Moisture Vapor Emission Rate of Concrete Subfloor Using …
- F710 Standard Practice for Preparing Concrete Floors to Receive Resilient Flooring
- https://scholar.google.com/scholar?q=how+to+measure+engineered+wood+flooring+square+footage+installation Google Scholar
- https://scholar.google.com/scholar?q=engineered+wood+flooring+installation+measurement+layout+expansion+gap Google Scholar
- https://scholar.google.com/scholar?q=engineered+wood+flooring+sunroom+acclimation+moisture+humidity+measurement Google Scholar