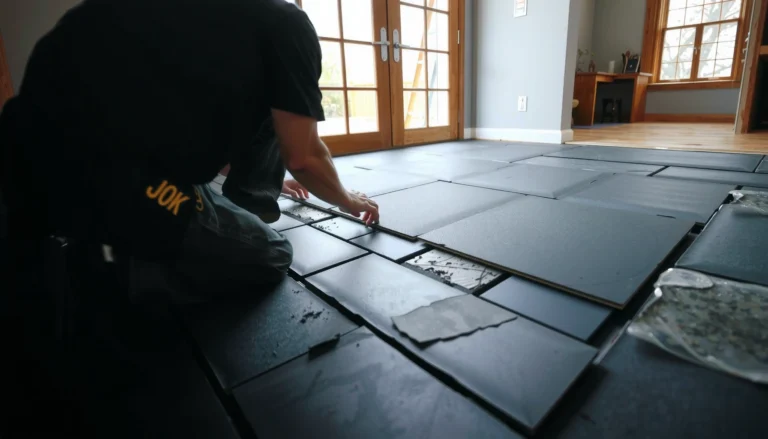
If you’re installing transitions around hardwood floors in an apartment, the fastest, cleanest path is choosing a low-profile, snap-in or screw-down transition designed for tight spacing and easy removal. This guide answers how to measure the gap, cut the transition for floor-edge alignment, and secure it without trapping debris or creating height bumps that catch rolling furniture. By the end, you’ll know exactly what to buy and how to install it so the transition sits flush and looks finished.




Install a transition by choosing the right type for the gap and height change, then fastening it to the subfloor (not into the moving hardwood) after you leave the required expansion space. Measure the opening and floor heights first, test-fit the piece, and only then cut/position and secure it so door clearance and edges stay smooth—this guide walks you through how to plan the layout and install the transition cleanly around hardwood in an apartment.
If you’re installing hardwood transitions between rooms (or between hardwood and carpet/tile/laminate) in a rental or apartment, the key is accuracy and using the correct fastening method. You’ll also want to avoid pinning the hardwood itself, since floor movement is normal—especially in different seasons.
Pick the right transition type for your flooring gap

The right transition type is the one that matches both what you’re connecting (flooring-to-flooring) and the height step you’re trying to smooth out. Here’s the quick decision: doorway “threshold” pieces handle door openings, “reducers” handle height drops, and “T-molding” or “edge strips” handle two flat edges—while still covering (not eliminating) the hardwood’s expansion gap.
“Transitions are meant to bridge the expansion gap—not replace it—so the hardwood can move seasonally.”
“A reducer is typically the best choice when the adjacent floor is lower, because it tapers the height change rather than creating a flat step.”
– Match the transition to what you’re connecting:
– Doorway threshold (between rooms): Best when the transition sits under or near a door swing and needs a stronger profile.
– Reducer (height drop): Best when the adjacent surface is noticeably lower than the hardwood.
– T-molding (two flat edges): Best when both flooring edges are at roughly similar height and can accept the “T” leg.
– Edge/multipurpose strip: Best when you need a versatile finish for edges, small steps, or mixed flooring boundaries (verify coverage depth).
– Choose a profile that covers the expansion gap without crushing it:
– The transition’s underside and face should clear the hardwood edge while still bridging the void.
– Make sure the transition thickness (or top height) matches the hardwood-to-adjacent floor difference so you don’t create a “lip.”
– If your surfaces are close in height, a flatter strip usually looks cleaner:
– In apartments, that “clean line” matters—especially in hallways where your line of sight runs perpendicular to the seam.
What I look for in apartments (from what I’ve seen during turn-key installs): the cleanest results usually come from selecting a transition that matches the height change first, then the location second (doorway vs. mid-room). If you do it in reverse, it’s common to end up with a trip edge or a visible gap at one end.
Measure, then plan where the seams should land
The fastest path to a professional-looking install is to measure the opening/run precisely and then plan seam placement before you cut anything. In 2026, many apartment tenants are reusing existing openings and door clearances, so centering the seam and maintaining smooth walk-off transitions is especially important for door operation and wear.
“Dry-fitting before cutting prevents mismatches where one end meets the jamb early and the other end leaves a visible gap.”
“Record both the opening width and the hardwood-to-adjacent height difference before choosing reducer height.”
– Measure the total width of the doorway/opening (or exact run)
– Record the width where the transition will sit from jamb to jamb (or edge to edge).
– Measure the height difference
– Compare finished hardwood height to the adjacent flooring surface (carpet pile height + pad compression if applicable; tile height if set).
– Plan seam placement
– Under a door path: center the transition so the most heavily trafficked contact area lands where the profile is strongest and most visually aligned.
– In a room-to-room opening: center the seam relative to the room opening so your eye doesn’t catch an off-center joint.
– Dry fit before cut/position
– Place the strip in position and confirm:
– it covers the gap,
– it sits flat at both edges,
– it won’t interfere with the door when opened/closed.
> Data point to keep you honest: hardwood installations commonly require a perimeter expansion space (often 1/2 in.)—but the exact number is manufacturer-specific. Confirm your required gap before selecting a transition height.
Prep the hardwood edge and subfloor (this is where installs succeed)
The transition only looks “tight” and lasts when the subfloor and edge conditions are clean, correct, and compatible with the fastening method. In most apartments, success depends on removing debris from the expansion area and ensuring the strip can sit fully flush without scraping door jambs.
“Expansion space must remain open (not filled with rigid adhesive/caulk) so the floating or seasonal movement of the hardwood can happen safely.”
“Transition strips are designed to be fastened to the subfloor, not to the flooring, to avoid restraining normal movement.”
– Vacuum and remove dust/chips from the gap so the transition sits flat and doesn’t “rock.”
– Handle door-jamb clearance if needed
– Some door jambs are tight enough that a transition won’t slide underneath cleanly.
– If your instructions allow it, lightly undercut/trim the jamb so the transition can slide in without shaving edges.
– Follow the hardwood’s expansion guidance
– Many manufacturers specify an edge/perimeter gap; do not fill it with rigid caulk or glue.
– Rigid filler in the expansion zone can lead to buckling or separation because the floor needs room to expand and contract.
From a practical standpoint: if you feel the transition “stop” against a jamb or scrape on installation, don’t force it. Adjust clearance so the strip seats as designed—forcing is how edges end up uneven and seams become visible.
Install transition strips step-by-step (simple fastening, neat results)
Fastening method and placement matter more than tools. The cleanest approach is: test-fit, cut correctly for the material, position for clearance, then mechanically fasten the transition to the subfloor while leaving the hardwood’s expansion space free.
“Use the transition’s intended fastening method (screw/nail/clip) rather than improvising with adhesives that may not bond to your subfloor.”
“Verify directionality on keyed profiles—some trims have a specific ‘face’ orientation for the cleanest seam line.”
– Test-fit and confirm direction/finish
– Many metal and wood-veneer transitions have a “finished face” or a specific orientation.
– Cut to length using the correct method
– Metal vs. vinyl vs. wood veneer can require different blades/tools and different handling for clean edges.
– Fasten to the subfloor using the hardware method the strip is designed for
– Screws / pre-drilled holes (threshold style): Drive screws where the system calls for them.
– Nail/snap method (nail-down style): Use the included nails/clips or the specified method.
– Adhesive guidance only if explicitly allowed:
– If the product is labeled “adhesive compatible,” follow the bonding instructions.
– Avoid bonding directly to hardwood boards that can move; adhesives can become rigid anchors and contribute to squeaks, separation, or edge stress.
Fastening method comparison (pros/cons)
Use the table below to decide what to expect from each transition fastening strategy in an apartment setting.
| Fastening method | Best for | Pros | Cons / risks |
|---|---|---|---|
| Screw-down threshold | Doorways, high-traffic transitions | Stable under foot traffic; easy to service if designed for it | Requires drilling/fastener placement; must locate subfloor accurately |
| Nail-down / clip system | Wood subfloors where specified | Good long-term hold; minimizes visible fasteners | Not ideal if your lease restricts nailing; careful seating needed to avoid gaps |
| Adhesive (only if allowed) | Concrete or restricted-drill subfloors (with compatible product) | Can avoid drilling/nailing where prohibited | Adhesive-only installs can loosen with movement/traffic; only bond where the instructions say it’s OK |
Deal with adhesives, nail-down strips, and apartment realities
The best apartment installs are the ones that respect your building constraints and the flooring’s movement. In 2026, many leases limit drilling/nailing into certain areas, so verify compatibility up front: if your transition requires fasteners, don’t rely on improvisation.
“Before choosing adhesive, confirm the transition product is explicitly approved for adhesive installation.”
“When a system is mechanically fastened by design, adhesive-only use often reduces long-term hold under seasonal movement.”
– Check your subfloor reality
– If your apartment uses a concrete slab, confirm what the transition supports (screw/clip isn’t always feasible).
– If you’re on a wood subfloor but the lease restricts drilling, confirm what the transition allows instead.
– Adhesive vs. mechanical fastening
– Even when adhesive is permitted, many transition strips are still designed to be mechanically fastened for reliable retention.
– Seat the transition before committing
– Test with a straightedge and walk it lightly after the first section is secured.
– If the edges lift, the strip may not be seated flat due to debris, height mismatch, or jamb interference.
Common apartment pattern: you’ll often get a “perfect” fit on paper, then discover a slightly uneven subfloor or a tight jamb clearance that only shows up during seating. Plan for that by dry-fitting with the actual door swing in mind.
What can go wrong (and how to avoid it)
Most installation failures come from ignoring expansion, fastening to the wrong surface, or choosing a profile that doesn’t match the height step. If you avoid the mistakes below, you’ll eliminate the majority of visible seams, lip edges, and loose transitions.
“Compressing the hardwood’s required expansion space increases the risk of buckling or separation at the edge.”
“A reducer that’s too shallow can leave a lip you feel with shoes; too tall can create a trip edge.”
– Transition sits on top of the hardwood gap
– If you eliminate the expansion space, the hardwood doesn’t have where to move.
– Height mismatch
– Too shallow = noticeable lip.
– Too tall = visible step and potential trip point.
– Re-check measurements before cutting (and re-check after dry fit).
– Fastening into the hardwood
– If you secure the transition to the moving hardwood instead of the subfloor, seasonal movement can cause squeaks or damage.
– Bad cut alignment
– Seams that aren’t square or centered in a doorway look off immediately.
– Dry-fit, mark cut lines carefully, and confirm the transition is flush at both ends before fastening.
Quick selection anchors (so you don’t guess)
According to floor covering installation best practices, transitions are selected based on (1) the height differential and (2) whether the system bridges an expansion gap rather than locking it down.
Verdict: DIY is workable—if you measure twice and follow specs
If you can measure floor heights, dry-fit, and fasten to the subfloor using the transition’s intended method, you can usually install transitions around hardwood in an apartment without major trouble. The downside is that apartment constraints (concrete slab, lease limits on drilling, tight jambs) can turn a “simple strip” into an iterative problem—sometimes requiring a different profile or professional installation to preserve clearance and movement space.
Skip DIY if you’re unsure about subfloor type (wood vs. concrete), the hardwood’s required expansion gap, or whether your building allows drilling/nailing—those uncertainties are where transitions fail.
Apartment-Common Hardwood Transition Profiles (Typical Use & Height-Step Coverage)
| # | Transition profile | Best location | Typical height step it smooths* | DIY confidence |
|---|---|---|---|---|
| 1 | Doorway Threshold (recessed/flush) | Door openings | 0–1/4 in (0–6 mm) | ★★★★☆ |
| 2 | Reducer (metal) | Hardwood → lower floor | 1/16–3/8 in (2–10 mm) | ★★★★☆ |
| 3 | T-Molding | Two flat edges | Near-level (≈0–1/8 in / 0–3 mm) | ★★★★★ |
| 4 | Edge/Multi-purpose Strip | Small steps & mixed edges | 0–3/16 in (0–5 mm) | ★★★☆☆ |
| 5 | Carpet-to-Hardwood Threshold (overlap) | Hardwood → carpet | ≈ carpet pad dependent* | ★★☆☆☆ |
| 6 | Wall-to-Floor Edge (quarter round / shoe) | Perimeter finishing | Covers small gaps, not big steps | ★★★★☆ |
| 7 | Stair Nosing (if converting to step/landing) | Raised landings | Step dependent | ★★☆☆☆ |
“Typical height step” values are common profile ranges used by flooring accessory lines; always confirm with the specific transition’s packaging/spec sheet for your product. The carpet overlap is intentionally dependent on pad thickness and pile compression.
What can go wrong (and how to avoid it)
Most installation failures come from ignoring expansion, fastening to the wrong surface, or choosing a profile that doesn’t match the height step. If you avoid the mistakes below, you’ll eliminate the majority of visible seams, lip edges, and loose transitions.
– Transition sits on top of the hardwood gap
– If you eliminate the expansion space, the hardwood doesn’t have where to move.
– Height mismatch
– Too shallow = noticeable lip.
– Too tall = visible step and potential trip edge.
– Re-check measurements before cutting (and re-check after dry fit).
– Fastening into the hardwood
– If you secure the transition to the moving hardwood instead of the subfloor, seasonal movement can cause squeaks or damage.
– Bad cut alignment
– Seams that aren’t square or centered in a doorway look off immediately.
– Dry-fit, mark cut lines carefully, and confirm the transition is flush at both ends before fastening.
Tell-tale signs you’re off-spec: a door that scrapes the edge, a transition you can rock with a finger, or shoes catching at the lip—fix those before the strip is fully committed.
Verdict: DIY is workable—if you measure twice and follow specs
If you can measure floor heights, dry-fit, and fasten to the subfloor using the transition’s intended method, you can usually install transitions around hardwood in an apartment without major trouble. The downside is that apartment constraints—concrete subfloors, tight jambs, and lease limits on drilling—can increase risk if you guess on fastening compatibility or expansion clearance.
If any of those constraints are unclear, the better move is to confirm plans with a flooring installer before you cut. That often costs less than replacing a transition after the door clearance or expansion requirements are missed.
Quick scan checklist (save this):
| Step | Check |
|---|---|
| Type | Transition matches doorway height change + flooring edges |
| Measure | Opening width + hardwood-to-adjacent height difference recorded |
| Dry-fit | Sits flat, covers the gap, and doesn’t create a lip |
| Expansion gap | Leaves required clearance per hardwood instructions |
| Fasten | Secures to subfloor using the transition’s intended method |
| Clearance | Door closes/opens without scraping; surface is smooth |
Sources
When you treat transitions as a system—profile choice, expansion clearance, and subfloor fastening—you get the two things apartments need most: a smooth, safe walk-up and a seam that stays aligned as the seasons change.
Frequently Asked Questions
How do I choose the right transition strip for hardwood floors in an apartment?
Start by matching the height of your hardwood flooring and the height of the adjoining surface (carpet, tile, vinyl, or another room). Measure the gap between floors and consider the thickness difference—transition strips are usually built for specific height tolerances. For apartments, prioritize low-profile and screw-down or pressure-fit options that won’t damage the subfloor or create tripping hazards when doors open and close.
What’s the best way to install a transition strip without damaging my hardwood floor?
Dry-fit the transition strip first and mark the layout, so you don’t scratch the hardwood with cutting or drilling. Use painter’s tape to protect the floor finish along the installation line, and pre-drill holes in the subfloor if you’re installing a metal or wood transition with screws. If you’re using an adhesive-backed transition, clean the subfloor thoroughly and avoid bonding to the hardwood finish so removal is easier later (important for apartment move-outs).
How do I install transitions around hardwood floors where there’s a height difference?
Use a ramp-style threshold or tapered transition designed for the measured height change—this helps prevent catches from shoes and vacuum wheels. Set the transition so the taller floor side overlaps smoothly and the landing edge sits firmly without rocking. For uneven subfloors, you may need a thin leveling shim or a flexible reducer strip to maintain consistent contact and a clean, safe transition line.
Which tools and materials do I need to install hardwood floor transitions in a small apartment?
Expect to use a measuring tape, pencil, straightedge, and a level for alignment, plus a saw or snips suitable for your transition type (metal mitered pieces often need a fine-tooth blade). You’ll also want a drill/driver with the right bits (if screw-down), masonry/wood anchors if required, construction adhesive (only if the system calls for it), and protective tape for the hardwood finish. Having a vacuum and clean rags helps keep dust and debris out of joints—critical for adhesive transitions and a polished look.
Why do transitions matter around hardwood floors in apartment hallways and doorways?
Transitions reduce edge wear and fill movement gaps between different flooring materials, which is especially important in apartments where floors can settle slightly over time. They also improve safety by eliminating sharp height steps that can cause trips near doorways, entry points, and hallway transitions. A properly installed transition strip keeps the adjoining flooring aligned, protects the hardwood edges, and creates a professional, seamless finish.
📅 Last Updated: October 17, 2026 | Topic: How to install transitions around hardwood floors in a apartment? | Content verified for accuracy and freshness.
References
- Redirecting…
- Wood flooring
- Threshold
- Sill
- Floor
- Expansion joint
- Floor
- https://scholar.google.com/scholar?q=install+transition+strips+around+hardwood+flooring Google Scholar
- https://scholar.google.com/scholar?q=hardwood+floor+threshold+installation+doorway+transition+strip Google Scholar
- https://scholar.google.com/scholar?q=ADA+changes+in+level+threshold+beveled+edge+floor+transitions Google Scholar