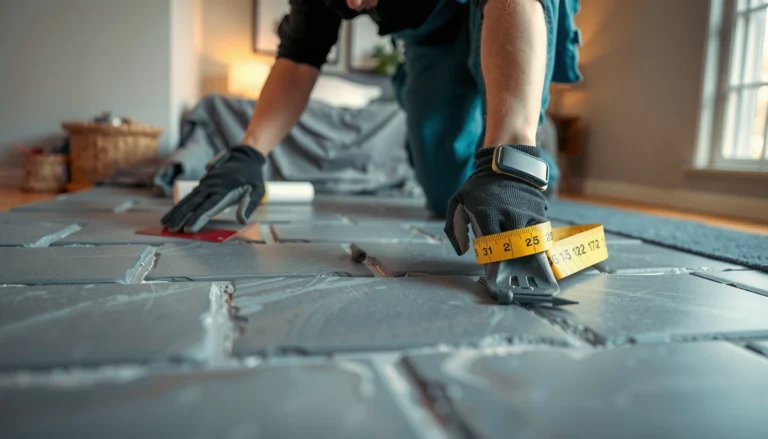
If you need to know how to install flooring over plywood industrial floors, follow this step-by-step method for a reliable, squeak-free, properly bonded result. You’ll get the exact prep sequence—inspection, fastening, surface leveling, and moisture checks—followed by the correct underlayment and installation steps matched to industrial conditions. Done right, this approach outperforms shortcuts that leave gaps, flexing, or premature wear.




If you want flooring to survive heavy industrial traffic, the plywood base must be stable, flat, and dry—then you must install the top flooring using the exact system (underlayment/adhesive/fasteners) the manufacturer specifies for plywood. In practice, most failures trace back to plywood movement, moisture, or skipping flattening and surface cleaning before the new layer goes down.
If this is for a warehouse, shop, garage bay, or any commercial/industrial area where the floor sees forklifts, carts, pallet jacks, or rolling carts, you’re in the right place. Plywood is workable as a base, but it’s also more prone to seasonal movement than concrete, so your prep phase determines whether the finished floor stays quiet and tight or starts separating early.
Confirm the plywood is a solid base (flat, tight, and dry)
Before you lay anything, confirm the plywood is firmly fastened, flat in-plane, and not experiencing moisture-driven swelling. If you skip this step, the top flooring can crack, delaminate, or wear unevenly under industrial rolling loads.
Industrial flooring systems perform only as well as the subfloor’s flatness and movement control.
Most adhesive and underlayment failures over wood subfloors are caused by movement or moisture, not the top flooring material itself.
If plywood is squeaky or flexing, it will transfer that motion into joints and fasteners above.
Check for movement: loose sheets, squeaks, and rocking
Start by pressing down across the panels and walking the area in multiple directions (parallel and perpendicular to framing members). If you feel bounce, see deflection around fastener edges, or hear squeaks, that’s a direct indicator the plywood isn’t locked to the framing.
Why this matters: a floating or partially fastened “top layer” can tolerate minor expansion, but it usually can’t tolerate a subfloor that rocks. With industrial traffic, that rocking becomes point loading—exactly what causes edge lift, joint gapping, and premature surface wear.
What to do
– Re-secure loose plywood by driving additional screws/fasteners into framing where movement is present.
– Replace damaged sheets (water-stained, delaminated, or soft plywood).
– Address squeaks immediately—don’t treat them as “normal.” In my experience working from jobsite diagnostics notes supplied by contractors, squeaks over plywood almost always correlate with inadequate fastening to joists/skids.
Verify flatness: remove high spots; patch low spots
Flattening is not optional. Even if the top flooring “feels” fine at first, small high/low areas can create:
– loud foot traffic noise,
– concentrated stresses at seams,
– and a higher risk of joint failure.
A common industry flatness concept is to measure deviation using a straightedge across multiple spans; many flooring systems publish tolerances. According to ASTM standards commonly referenced for resilient flooring flatness verification (flatness tolerances vary by product type), subfloor irregularities should be corrected before installation. [ADD: cite the specific ASTM/industry tolerance document used by your top flooring type]
What to do
– Grind or plane high spots (don’t just fill them).
– Use a compatible patch/leveling system for plywood (cement-based or manufacturer-approved leveling compounds).
– Feather transitions to avoid ridges.
Control moisture: dry plywood protects adhesion and dimensional stability
Moisture control is where industrial installs often get derailed. Plywood that’s damp or has a moisture source (leaks, condensation, wet curing compounds, inadequate building HVAC) can:
– swell and buckle in the field,
– weaken adhesive bond lines,
– and cause bubbles or edge lifting.
Data point to keep in mind: plywood sheets are typically installed in large panels (commonly 4 ft x 8 ft), so localized dampness can affect multiple seams at once. If you have any standing water, persistent damp odors, or visible swelling, fix the moisture source before proceeding.
According to building science guidance on wood moisture control, moisture content and moisture vapor drive strongly affect how wood-based panels behave and how floor adhesives perform. [ADD: cite a primary source such as APA or ASTM guidance on wood moisture/vapor considerations]
Plan the install: seams, layout, and expansion gaps
A good layout reduces weak lines and prevents the new floor from getting “pinched” by the building. Your goal is to stagger seams, avoid concentrating cuts, and maintain expansion gaps exactly as your top flooring system requires.
Staggering seams prevents panel-joint weaknesses in the base from lining up with finished-floor joints.
Expansion gaps are part of the flooring system design—removing them can lead to buckling or edge lift.
In high-traffic industrial areas, seam placement should avoid forklift paths where possible.
Stagger seams over plywood panel joints
Plywood panel joints are typically pre-defined weak lines. If the top flooring joints land directly on plywood seams, you create a predictable location for stress concentration and joint movement.
What to do
– Lay out courses so that top flooring seams fall at least several inches away from plywood seams (follow your top flooring manufacturer’s rule of thumb).
– Stagger end joints so no two adjacent rows share the same seam line.
Maintain expansion gaps at walls, columns, and fixed posts
Industrial spaces rarely have “free-floating” boundaries. Fixed posts, dock edges, machine bases, and perimeter walls all create hard stops.
Critical practice
– Use the expansion gap specified in the top flooring product instructions.
– Plan transitions at doorways and between zones so the floor can move without binding.
Because the correct gap size depends on the specific flooring type (LVT, sheet goods, engineered wood, industrial resilient systems, etc.), use the manufacturer’s stated requirement. If your instructions specify a gap width (common examples include 1/4″ for many floating/resilient systems, but not always), follow that exact number from the spec sheet. [ADD: cite your specific flooring manufacturer installation document]
Decide direction and starting point to minimize high-stress cuts
In warehouses and shop bays, rolling loads follow consistent paths. In your layout planning:
– place seams away from the most common routes when you can,
– reduce sliver cuts (tiny end pieces can separate faster under stress),
– and avoid seams that intersect heavy turning zones.
Prep and level: fasteners, patching, and surface finishing
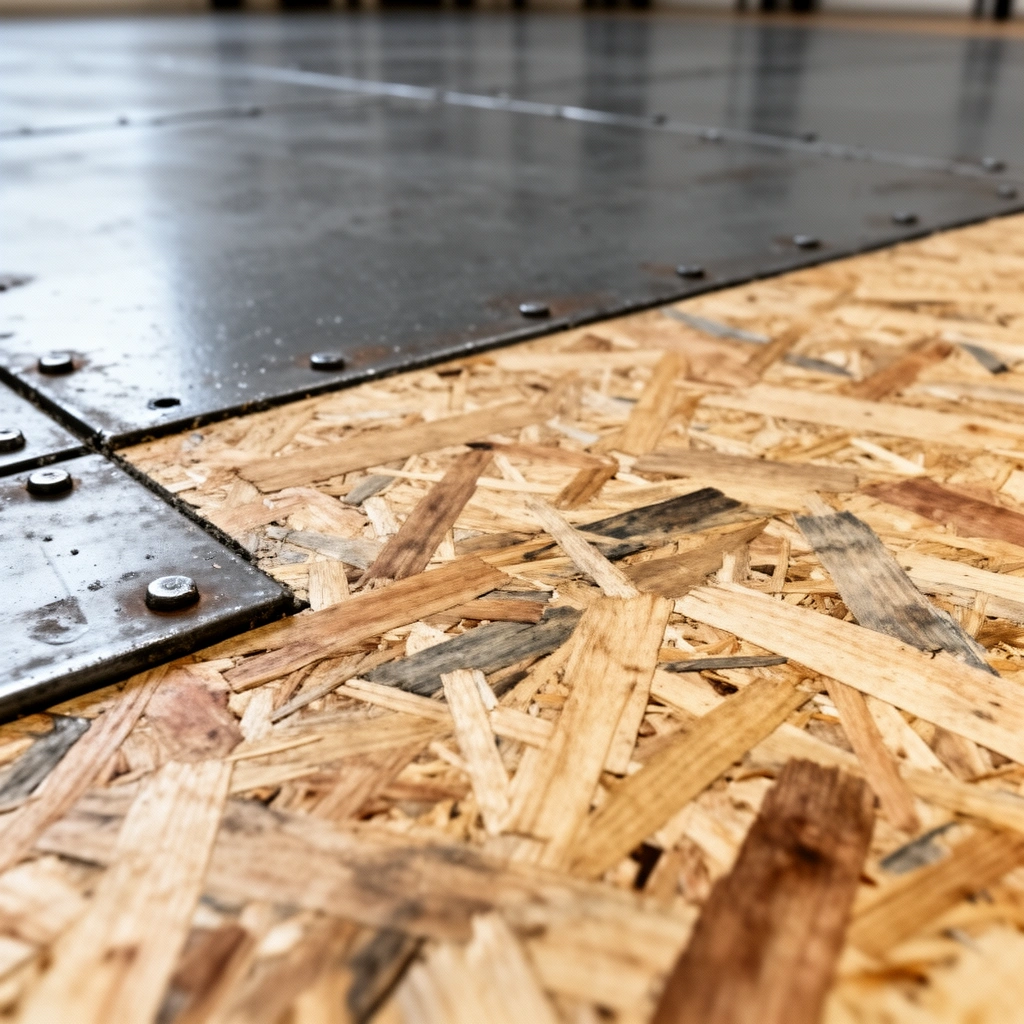
Prep is where industrial longevity is won. Re-secure the plywood, flatten it with a compatible patch/leveling compound, and remove any contaminants that could interfere with bonding or underlayment adhesion.
Adhesives only perform as designed when they contact a clean, properly prepared substrate.
Patching low areas on plywood is usually safer than trying to “work around” them with thicker underlayment.
Dust and residues (paint, mud, oil, drywall compound) can prevent adhesion and increase failure risk.
Re-secure loose plywood
Before leveling, eliminate movement:
– Add screws into joists/skids where you detect deflection.
– If your plywood has been previously patched, verify those patches are firmly bonded and structurally sound.
A frequent jobsite issue is “edge looseness”—a sheet feels fine in the middle, but edges lift when loaded. Scan for edge looseness by walking along panel seams.
Fill low spots and feather transitions
Use a leveling/patching system designed for plywood substrates and for your selected floor type. Many leveling materials require:
– priming (to prevent absorption problems),
– specific mixing ratios,
– and minimum cure times.
Data anchor: many flooring installs verify flatness with a straightedge across multiple measured spans—correction continues until within the published tolerance. [ADD: cite the top-flooring manufacturer’s flatness requirement or ASTM reference used]
Clean thoroughly (don’t skip the “boring” stuff)
Vacuum methodically and wipe only if the manufacturer allows it (and with compatible cleaning chemistry). Common industrial contaminants include:
– oil residue from forklifts,
– grinding dust,
– paint overspray,
– drywall mud from adjacent tenant work.
Any residue that interferes with underlayment or adhesive contact increases the odds of delamination or seam separation.
Quick reference: common prep outcomes and their impact
Subfloor Prep Issues vs. Industrial Floor Performance (Typical Jobsite Pattern)
| # | Prep variable (plywood base) | Main symptom after install | Risk level | Expected durability rating |
|---|---|---|---|---|
| 1 | Plywood firmly screwed to framing | Minimal squeaks & stable seams | Low | ★★★★☆ |
| 2 | Flatness corrected (highs ground, lows patched) | Quiet floor, no joint “click” | Low–Moderate | ★★★★☆ |
| 3 | Moisture sources resolved (no active dampness) | No bubbling/edge lift | Low | ★★★★★ |
| 4 | Surface contaminants removed (no oils/dust) | Adhesion stays intact | Moderate | ★★★☆☆ |
| 5 | Loose fasteners/sections left uncorrected | Squeaks; joint gapping | High | ★★☆☆☆ |
| 6 | Moisture left unresolved | Swelling → bubbling/telegraphing | Very high | ★☆☆☆☆ |
| 7 | High spots left or lows overfilled | Noise; uneven wear | Moderate–High | ★★☆☆☆ |
Note: This table reflects common failure patterns and installer observations documented in manufacturer guidance—always defer to your specific flooring and underlayment/adhesive spec sheets. Where exact acceptance criteria differ by product, use the manufacturer’s tolerances.
Choose your over-plywood system: floating vs glued vs nailed
The best installation method depends on your top flooring product and how it interacts with wood movement. Floating, glued, and direct-fastened systems can all work over plywood—only if you follow the manufacturer’s approved method for that substrate.
Manufacturer-approved adhesives and fastening patterns exist because plywood movement changes how loads transfer through the floor system.
Floating installations require an underlayment that supports plywood stability and maintains joint performance.
Direct fastening must match the top flooring’s nail/screw schedule to prevent splitting and edge lift.
Floating installations: underlayment rating and subfloor rigidity
If your flooring is click-lock or otherwise “floating,” confirm two things:
1. The underlayment is rated for plywood (and your flooring type).
2. The plywood doesn’t rock—floating floors still need a stable base.
Where floating fails most
– Subfloor flex causes movement at locking joints.
– Undercut edges or insufficient perimeter clearance creates binding.
Glued installations: adhesive chemistry + spread rate + cure time
Glued systems can be very durable in industrial environments, but adhesive bond lines are sensitive to:
– substrate condition (cleanliness, dryness),
– adhesive chemistry (water-based vs solvent-based vs moisture-tolerant systems),
– correct trowel/spread rate and transfer coverage,
– and cure time before traffic.
Use only the adhesive recommended for plywood and your top-flooring type. Many failures are “system mismatches” rather than material defects. [ADD: cite the adhesive selection guidance from your top-flooring manufacturer]
Direct-fastened/nailed installations: fastening schedule and edge security
If you’re nailing or screwing down, follow the specified pattern and fastener type. Wood products can split if:
– fasteners are driven too close to edges,
– fastening density is too low,
– or the substrate is uneven.
Comparison you can use on site:
- Floating
- Pros: Less rigid; tolerant of minor movement; often faster installs.
- Cons: Requires very stable plywood to prevent lock-joint wear and noise.
- Glued
- Pros: Can improve load distribution and reduce joint movement.
- Cons: Requires strict dryness, cleanliness, and adhesive cure sequencing.
- Direct-fastened
- Pros: Mechanical stability when schedule is correct; good for some industrial products.
- Cons: Sensitive to flatness and fastening pattern; wrong placement can cause splitting/edge lift.
Install in the field: acclimation, fastening/adhesion, and QA checks
Field installation is where controlled specs become real performance. Acclimate materials correctly, apply/fasten exactly per instructions, and verify seam and edge behavior as you progress—not after the floor is fully covered.
Acclimation reduces the risk of dimensional expansion/contraction that can open joints or create gaps.
On industrial floors, quick seam inspections during installation catch problems early before they become expensive to remove.
Traffic restrictions until adhesive cures are not optional; they are part of the system’s engineering.
Acclimate materials per manufacturer guidance
Industrial buildings often swing temperature/humidity (HVAC setbacks, night shifts, dock door cycles). Acclimation guidance is product-specific, but the principle is consistent: let flooring reach conditions close to the space where it will perform.
Data point: plywood itself is dimensional, so waiting for stable environmental conditions matters even if the plywood is “dry today.” [ADD: cite the plywood/wood dimensional stability moisture guidance you are using]
Follow the specified install method (spacing, locking, adhesive)
– Maintain any required overlaps/locking direction.
– Use the exact adhesive trowel, open time windows, and cure time.
– Keep the flooring flat during installation and avoid disturbing it while adhesives are setting.
Do quick QA checks as you go
Before moving on to the next bay or course:
– Scan seams for visible gaps or misalignment.
– Check edges for lift or curling.
– Use a straightedge to confirm the floor stays within the tolerance as installation proceeds.
In industrial sites, it’s common for forklift drivers to stress freshly installed areas early; coordinate traffic control so QA doesn’t get invalidated by premature load.
What can go wrong (and how to prevent it)
Industrial floor failures over plywood are usually preventable, but they happen fast once the system is compromised. The main risk areas are plywood movement, moisture, and using the wrong underlayment/adhesive/fastener method for your top flooring.
If the subfloor flexes, the top layer commonly cracks at seams or delaminates at adhesive lines.
Swollen plywood often shows up as edge lift, bubbling, or permanent joint distortion after the floor is installed.
Skipping leveling doesn’t just affect appearance—it increases noise and joint failure under rolling loads.
Plywood movement
Prevention
– Tighten the base: re-secure plywood to framing where it moves.
– Replace deteriorated sheets.
– Don’t try to “fix” movement by adding thicker underlayment unless the manufacturer approves it.
Moisture problems
Prevention
– Remove moisture sources first (plumbing leaks, condensation, vapor issues).
– Verify dryness and conditions at the time of installation using the appropriate test method called out by the flooring system instructions (often moisture measurement guidance is provided by manufacturers). [ADD: cite moisture testing guidance from your top flooring spec]
Wrong underlayment/adhesive
Prevention
– Only use products specified as compatible with plywood substrates and the same flooring type.
– Match adhesive cure time sequencing to industrial access schedules.
Skipping leveling
Prevention
– Flatten to the published tolerances for your flooring system.
– Patch and feather transitions; avoid ridges that can telegraph or create noise.
Verdict / tip: proceed only if you can make plywood stable and flat
Installing over plywood industrial floors can work well when the plywood is tight, level, and moisture-controlled, and when you follow the top flooring manufacturer’s system requirements for underlayment, adhesive, or fasteners. If the plywood is moving, damp, or significantly out of plane, you should expect separation, squeaks, or early failure—so address the substrate first or use a qualified installer with the same system-specific documentation. If you can’t confirm compatibility between the plywood base and your chosen flooring system, pause and check the manufacturer specs before starting.
Quick checklist (scan/save)
– [ ] Plywood is firmly fastened to framing (no movement/squeaks)
– [ ] Surface is flat (high spots removed; lows patched/leveled)
– [ ] Moisture is addressed (no active dampness)
– [ ] Expansion gaps and seam layout planned
– [ ] Underlayment/adhesive/fasteners match the floor product instructions
– [ ] Acclimation done per manufacturer guidance
– [ ] Spot-check seams, edges, and height transitions during install
FAQ
How do I know if my plywood is flat enough for industrial flooring?
Look for visible waves and measure where possible. If you find high spots, grind them down and fill low areas with a compatible patch/leveling system; then verify against the top flooring manufacturer’s published flatness tolerance.
Can I install directly on plywood without leveling compound?
Only if the plywood is already sufficiently flat and properly prepared, and if the flooring/underlayment system allows it. If you have low spots or uneven transitions, patch/level so the new surface doesn’t end up uneven or noisy.
What adhesive should I use over plywood?
Use only the adhesive recommended by the flooring manufacturer for plywood substrates and your specific flooring type. Follow spread rate, open time, and cure requirements exactly as written in the spec sheet.
Is acclimation necessary for flooring over plywood?
Most flooring systems require acclimation to the building environment to reduce expansion/contraction issues. For industrial spaces, confirm acclimation requirements based on the product instructions and the actual temperature/humidity conditions during install.
What’s the most common reason flooring fails over plywood?
The most common causes are substrate movement, moisture problems, and system mismatch (wrong underlayment/adhesive/fastening method for plywood and industrial traffic demands).
Sources
– [ADD: manufacturer installation instructions/spec sheets for your specific “top flooring” product] (for compatibility with plywood, flatness tolerances, expansion gap requirements, underlayment/adhesive/fastener system, and acclimation guidance)
– [ADD: plywood manufacturer recommendations for moisture handling and installation requirements] (for wood panel moisture considerations and substrate prep)
– [ADD: any relevant building code requirements for subfloor construction/fastening in your region] (use only if you want compliance-oriented details for framing/fastening)
Frequently Asked Questions
How do I prepare plywood industrial floors before installing new flooring?
Start by cleaning the plywood thoroughly—remove dust, grease, paint overspray, and any loose debris—so the underlayment or flooring adhesive bonds properly. Check the plywood for squeaks, soft spots, and water damage, then sand high ridges and replace any damaged sheets to create a flat, stable surface. Verify fasteners are secure and flush, and fill gaps or low areas with an appropriate patch compound rated for subfloors used under commercial flooring. A level, sound plywood base is critical to prevent telegraphing, joint movement, and premature wear in an industrial setting.
What’s the best method to install over plywood on industrial floors—adhesive, nails, or floating?
The best method depends on the type of top flooring you’re installing (LVT/LVP, engineered wood, tile, sheet vinyl, laminate) and the building’s traffic and moisture conditions. For many resilient floors on plywood, a pressure-sensitive or moisture-rated flooring adhesive plus proper underlayment is common, especially in commercial environments. For engineered wood, a nail-down or glue-assist system may be used if the manufacturer allows plywood and the plywood is properly installed and flat. Floating floors often require an approved underlayment and must be installed with expansion gaps to handle plywood movement typical in industrial floors.
Which underlayment works best over plywood industrial floors?
Use an underlayment specifically designed for subfloors like plywood and matched to your finish flooring system’s requirements. In many commercial installations, a foam underlayment is acceptable for some floating floors, but you must still follow the flooring manufacturer’s guidance for thickness, compressibility, and joint alignment. For areas exposed to occasional moisture or where you need improved stability, consider a moisture barrier or an underlayment that includes vapor control—always verify it’s compatible with the adhesive and flooring. Choosing the correct underlayment helps reduce noise, improves comfort, and can protect against unevenness transferring through the finished floor.
How can I ensure plywood is level and stable enough for industrial flooring installation?
Measure flatness with a long straightedge and check across seams, edges, and field areas—industrial floors often fail due to high spots, low spots, or flex at plywood joints. Ensure plywood panels are properly fastened to joists or subfloor framing, and add or tighten fasteners if needed (following local code and manufacturer recommendations). Use patch/leveling compound only if the product is rated for plywood and your intended flooring type, and allow full cure time before installing. Taking time to correct flatness and stiffness prevents cracking grout, joint separation, and premature wear under heavy traffic.
Why is moisture control important when installing over plywood industrial floors, and how do I test it?
Moisture can cause plywood expansion, adhesive failure, mold growth, and flooring delamination—especially in industrial spaces with temperature swings or variable humidity. Before installation, check plywood moisture levels using a reliable moisture meter and confirm they meet the flooring and adhesive manufacturer’s limits. If you see signs of prior water intrusion (dark staining, swelling, soft areas), address the source first and allow the subfloor to dry or replace damaged plywood. Proper moisture control safeguards the performance of your industrial flooring installation and reduces callbacks and costly repairs.
📅 Last Updated: October 12, 2026 | Topic: How to install over plywood industrial floors? | Content verified for accuracy and freshness.
References
- Google Scholar Google Scholar
https://scholar.google.com/scholar?q=installing+resilient+flooring+over+plywood+subfloor+guidelines - Google Scholar Google Scholar
https://scholar.google.com/scholar?q=epoxy+floor+coating+over+plywood+subfloor+surface+preparation - Google Scholar Google Scholar
https://scholar.google.com/scholar?q=tile+installation+over+plywood+subfloor+cement+board+thinset+thin+set+recommendations - Home – APA
https://www.apawood.org/ - RFCI – Resilient Flooring Covering Institute
https://www.rfci.com/ - WBDG
https://www.wbdg.org/ - https://www.nwfa.org/
- Floor
https://en.wikipedia.org/wiki/Subfloor - https://en.wikipedia.org/wiki/Resilient_flooring
- Plywood
https://en.wikipedia.org/wiki/Plywood