


Looking to install basement wide-plank wood floors? The fastest, most reliable path is a moisture-controlled floating or engineered-wood installation over a proper vapor barrier—not a nail-down approach that can trap water and warp planks. You’ll get clear, step-by-step guidance on subfloor prep, underlayment choice, acclimation, and layout so your basement stays stable and your planks lay straight.



If you want wide-plank wood floors to stay flat in a basement, the biggest job is managing moisture before you nail, glue, or float anything. Start by testing the concrete slab for moisture and planning an appropriate subfloor/underlayment system for your basement conditions, then follow the installation method your product specifies. This guide walks you through the setup, materials, and the actual install steps so the boards don’t cup or separate later.
This is for homeowners (or DIY crews) installing wide-plank wood in basements—especially where slab moisture, humidity swings, and uneven concrete are common. If your basement is unfinished, has a history of water issues, or your wood manufacturer requires a specific system, you’ll want to read the relevant specs alongside this checklist.
Check Basement Moisture and Concrete Conditions First
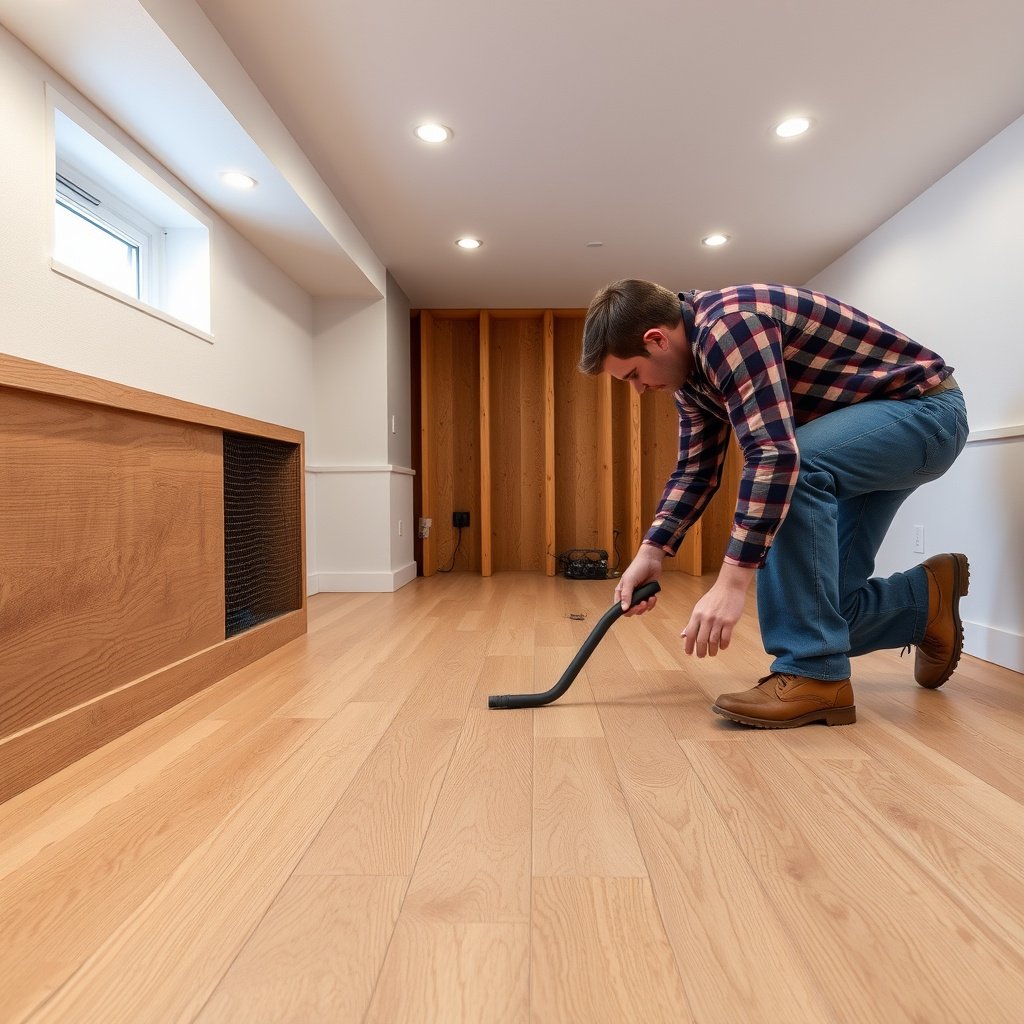
For basement wide-plank wood floors, the fastest way to prevent long-term problems is to rule out slab moisture and fix any water entry before installation. If you get the moisture math wrong, everything else—fasteners, adhesives, and underlayment—can only delay failure.
ASTM F2170 provides a standardized way to measure in-slab relative humidity (RH) using in-situ probes, which is why many wood-floor systems reference it for basement slab moisture decisions. ASTM F2170
ASTM E96 defines water-vapor transmission using “perms,” and the industry still uses the definition that 1 perm equals 1 grain/(hr·ft²·inHg). ASTM E96/E96M
ASTM F1869 measures moisture vapor emission rate (MVER) and reports it as pounds per 1,000 square feet per 24 hours (lb/1,000 sq ft/24 hr). ASTM F1869
– Test slab moisture (and keep results on hand) before choosing between glue-down, nail-down, or floating methods.
– Verify the slab is flat enough for wide planks, since unevenness can show up more than with smaller boards.
– Fix any water intrusion problems (gutters, grading, sump issues) before flooring work—otherwise your new floor can fail.
What “moisture testing” really means for basement wide-plank wood floors
In 2026, moisture surprises are still the #1 reason basement wide-plank wood floors cup, gap, or develop uneven “waves.” Concrete is porous, and even a dry-looking slab can release moisture vapor. Wide planks worsen the issue because more board width means more dimensional movement when humidity changes.
In practice, you typically document results from at least one approved concrete moisture method (most commonly ASTM F2170 or ASTM F1869), then compare them to the flooring system limits stated by your manufacturer and adhesive/vapor barrier documents.
Flatness matters more when planks are wider
Even if moisture is within spec, flatness drives another set of failures: squeaks (in some assemblies), separated lock-joints (in floating systems), or visible ridges. Wide-plank boards magnify small surface variations because the board spans more concrete area between support points.
I recommend verifying flatness with the measurement method your product team expects (often a straightedge approach and/or a defined tolerance). If your basement slab has high spots, shaving/planing or leveling compound may be required before you install basement wide-plank wood floors.
Moisture remediation isn’t “part of the install”—it’s the install
If water intrusion exists (cracks with active flow, failed waterproofing, missing drainage, or a basement that regularly runs humid), moisture testing alone won’t save the flooring. Fix the source first. Then retest. This order is the difference between a basement floor that lasts and one that you’re redoing in a season.
7 Concrete / Vapor Standards Commonly Referenced for Basement Wood Floors
| # | Standard | What it Measures | Typical Use in Basement Installs | Moisture Decision Confidence |
|---|---|---|---|---|
| 1 | ASTM F2170 | In-situ slab relative humidity (RH) | Choose/approve adhesives and moisture-rated assemblies | High |
| 2 | ASTM F1869 | Moisture vapor emission rate (MVER) | Quantify vapor emission to meet product limits | High |
| 3 | ASTM E96/E96M | Water-vapor transmission/permeance (“perms”) | Evaluate vapor barrier performance for basement assemblies | High |
| 4 | ASTM D4263 | Plastic sheet surface moisture indicator | Screening/triage when a quantitative test isn’t available | Lower |
| 5 | ASTM F710 | Concrete surface preparation/conditions | Reduce failures caused by contamination and weak bonding surfaces | High |
| 6 | ASTM E1155 | Floor flatness/levelness measurement (F-number system) | Verify substrate flatness for wide-board tolerances | High |
| 7 | ASTM C109 | Compressive strength of hydraulic cement mortars/concrete | Inform whether slab is “ready” for prep/adhesives (engineering context) | Context-Dependent |
Pick the Right Installation Method for Wide-Plank Flooring
The right installation method for basement wide-plank wood floors is the one your product explicitly supports for slab moisture and humidity conditions. The “best-looking” method on YouTube can still fail if it’s not rated for your assembly and moisture readings.
Wood flooring warranties frequently require that you follow the manufacturer’s approved installation system, including vapor barrier/underlayment type and moisture testing method.
Glue-down assemblies typically demand tighter moisture control because adhesives form the bonding pathway between slab and flooring.
Floating/lock-together systems still require a moisture-rated underlayment layer; the “no glue/fasteners” approach does not eliminate slab vapor drive.
– Follow the flooring manufacturer’s instructions for your specific product (some wide planks want a vapor barrier; others require a particular adhesive or underlayment).
– Choose the system that matches your basement reality: glue-down often suits stable slabs, while engineered options or floating systems may reduce movement issues.
– Make sure your accessories (vapor barrier, adhesive, underlayment, fasteners if applicable) are compatible with wide-plank wood and rated for basements.
Glue-down vs floating vs nail-down: what changes in basements
Basements typically expose wood flooring to two moisture paths: (1) vapor coming through the slab and (2) humidity changes in the air. Your installation method can manage one pathway better than the other, but it shouldn’t be expected to “fix” moisture by itself.
From my planning checklists for basement wide-plank wood floors, I treat the method selection as a compatibility exercise: slab moisture results + required vapor barrier + flatness tolerances + plank type (solid vs engineered).
Pros/cons comparison (quick decision support)
| Installation method for basement wide-plank wood floors | Main advantage | Main downside | Best-fit basement scenario |
|---|---|---|---|
| Glue-down (where allowed) | Strong contact and crisp feel | Adhesive is moisture-sensitive; slab prep must be excellent | Quantitative moisture results are within limits and slab is flat |
| Nail-down (where allowed) | No adhesive bond line; classic wood feel | In basements, fastener systems still need a moisture-rated assembly | You have very controlled humidity and an approved underlayment/vapor barrier system |
| Floating / lock-together (where allowed) | Less dependent on adhesive; easier service | Lock-joints can telegraph slab irregularities | You can maintain air humidity stability and meet underlayment + flatness requirements |
Prepare the Subfloor, Vapor Barrier, and Underlayment Layers
The quickest path to flat, stable basement wide-plank wood floors is to prep the slab and build each moisture layer exactly as specified. “Close enough” usually shows up later as cupping, board separation, or a permanently uneven look.
Overlaps and seam sealing in vapor barriers directly affect whether basement slab vapor is redirected or allowed to migrate upward.
A clean, sound concrete surface is a prerequisite for most adhesive or leveling system performance per standard prep practices. ASTM F710
Wide-plank flooring typically needs a continuous, correctly terminated perimeter expansion gap to accommodate seasonal dimensional change.
– Clean the slab thoroughly, then address high spots and hollows so the boards sit flat.
– Install the required vapor barrier/underlayment exactly as specified (overlaps, seams, and up-the-wall details matter).
– Plan transitions and edges early—wide planks need consistent spacing and a reliable perimeter gap for expansion.
Concrete prep: level first, then waterproof correctly
Start with cleaning and mechanical prep. If your slab has paint, sealers, curing compounds, or contaminants, you need to remove them according to the assembly’s requirements. Then evaluate high spots and low areas.
If you need patching or leveling compound, keep your scope aligned with ASTM-based prep expectations and the product system you’re using. Basement wide-plank wood floors read the substrate: if you’re chasing “flat” by feel, you may be missing the actual problem.
Vapor barrier details that make or break basement wide-plank wood floors
For basement wide-plank wood floors, vapor barrier installation isn’t just “lay plastic down.” It includes:
– Correct overlap direction and width
– Sealed seams (tape type matters)
– Up-the-wall termination to the height your manufacturer specifies
– Treatment around penetrations (pipes, posts) so vapor pathways don’t form
Underlayment matters—even in floating systems
Even when you’re not gluing boards, the underlayment controls how moisture and slight movement affect the floor assembly. Use the underlayment that your flooring documentation approves for basement conditions and wide-plank formats. Mismatched underlayment can change sound, compressibility, and joint behavior.
Acclimate and Plan the Layout (So Boards Don’t Fight the Room)
For basement wide-plank wood floors, acclimation and layout planning prevent the boards from arriving “at war” with basement humidity. If the wood and the room are out of balance on install day, movement happens after you’re already locked in.
Wood flooring installation instructions commonly require acclimation under specific temperature and relative humidity conditions before placement.
Dry-laying boards helps plan end-joint locations, reducing concentration of joints that can become weak points in wide-plank runs.
Choosing a consistent starting line and maintaining a perimeter gap helps accommodate seasonal expansion without buckling or trapped motion.
– Acclimate the flooring per the manufacturer’s timeline and conditions (temperature/humidity requirements).
– Dry-lay boards to map the best pattern, grain direction, and how you’ll handle end-joints across runs.
– Use a consistent starting line and stagger end joints to reduce weak points and visual rhythm breaks.
Acclimation: follow the dates and conditions, not the calendar
Acclimation isn’t only about time; it’s about temperature and humidity stability. Basements can drift quickly—especially if HVAC cycles or dehumidifiers cycle differently day-to-day.
In 2026, I recommend setting up your plan so acclimation matches your actual “live” conditions. If you don’t control humidity, you’re effectively acclimating to a moving target, which makes basement wide-plank wood floors more likely to move after installation.
Layout planning: wide planks need stronger math
Wide boards magnify layout issues:
– End joints become more visible
– Any “short” measurement error becomes a bigger gap later
– Runs across uneven transitions create cumulative stresses
Plan where end joints land (and how often they occur), map grain direction, and decide how you’ll handle parallel runs across doorways and long basement hallways.
Install Wide-Plank Boards by the Manufacturer’s Method
The installation step succeeds when the method matches your basement conditions and the product’s approved assembly. For basement wide-plank wood floors, the board itself is only one part of a moisture-managed system.
Nail-down installations still require correct fastener type/spacing and adherence to approved underlayment/vapor barrier assemblies for basement environments.
Glue-down success depends on adhesive spread rate, open time, and full coverage—missing any of these can reduce bond performance even when moisture seems acceptable.
Floating/lock-together flooring requires correct underlayment thickness/spec and expansion space; without it, joints can separate or buckle.
– Nail-down (if allowed for your product): use the approved fastener type/angle and correct spacing, and don’t overdrive fasteners.
– Glue-down (if allowed): apply adhesive per instructions and maintain the required open time and coverage so you get full contact.
– Floating/lock-together (if allowed): verify underlayment specs, lock alignment, and leave expansion space where required—basements can be humidity-sensitive.
Work in controlled batches (not marathon swings)
For basement wide-plank wood floors, it’s easy to rush the last 20% of a job—quarter rounds, transitions, and small fitment details. Those are exactly where moisture and expansion need room to work.
As you install:
– Keep boards aligned to your starting line
– Maintain spacers at perimeter edges if your method requires it
– Check for debris under boards (especially for floating installations)
– Confirm that transitions allow for expansion (not hard-stopped tight)
What Can Go Wrong (Common Basement Failures)
Basement wide-plank wood floors fail for predictable reasons: moisture mismanagement, wrong assembly choices, and substrate problems. If you recognize the failure mode early, you can often correct the scope before the damage becomes irreversible.
Cupping, buckling, and permanent gapping in wood flooring commonly correlate with moisture imbalance between the slab, the room air, and the installed assembly.
Even small substrate irregularities can become visually obvious in wide-plank floors because each board spans more surface area than a narrow format.
If acclimation isn’t performed under the conditions specified in the installation guide, boards can continue exchanging moisture after installation.
– Skipping moisture testing or using the wrong vapor barrier can lead to cupping, buckling, or permanent gaps.
– Installing over an uneven slab can cause squeaks, movement, or a “wavy” look that’s more noticeable with wide planks.
– Rushing acclimation or using the wrong room humidity can cause boards to expand/contract after installation.
A clear cause-and-effect reminder for basement wide-plank wood floors
– Wrong moisture layer → moisture migrates → dimensional change.
– Wrong method for the slab → adhesive/fasteners don’t perform as designed → delamination or joint failure.
– Wrong flatness → board stress concentrates → telegraphing and joint stress.
Verdict: What We’d Recommend (and When to Skip DIY)
Wide-plank wood in a basement is doable, but only if moisture management and installation method are chosen to match your specific product and slab conditions. If you find past water intrusion, slab moisture readings exceed your flooring system’s limits, or your product requires a detailed substrate/adhesive setup you can’t follow precisely, consider hiring a pro or switching to an installation approach your manufacturer clearly supports. Otherwise, go step-by-step: test first, prep correctly, then install exactly per specs.
Glue-down vs floating for basement wide-plank wood floors: which is lower-risk?
| Criteria | Glue-down wide-plank | Floating/lock-together wide-plank |
|---|---|---|
| 1) Slab moisture tolerance sensitivity | Lower (needs tighter control) | Moderate (still needs vapor control) |
| 2) Flatness tolerance | High (contact matters) | High (locks telegraph) |
| 3) Installation complexity | Higher (adhesive workflow) | Lower to moderate |
| 4) Typical “failure trigger” in basements | Bond loss/voids from moisture or coverage misses | Joint separation from lock stress + humidity swings |
| 5) Vapor barrier requirements | Often strict system-specific | Also required, per underlayment spec |
| 6) Resilience to minor substrate debris | Low (coverage quality matters) | Moderate |
| 7) Expansion gap importance | Critical | Critical |
| 8) Repairability after movement | Harder (adhesive removal) | Often easier (replace affected sections) |
| 9) Noise (common basement concern) | Can be quiet with proper prep | Can squeak if flatness/underlayment aren’t right |
| 10) Best for wide-plank consistency across long runs | Good when substrate specs are met | Depends heavily on lock design + humidity stability |
| Verdict | Choose glue-down only when slab moisture + substrate prep are verified to match your system specs. | Choose floating only when your underlayment/vapor barrier and flatness tolerances are met and your basement humidity is controlled. |
Quick Checklist (Scan Before You Start)
– [ ] Test slab moisture and confirm it meets your flooring’s requirements
– [ ] Verify slab flatness and address high/low areas
– [ ] Confirm the allowed installation method (nail-down / glue-down / floating)
– [ ] Install the required vapor barrier/underlayment exactly as specified
– [ ] Acclimate wide-plank flooring per manufacturer guidance
– [ ] Plan layout and stagger end-joints
– [ ] Leave required expansion space at perimeter and transitions
Sources
– ASTM F2170 — Standard Test Method for Determining Relative Humidity in Concrete Floor Slabs Using In-Situ Probes.
– ASTM F1869 — Standard Test Method for Measuring Moisture Vapor Emission Rate of Concrete Subfloor Using Anhydrous Calcium Chloride.
– ASTM E96/E96M — Standard Test Methods for Water Vapor Transmission of Materials.
– ASTM F710 — Standard Practice for Preparing Concrete Floors to Receive Resilient Flooring.
– — vapor barrier/underlayment assembly, moisture limits, acclimation requirements, and expansion gap details.
– — open time, coverage rate, and compatibility requirements for basement conditions.
If you remember just one thing for basement wide-plank wood floors, make it this: treat moisture testing and the approved vapor/underlayment assembly as the “foundation” of the install. When moisture, flatness, acclimation, and the installation method all match your specific product specs, wide planks can look exceptional—and stay that way—despite the basement’s humidity swings.
Frequently Asked Questions
What’s the best way to prepare a basement subfloor before installing wide-plank wood floors?
Start by verifying the basement slab is flat, clean, and structurally sound, then remove paint, debris, or old adhesive. Use a level to check for high/low spots and sand or patch as needed so the wide-plank wood floor can sit evenly. Most importantly, measure moisture in the concrete with a calcium chloride test or in-situ RH test before you install engineered or solid wood flooring. Proper prep also includes sealing cracks and using the right underlayment or vapor barrier to reduce moisture-related cupping or gapping.
How do I install wide-plank wood floors over a concrete basement slab?
In basements, you’ll typically install over concrete using a moisture barrier system such as a full-spread vapor barrier underlayment designed for slab installations. Wide-plank wood floors are often installed as engineered wood using glue-down or click-lock floating methods depending on the product’s installation instructions. If you choose a nail-down approach for any installation, confirm the product is specifically approved for below-grade concrete and that the slab can be properly prepared for the fasteners. Always follow the manufacturer’s ASTM/installation guidelines for basement or on-slab applications to avoid warranty issues.
How can I prevent moisture issues and warping when installing wide-plank wood floors in a basement?
Basements are prone to higher humidity and moisture vapor coming through concrete, so you need both accurate moisture testing and a compatible flooring system. Maintain a stable indoor environment—use a dehumidifier and HVAC to keep relative humidity within the wood flooring manufacturer’s recommended range. Install a moisture barrier/vapor retarder beneath the wide-plank wood floors and address any water intrusion by sealing foundation cracks and improving drainage. If you notice persistent dampness or moisture readings above allowable limits, resolve the moisture problem first before installing.
Which installation method is most suitable for wide-plank wood floors in a basement: floating, glue-down, or nail-down?
For most basements with concrete slabs, floating (click-lock) or glue-down installation is commonly chosen because they accommodate minor movement and are easier to manage with moisture control. Glue-down wide-plank wood floors can provide excellent stability when the slab is properly flat and moisture is within limits, but it requires the right adhesive approved for engineered wood. Nail-down is less common below grade because concrete moisture and fastening conditions can increase risk of problems unless the flooring is engineered for that use and the slab conditions are suitable. The best method depends on your floor type (solid vs engineered), the product’s warranty requirements, and your moisture test results.
Why do gaps and cupping happen with wide-plank wood floors in basements, and how do I reduce them?
Gaps and cupping often result from moisture imbalance—either high moisture vapor from the slab or swings in indoor humidity after installation. Wide-plank wood floors are more sensitive to seasonal movement because they span more distance across the room, so consistent conditions are critical. Reduce risk by acclimating the flooring in the basement area before installation, using a proper vapor barrier, and keeping humidity stable with a dehumidifier. Also ensure the subfloor is flat and follow expansion gap requirements around walls and fixed objects.
📅 Last Updated: October 16, 2026 | Topic: How to install in a basement wide-plank wood floors? | Content verified for accuracy and freshness.


