
Want a step-by-step answer for how to install garage floors that actually holds up to cars, spills, and moisture? This guide walks you through choosing the right flooring system, prepping the concrete, applying the coating or surface, and finishing with a durable, cleanable surface. Follow these steps in order and you’ll get a professional-looking installation without guesswork—whether you’re upgrading an existing slab or starting fresh.


Install garage floors by prepping the concrete first, then applying the correct coating or mat system for how you’ll actually use the space. Clean, repair, and verify moisture/paintability (when required) before you mix and apply—because most failures come from skipping one of those steps. This guide walks you through the practical order of operations so your floor looks good and holds up.
If you’re planning a DIY upgrade—whether you want a coated concrete finish, a roll-out system, or interlocking tiles—this is for you. It’s especially useful when you’re not sure whether to prioritize leveling, moisture checks, or choosing the right product first.
Gather materials and choose the right garage floor system
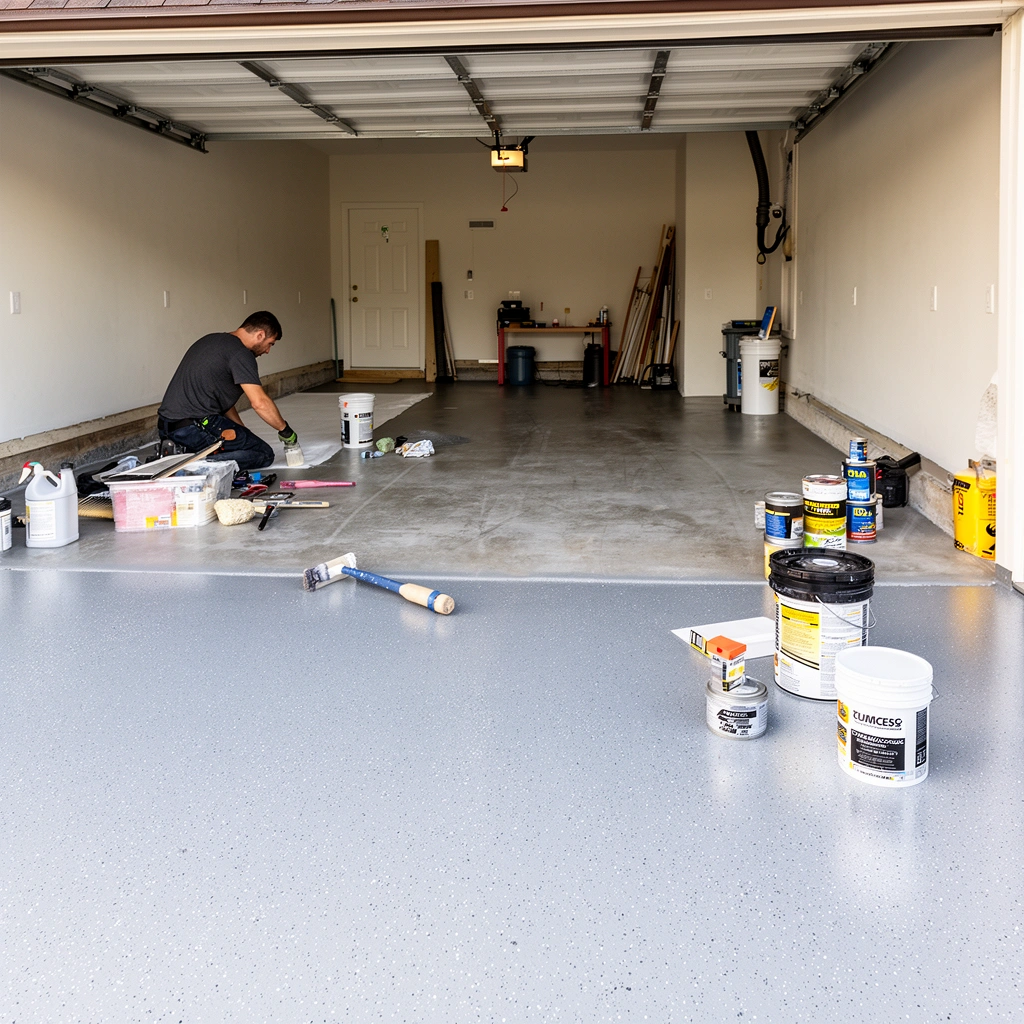
Choose the system first, then prep the slab to match that system’s bonding and tolerance requirements. The “right” garage floor isn’t the one with the flashiest finish—it’s the one whose installation specifications your concrete can actually meet.
“Concrete surface preparation controls adhesion more than the topcoat color or brand.”
“Epoxy and polyurea systems are moisture-sensitive; manufacturers specify allowable moisture ranges and test methods.”
Pick the system based on your garage use:
– Cars only / light rolling loads: A decorative coating (epoxy or polyaspartic) or a simple mat can be enough.
– Heavy rolling loads (tool carts, frequent trailer tires, lift operations): Consider systems designed for higher impact and abrasion resistance (and follow their minimum slab flatness requirements).
– Spills and chemicals (oil, brake fluid, de-icer, shop cleaners): Use a floor system with chemical-resistance documentation for the specific chemicals you expect.
– Humidity-prone garages (unconditioned basements, coastal climates): Prioritize moisture-tolerant systems and moisture testing methodology that matches the coating’s data sheet.
Match the floor finish to the slab condition:
– Coatings typically perform best on concrete that’s stable, properly profiled (mechanically prepared), and free of sealers/paint/contamination.
– Tiles/mats can be more forgiving if your slab has minor surface issues, but they still need a sufficiently flat base to avoid rocking, gaps, and premature wear.
Read the full installation instructions for your exact product first:
– Coverage rate determines how much material you need per coat.
– Dry/recoat times determine whether you’ll finish within the manufacturer’s working window.
– Required tools (profile grinder, mixer, spike roller, notch gauge, etc.) affect the final result as much as the chemistry does.
Also decide now whether you’ll be doing spot repairs or full slab correction. A coating can only “hide” so much—texture and cracks will telegraph if you don’t repair and prep correctly.
Prep the concrete slab correctly (this is the make-or-break step)
Concrete prep isn’t a nice-to-have—it’s the make-or-break step that determines whether the coating bonds and stays intact. Start by removing anything that prevents adhesion, then repair and confirm the slab meets the coating’s moisture and surface requirements.
“If the slab has sealers or curing compounds, most coatings require mechanical removal to achieve adhesion.”
“ICRI guidance recommends achieving a consistent concrete surface profile before applying protective coatings.”
Remove everything that can interfere with bonding:
– Paint, sealers, old coatings
– Oil/grease, tire transfer, waxy residues
– Dust and loose concrete
– Any contaminant that creates a “bond breaker layer”
A practical method that many contractors follow is:
1. Degrease / contaminant removal using an appropriate cleaner/degreaser that’s compatible with coatings (then rinse per product guidance).
2. Mechanical abrasion (grinding or shot blasting) rather than relying on detergents alone.
3. Vacuum with a true shop vacuum plus fine dust filtration so you don’t re-deposit residue.
Repair cracks and pitting:
– Use repair products compatible with the coating system (some epoxies require a particular primer/repair profile).
– Let patch materials cure fully—partially cured repairs can cause soft spots and adhesion failures later.
– Address spalls (broken edges) so the finish doesn’t bridge hollow areas.
Ensure the slab is dry and suitable for the coating you chose:
– Confirm using the coating’s stated moisture requirements and test method (e.g., relative humidity probes, plastic sheet test, or moisture vapor testing method per ASTM standards).
– According to ASTM F2170, relative humidity testing uses in-slab RH probes to measure moisture conditions before coating application (ASTM F2170).
Moisture Targets Commonly Used for Epoxy-Style Garage Coatings (Reference Ranges)
| # | Moisture Check (Method) | Typical Pass Target* | Why It Matters | Fit Rating |
|---|---|---|---|---|
| 1 | In-slab RH probes (ASTM F2170) | ≤ 75% RH | Limits vapor pressure-driven coating failure | ★★★★☆ |
| 2 | MVER (ASTM F1869) | ≤ 3.0 lb/1000 ft²/24 hr | Helps prevent blistering and adhesion loss | ★★★☆☆ |
| 3 | Plastic sheet test (qualitative) | No condensation / no darkening | Screening tool when specs allow | ★★☆☆☆ |
| 4 | Temperature stabilization (practical) | Stable within spec window | Reduces blushing and cure inconsistencies | ★★★★☆ |
| 5 | Surface profile consistency (ICRI) | Common targets: CSP 2–3 | Improves mechanical interlock | ★★★☆☆ |
| 6 | Moisture & pH screening (as specified) | Per product pH/compatibility guidance | Reduces risk of softening/adhesion issues | ★★★☆☆ |
| 7 | Visual cleanliness (last step) | No dust film; no sheen residue | Prevents “weak boundary layer” bonding | ★★☆☆☆ |
Targets vary by manufacturer and system type; always follow the specific moisture limits and testing method in your coating’s datasheet and installation guide (ASTM F2170, ASTM F1869).
Plan layout, manage slopes, and control temperature/humidity
A successful garage floor installation is about controlling variables before you open the mixing bucket. Plan edges, seams, and transitions, then work inside the product’s temperature and humidity window to avoid cure problems and uneven sheen.
“Most coating failures are installation-environment failures as well as surface-prep failures.”
“Working time and recoat windows are specified so layers bond rather than trap solvents.”
Decide where seams, edges, and transitions will land:
– Dry-fit tape lines or chalk guides for where you’ll stop and start sections.
– Plan the direction you’ll apply so you don’t trap wet edges.
– If you use tiles or interlocking systems, plan cut lines near walls so small cuts aren’t in high-traffic zones.
Check for garage floor issues like low spots or drainage needs:
– Some systems tolerate minor variation; others telegraph texture or create hollow spots under tiles.
– If you have slope problems, address them before coating or tile installation. Coatings generally follow the slab—there’s no “invisible correction.”
Follow the installation environment requirements:
– You should follow the manufacturer’s exact limits for temperature and humidity in the instructions—insert your product’s stated limits here: ([ADD: exact limits from your product label/datasheet]).
– If your garage is unconditioned, schedule the job for stable weather and consider fans/heaters only if the product allows it.
My practical takeaway from many slab-prep projects: the environment is usually the easiest variable to mess up because DIY schedules drift. Build in time buffers for unexpected crack repair cure and slab drying. If you can’t meet the spec window, reschedule—don’t “make it work.”
Install the garage floor (coating vs. tile/mat systems)
Install the system by following the product’s sequence exactly—mixing, priming (if required), applying to the specified spread rate, then respecting cure and recoat timing. The difference between a pro-looking floor and a mediocre one is usually layer thickness consistency and adherence to the working window.
“Coatings are typically applied at a controlled spread rate; thicker application can cause cure and blistering issues.”
“Interlocking tile systems still depend on a flat base to prevent movement and seam separation.”
Coatings (typical workflow—always confirm with your label):
– Priming: Apply a primer if the system requires it for bonding.
– Mixing: Mix components to the specified ratio and mixing time; scrape sides/bottoms.
– Multiple coats: Apply each coat at the required spread rate.
– Recoat/cure: Wait until the previous layer reaches the specified condition before the next.
Tiles/mats (typical workflow):
– Ensure the slab is flat enough for the system you selected.
– Set the layout with tight alignment and spacing where required.
– Trim edges carefully and follow any expansion-gap instructions near garage doors and walls.
Work in manageable sections:
– For coatings, maintain “fresh” edges to avoid lap marks.
– For tiles, keep pattern alignment consistent across the garage—especially near entrances.
Important timing detail to add from your product instructions:
– ([ADD: any known timing/working-window details from your product instructions])
Cure, protect, and keep it maintenance-friendly
Protecting the floor during cure is what turns an installation into a long-term finish. Respect the manufacturer’s cure time before vehicle traffic, then use only cleaning methods that the system documentation allows.
“Even when a coating feels dry, it may not be fully cured; full cure time governs chemical and abrasion resistance.”
“Using the wrong cleaner can attack epoxy/polyurethane topcoats, causing dulling or softening.”
Respect cure times:
– Follow the documented timeline for pedestrian traffic, light rolling loads, and full vehicle service—insert your product’s cure timeline: ([ADD: exact cure times from your product instructions]).
– Avoid parking vehicles early. Tire oils and residue can become embedded in an under-cured surface.
Protect during curing:
– Keep dust and debris off the floor.
– Ventilate as allowed by the product guidance.
– Keep spills off the surface until fully cured.
Plan maintenance that doesn’t damage the finish:
– Recommended: sweep/vacuum regularly and clean with pH-neutral products that are compatible with coatings.
– Avoid: harsh solvents, strong acids/bases, and abrasive pads unless your manufacturer explicitly permits them.
Add your product’s cleaning guidance:
– ([ADD: recommended vs. prohibited cleaners from product documentation])
What can go wrong (and how to avoid it)
Most garage floor problems trace back to three categories: inadequate bonding conditions, incorrect layer thickness/application, and missed environmental or timing requirements. If you can identify which category you’re facing, the fix becomes much easier.
“Adhesion failures usually link to contamination, insufficient surface prep, or skipping required primer.”
“Peeling and cracking often reflect system mismatch to slab movement or unaddressed concrete defects.”
Poor adhesion (common causes):
– Skipped degreasing or incomplete removal of sealers/paint
– Applying coating over dust film
– Skipping a required primer or using the wrong primer
Fix/avoid:
– Follow the surface-prep method and primer requirement in the TDS/installation guide.
– Test the bond suitability where the manufacturer provides a method.
Cracks and peeling:
– Repair failing concrete before coating.
– Don’t apply a rigid coating over slabs that are actively moving without addressing the underlying issue.
Uneven finish or visible seams:
– Coating applied outside spread rate and recoat timing
– Not mixing consistently or not using the correct application tools (roller type, squeegee settings, etc.)
Moisture surprises:
– If the slab has ongoing moisture and the system isn’t designed for it, you can see bubbling, haze, whitening, or long-term adhesion loss.
– Add moisture symptoms from your product documentation: ([ADD: moisture-related symptoms tied to your chosen system])
Quick compare: Coating vs. Tile/Mat (what tends to go wrong)
| Factor | Coatings | Tiles/Mats |
|---|---|---|
| Best slab condition | Stable, properly prepped concrete with correct moisture limits | Fairly flat slab (surface defects matter less than flatness) |
| Biggest DIY risk | Inadequate prep or wrong moisture environment | Base not flat enough → rocking and seam separation |
| Typical appearance issues | Lap marks, uneven sheen, telegraphed texture | Misalignment at seams/edges, trimming mistakes |
| Repair approach | Local patching may be limited by system chemistry | Individual tiles can be replaced if the base remains stable |
Verdict: what I’d recommend (and who should skip this)
A DIY garage floor installation works best when you treat preparation and spec compliance as the main job—not the final color. If your slab is stable, accessible for mechanical prep, and you can meet the moisture and environment requirements, a coating or tile/mat system can look professional.
“If you can’t meet the manufacturer’s moisture and temperature requirements, the safest choice is to stop and reassess.”
“Rigid coatings depend on a stable substrate; visible slab failure means the system can’t compensate.”
Skip DIY (or pause and consult specs) if:
– You’re planning a coating over concrete with unknown sealers or prior treatments
– You can’t meet the product’s temperature/humidity or curing-time requirements
– You need a guarantee against moisture-related failure
Warranty caveat to confirm:
– ([ADD: specify whether your product offers a warranty contingent on moisture testing])
What I’d do next in your shoes:
1. Verify moisture approach per the manufacturer (and the ASTM method they reference).
2. Confirm whether primer is required.
3. Ensure your slab can be mechanically prepped to the system’s profile expectations (ICRI CSP guidance is commonly referenced, but your product controls final requirements).
Quick checklist / scan-and-save
– [ ] Choose system (coating vs. tiles/mats) based on garage use
– [ ] Clean and remove paint/sealer/contaminants to meet bonding requirements
– [ ] Repair cracks/spalls; let patch materials cure fully
– [ ] Confirm slab suitability (especially moisture/paintability requirements) per product specs
– [ ] Plan layout and edges; prep tools and mixing quantities ahead of time
– [ ] Install in the recommended conditions; follow recoat timing and spread rates
– [ ] Allow full cure before vehicles and heavy loads; protect during curing
– [ ] Maintain with manufacturer-approved cleaning methods
FAQ
How long does it take to install garage floors?
Total time depends on surface prep plus the system’s recoat and cure schedule. Plan around cure/recoat windows listed in your manufacturer’s installation guide—insert your product’s total timeline: ([ADD: total timeline from your product instructions]).
Do I need to level the garage floor before installing?
Not always, but significant low/high spots can create uneven appearance with coatings and poor fit or rocking with tiles/mats. Coatings also tend to telegraph texture, so check flatness tolerance in your product spec sheet—([ADD: flatness tolerance from your product spec sheet]).
Can I install garage floor coating over an existing sealed concrete surface?
Only if your manufacturer explicitly allows it and you meet their adhesion and surface-prep requirements. Many coatings require mechanical abrasion and verification steps on sealed surfaces—([ADD: exact allowance/requirements from the coating’s documentation]).
What’s the biggest mistake people make when installing garage floors?
Most failures trace to inadequate prep: contamination, skipped primer, or ignoring moisture/temperature instructions.
What type of garage floor is best for oil or chemical spills?
Choose a system rated for the specific exposures you expect (oil, brake fluid, de-icing chemicals, cleaners). Use the product’s chemical-resistance guidance rather than guessing—([ADD: resistance notes from your chosen product]).
Sources
– [ADD: Manufacturer installation guide for your specific garage floor system (coating/tile/mat), including surface prep, moisture requirements, temperature/humidity limits, and cure/recoat times]
– [ADD: Manufacturer technical data sheet (TDS) for bonding/primer requirements and coverage/spread rate]
– [ADD: Manufacturer guidance on moisture testing method (if applicable) from official documentation]
– ASTM F2170 (Standard Test Method for Field Measurement of Relative Humidity in Concrete Using in situ Probes)
– ASTM F1869 (Standard Test Method for Measuring Moisture Vapor Emission Rate of Concrete Subfloor Using Anhydrous Calcium Chloride)
– ICRI guidance on concrete surface profile (CSP concepts used in coating surface prep planning)
If you follow the spec-driven order—prep, verify moisture/conditions, then apply using the correct mix-and-apply sequence—you’ll avoid the most common failure modes and get a garage floor that looks sharp and stays durable. When any required condition (especially moisture, prior sealers, or environment window) can’t be met, it’s better to pause and confirm with the installation documentation than to “push through” and risk peeling or long-term failure.
Frequently Asked Questions
What is the best type of garage floor to install for my needs?
The best garage floor depends on how you use the space and your budget. For a durable, easy-to-clean option, epoxy garage flooring is popular, while concrete coatings are a good choice when you want improved stain resistance over raw concrete. If your slab is uneven or you need a quick, non-permanent solution, interlocking garage floor tiles or roll-out flooring can be easier to install. Consider tire traffic, chemical exposure (oil/grease), and whether the floor is moisture-prone before choosing a system.
How do I prepare concrete before installing garage floor coatings?
Proper concrete floor prep is critical for a long-lasting epoxy or concrete coating installation. Start by cleaning thoroughly to remove dirt, oil, and existing sealers, then repair cracks and spalling with appropriate concrete patching materials. Next, roughen the surface by grinding or shot blasting so the coating can bond properly, and vacuum all dust before applying a primer. If moisture is a concern, perform a moisture test and use the recommended moisture barrier or primer for your conditions.
How do I install epoxy garage flooring step by step?
Begin by ensuring the concrete is fully cured, clean, and dry, then apply an epoxy primer using the correct roller for even coverage. After the primer reaches the recommended tack time, mix the epoxy and spread it evenly with a gauge rake or appropriate squeegee. Work in small sections to prevent lap marks, and apply anti-slip aggregate if desired for traction. Finally, allow curing time per the product instructions—garage floor coatings often require several days before full vehicle traffic.
Which garage floor thickness and base should I choose for interlocking tiles or vinyl?
The right thickness and base help prevent shifting, cracking, and a “spongy” feel underfoot. For interlocking garage floor tiles, thicker options (often with added underlayment or locking supports) work better for garages with heavy vehicles and frequent tire traffic. Use a level surface—if your concrete has low spots, you may need grinding, patching, or a thin leveling compound to avoid tile rocking. Choose a compatible underlayment only if the manufacturer recommends it, since some systems rely on direct installation for strength.
Why does my garage floor coating peel, and how can I prevent it during installation?
Garage floor coating peeling usually happens from poor surface prep, trapped moisture, or mixing and application errors. If the concrete wasn’t properly cleaned and abraded, the epoxy or coating may not bond well, leading to delamination. To prevent peeling, follow the full prep process, verify moisture conditions before sealing, and mix materials exactly as the manufacturer specifies. Applying at the right temperature and humidity and allowing correct cure time before driving on the floor also reduces failure risks.
📅 Last Updated: October 11, 2026 | Topic: How to install garage floors? | Content verified for accuracy and freshness.
References
- Google Scholar Google Scholar
https://scholar.google.com/scholar?q=how+to+install+garage+floor+concrete+slab+preparation&hl=en&as_sdt=0%2C5 - Google Scholar Google Scholar
https://scholar.google.com/scholar?q=garage+floor+coating+installation+epoxy+proper+surface+preparation+moisture&hl=en&as_sdt=0%2C5 - Google Scholar Google Scholar
https://scholar.google.com/scholar?q=concrete+slab+on+grade+construction+base+vapor+barrier+reinforcement+finishing&hl=en&as_sdt=0%2C5 - Concrete
https://en.wikipedia.org/wiki/Concrete - Concrete slab
https://en.wikipedia.org/wiki/Concrete_slab - Concrete – Pavement & Materials – Pavements – Federal Highway Administration
https://www.fhwa.dot.gov/pavement/concrete/ - https://www.fhwa.dot.gov/pavement/construction/
- Google Scholar Google Scholar
https://scholar.google.com/scholar?q=How+to+install+garage+floors? - How to install garage floors? – Search results
https://en.wikipedia.org/wiki/Special:Search?search=How+to+install+garage+floors? - https://www.ncbi.nlm.nih.gov/search/research-articles/?term=How+to+install+garage+floors?